
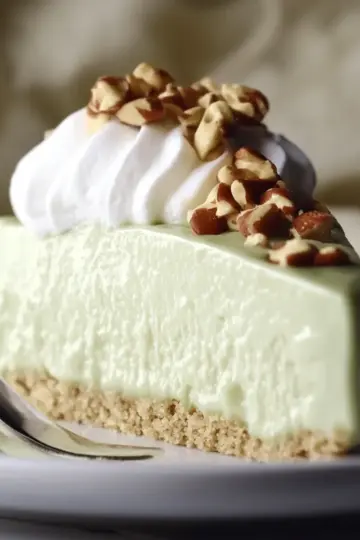
The air was electric with excitement as I flipped through holiday cookbooks, searching for a treat that would channel my inner festive spirit. That’s when I stumbled upon the idea of Grinch Mini Cheesecakes—adorable and loaded with a playful twist! These little gems not only look festive with their bright green hue but also offer a delightful burst of cream cheese richness that every homemade dessert lover will cherish. Perfect for those moments when you want to treat yourself and impress guests without spending hours in the kitchen, their quick prep and fun presentation make them a must-have at any holiday gathering. Plus, who doesn’t love a dessert that brings out your inner child? Are you ready to whip up these cheerful bites and spread some joy this season?
Why Are Grinch Mini Cheesecakes So Irresistible?
Colorful Festivity: The stunning green hue of these mini cheesecakes instantly adds holiday cheer to any dessert table, making them a showstopper at gatherings.
Quick & Easy: With just 20 minutes of prep and minimal baking skills required, you'll have a delightful dessert ready to impress friends and family without the stress.
Flavorful Indulgence: The rich cream cheese combined with a hint of vanilla creates a beautifully smooth texture, while the chocolate chips bring bursts of decadence that are hard to resist.
Customizable Fun: Feel free to get creative! Change the decorations, or serve them plain—these mini cheesecakes cater to every palate.
Perfect Portion Sizes: Being mini means they’re great for sharing, allowing everyone to enjoy a taste without overindulging. If you love mini desserts, check out my Mini Chocolate Lava Cakes that also pack a big flavor punch!
Grinch Mini Cheesecakes Ingredients
Get ready to dive into the festive fun with these delightful bites!
For the Crust
• Graham cracker crumbs – These provide a sweet, crunchy base for your mini cheesecakes.
• Unsalted butter, melted – This binds the crumbs together for a perfect crust texture.
• Granulated sugar – Just a bit adds sweetness to the crust, complementing the filling.
For the Cheesecake Filling
• Cream cheese, softened – A creamy base for that luscious cheesecake flavor; make sure it's at room temperature for easy mixing.
• Granulated sugar (additional) – Enhances the sweetness of the filling, so every bite is pure bliss.
• Vanilla extract – Adds depth to the flavor profile; don’t skip this!
• Large eggs – Help the cheesecake set properly; use room temperature eggs for best results.
• Sour cream – Contributes to a rich, smooth texture while balancing the sweetness.
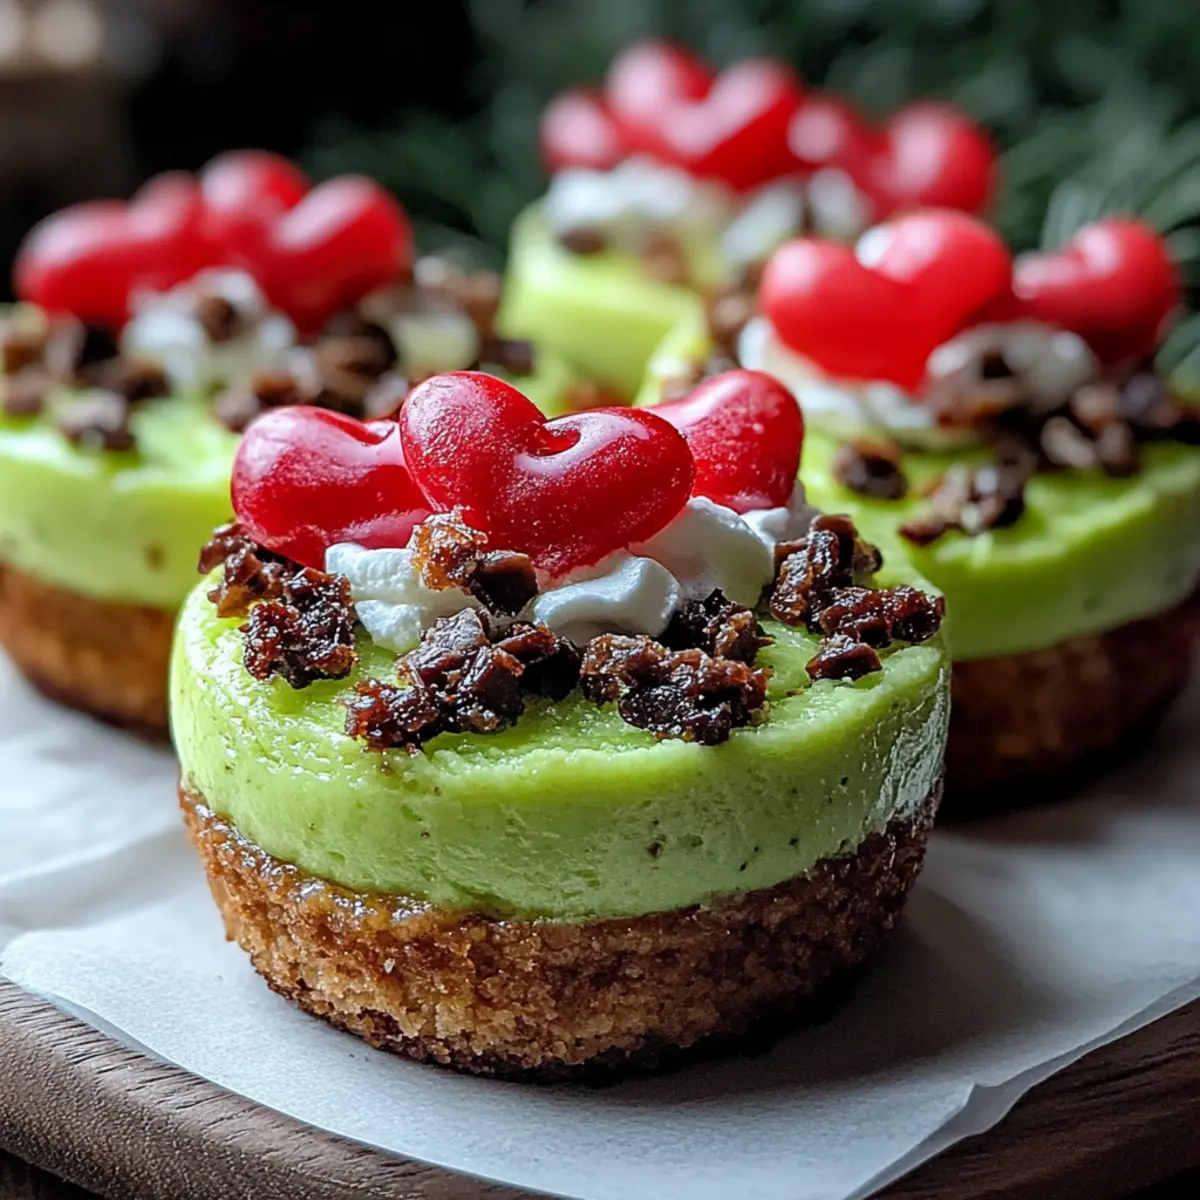
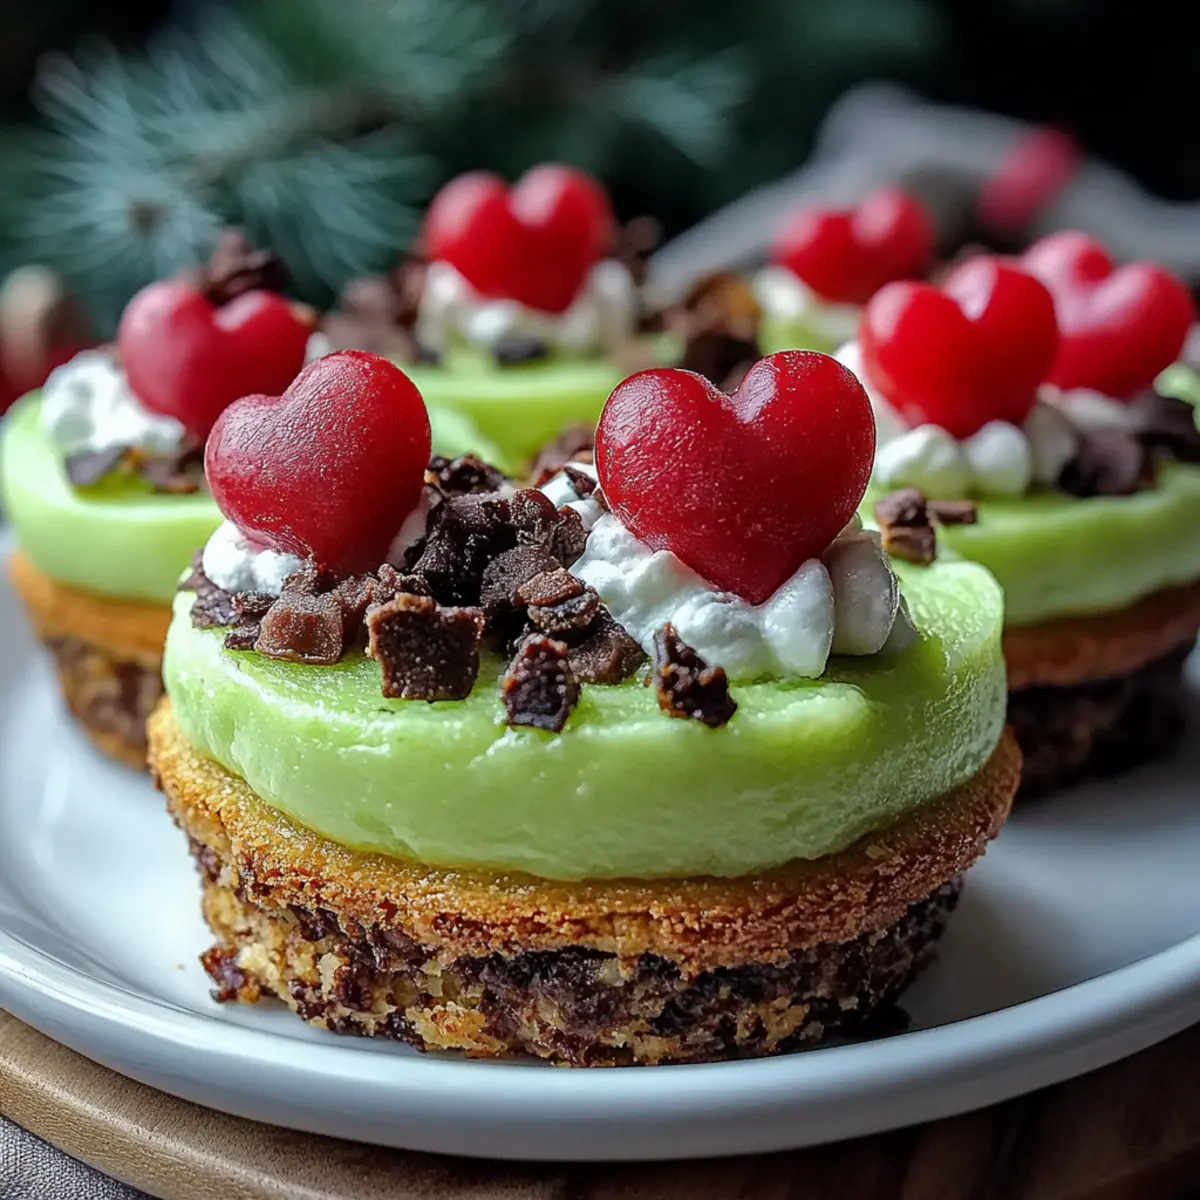
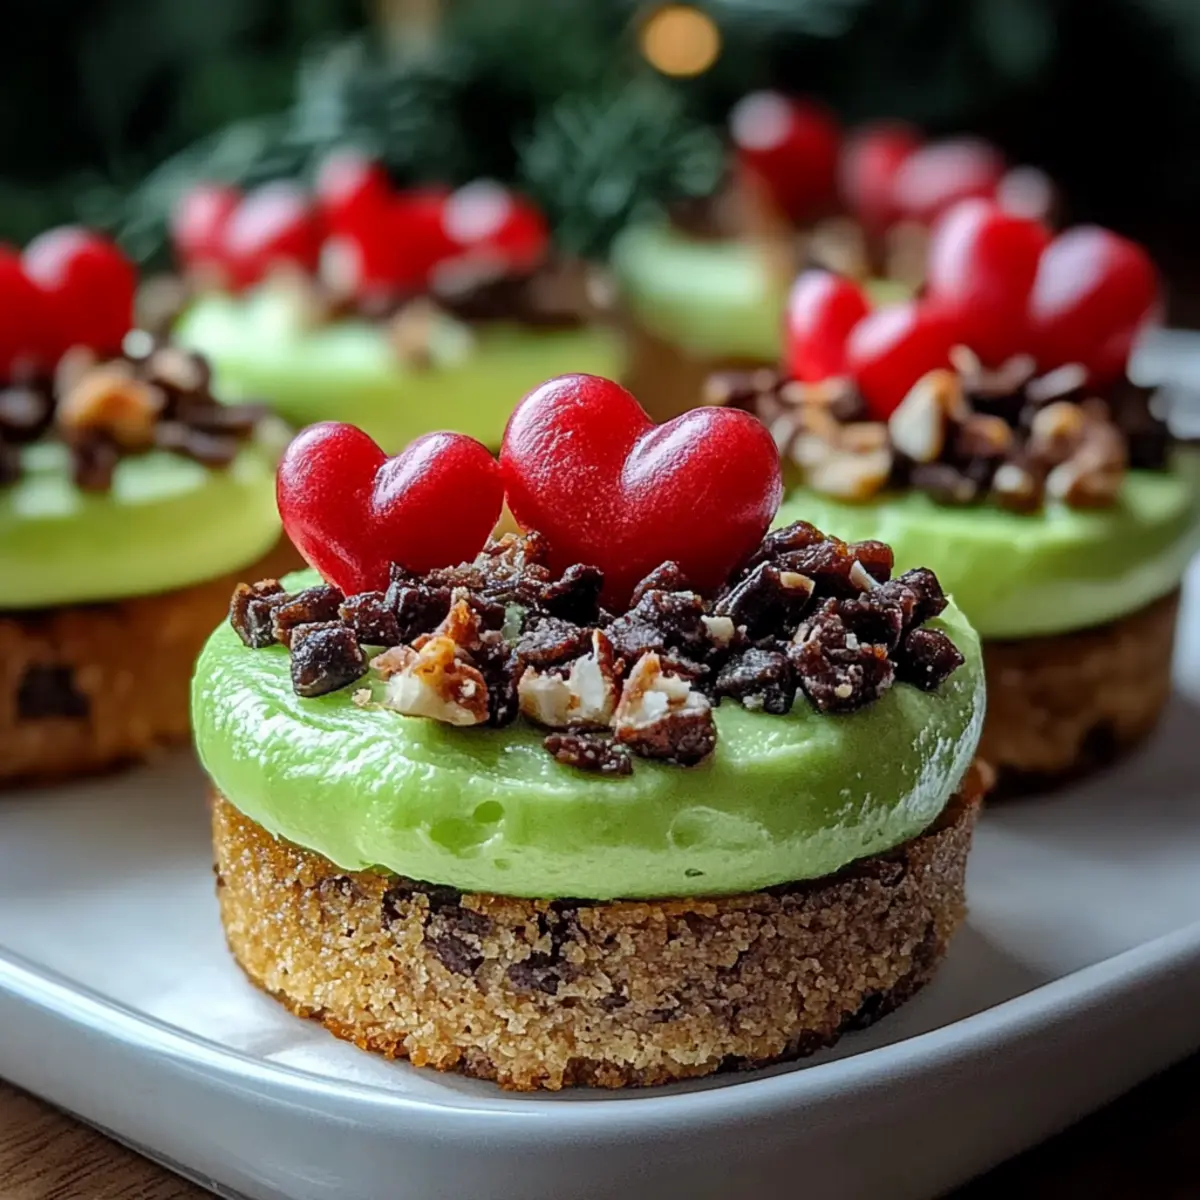
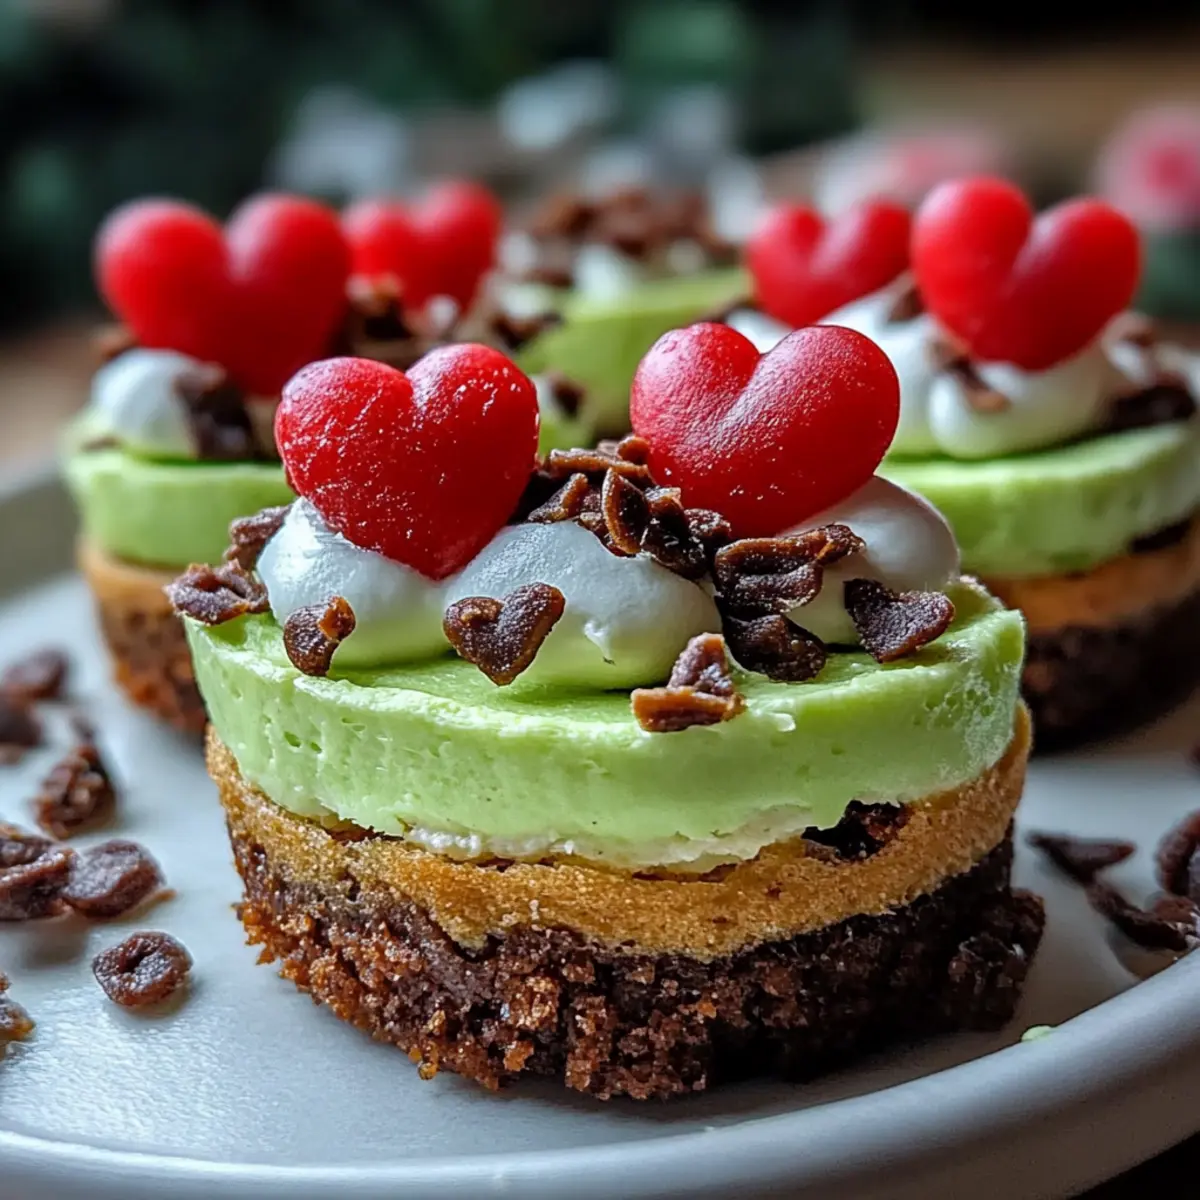
• Green food coloring – This gives the cheesecakes their festive Grinch hue, making them visually stunning!
• Mini chocolate chips – These provide delightful bursts of chocolate in every bite and elevate the flavor experience.
For Decoration
• Red candy hearts (optional) – A charming festive touch to brighten up your mini cheesecakes!
These Grinch Mini Cheesecakes are sure to steal the show at your holiday celebrations, turning every gathering into a joyful occasion!
Step‑by‑Step Instructions for Grinch Mini Cheesecakes
Step 1: Preheat Your Oven
Start by preheating your oven to 325°F (163°C). This temperature is perfect for baking our delightful Grinch Mini Cheesecakes. While the oven warms up, line a muffin tin with paper liners to make the cheesecake removal easy later, or you can lightly grease each cup with non-stick cooking spray.
Step 2: Prepare the Crust
In a medium bowl, mix 1 ½ cups of graham cracker crumbs, ½ cup of melted unsalted butter, and 2 tablespoons of granulated sugar. Stir until everything is combined and resembles wet sand. This mixture will form the base of your cheesecakes, adding that essential crunch.
Step 3: Form the Crusts
Take about 1 tablespoon of the crumb mixture and press it firmly into the bottom of each muffin tin cup. Use the back of a spoon or your fingers to pack it down well. This will create a solid foundation for the creamy filling, ensuring it holds together nicely after baking.
Step 4: Mix the Filling
In a large mixing bowl, beat 16 oz of softened cream cheese using an electric mixer on medium speed until it’s smooth and creamy. This is the key step for your Grinch Mini Cheesecakes, as a well-blended mixture will give you that luxurious texture everyone loves in a good cheesecake.
Step 5: Sweeten the Filling
Gradually add in ½ cup of granulated sugar while continuing to beat the mixture. You want to blend until it’s fully incorporated, creating a smooth and sweet base for your mini cheesecakes. The mixture should be creamy without any lumps, so take your time with this step.
Step 6: Flavor the Mixture
Add 1 teaspoon of vanilla extract to the creamy mixture and mix until just combined. The vanilla flavor elevates your Grinch Mini Cheesecakes, making them irresistibly delicious. Remember, don’t overmix; we want to keep that airiness in the cheesecake!
Step 7: Add the Eggs
Introduce 3 large eggs to the mixture, adding one at a time. After each addition, mix on low speed until just combined. Be careful not to overmix, as this can lead to cracks in your finished cheesecake. This step ensures your filling is fluffy and light!
Step 8: Fold in the Sour Cream and Color
Now, add 1 cup of sour cream and 1 tablespoon of green food coloring to the bowl. Gently stir until the mixture is evenly colored and smooth, achieving that festive Grinch hue. This not only adds flavor but also gives your cheesecakes their signature look.
Step 9: Incorporate Chocolate Chips
With a spatula, carefully fold in ½ cup of mini chocolate chips into the cheesecake batter. Make sure they are well-distributed throughout, adding delightful pockets of chocolate in every bite of your Grinch Mini Cheesecakes. This adds a delicious surprise to your creamy filling.
Step 10: Fill the Muffin Cups
Pour the cheesecake batter over your prepared crusts in the muffin tin, filling each cup about ¾ full. This amount allows enough space for the cheesecakes to rise without overflowing. The vibrant green batter should look inviting and rich as it fills the cups.
Step 11: Bake the Cheesecakes
Place the muffin tin in your preheated oven and bake for 18-20 minutes. You’ll know they are done when the edges are set and the centers have a slight jiggle—this means they will firm up perfectly as they cool!
Step 12: Cool and Chill
Once baked, remove the mini cheesecakes from the oven and let them cool in the pan for about 15 minutes. After that, carefully transfer them to the refrigerator to chill for at least 2 hours, or until they are completely set. This cooling time is crucial for achieving that perfect texture.
Step 13: Decorate
When you’re ready to serve, take the chilled Grinch Mini Cheesecakes out and top them with red candy hearts, if desired. This festive touch makes them even more appealing and adds a delightful pop of color to your holiday spread.
Step 14: Serve and Enjoy
Finally, serve your beautiful mini cheesecakes chilled. The combination of rich cheesiness with a striking green color and festive decorations will surely bring joy to your holiday gatherings!
What to Serve with Grinch Mini Cheesecakes?
Elevate your festive gatherings with delightful accompaniments that balance the rich sweetness of these mini treats!
-
Festive Fruit Platter: A colorful assortment of berries and citrus adds a refreshing touch, cutting through the cheesecake's richness and enhancing the holiday spirit.
-
Spiced Hot Chocolate: This warm, velvety drink pairs beautifully, matching the sweetness of the cheesecakes while offering a comforting vibe for chilly gatherings.
-
Whipped Cream: A cloud of freshly whipped cream on top provides an airy contrast, making each bite a delightful experience of flavors and textures.
-
Candy Cane Crumble: Sprinkle crushed candy canes for a minty crunch that complements the creamy cheesecake, giving it a festive flair that everyone loves.
-
Chocolate Drizzle: A rich, chocolaty finish drizzled over the cheesecakes adds an extra layer of decadence, making these mini delights even more irresistible.
-
Gingerbread Cookies: These spiced cookies bring a nostalgic crunch and warmth, pairing wonderfully with the cheesecake's smooth texture while adding a holiday classic to the table.
-
Peppermint Tea: A cup of soothing peppermint tea offers a refreshing palate cleanser after the cheesecake and ties in with the holiday theme perfectly.
-
Nutty Granola: Serve a small scoop of nutty granola on the side for a pleasant crunch that contrasts the creamy cheesecakes, adding a wholesome element to your dessert spread.
These thoughtful pairings will surely make your Grinch Mini Cheesecakes the ultimate star of your holiday celebrations!
Grinch Mini Cheesecakes Variations
Feel free to jazz up your Grinch Mini Cheesecakes with these delightful twists that will cater to your taste buds!
-
Dairy-Free: Use coconut cream and dairy-free cream cheese for a lactose-free version that’s just as creamy and delicious.
-
Gluten-Free: Swap out graham cracker crumbs for crushed gluten-free cookies or almond flour to enjoy a gluten-friendly dessert.
-
Chocolate Lovers: Add ¼ cup of cocoa powder to the cream cheese mixture for a chocolatey twist that pairs exquisitely with the green.
-
Fruit-Filled: Fold in some finely chopped strawberries or raspberries before baking for a fruity explosion that complements the cheesecake nicely.
-
Spicy Kick: Add a pinch of cayenne pepper or chili powder to the chocolate chips to create a surprisingly delightful sweet-heat combo.
-
Nutty Texture: Mix in chopped pecans or walnuts with the crust for an added crunch that enhances flavor and texture wonderfully.
-
No-Bake Option: Skip the oven! Use a no-bake cheesecake filling and set the crust in the fridge—perfect for those hot summer gatherings.
-
Vegan: Substitute eggs with flaxseed meal (1 tablespoon flaxseed meal + 2.5 tablespoons water = 1 egg) and use plant-based cream cheese and yogurt for a creamy vegan option.
Each of these variations can transform your Grinch Mini Cheesecakes into something uniquely special! If you're looking for even more delightful mini treats, don’t miss my Mini Lemon Tarts that showcase bright flavors and beautiful presentations.
Expert Tips for Grinch Mini Cheesecakes
Room Temperature Ingredients: Ensure your cream cheese and eggs are at room temperature for a smooth, lump-free filling. Cold ingredients can lead to a less creamy texture.
Don’t Overmix: When adding the eggs, mix on low speed just until combined to prevent cracks in your finished mini cheesecakes. Overmixing can incorporate too much air.
Chilling is Crucial: Allow the cheesecakes to chill for at least 2 hours after baking. This step ensures they set properly and achieve the perfect texture, making your Grinch Mini Cheesecakes even more delightful.
Fill with Care: Don’t overfill the muffin cups with batter; aim for ¾ full to prevent overflow during baking. A little jiggle in the center is perfect—trust the cooling process!
Decorate Last Minute: For the best presentation, decorate with red candy hearts just before serving. This keeps them looking fresh and festive, adding a cheerful touch!
How to Store and Freeze Grinch Mini Cheesecakes
Fridge: Store your Grinch Mini Cheesecakes in an airtight container for up to 3 days. This keeps them fresh and maintains their creamy texture, ready for dessert whenever you desire.
Freezer: If you want to keep them longer, freeze the mini cheesecakes for up to 2 months. Place them in a single layer on a baking sheet until firm, then transfer to a freezer-safe container.
Thawing: To enjoy frozen cheesecakes, thaw them in the refrigerator overnight. This gradual thaw helps maintain their delightful texture without compromising taste.
Reheating: These mini cheesecakes are best served chilled straight from the fridge, but if you prefer them slightly warm, let them sit at room temperature for about 10-15 minutes before serving.
Make Ahead Options
These Grinch Mini Cheesecakes are perfect for meal prep, allowing you to enjoy all the festive flavors with minimal last-minute effort! You can prepare the graham cracker crusts up to 24 hours in advance and simply store them in an airtight container at room temperature. Additionally, you can mix the cheesecake filling up to 3 days ahead, just be sure to keep it covered in the refrigerator to maintain its freshness. When you're ready to bake, fill the crusts with the cheesecake batter and bake as instructed. This way, you’ll save time while still delivering scrumptious, restaurant-quality treats that everyone will adore!
Grinch Mini Cheesecakes Recipe FAQs
How do I choose the right cream cheese for my mini cheesecakes?
Absolutely! When selecting cream cheese for your Grinch Mini Cheesecakes, opt for full-fat, block-style cream cheese for the best texture and flavor. Avoid whipped varieties as they contain air, which may affect the cheesecakes' structure. Make sure it’s fully softened to room temperature before mixing to ensure a silky-smooth filling.
How should I store the Grinch Mini Cheesecakes?
I recommend storing your Grinch Mini Cheesecakes in an airtight container in the refrigerator for up to 3 days. This keeps them fresh and maintains that delightful creamy texture. For longer storage, freeze them (as detailed below) but ensure they're cooled completely before placing them in a container.
Can I freeze these mini cheesecakes? What’s the process?
Very easy! To freeze your Grinch Mini Cheesecakes, first allow them to cool in the refrigerator for at least 2 hours until they're fully set. Next, place them in a single layer on a baking sheet and freeze until firm. Then, transfer them to a freezer-safe container with parchment paper between layers to prevent sticking. They can be frozen for up to 2 months. When you’re ready to enjoy them, thaw them in the refrigerator overnight to preserve their texture—it's magic!
What should I do if my crust is too crumbly?
If you find your crust isn’t holding together well, don't worry! This can happen if there's not enough butter or if it hasn't been packed down firmly enough. To fix it, try adding a little more melted butter (1 tablespoon at a time) and mix until the mixture holds together better. Another tip is to press the crust down more firmly in the muffin tin to ensure it binds properly during baking.
Are there any dietary considerations I should keep in mind?
Absolutely! If you’re making these Grinch Mini Cheesecakes for someone with allergies, you can substitute the cream cheese with a dairy-free option to make them lactose-free. Additionally, for a gluten-free version, use gluten-free graham cracker crumbs for the crust. Always double-check the ingredients to ensure they meet dietary needs, and consider leaving out the mini chocolate chips for those sensitive to chocolate as well.
Grinch Mini Cheesecakes That Bring Holiday Joy in Every Bite
Ingredients
Equipment
Method
- Preheat your oven to 325°F (163°C). Line a muffin tin with paper liners or grease with non-stick spray.
- In a medium bowl, mix 1 ½ cups of graham cracker crumbs, ½ cup of melted unsalted butter, and 2 tablespoons of granulated sugar.
- Press about 1 tablespoon of the crumb mixture into the bottom of each muffin tin cup.
- In a large mixing bowl, beat 16 oz of softened cream cheese until smooth and creamy.
- Gradually add in ½ cup of granulated sugar while continuing to beat until fully incorporated.
- Add 1 teaspoon of vanilla extract to the mixture and mix until combined.
- Introduce 3 large eggs one at a time, mixing on low speed until combined.
- Add 1 cup of sour cream and 1 tablespoon of green food coloring, stirring until smooth.
- Fold in ½ cup of mini chocolate chips until well-distributed.
- Pour the cheesecake batter over the prepared crusts, filling each cup about ¾ full.
- Bake for 18-20 minutes until the edges are set and centers jiggle slightly.
- Let them cool in the pan for about 15 minutes, then refrigerate for at least 2 hours to set.
- Top with red candy hearts just before serving for a festive touch.
- Serve chilled and enjoy the delightful flavors!
Leave a Reply