
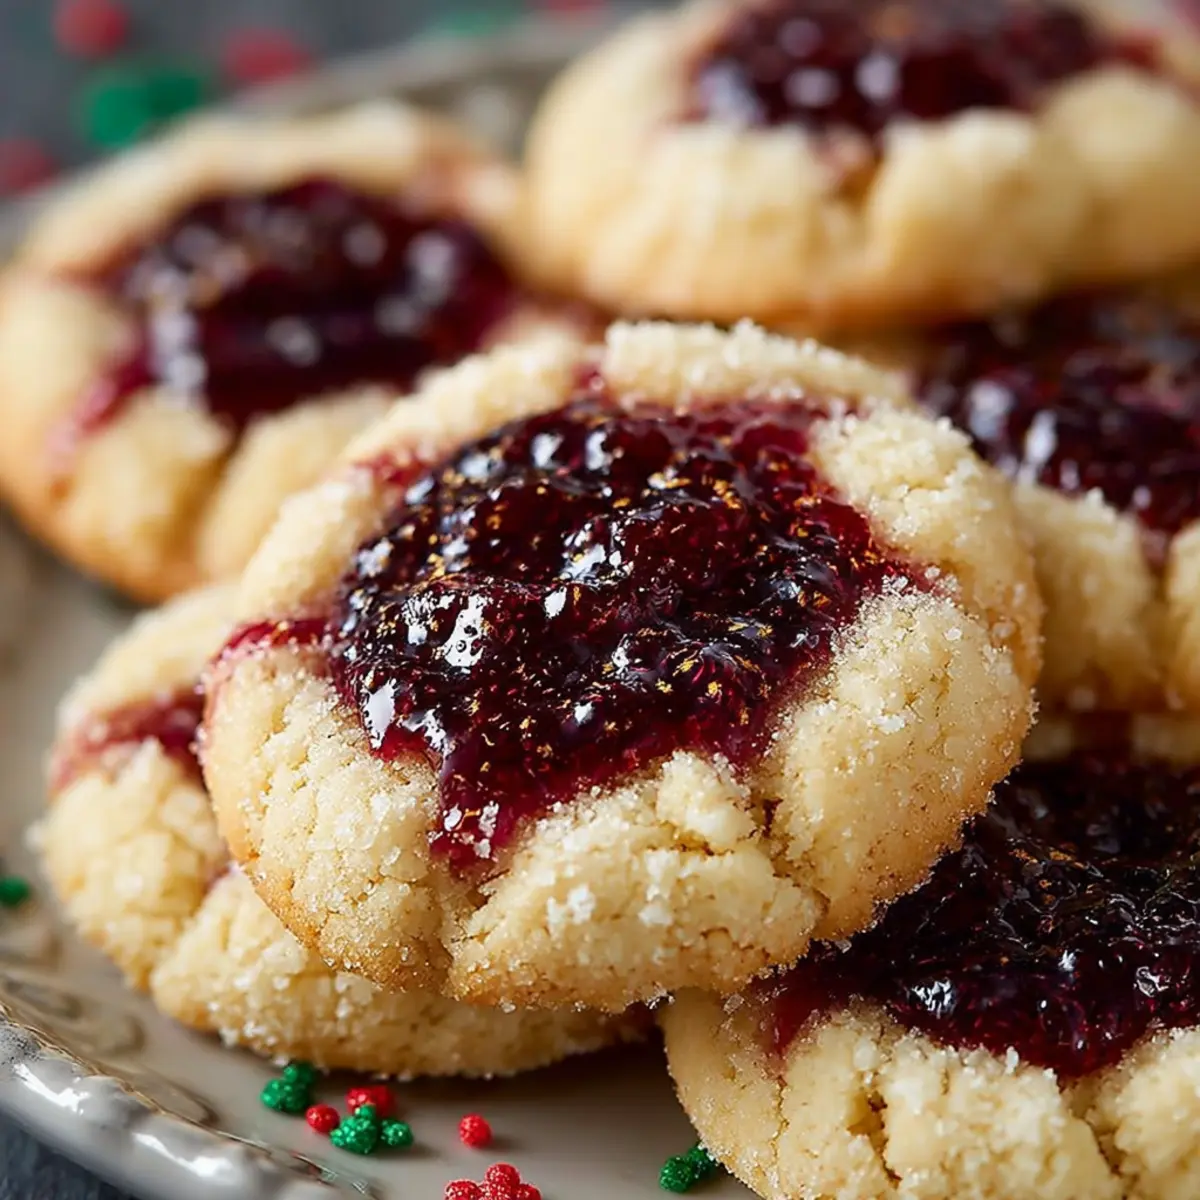
As I strolled through the vibrant winter market last December, the air filled with the sweet warmth of baking cookies, I couldn't resist stopping by a cozy stall. That’s where I discovered the magic of Christmas thumbprint cookies—an irresistible holiday treat that balances the delightful crunch of a sugared exterior with a soft, jam-filled center.
These classic thumbprint cookies, or as I like to call them, holiday hugs in cookie form, are a breeze to make and can be customized with your favorite flavors, from tangy raspberry to luscious apricot. One of the best perks? They’re not only a crowd-pleaser but also a fantastic way to impress guests without spending all day in the kitchen.
Whether you're looking to rekindle your holiday spirit or simply want to treat your loved ones to something special, this easy recipe will have you diving into festive fun faster than you can say “sugar cookies.” Ready to fill your kitchen with the scent of nostalgia and joy? Let's get started!

Why will you love Christmas thumbprint cookies?
Easy to Make: This recipe simplifies the art of baking, ensuring anyone can whip up these delightful treats without any fuss.
Customization: You can personalize each cookie with different jam flavors, making every batch a unique experience.
Festive Appeal: Their charming appearance and sweet aroma instantly brighten any holiday gathering.
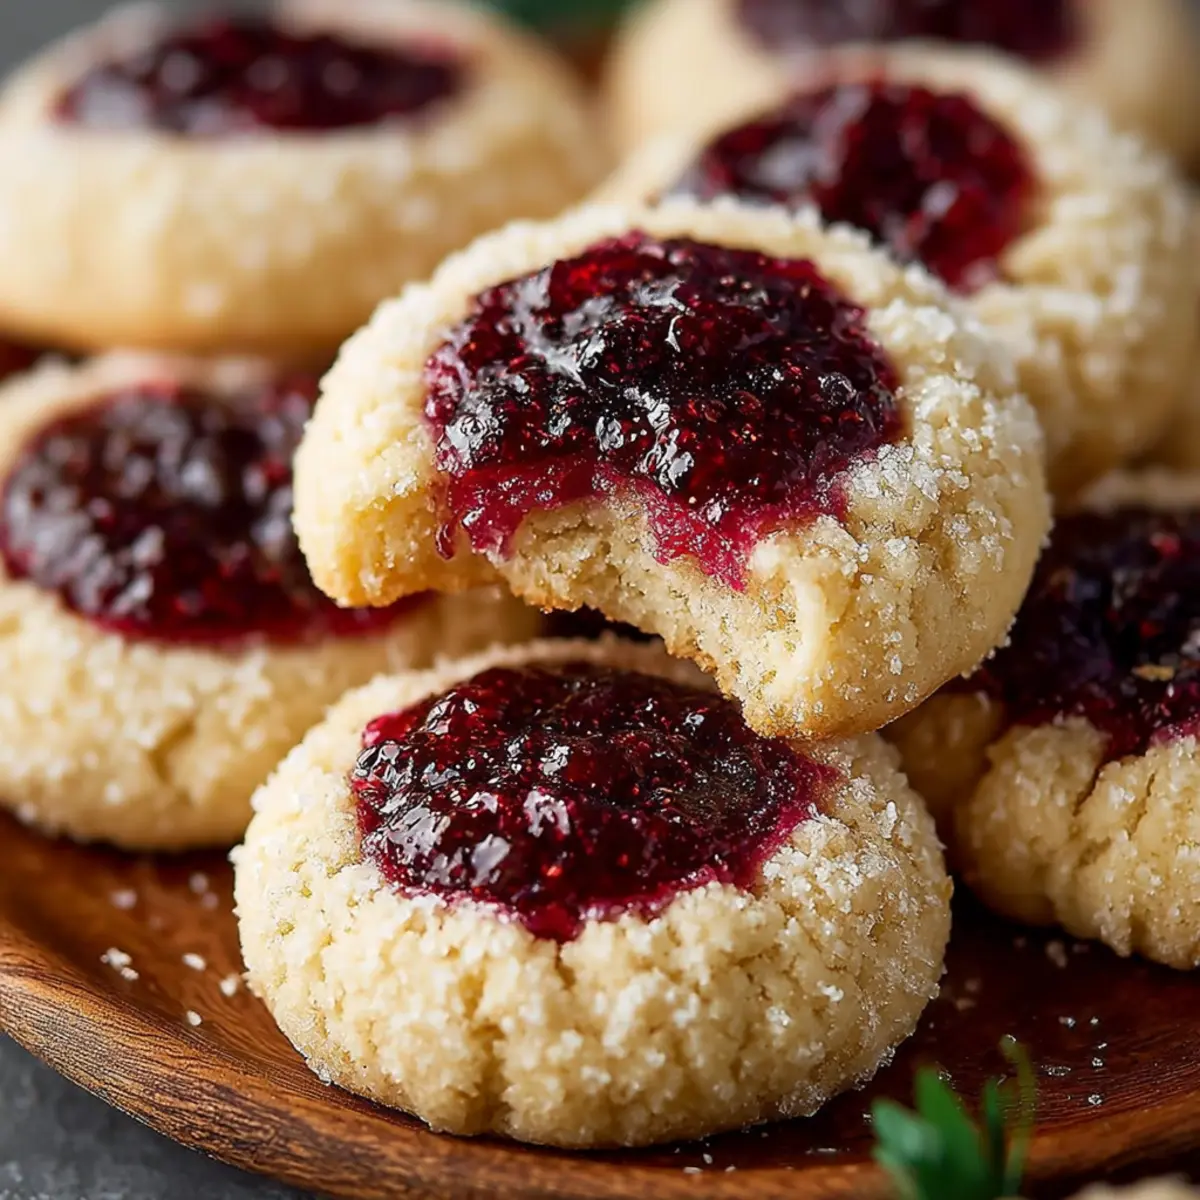
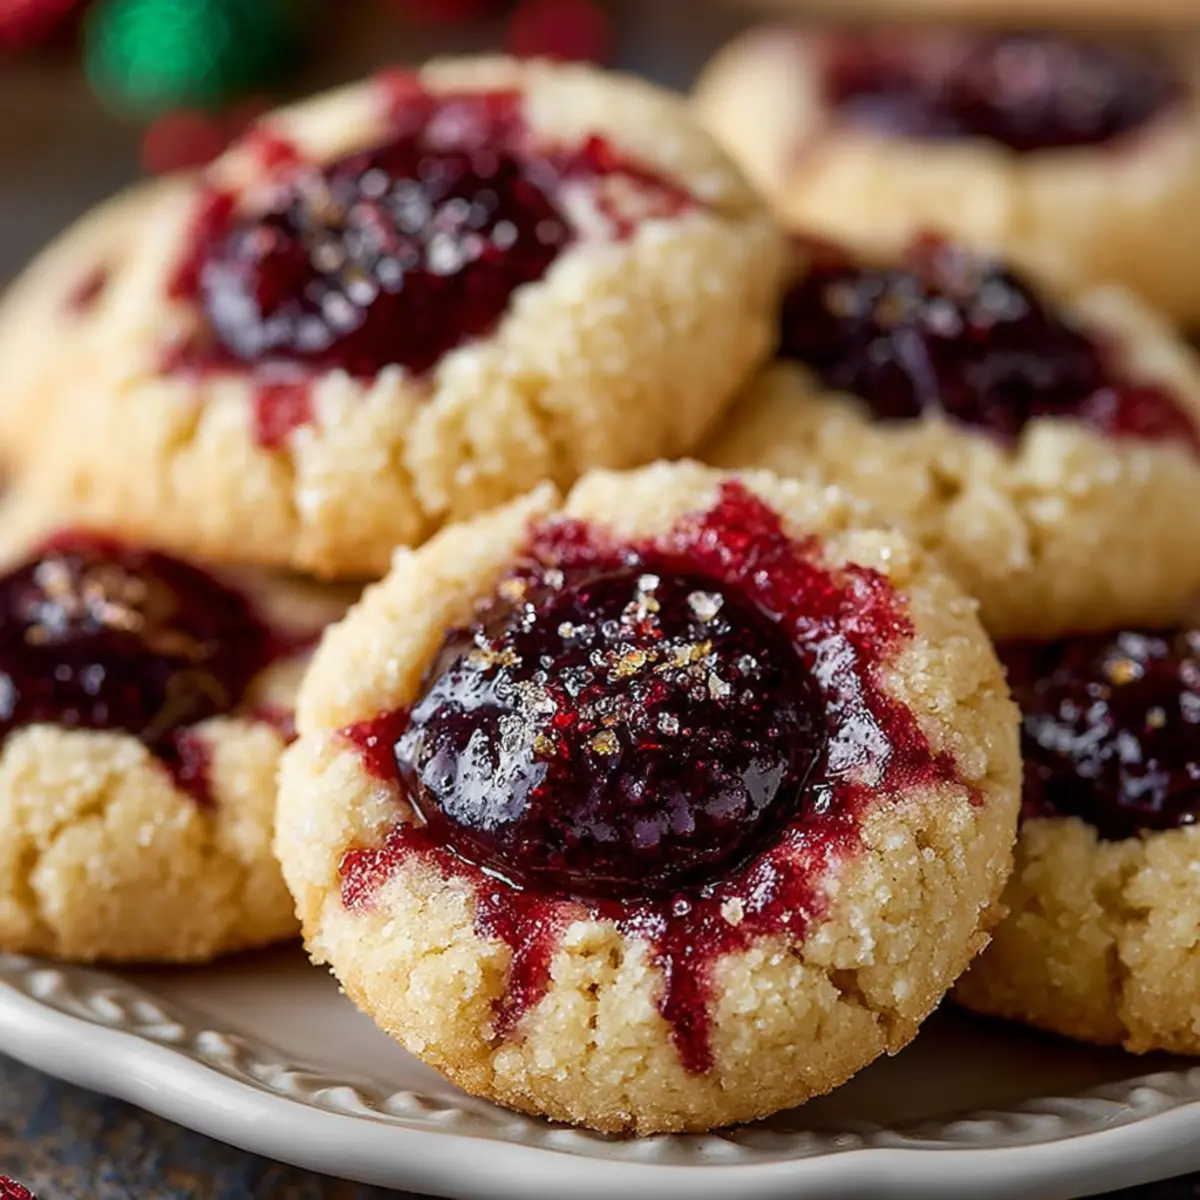
Texture Contrast: Enjoy the delightful crunch of the sugared exterior combined with the soft, jam-filled center.
Crowd Favorite: These cookies are sure to impress, bringing smiles to young and old alike.
If you’re looking for more festive delights, check out my Christmas strawberry cupcakes for an extra touch of holiday cheer!
Christmas Thumbprint Cookies Ingredients
These delightful cookies come together with just a few essential ingredients!
For the Cookie Base
• Unsalted Butter – Adds richness; make sure it's softened to room temperature for easy mixing.
• Granulated Sugar – Sweetens the dough; you can substitute with coconut sugar for a different flavor.
• Light Brown Sugar – Contributes moisture and a hint of molasses taste; don't skip this for the perfect texture!
• Egg Yolk – Provides richness and helps bind everything together.
• Vanilla Extract – Infuses the cookies with a warm flavor; use a high-quality extract for best results.
For the Dry Mixture
• All-Purpose Flour – Essential for structure; measure carefully to ensure a tender cookie.
• Cornstarch – Gives the cookies a soft, tender bite; it's the secret ingredient!
• Salt – Enhances all the flavors; a pinch is all you need.
For Topping
• Sugar for Rolling (optional) – Adds a beautiful sparkle to the cookies; feel free to skip if you prefer them plain.
For the Filling
• Jam or Preserves (Raspberry Preserves used) – The star of the cookie; any flavor will do, so feel free to get creative with your favorite jam for these Christmas thumbprint cookies!
Step-by-Step Instructions for Christmas Thumbprint Cookies
Step 1
Begin by creaming the softened unsalted butter in a large mixing bowl using an electric mixer on medium speed. Continue mixing until the butter is light and fluffy, which should take about 2-3 minutes. Next, gradually add in the granulated sugar and light brown sugar, beating until well combined and smooth. The mixture should look creamy and pale in color, setting a delicious base for your Christmas thumbprint cookies.
Step 2
Crack an egg yolk into the butter-sugar mixture and pour in the vanilla extract. Mix everything together on low speed until fully incorporated, which takes about 30 seconds. You should see a rich, golden mixture that exudes warmth. This step adds depth and flavor to your thumbprint cookies, preparing the dough for the dry ingredients.
Step 3
In a separate bowl, whisk together the all-purpose flour, cornstarch, and salt. This combination will provide the necessary structure and tenderness for your cookies. Slowly add the flour mixture to the wet ingredients, mixing on low speed until just combined. The dough may initially appear dry and crumbly, but don’t worry—it will come together with a little bit of kneading.
Step 4
Scoop about one tablespoon of dough and roll it into a ball using your hands. If desired, roll the ball in granulated sugar to add a sparkling touch to your Christmas thumbprint cookies. Place these dough balls on a wax-paper covered plate or a small cookie sheet. Once done, chill them in the freezer for about 30 minutes, which helps the cookies maintain their shape while baking.
Step 5
While the dough is chilling, preheat your oven to 375°F (190°C). This heating step ensures that your Christmas thumbprint cookies will bake evenly. Meanwhile, place the jam or preserves in a microwave-safe bowl and heat it for about 5-10 seconds. This will soften the jam, making it easier to spoon into the cookies later.
Step 6
After chilling, remove the dough from the freezer and take each ball in your hands. Using your thumb (or the back of a teaspoon), gently press an indentation into the center of each cookie dough ball. The indents should be deep enough to hold a generous amount of jam but not so deep that they reach the bottom. This step is crucial for creating that signature thumbprint in your cookies.
Step 7
Carefully spoon the softened jam into each thumbprint, being cautious not to overfill. You want just the right amount of jam so that it doesn’t overflow while baking. Once all the cookies are prepared, place the cookie sheet in your preheated oven and bake at 375°F (190°C) for about 11 minutes, or until the edges are lightly golden.
Step 8
When the timer goes off, remove the cookie sheet from the oven. They should be golden around the edges and slightly puffed. Let the Christmas thumbprint cookies cool completely on the sheet for about 10 minutes before transferring them to a wire rack. This cooling time allows the cookies to set and ensures they hold their shape perfectly.
How to Store and Freeze Christmas Thumbprint Cookies
Room Temperature: Store cooled cookies in an airtight container at room temperature for up to 3 days. This keeps them soft and fresh.
Fridge: If you want to extend their shelf life, keep the cookies in the fridge for up to a week in an airtight container. They can be enjoyed cold or brought to room temperature.
Freezer: For long-term storage, freeze the Christmas thumbprint cookies in a single layer on a baking sheet, then transfer to a zip-top bag for up to 3 months. Thaw at room temperature before enjoying.
Reheating: For a warm treat, reheat cookies in a 350°F (175°C) oven for 5-7 minutes, giving a fresh, delightful bite to your jam-filled cookies!
Make Ahead Options
These irresistible Christmas thumbprint cookies are perfect for meal prep enthusiasts! You can prepare the dough up to 24 hours in advance—just scoop the dough into balls, roll them in sugar if desired, and refrigerate them until ready to bake. Alternatively, you can freeze the dough balls for up to 3 months; simply place them in an airtight container. When you're ready to bake, there's no need to thaw—just press your thumbprint, fill with jam, and bake directly from the freezer, adding a minute or two to the baking time for perfectly fresh cookies. This method ensures that your holiday baking is both efficient and delightful, allowing you to enjoy all the sweetness without the last-minute rush!
Expert Tips for Christmas Thumbprint Cookies
- Dough Consistency: If the dough feels too dry and crumbly, knead it gently until it holds together. This will ensure a tender texture in your Christmas thumbprint cookies.
- Rolling Technique: Roll the dough balls smoothly to avoid cracks. A well-rolled cookie will bake evenly and maintain its shape beautifully.
- Jam Filling: Remember to adjust the jam consistency by microwaving it briefly. Ensuring the jam is soft allows for easier filling and avoids overflow while baking.
- Indentation Depth: Be mindful when pressing the thumbprint; indents should be deep enough to hold a good amount of jam but not so deep that they reach the bottom of the cookie.
- Cooling Time: Allow the cookies to cool completely on the sheet before transferring them to a wire rack. This step helps them firm up and retain their shape, making your Christmas thumbprint cookies perfect!
What to Serve with Christmas Thumbprint Cookies?
These delightful cookies are the perfect treat, but pairing them with the right accompaniments enhances their festive charm.
- Fresh Fruit Platter: A colorful array of seasonal fruits adds brightness and complements the sweetness of the cookies beautifully.
- Rich Hot Chocolate: Luxuriously creamy hot chocolate, topped with whipped cream, is a perfect drink to enjoy alongside these sweet treats.
- Vanilla Ice Cream: A scoop of velvety vanilla ice cream juxtaposes the cookies’ crunchy exteriors with a soft and creamy texture for a perfect balance.
- Coffee or Espresso: A robust cup of coffee or a shot of espresso perfectly contrasts the sweetness, making it an ideal pairing for a cozy afternoon treat.
- Cheesecake Bites: Mini cheesecake bites bring a smooth texture that contrasts with the festive thumbprint cookies while adding an extra layer of flavor.
- Spiced Cider: Warm spiced apple cider fills your home with cozy aromas that fit the holiday spirit and beautifully accompany these cookies.
Each of these pairings brings a unique flavor profile, ensuring there's something delightful for everyone at your holiday gatherings!
Christmas Thumbprint Cookies Variations
Get ready to explore the endless possibilities with these delightful cookies!
- Nutty Twist: Add ½ cup of chopped nuts like walnuts or pecans to the dough for a delicious crunch and flavor boost. The combination of nutty goodness with sweet jam is simply irresistible!
- Chocolate Lovers: Incorporate ¼ cup of cocoa powder to the flour mixture for a chocolaty base. Top with your favorite chocolate ganache instead of jam for a decadent treat.
- Spicy Kick: Mix in ½ teaspoon of cinnamon or ginger to the dough for a warm spiced flavor. These cozy notes elevate the cookies into a comforting winter delight.
- Dairy-Free: Substitute unsalted butter with coconut oil or vegan butter for a dairy-free version. They’ll still come out soft and delightful!
- Fruit-Infused: Use fresh fruit compotes instead of jam. Blueberries or blackberries create a vibrant, fresh contrast and light tartness.
- Herbal Note: Experiment with adding finely chopped fresh herbs like rosemary or thyme to the dough for a unique savory twist. The herbal aroma pairs beautifully with sweet jam!
- Different Sweeteners: Swap granulated sugar for maple syrup or honey to adjust the sweetness with natural sugars. Just reduce the flour slightly to maintain the right dough consistency.
- Colorful Sprinkles: Top with festive sprinkles before baking to add a pop of color to your cookies. Kids will love them, and they make for picture-perfect holiday treats!
Christmas Thumbprint Cookies Recipe FAQs
What type of jam should I use for Christmas thumbprint cookies?
Absolutely! You can use any flavor of jam or preserves you love. Raspberry is a classic choice, but feel free to experiment with apricot, strawberry, or even a mix of flavors for a unique twist. Just make sure the jam isn’t too chunky for easy filling.
How should I store my Christmas thumbprint cookies?
For short-term storage, place your cooled cookies in an airtight container at room temperature for up to 3 days. If you want them to last longer, refrigerate them in an airtight container for up to a week. Remember, they can be enjoyed cold or at room temperature!
Can I freeze Christmas thumbprint cookies?
Very! To freeze, line a baking sheet with parchment paper and place the cooled cookies in a single layer. Freeze them until solid, about 1-2 hours. Then, transfer the cookies to a zip-top bag for up to 3 months. When you're ready to indulge, thaw them at room temperature for the best taste!
What should I do if my cookie dough is too crumbly?
If your dough appears dry and crumbly, don’t panic! Simply knead it gently with your hands until it holds together. If it’s still not coming together, try adding a teaspoon of milk or water, mixing it in just enough to bring the dough together without making it sticky.
Do these cookies work well for gifting?
Absolutely! These Christmas thumbprint cookies make delightful gifts. Just pack them in a festive tin or jar, and they will add a personal, homemade touch to any present. You might want to layer them with parchment paper to prevent sticking.
Are Christmas thumbprint cookies suitable for pets?
Unfortunately, these cookies aren’t safe for pets due to the sugar and jam content, which can be harmful to them. Always keep your delicious bakes out of reach from your furry friends to ensure their safety!
Irresistibly Easy Christmas Thumbprint Cookies Recipe
Ingredients
Method
- Begin by creaming the softened unsalted butter in a large mixing bowl using an electric mixer on medium speed. Continue mixing until the butter is light and fluffy, about 2-3 minutes. Gradually add in the granulated sugar and light brown sugar, beating until well combined and smooth.
- Crack an egg yolk into the butter-sugar mixture and pour in the vanilla extract. Mix everything together on low speed until fully incorporated, about 30 seconds.
- In a separate bowl, whisk together the all-purpose flour, cornstarch, and salt. Slowly add the flour mixture to the wet ingredients, mixing on low speed until just combined.
- Scoop about one tablespoon of dough and roll it into a ball. If desired, roll the ball in granulated sugar for a sparkling touch. Place on a wax-paper covered plate or small cookie sheet and chill in the freezer for about 30 minutes.
- Preheat your oven to 375°F (190°C). Microwave the jam or preserves for about 5-10 seconds to soften it.
- Remove the dough from the freezer and press an indentation into the center of each cookie dough ball using your thumb.
- Spoon the softened jam into each thumbprint, then place the cookie sheet in your preheated oven and bake for about 11 minutes, until the edges are lightly golden.
- Let the cookies cool on the sheet for about 10 minutes before transferring to a wire rack.
Nutrition
Notes
- Dough Consistency: Knead gently if the dough feels too dry and crumbly.
- Rolling Technique: Roll the dough balls smoothly to avoid cracks.
- Jam Filling: Ensure the jam is soft for easier filling.
- Indentation Depth: Make sure indents can hold jam without reaching the bottom.
- Cooling Time: Allow cookies to cool completely before transferring them.
Leave a Reply