
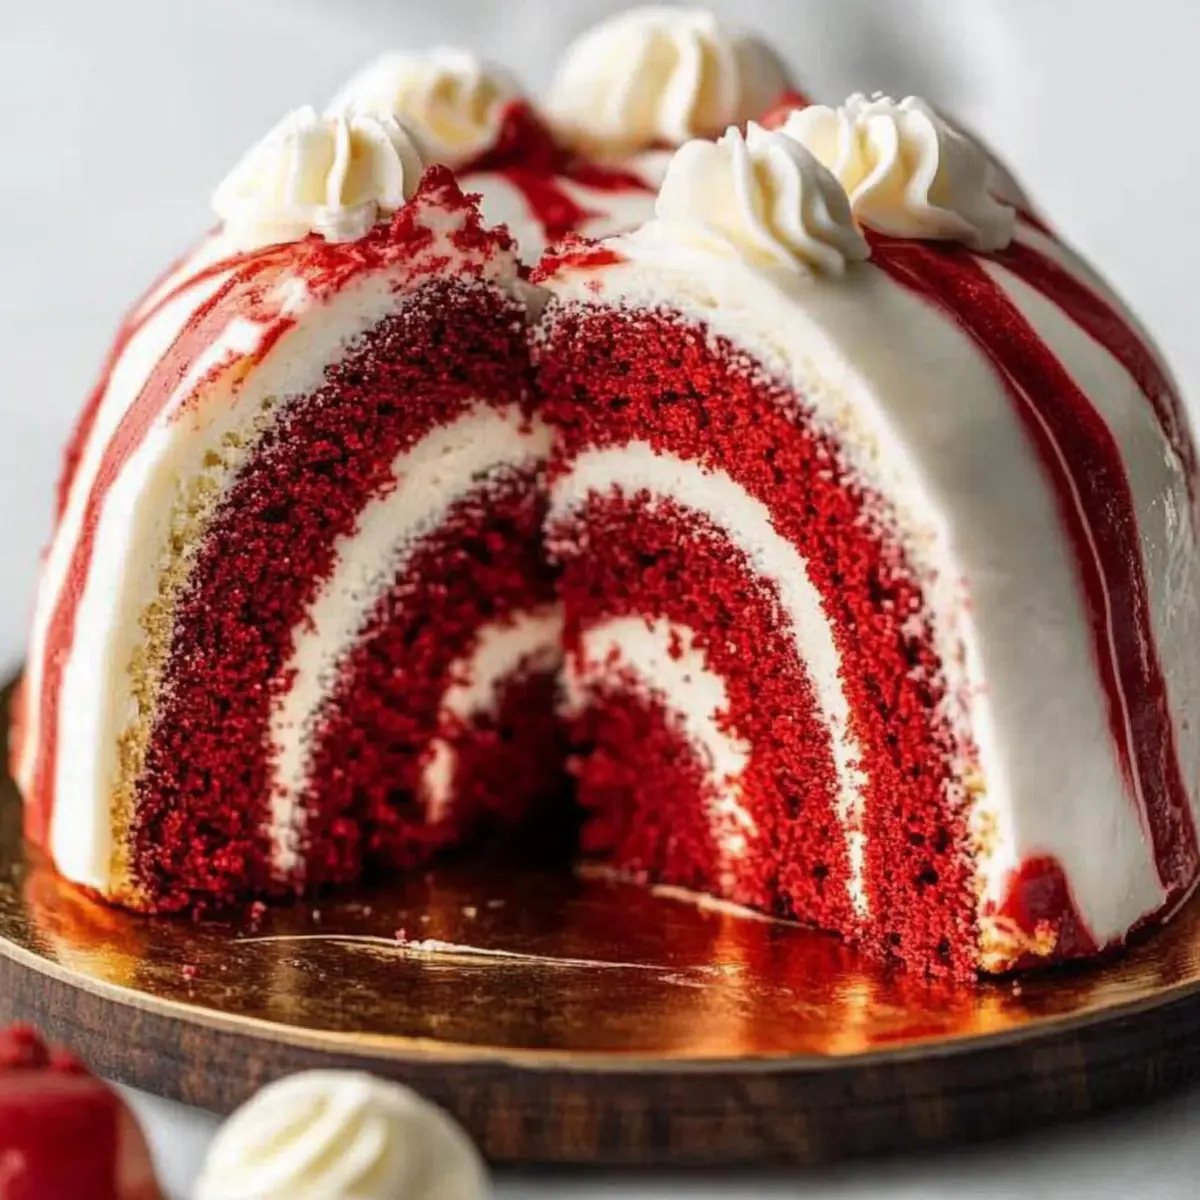
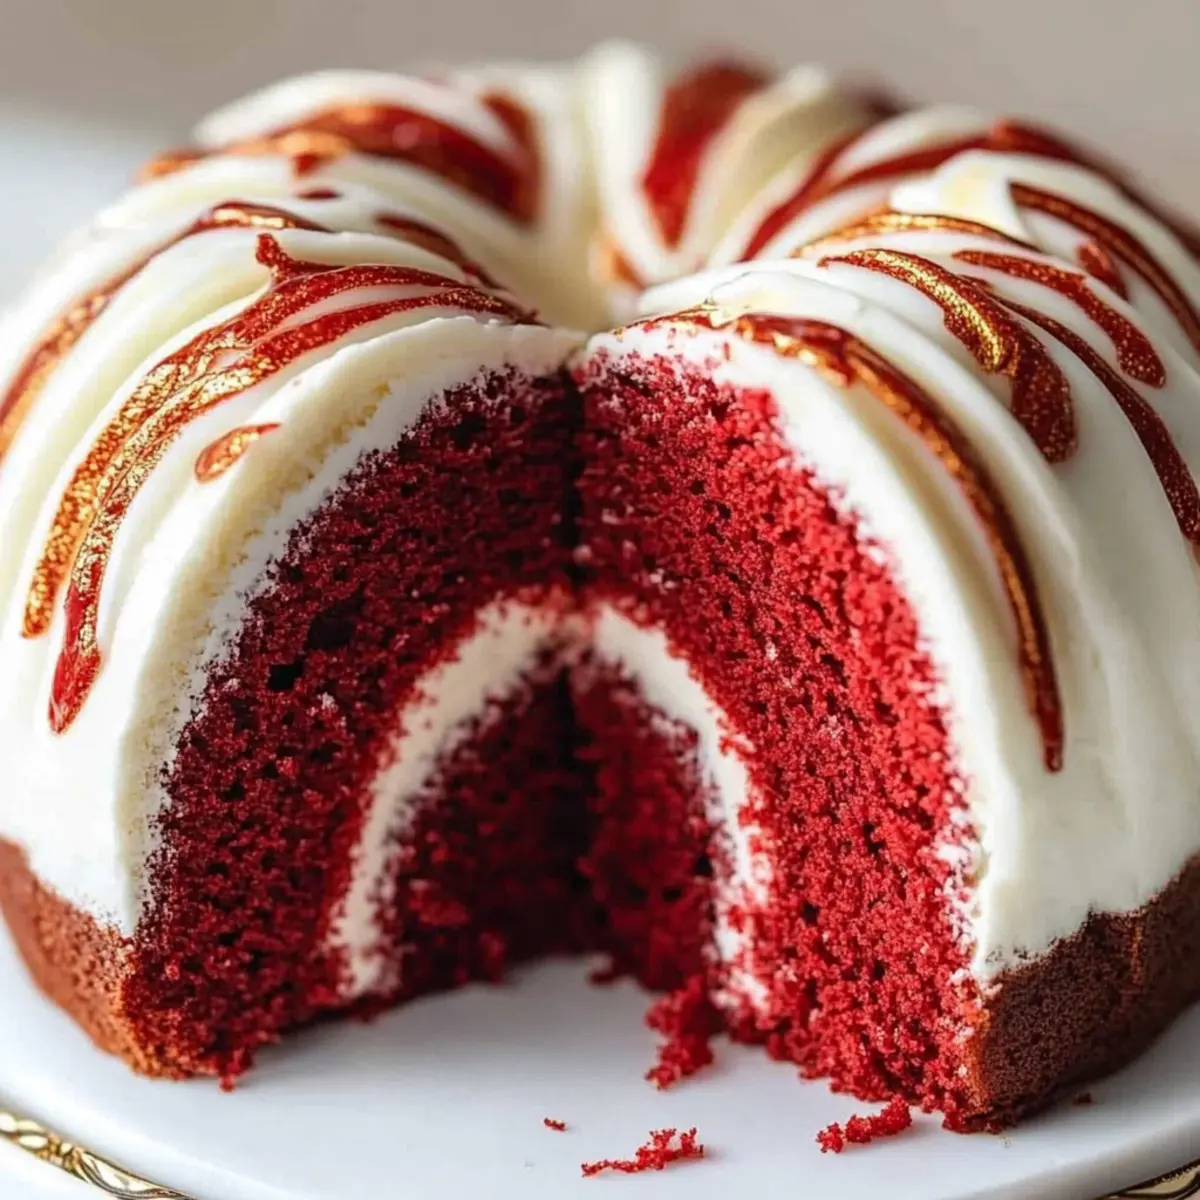
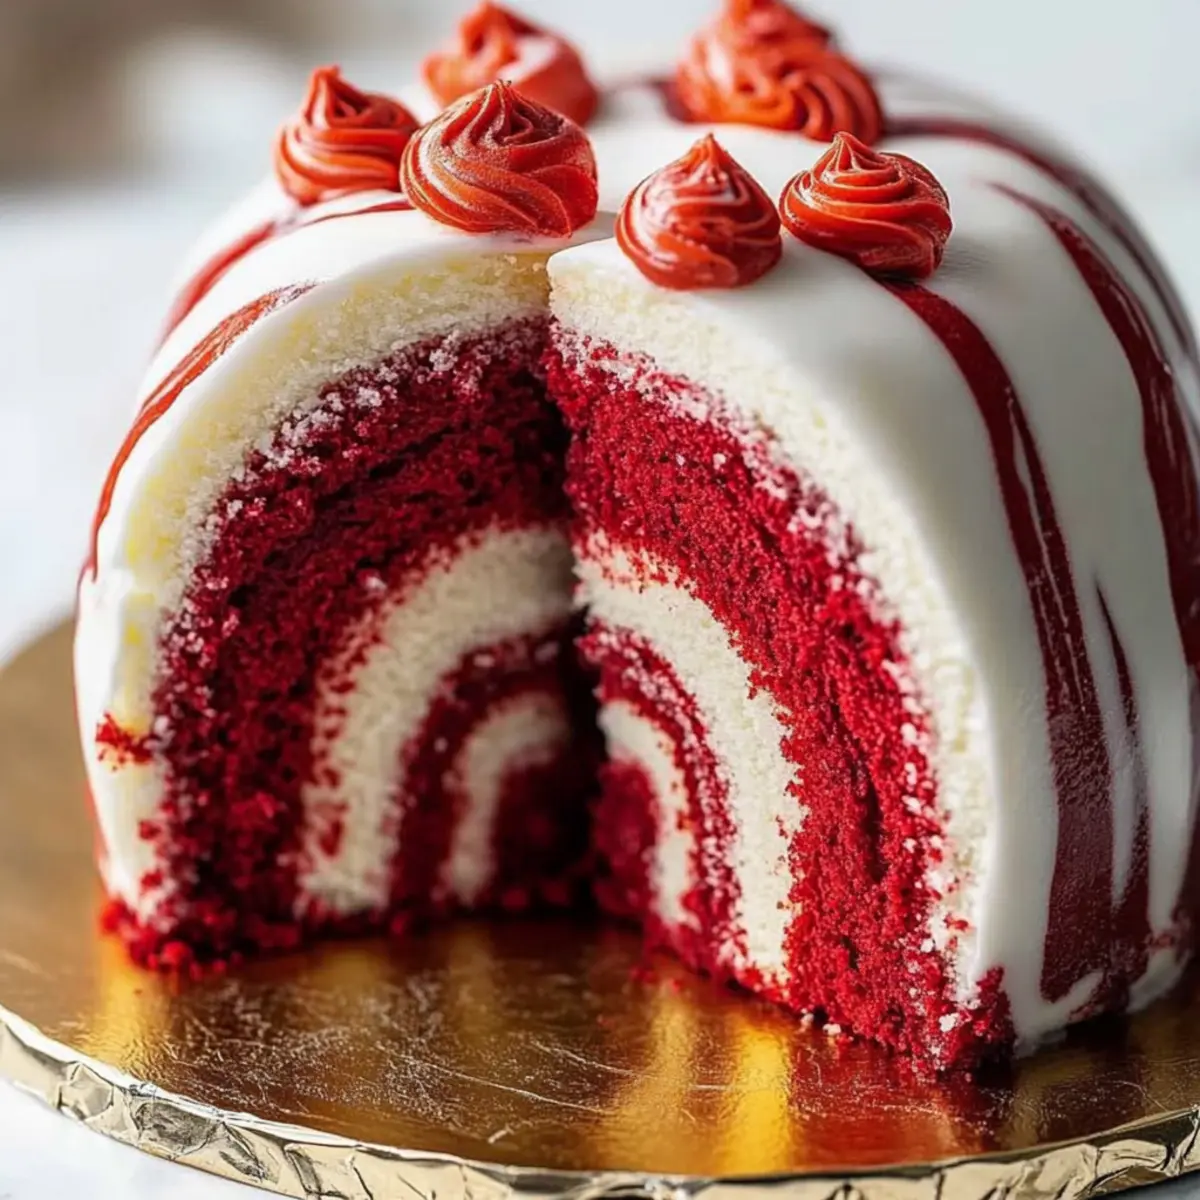
As I pulled the cake from the oven, the rich aroma of chocolate and sweet vanilla wafted through my kitchen, instantly transporting me to cherished holiday memories. This beautiful Red Velvet Marble Cake Recipe marries the classic flavors of red velvet and creamy vanilla, creating a stunning dessert that's as pleasing to the eye as it is to the palate. Moist and tender, this cake not only captures hearts during festive gatherings but also makes for a delightful surprise at any dinner. The best part? It’s straightforward to whip up, so you can impress your guests without spending hours in the kitchen. Curious about how this delightful cake can elevate your next celebration? Let’s dive into the recipe!

Why is this Red Velvet Marble Cake special?
Mouthwatering, This cake is not just a feast for the eyes; it’s a delicious blend of two beloved flavors, sure to delight all your guests.
Easy to Prepare: Perfect for both novice bakers and seasoned chefs, this recipe requires minimal effort while delivering maximum flavor.
Moist and Tender: Infused with buttery richness and subtle chocolate notes, each slice melts in your mouth, leaving you wanting more.
Festive Appeal: The vibrant red and creamy white swirls create a stunning centerpiece for any holiday table or gathering.
Versatile Option: Serve it as is or with whipped cream or vanilla ice cream for an indulgent treat that pleases every palate.
Time-Saving Delight: You can whip up this impressive dessert in no time, allowing you to focus on enjoying your company! For an even sweeter option, consider trying the Red Velvet Cheesecake Brownies to expand your dessert repertoire.
Red Velvet Marble Cake Ingredients
For the Cake Batter
- Unsalted Butter – Adds richness and moisture; ensure it's at room temperature for easy creaming.
- Cream Cheese – Provides a tangy flavor and contributes to a moist texture; use full-fat for the best results.
- Granulated Sugar – Sweetens the batter and helps in caramelizing for a golden crust.
- Vegetable or Canola Oil – Adds moisture and tenderness; can be substituted with melted coconut oil.
- Eggs (large, room temperature) – Acts as a binder and provides structure; using room temperature eggs ensures better mixing.
- Cake Flour – Creates a light and tender crumb; do not substitute with all-purpose flour without adjustments.
- Salt – Enhances flavor; use kosher or table salt for best results.
- Vanilla Extract – Adds depth of flavor; opt for pure extract for the richest taste.
- Unsweetened Cocoa Powder – Provides the chocolate flavor in the red velvet; Dutch-processed cocoa yields a smoother taste.
- Red Food Coloring – Offers vibrant color to the red velvet batter; gel-based is recommended for no flavor change.
- Hot Water – Activates the cocoa powder for enhanced flavor.
For the Glaze
- Powdered Sugar – Sweetens and thickens the cream cheese glaze, making it deliciously smooth.
- Milk – Achieves a smooth and pourable consistency for the glaze.
- Vanilla Extract (for glaze) – Enhances the flavor profile of the glaze, adding a lovely aroma.
This Red Velvet Marble Cake recipe is bound to become a favorite in your home, not just for its taste but also for its beautiful presentation. Enjoy the baking adventure!
Step‑by‑Step Instructions for Red Velvet Marble Cake Recipe
Step 1: Prepare the Batter
Begin by preheating your oven to 325°F (163°C) and greasing a Bundt pan. In a stand mixer, beat together the room temperature unsalted butter and cream cheese until the mixture is light and fluffy, about 3-5 minutes. Gradually add in the granulated sugar and vegetable oil, mixing until pale in color and well combined. Incorporate the eggs one at a time, scraping down the sides of the bowl to ensure an even mix.
Step 2: Combine Dry Ingredients
In a separate bowl, sift together the cake flour and salt. With the mixer on low speed, gradually add this dry mixture to the creamy batter until just combined. Be careful not to overmix, as this can lead to a denser cake. Once mixed, stir in the vanilla extract to enhance the flavors of the Red Velvet Marble Cake.
Step 3: Split the Batter
Carefully divide the batter into two separate bowls. To one bowl, add the unsweetened cocoa powder, red food coloring, and hot water. Whisk until the mixture is smooth and uniform, creating the vibrant red velvet batter. Leave the other half as the vanilla base. This beautiful contrast will give your marble cake its distinct look.
Step 4: Layer the Pan
Scoop alternating dollops of the red velvet and vanilla batter into the prepared Bundt pan. Use a skewer or a spatula to gently swirl the two batters together, creating a marbled effect without fully mixing them. Take care not to over-swirl, as you want to keep the lovely red and white colors distinct for this Red Velvet Marble Cake.
Step 5: Bake
Place the Bundt pan in your preheated oven and bake for 75-80 minutes. The cake is ready when a toothpick inserted into the center comes out clean and the edges start pulling away from the pan. Once done, allow it to cool in the pan for about 10 minutes before gently inverting it onto a wire rack to cool completely.
Step 6: Prepare the Glaze
While the cake cools, make the cream cheese glaze. In a medium bowl, combine cream cheese, powdered sugar, milk, and vanilla extract. Whisk until the glaze is smooth and pourable. Adjust the consistency with more milk if needed. This glaze will beautifully enhance the flavors of your Red Velvet Marble Cake.
Step 7: Glaze the Cake
Once the cake has cooled completely, place it on a serving platter. Pour the prepared glaze over the top, allowing it to cascade down the sides. The glossy finish will add an enticing touch to your Red Velvet Marble Cake, making it irresistible and perfect for sharing at your next gathering.
Expert Tips for Red Velvet Marble Cake
-
Batter Temperature: Always use room temperature ingredients. Cold butter or eggs can lead to a dense texture and affect the marbling of your Red Velvet Marble Cake.
-
Sifting Flour: Sift the cake flour and cocoa powder separately, then combine. This ensures an even distribution of dry ingredients and prevents clumping.
-
Don't Overmix: Mix the batter just until combined. Overmixing can create excess gluten, resulting in a tougher cake rather than the desired tender crumb.
-
Swirling Technique: When swirling the batters in the pan, use gentle movements to maintain distinct swirls. A too vigorous mix will result in a muddy appearance.
-
Cooling Time: Allow the cake to cool in the pan for a sufficient time to prevent it from breaking when inverted. If too warm, it may stick to the pan.
-
Glaze Consistency: If your cream cheese glaze is too thick, add a little more milk until it reaches your desired pourable consistency, ensuring a beautiful finish on your Red Velvet Marble Cake.
Red Velvet Marble Cake Recipe Variations
Feel free to get creative and customize your Red Velvet Marble Cake with these fun and delightful ideas!
-
Dairy-Free: Substitute almond or oat milk and vegan cream cheese to make a deliciously creamy glaze without dairy. It maintains that crave-worthy flavor and texture!
-
Gluten-Free: Swap in a 1:1 gluten-free flour blend for cake flour, allowing everyone at the table to join in on the delight without compromise. This will still yield a moist, fluffy cake!
-
Chocolate Lover’s Twist: Add a cup of semi-sweet chocolate chips to the vanilla batter for an indulgent surprise in every slice. That added richness will take the cake over the top!
-
Citrus Zing: Mix the zest of an orange or lemon into the vanilla batter for a refreshing citrus note that complements the sweetness of the cake. The contrast will brighten every bite.
-
Spicy Kick: Incorporate a teaspoon of ground cinnamon or nutmeg into the batter for a warm, spicy undertone. This twist will give a cozy vibe, perfect for holiday gatherings!
-
Nutty Texture: Toss in ½ cup of chopped walnuts or pecans into either batter for an added crunch that’ll surprise your guests. The classic flavors will harmonize beautifully.
-
Pastel Marble Effect: Use pastel gel food coloring for a softer look, creating a charming and unique cake to celebrate spring or any whimsical gathering. It's a feast for the eyes and palate!
-
Fruity Addition: Fold in a handful of fresh raspberries or strawberries into the red velvet batter for a delightful burst of fruitiness. The tanginess adds a refreshing twist that balances the sweetness perfectly!
By experimenting with these variations, you can make your Red Velvet Marble Cake a signature dessert that keeps your loved ones coming back for more!
Make Ahead Options
These Red Velvet Marble Cake preparation options are a lifesaver for busy home cooks! You can prepare the cake batter and refrigerate it for up to 24 hours before baking. Simply follow the steps to cream the butter, cream cheese, and sugars, then store the divided batters in airtight containers to maintain freshness. When you're ready to bake, just bring the batters to room temperature before swirling them into the Bundt pan. To ensure your cake remains moist and delicious, avoid overmixing and store any leftovers in an airtight container for up to 1 week. With these make-ahead tips, you can enjoy a stunning dessert without the last-minute rush!
What to Serve with Red Velvet Marble Cake
Transform your dessert into a delightful feast with perfect pairings that complement every luscious slice of cake.
-
Whipped Cream:
Light and airy, whipped cream adds a refreshing touch to the rich flavors of the cake. It’s a classic pairing that never disappoints. -
Vanilla Ice Cream:
The creamy texture and coolness of vanilla ice cream contrast beautifully with the warm, moist cake, creating a comforting combination. -
Fresh Berries:
A medley of strawberries, raspberries, or blueberries introduces a tartness that balances the cake's sweetness, making each bite more refreshing. -
Chocolate Ganache:
A drizzle of silky chocolate ganache heightens the cake’s decadence and adds an irresistible richness that chocolate lovers will adore. -
Mint Leaf Garnish:
Adding fresh mint on top not only elevates the visual appeal but brings a bright, fragrant note that enhances every bite. -
Coffee or Espresso:
Sipping a cup of coffee alongside your cake complements its flavors perfectly. The bitter notes of coffee enhance the sweetness of the cake, creating a well-rounded experience. -
Spiced Chai Tea:
The warm spices in chai tea harmonize with the cake's rich flavors, making it a comforting beverage choice for those cozy gatherings.
Let your imagination run wild with these pairings, and watch your Red Velvet Marble Cake become the star of any table!
How to Store and Freeze Red Velvet Marble Cake
Fridge: Keep the cake in an airtight container or well-wrapped for up to a week. This helps maintain its moistness and flavor, making every slice delightful.
Freezer: The unused cake can be frozen without the glaze for up to 6 months. Wrap it tightly in plastic wrap and aluminum foil, then allow to thaw in the refrigerator overnight.
Reheating: If you prefer a warm slice, simply microwave it for about 15-20 seconds. This method preserves the moist texture of your Red Velvet Marble Cake.
Glaze: For the best flavor, add the cream cheese glaze just before serving, ensuring it retains its lusciousness.
Red Velvet Marble Cake Recipe FAQs
Can I use a Bundt pan for red velvet cake?
Absolutely! A Bundt pan is perfect for the Red Velvet Marble Cake as it allows for beautiful presentation with its intricate shapes. Just make sure to grease it well to prevent sticking.
How do you get the marble effect on marble cake?
To achieve a stunning marbled effect, alternate dollops of the red velvet and vanilla batter in your prepared Bundt pan. Use a skewer or a toothpick to gently swirl the two batters together. Be careful not to overdo it; gentle swirling will keep the colors distinct and create that lovely marbling.
Does vinegar and cocoa powder turn red?
Very interesting! While vinegar is often used in red velvet recipes to activate the cocoa, it doesn't actually change the color of the batter. The red color comes from the food coloring you add. Cocoa powder itself does not react with vinegar to create redness; that vibrant hue is a combination of cocoa, buttermilk, and red food coloring.
What other cake flavor goes with red velvet?
The rich chocolate notes in the red velvet pair wonderfully with flavors like cream cheese (for the glaze), vanilla, or even coffee for a unique twist! For something extra special, consider adding chocolate chips into the batter or serving with a scoop of vanilla ice cream.
How should I store this cake?
For optimal freshness, store your Red Velvet Marble Cake in an airtight container at room temperature for up to 3 days. If you wish to keep it longer, wrap it tightly and freeze without the glaze for up to 3 months. To thaw, simply place it in the refrigerator overnight before serving.
What if my cake is too dense?
If your cake turns out denser than desired, it may be due to overmixing the batter or using cold ingredients. Be sure to mix only until combined, and use room temperature ingredients. This can help you achieve a soft, fluffy texture instead of a heavy one.
Melt-in-Your-Mouth Red Velvet Marble Cake Recipe to Savor
Ingredients
Equipment
Method
- Preheat oven to 325°F (163°C) and grease a Bundt pan. Beat unsalted butter and cream cheese until light and fluffy.
- Gradually add granulated sugar and vegetable oil, mixing until pale and well combined. Incorporate eggs one at a time, scraping down the bowl.
- In another bowl, sift together cake flour and salt. Gradually add to creamy batter, mixing until just combined. Stir in vanilla extract.
- Divide batter into two bowls. To one, add cocoa powder, red food coloring, and hot water. Whisk until smooth. Leave the other half as vanilla base.
- Scoop alternating dollops of the red velvet and vanilla batter into the Bundt pan. Use a skewer to gently swirl without fully mixing.
- Bake in preheated oven for 75-80 minutes until a toothpick comes out clean. Cool for about 10 minutes before inverting onto a wire rack.
- For the glaze, combine cream cheese, powdered sugar, milk, and vanilla extract. Whisk until smooth and pourable.
- Once the cake is cool, pour the glaze over the top, allowing it to cascade down the sides.
Leave a Reply