
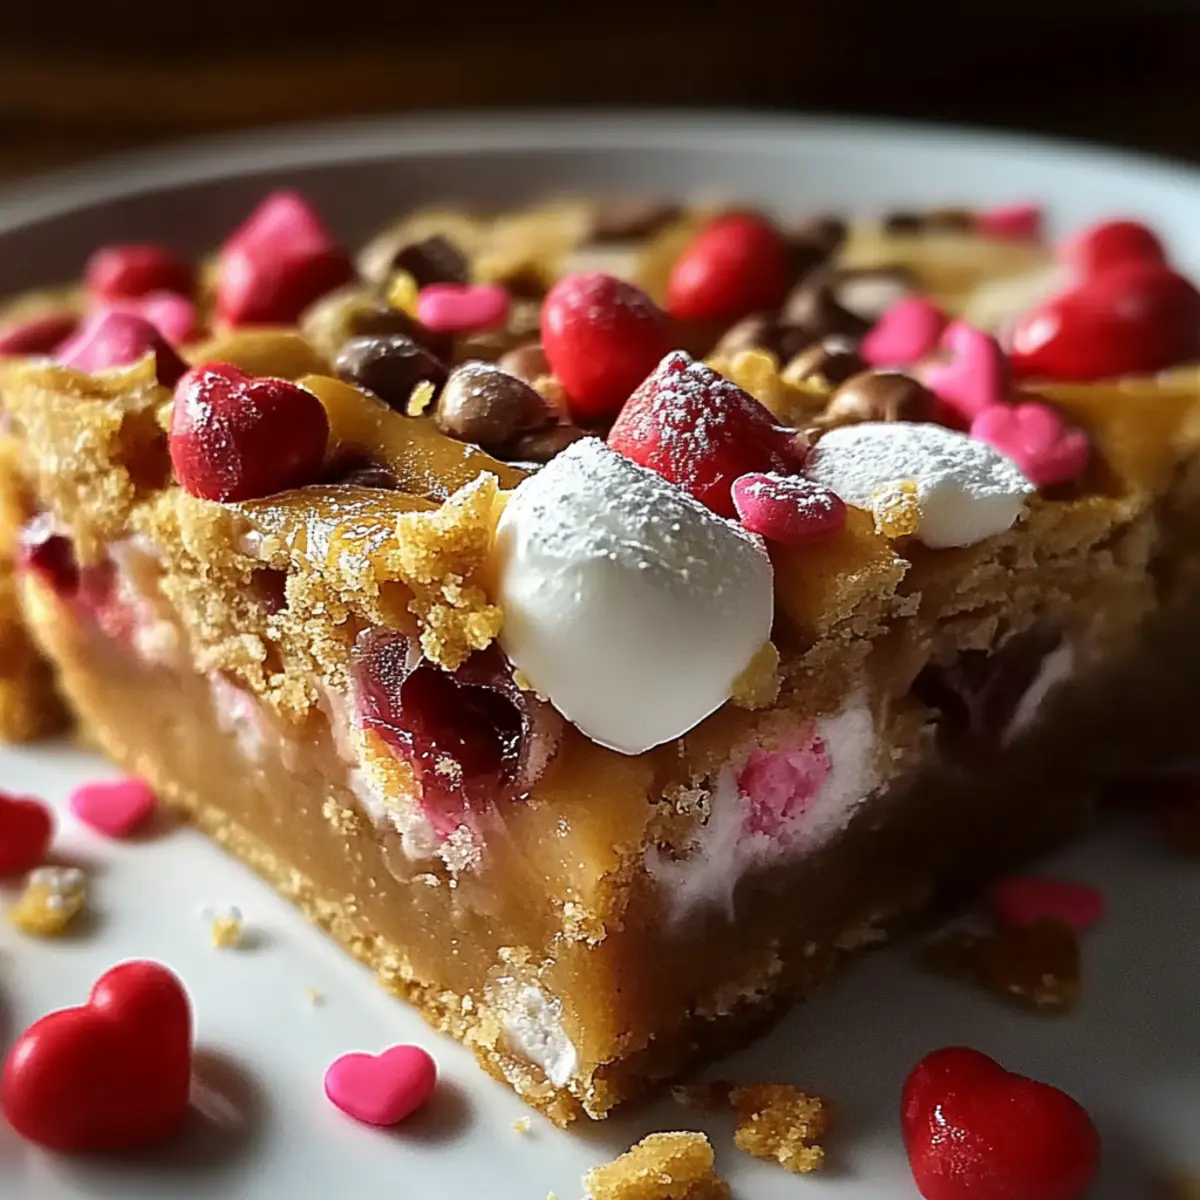
"Rushing out for a last-minute treat? Stop right there! Instead, let me introduce you to my Valentine Peanut Butter Cookie Bars. These delightful bars are perfect for sharing with your loved ones or simply indulging in a bit of self-love. With just 20 minutes of prep time, you can create a dessert that’s both simple and impressive! Plus, they feature a luscious combination of creamy peanut butter and decadent chocolate—making them a guaranteed crowd-pleaser. If you want to add a festive twist, the bright Valentine-colored M&M’s bring an adorable pop to every bite. Are you ready to discover how easy it is to make these irresistible bars that will make anyone swoon?"
Why Are These Bars So Irresistible?
Fudgy Delight: Every bite offers a rich, fudgy texture that melts in your mouth, thanks to the perfect balance of peanut butter and chocolate.
Quick & Easy: With just 20 minutes of prep, you’ll have a dessert ready to impress without hours in the kitchen.
Versatile Treat: Great for any occasion, these bars are perfect for Valentine's Day gatherings, bake sales, or simply as a cozy snack at home.
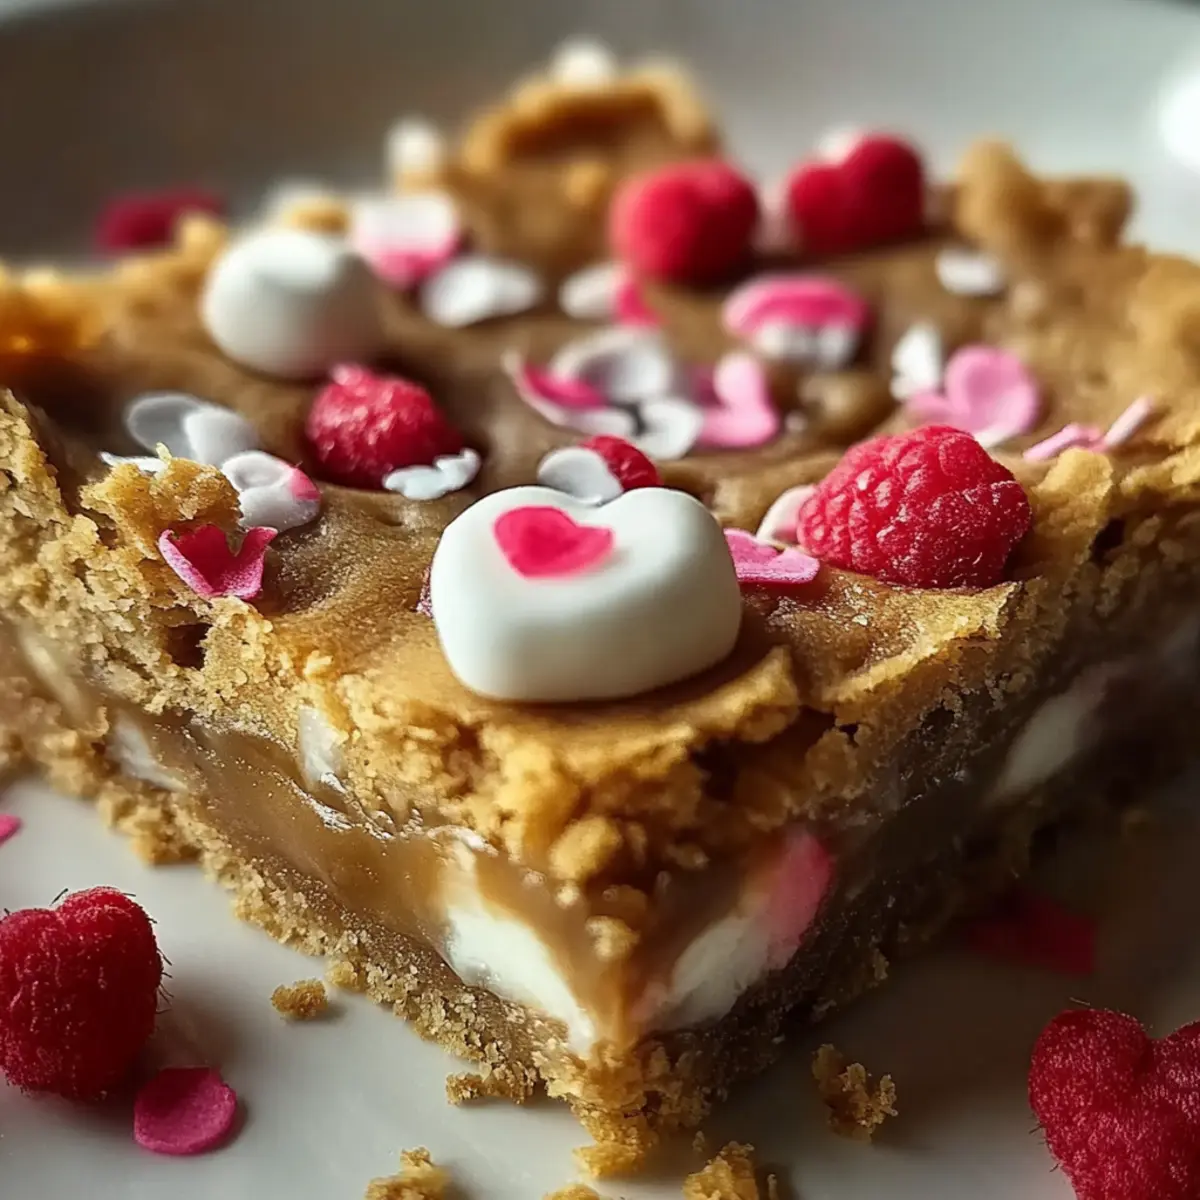
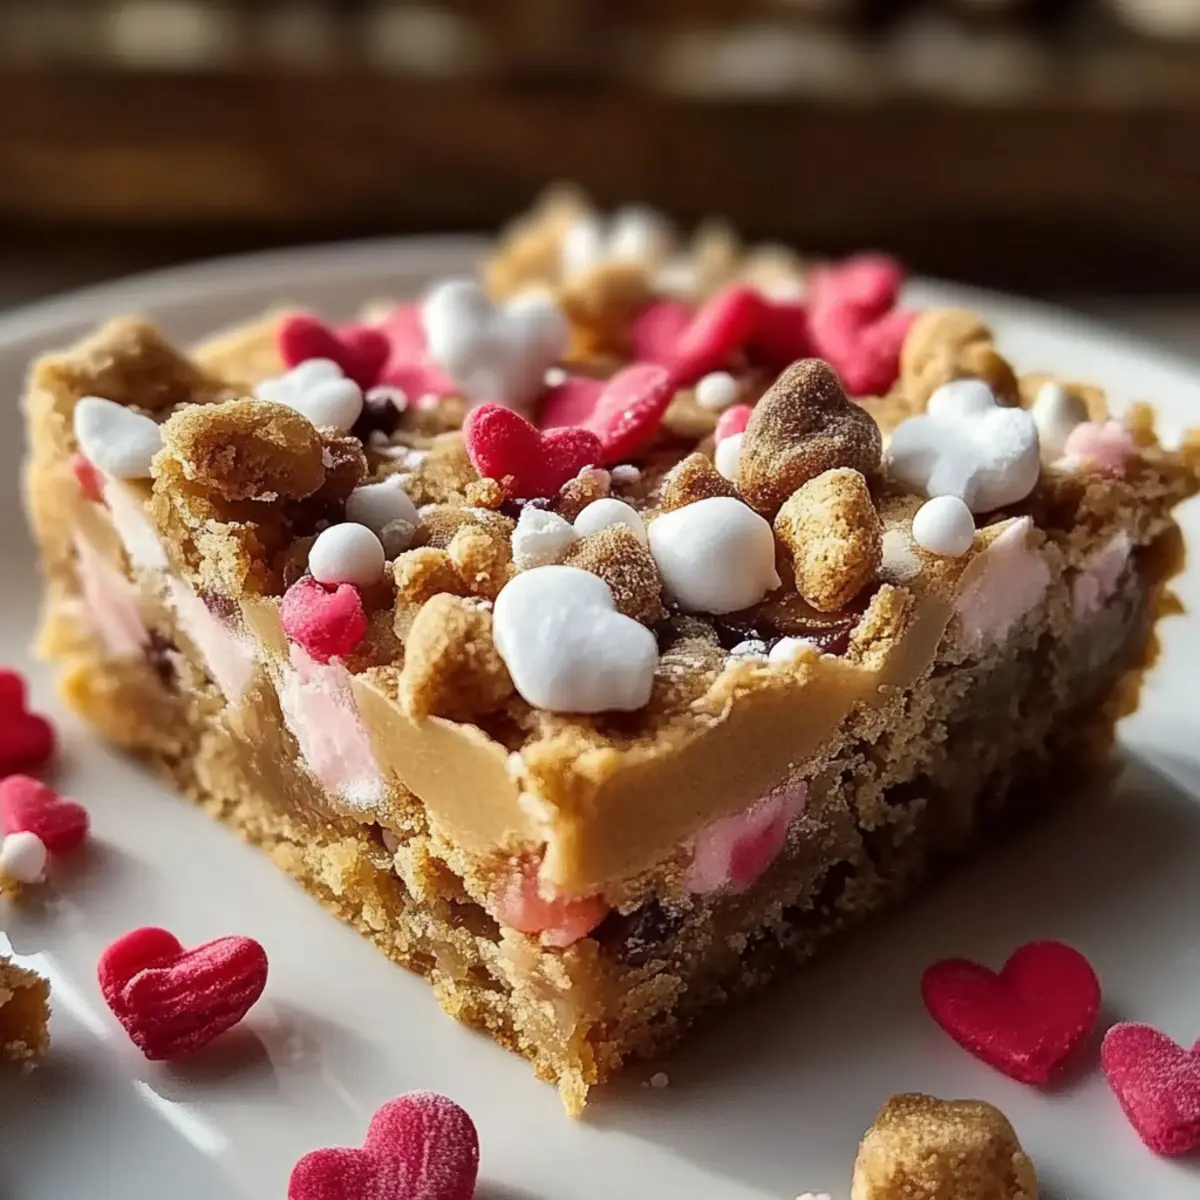
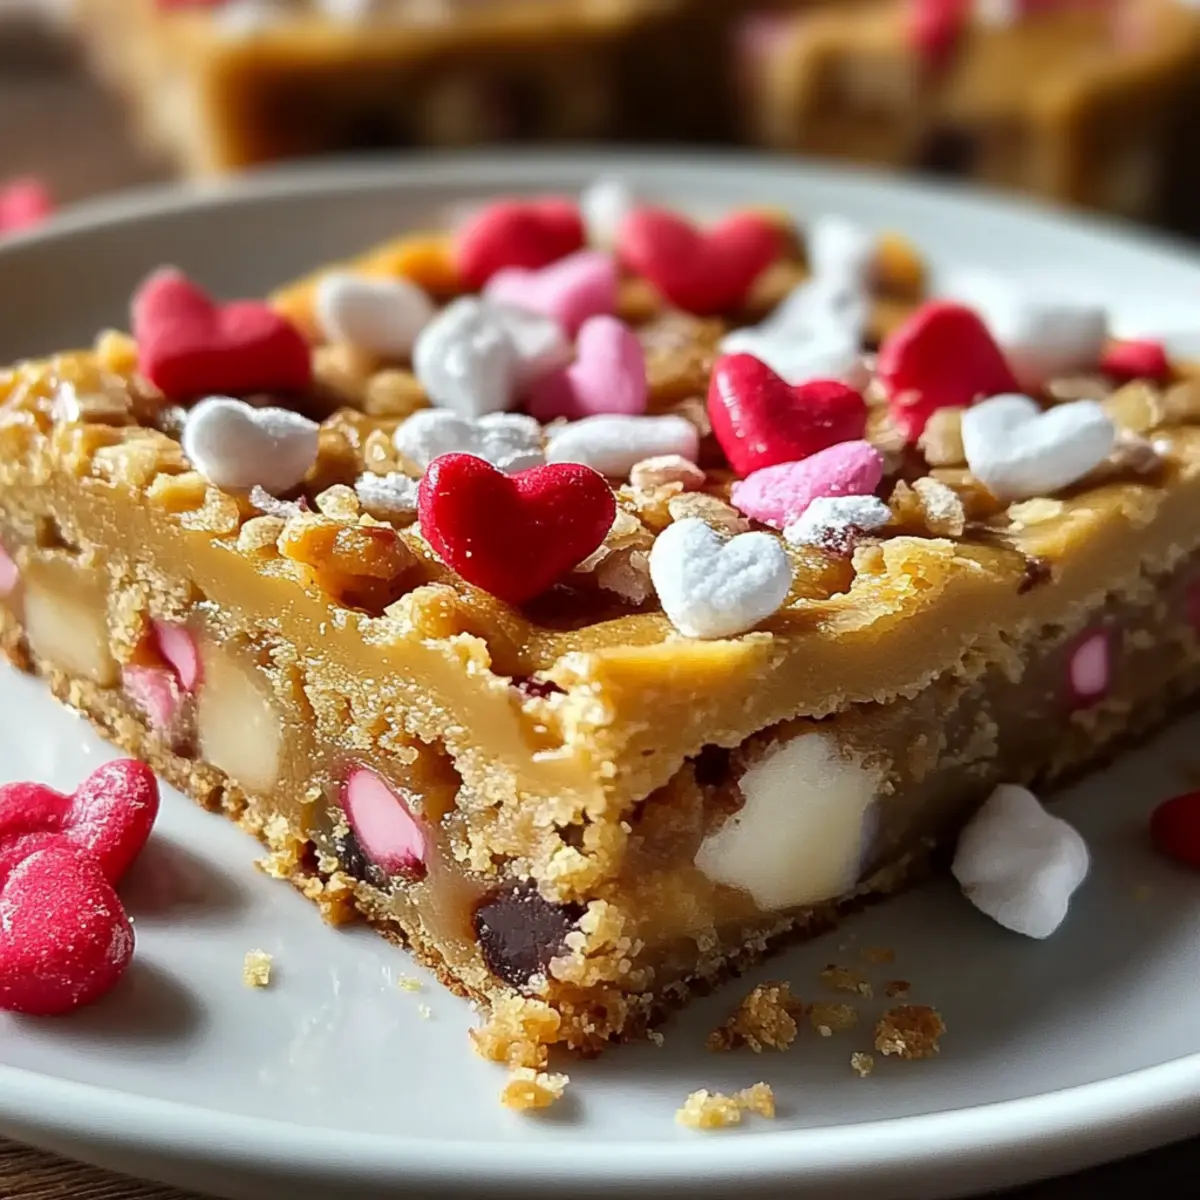
Colorful & Fun: The Valentine-colored M&M’s not only provide a festive flair but also add a delightful crunch that kids and adults alike will love.
Crowd-Pleaser: Whether it’s for a romantic evening or a fun get-together, these cookie bars guarantee smiles all around!
Valentine Peanut Butter Cookie Bars Ingredients
For the Base
- Unsalted butter – ½ cup, melted and slightly cooled, brings richness and helps create that fudgy texture.
- Creamy peanut butter – ¾ cup, opt for well-stirred varieties for smooth incorporation into the mix.
- Light brown sugar – 1 cup, packed for added moisture and a hint of caramel flavor.
- Granulated sugar – ¼ cup, for a touch of sweetness that balances the peanut butter's richness.
- Large eggs – 2, at room temperature for better incorporation and a fluffier texture.
- Pure vanilla extract – 1 ½ teaspoons, essential for enhancing all the cookie flavors.
For the Dry Mix
- All-purpose flour – 1 ¼ cups, spooned and leveled, creating the structure of the bars.
- Baking powder – ½ teaspoon, helping the bars rise slightly for a tender bite.
- Baking soda – ¼ teaspoon, contributes to a light and chewy texture.
- Fine sea salt – ½ teaspoon, balancing sweetness and enhancing flavors throughout.
For the Chocolate Lovers
- Semi-sweet chocolate chips – 1 cup, or milk chocolate for those with a sweet tooth, adding decadent richness.
- White chocolate chips – ½ cup, to swirl in and provide a beautiful contrast and additional creaminess.
For the Festive Touch
- Valentine-colored M&M’s or candy-coated chocolates – ¾ to 1 cup, sprinkle joy and color, transforming these into Valentine Peanut Butter Cookie Bars.
- Valentine sprinkles – 2 tablespoons, optional, but who can resist a little extra festivity?
- Flaky sea salt – for sprinkling on top, optional but elevates flavors for that gourmet touch.
For the Drizzle
- White chocolate chips – ½ cup, for an optional drizzle that adds a sweet finishing touch.
- Neutral oil – 1 teaspoon, helps white chocolate melt smoothly for the drizzle.
Step‑by‑Step Instructions for Valentine Peanut Butter Cookie Bars
Step 1: Prepare the Baking Pan
Start by lightly greasing a 9 x 13 inch baking pan with butter or nonstick spray. Next, line the bottom and long sides with parchment paper, leaving an overhang to lift the bars out later. Lightly grease the parchment as well, ensuring a smooth release for your Valentine Peanut Butter Cookie Bars.
Step 2: Preheat the Oven
While preparing your pan, preheat your oven to 350°F (175°C). This step is crucial, as it ensures that your bars bake evenly from the moment they hit the oven. A properly heated oven will help achieve that perfect golden edge and fudgy center.
Step 3: Mix Wet Ingredients
In a large mixing bowl, whisk together the melted, slightly cooled butter and creamy peanut butter until the mixture is smooth and well combined. Then, add in the packed brown sugar and granulated sugar, whisking until the mixture becomes thick and glossy. Incorporate the eggs, one at a time, and whisk thoroughly after each addition, followed by the pure vanilla extract for enhanced flavor.
Step 4: Combine Dry Ingredients
In a separate medium bowl, whisk together the all-purpose flour, baking powder, baking soda, and fine sea salt until evenly combined. This mix will provide the necessary structure for your Valentine Peanut Butter Cookie Bars. Gradually adding these dry ingredients will also ensure that your batter doesn't become overmixed.
Step 5: Combine Mixtures
Gently fold the dry ingredients into the wet mixture until no dry streaks remain, taking care around the edges of the bowl. Avoid overmixing, as the batter should be thick and creamy, setting the stage for that beloved fudgy texture.
Step 6: Add Chocolate Chips
Now it’s time to fold in the semi-sweet and white chocolate chips, ensuring they are evenly distributed throughout the batter. This will add a decadent chocolatey richness to your Valentine Peanut Butter Cookie Bars, making each bite delightful.
Step 7: Transfer to the Baking Pan
Transfer the thick dough into your prepared baking pan. Using a spatula or lightly greased hands, press the dough evenly into all corners of the pan, smoothing the surface. An even distribution will ensure uniform baking and beautifully shaped bars.
Step 8: Decorate with M&M’s
Gently press half to two-thirds of the Valentine-colored M&M’s into the surface of the dough, reserving the rest for later. Sprinkle with Valentine sprinkles for an extra festive touch, ensuring your bars are as beautiful as they are delicious.
Step 9: Bake the Bars
Place the baking pan in your preheated oven and bake for 18 to 24 minutes. Start checking at 18 minutes; the edges should look lightly golden, and the center will have a slight jiggle. A toothpick should come out with moist crumbs, indicating the perfect bake.
Step 10: Add More M&M’s
As soon as your bars come out of the oven, press the reserved M&M’s into any bare spots on top of the warm batter. This adds an appealing look and extra sweetness, ensuring your Valentine Peanut Butter Cookie Bars are as delightful to admire as they are to eat.
Step 11: Cool the Bars
Allow the bars to cool completely in the pan for at least 1 to 1 ½ hours. For an even fudgier texture, consider chilling the bars in the refrigerator for 30 to 45 minutes before slicing. The wait will be worth it for that chewy, mouthwatering result.
Step 12: Optional Drizzle
If you want to elevate your dessert, melt ½ cup of white chocolate chips with 1 teaspoon of neutral oil in a microwave-safe bowl. Drizzle the melted mixture over the cooled bars and scatter extra sprinkles or crushed candies on top for added flair.
Step 13: Slice and Serve
Using the parchment overhang, lift the cooled bars out of the pan and onto a cutting board. Cut into squares or rectangles, wiping the knife clean between cuts for neat portions. Now your Valentine Peanut Butter Cookie Bars are ready to be enjoyed or shared!
Step 14: Store the Bars
To store, place the cooled bars in an airtight container at room temperature for up to 3–4 days, or refrigerate for up to one week. If freezing, wrap individual bars tightly and place them in a freezer-safe bag for up to two months. When you're ready to indulge, simply thaw at room temperature.
Valentine Peanut Butter Cookie Bars Variations
Feel free to get creative and customize these luscious bars to fit your taste and dietary needs!
-
Gluten-Free: Substitute all-purpose flour with a 1:1 gluten-free baking blend for a deliciously safe treat.
-
Nut-Free: If you're cooking for someone with nut allergies, use sunflower seed butter instead of peanut butter; it's equally creamy and flavorful!
-
Healthier Sweetness: Swap out the sugars for coconut sugar or a sugar alternative like Monk fruit for a lower-calorie option.
-
Add Spice: Include a teaspoon of cinnamon or a pinch of cayenne for a surprising warmth that elevates the flavor profile immensely.
-
Dried Fruits: Toss in some chopped dried cherries or cranberries for a chewy texture that contrasts beautifully with the fudgy bars.
-
Nutty Crunch: For added texture, mix in ½ cup of chopped peanuts or walnuts, providing a delightful crunch with each bite.
-
Extra Chocolate: Increase the amount of chocolate chips to 1.5 cups for a truly chocolatey experience that will satisfy all sweet cravings.
-
Decadent Drizzle: Top the bars with a rich dark chocolate drizzle in addition to or instead of white chocolate—perfect for chocolate lovers!
These variations not only enhance the flavor but also bring a personal touch to your Valentine Peanut Butter Cookie Bars, making them uniquely yours. And if you're feeling adventurous, why not try them with a scoop of homemade vanilla ice cream? The combination is heavenly!
What to Serve with Valentine Peanut Butter Cookie Bars
Elevate your dessert experience by pairing these delightful bars with some perfect accompaniments that enhance their rich flavors.
-
Milkshake: A creamy chocolate or vanilla milkshake creates a nostalgic pairing that’s sure to impress and satisfy cravings.
-
Ice Cream: Serve with a scoop of vanilla or chocolate ice cream. The cold creaminess beautifully contrasts the fudgy warmth of the bars.
-
Fresh Strawberries: Dipped in chocolate or served fresh, strawberries add a fruity brightness and balance out the richness of the cookie bars.
-
Coffee: A warm cup of coffee pairs delightfully, enhancing the peanut butter and chocolate flavors while providing a cozy touch.
-
Chocolate Sauce: Drizzle extra chocolate sauce on top for a decadent finish, creating an indulgent treat that chocolate lovers will adore.
-
Whipped Cream: A dollop of freshly whipped cream adds lightness and sweetness, complementing the dense, fudgy texture without overpowering it.
-
Red Wine: A light red wine, like Pinot Noir, pairs surprisingly well with the richness of the bars, offering a sophisticated twist to your dessert.
-
Hot Chocolate: For a comforting option, a cup of hot chocolate can be a warm companion that complements the peanut butter and chocolate flavors beautifully.
-
Cheese Board: An assortment of cheeses, like creamy brie or sharp cheddar, can create a fun contrast to the sweet bars, rounding out a delightful dessert experience.
-
Cookie Dough Dip: For an extra dose of indulgence, serve chocolate chip cookie dough dip alongside the bars, perfect for pairing with those sweet M&M’s!
Expert Tips for Valentine Peanut Butter Cookie Bars
-
Chill the Dough: If you have time, chilling the dough for 30 minutes can enhance the fudgy texture of your bars.
-
Don’t Overmix: Gently fold the dry ingredients into the wet mixture to avoid overmixing, which can lead to tougher bars instead of the intended gooey perfection.
-
Check for Doneness: Start checking at 18 minutes; the center should still have a slight jiggle. Overbaking will dry out your Valentine Peanut Butter Cookie Bars.
-
Utilize Parchment Paper: Using parchment with overhang makes lifting out the bars easy, ensuring a perfect cut and clean presentation.
-
Experiment with Mix-Ins: Feel free to swap or add different chocolates or nuts; just keep the ratios similar for the best results.
Make Ahead Options
These Valentine Peanut Butter Cookie Bars are perfect for meal prep and can save you valuable time on busy days. You can mix the dry ingredients (flour, baking powder, baking soda, and salt) and store them in an airtight container for up to 3 days in advance. Additionally, the wet mixture can be prepared and kept in the refrigerator for up to 24 hours. To maintain the bars' luscious fudginess, be sure to cool them completely before cutting and store them in an airtight container at room temperature for up to 3–4 days. When ready to serve, simply slice and drizzle with melted white chocolate for an extra touch, ensuring your Valentine Peanut Butter Cookie Bars taste just as delightful as if they were freshly made!
How to Store and Freeze Valentine Peanut Butter Cookie Bars
Room Temperature: Store cooled bars in an airtight container at room temperature for up to 3–4 days to maintain their fresh taste and delightful texture.
Fridge: For extended freshness, refrigerate the bars in an airtight container for up to one week. The cold enhances the fudginess!
Freezer: To freeze, wrap individual Valentine Peanut Butter Cookie Bars tightly in plastic wrap, then place them in a freezer-safe bag. They can be frozen for up to two months.
Thawing: When you're ready to enjoy, simply thaw the bars at room temperature for a few hours, and they'll be just as delicious as the day you made them!
Valentine Peanut Butter Cookie Bars Recipe FAQs
What type of peanut butter should I use?
Absolutely! For the best results, use a creamy peanut butter that is not labeled as "natural" and is well-stirred. This type blends smoothly with the melted butter and sugar, creating that irresistible texture we love in these Valentine Peanut Butter Cookie Bars. Chunky peanut butter can lead to a different texture, so it’s best to stick with the creamy kind!
How should I store leftover bars and for how long?
You can store cooled bars in an airtight container at room temperature for up to 3–4 days. If you’d like to keep them even longer, refrigerating them extends their freshness to about one week. Just note that if you chill them, the fudgy texture may become even richer and denser, which is a delightful bonus!
Can I freeze the bars, and how do I do it?
Yes, you can freeze these delectable bars! I often do this myself. Wrap each cooled bar tightly in plastic wrap, then place them in a freezer-safe bag. They can be stored in the freezer for up to two months. When you're ready to indulge, simply let them thaw at room temperature for a couple of hours—the taste will be just as delightful as the day you baked them!
What if my cookie bars turn out too dry?
Very! A common issue is overbaking, which can make the bars dry. Be sure to start checking for doneness around 18 minutes. The edges should be slightly golden, but the center can still have a slight jiggle. If you do find they're a bit dry, try serving them warm (pop them in the microwave for a few seconds) and pair them with a scoop of vanilla ice cream for a luscious treat!
Are there any allergy considerations for the ingredients?
Definitely! If you're catering to those with allergies, this recipe contains peanuts, gluten (from the flour), and dairy (from the butter and chocolate). For a gluten-free option, you can substitute the all-purpose flour with a gluten-free baking blend. If anyone has nut allergies, you could try using sunbutter instead of peanut butter, although it will alter the flavor profile slightly. Always check your chocolate chip brands as some may contain allergens too.
Irresistibly Fudgy Valentine Peanut Butter Cookie Bars
Ingredients
Equipment
Method
- Prepare the Baking Pan: Lightly grease a 9x13 inch baking pan. Line the long sides with parchment paper, leaving an overhang.
- Preheat the Oven: Preheat your oven to 350°F (175°C).
- Mix Wet Ingredients: In a large bowl, whisk together melted butter and peanut butter until smooth. Add brown sugar and granulated sugar, whisking until thick and glossy. Incorporate eggs one at a time, then add vanilla extract.
- Combine Dry Ingredients: In a separate bowl, whisk together flour, baking powder, baking soda, and sea salt.
- Combine Mixtures: Gently fold dry ingredients into wet mixture until no dry streaks remain.
- Add Chocolate Chips: Fold in semi-sweet and white chocolate chips.
- Transfer to the Baking Pan: Transfer dough into prepared pan and press evenly into corners.
- Decorate with M&M’s: Press half to two-thirds of M&M’s into the top and sprinkle with valentine sprinkles.
- Bake the Bars: Bake for 18 to 24 minutes, starting to check at 18 minutes.
- Add More M&M’s: Press reserved M&M’s into warm bars once out of the oven.
- Cool the Bars: Allow to cool completely in the pan for 1 to 1 ½ hours.
- Optional Drizzle: Melt white chocolate chips and oil, drizzle over cooled bars, and add extra sprinkles.
- Slice and Serve: Lift out using parchment overhang and cut into squares.
- Store the Bars: Store in an airtight container at room temperature for up to 3-4 days.
Leave a Reply