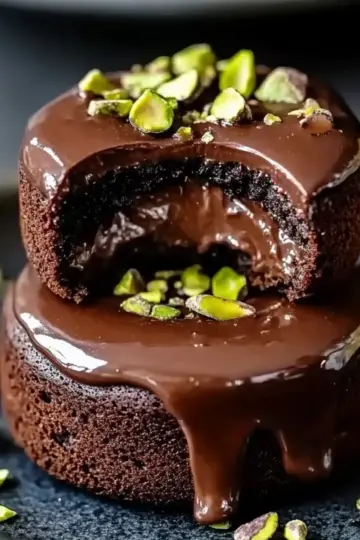
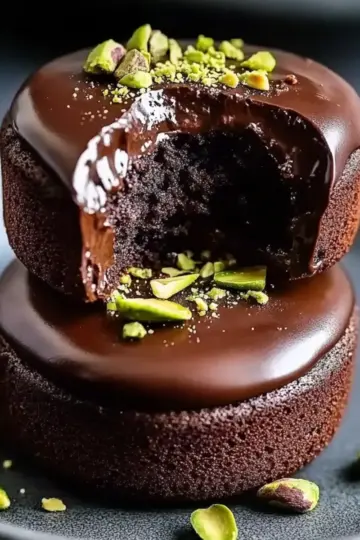
Did you know that a simple combination of dates, cocoa, and nut butter can change your snacking game forever? I stumbled upon a recipe for Brownie Balls that not only satisfies my sweet tooth but also aligns with my health goals. Inspired by Elle Gibsonn’s viral TikTok sensation, these no-bake wonders are as easy to whip up as they are delicious.
The Brownie Balls Recipe I’m sharing is a fantastic treat that’s vegan, gluten-free, and packed with flavor. Whether you need a quick snack during the day or a post-workout pick-me-up, these delightful bites serve both purposes without the guilt. Plus, they’re freezer-friendly, making them a perfect option for meal prep enthusiasts.
Imagine indulging in a fudgy, chocolatey treat that feels rich yet guilt-free. It’s a crowd-pleaser and a fabulous alternative to your usual sugary desserts. Are you ready to transform your kitchen into a haven of healthy treats? Let’s dive into this fun and satisfying recipe that you’re going to want to keep close at hand!

Why are Brownie Balls Recipe so popular?
Healthier Option: These Brownie Balls provide a sweet escape that doesn't compromise on nutrition, thanks to wholesome ingredients like Medjool dates and almond butter.
Quick and Easy: With just a few simple steps, these no-bake delights come together in no time, making them perfect for even the busiest schedules.
Vegan and Gluten-Free: This recipe caters to diverse dietary needs, winning over everyone from health-conscious foodies to dessert lovers.
Versatile Ingredients: Feel free to adapt the recipe to your taste—swap nut butters or mix in favorite nuts to create your unique spin.
Meal Prep Friendly: Store these treats in the fridge for up to two weeks, ensuring you always have a healthy snack on hand. For even more healthy snack ideas, check out these Christmas popcorn balls recipe.
Crowd-Pleaser: Share these tasty morsels at gatherings or snack times, and watch them disappear quickly—everyone will ask for more!
Brownie Balls Recipe Ingredients
• To create your own Brownie Balls, gather these wholesome ingredients that come together for a delightful treat!
For the Batter
- Medjool Dates – These provide a chewy texture and are the main sweetener; if yours aren't sticky, soak other dates in water.
- Cocoa Powder – Adds that luscious chocolate flavor; feel free to use any unsweetened cocoa or cacao powder.
- Almond Butter – Contributes creaminess and healthy fats; you can also substitute with tahini or any nut/seed butter of your choice.
- Maple Syrup – Serves as an additional sweetener and moisture; for a non-vegan option, you might use honey instead.
- Oat Flour – Offers structure to the recipe; almond flour or blended instant oats work as a fantastic replacement.
- Protein Powder – Boosts the protein content; use a flavorless variety or simply more oat flour if you prefer.
- Salt – Enhances the flavors; a necessary ingredient to balance the sweetness.
- Cinnamon Powder – Adds a delightful warmth; it’s optional but highly recommended!
- Espresso Powder – Intensifies the chocolate flavor; use this for extra complexity if desired.
- Vanilla Extract – Elevates the sweetness and flavor; can be omitted in a pinch.
For the Coating
- Dark Chocolate – Creates a rich and decadent coating; this step can be skipped for a lighter version.
- Coconut Oil – Helps to melt the chocolate smoothly; vegetable oil serves as a good substitute if needed.
Grab these ingredients for your Brownie Balls Recipe and prepare yourself for a treat that’s not only healthy but incredibly indulgent!
Step-by-Step Instructions for Brownie Balls Recipe
Step 1
Start by preparing your ingredients. In a food processor, blend together the Medjool dates, cocoa powder, almond butter, maple syrup, oat flour, protein powder, salt, cinnamon, espresso powder, and vanilla extract. Process the mixture until it forms a sticky dough, which should take about 1-2 minutes. You may need to pause to scrape down the sides to ensure everything is well mixed. The result should be a cohesive, soft mixture that holds together when pressed.
Step 2
Once your mixture is ready, it’s time to form the Brownie Balls. Divide the sticky dough into 10 equal portions for bite-sized treats. To keep the dough from sticking to your hands, lightly coat them with a bit of oil. Roll each portion into a smooth ball, and place them on a plate lined with baking paper. This will help them maintain their shape and make for easy handling later on.
Step 3
Chill your formed Brownie Balls in the freezer for about 10 minutes. This step is crucial as it helps firm them up, making them easier to coat later. While they chill, you can prepare your chocolate coating, so all the elements come together perfectly. After the time is up, you should notice they have set slightly but remain soft and fudgy.
Step 4
Now for the chocolate coating! In a microwave-safe bowl, combine your dark chocolate and coconut oil. Heat in the microwave in 30-second intervals, stirring in between until the chocolate is completely melted and smooth. This should take about 1-2 minutes. Make sure not to overheat; the chocolate should be velvety and shiny, perfect for dipping.
Step 5
Dunk each chilled Brownie Ball into the melted chocolate, ensuring each one is completely coated. Allow any excess chocolate to drip off before placing them back on the lined plate. If you desire, sprinkle a little sea salt over each ball for added flavor. This step adds a lovely contrast to the sweetness and enhances the overall taste.
Step 6
Finally, place the coated Brownie Balls back in the freezer for about 15 minutes, allowing the chocolate to set firmly. Once they’re ready, you can enjoy them chilled or store them in an airtight container in the fridge for up to two weeks. Each bite will deliver that rich, fudgy flavor you crave, making these Brownie Balls the perfect guilt-free treat!

Make Ahead Options
These Brownie Balls are perfect for busy home cooks looking to save time! You can prepare the base mixture up to 24 hours in advance. Simply blend all the dry ingredients (dates, cocoa, almond butter, and others) and refrigerate the sticky dough in an airtight container. When you're ready to serve, roll them into balls, chill for 10 minutes, and coat with melted chocolate, then freeze again for 15 minutes to set. For optimal freshness, store finished brownie balls in the fridge for up to 2 weeks. This way, you'll always have a delicious and healthy snack on hand without the guilt!
What to Serve with Brownie Balls Recipe?
These delectable treats are perfect for pairing with flavors or drinks that accentuate their rich, fudgy chocolate goodness.
- Almond Milk: A creamy, nutty complement that offers a refreshing contrast and balances out the chocolate richness.
- Fresh Berries: Juicy strawberries or raspberries add a tart brightness to each bite, enhancing the overall flavor experience.
- Coconut Whipped Cream: This light, airy topping brings a touch of tropical flavor and creaminess, perfect for elevating your Brownie Balls.
- Herbal Tea: A warm chamomile or peppermint tea can serve as a soothing counterpart, creating a cozy snack time vibe.
- Chopped Nuts: Sprinkle some crushed walnuts or pecans on top for a delightful crunch that adds texture and nuttiness.
- His and Hers Smoothies: Blend banana, spinach, and almond milk for a nutrient-packed smoothie that pairs wonderfully with these rich treats.
- Mint Tea: A refreshing sip that complements the chocolate flavor while offering a soothing effect; perfect for an afternoon snack!
- Dark Chocolate Covered Fruit: Dip fruits like banana or orange slices into dark chocolate for a decadent and fruity pairing that harmonizes beautifully.
With these delightful pairings, your Brownie Balls will shine just a little brighter at every gathering!
How to Store and Freeze Brownie Balls
Fridge: Keep your Brownie Balls in an airtight container in the fridge for up to 2 weeks. This helps maintain their fudgy texture and flavor while keeping them fresh.
Freezer: For longer storage, place the Brownie Balls in a single layer on a baking sheet and freeze for about 1 hour. Once firm, transfer them to a freezer-safe bag or container, where they can last up to 3 months.
Thawing: To enjoy your frozen Brownie Balls, simply remove them from the freezer and let them thaw in the fridge for 1-2 hours before serving.
Reheating: These treats are best served chilled, but you can slightly warm them in the microwave for about 10 seconds for a gooey experience!
Expert Tips for Brownie Balls Recipe
Fresh Dates Matter: Ensure your Medjool dates are fresh; dried dates may require soaking to achieve the right sticky texture for your Brownie Balls.
Mind Your Mixing: Avoid over-processing your mixture in the food processor; stop when you reach a sticky consistency to maintain that fudgy texture.
Chocolate Coating: For a smooth chocolate coating, melt your chocolate correctly—microwave gently and stir frequently to prevent burning.
Customize to Taste: Feel free to swap almond butter for other nut or seed butter to create a unique flavor profile in your Brownie Balls.
Perfect Storage: Store your finished Brownie Balls in an airtight container in the fridge, where they’ll last for up to two weeks—ideal for a quick snack!
Brownie Balls Recipe Variations
Feel free to let your creativity shine by customizing your Brownie Balls for a unique twist!
- Nut-Free: Swap almond butter with sunflower seed butter for a creamy, nut-free alternative that still delights.
- Chocolate Lovers: Mix in chocolate chips or chunks into the batter for an extra chocolaty surprise in each bite.
- Protein Boost: Add a scoop of your favorite protein powder to the mixture for an additional nutritious punch. It makes these snacks perfect for post-workout recovery!
- Coconut Dreams: Incorporate shredded coconut into the mix for added texture and a tropical flair. This delivers a delightful chewiness that pairs perfectly with chocolate.
- Dried Fruit Fusion: Toss in some chopped dried fruits like cranberries or apricots for sweetness and a chewy texture. They offer a lovely contrast to the fudginess of the Brownie Balls.
- Spicy Kick: For a flavor adventure, add a pinch of cayenne pepper or chili powder for a surprise heat that complements the chocolate beautifully. It’s a heartwarming twist!
- Zesty Twist: Experiment with citrus zest—try orange or lemon zest—for a refreshing brightness that cuts through the richness. The zing lifts these bites in an exciting way!

Brownie Balls Recipe FAQs
How do I choose the best Medjool dates for the Brownie Balls?
Absolutely! When selecting Medjool dates, look for plump, moist varieties with a shiny appearance. Avoid dates with dark spots or dry texture, as these can affect the stickiness vital for the Brownie Balls. If you encounter drier dates, try soaking them in warm water for about 10 to 15 minutes to soften them up before blending.
How should I store the Brownie Balls?
To keep your Brownie Balls fresh and delicious, store them in an airtight container in the fridge for up to 2 weeks. It minimizes the chance of them drying out while keeping their fudgy texture. If you plan to enjoy them later or want to keep them for an extended period, they can also be frozen for up to 3 months. Just ensure they’re in a freezer-safe bag or container to prevent freezer burn.
Can I freeze the Brownie Balls, and if so, how?
Certainly! To freeze your Brownie Balls, first place them in a single layer on a baking sheet and freeze for about 1 hour until firm. Once set, transfer them to a freezer-safe bag or container. Ensure to label the bag with the date so you can track how long they’ve been frozen. When you're ready to enjoy them, remove from the freezer and let them thaw in the fridge for about 1-2 hours before serving.
What should I do if my Brownie Balls mixture is too dry?
If your mixture feels too dry and doesn’t hold together, it’s likely that your dates weren't moist enough. Simply add a little more almond butter or a splash of water (about half a tablespoon) to help bring it together. Blend again until the mixture is sticky enough to form a ball. Don't hesitate to adjust based on your texture needs!
Are these Brownie Balls safe for people with nut allergies?
It's essential to be cautious! Since this Brownie Balls Recipe uses almond butter, they may not be suitable for those with nut allergies. However, you can easily substitute almond butter with sunflower seed butter or tahini to create a nut-free version that retains creaminess and flavor. Always double-check the labels for allergen information to ensure safety.
How can I improve the flavor of my Brownie Balls?
Very! To enhance flavor, consider adding a teaspoon of espresso powder, which intensifies the chocolate taste remarkably. You can also mix in nuts, dried fruits, or even a scoop of your favorite protein powder for added flavor and texture. If you're feeling adventurous, experiment with spices like nutmeg or a hint of sea salt on the outside for a flavor boost!

Indulge in Guilt-Free Brownie Balls Recipe Everyone Loves
Ingredients
Method
- Start by preparing your ingredients. In a food processor, blend together the Medjool dates, cocoa powder, almond butter, maple syrup, oat flour, protein powder, salt, cinnamon, espresso powder, and vanilla extract. Process until it forms a sticky dough.
- Once your mixture is ready, divide the sticky dough into 10 equal portions. Roll each portion into a smooth ball and place them on a plate lined with baking paper.
- Chill your formed Brownie Balls in the freezer for about 10 minutes to help firm them up.
- In a microwave-safe bowl, combine your dark chocolate and coconut oil. Heat in the microwave in 30-second intervals until the chocolate is completely melted and smooth.
- Dunk each chilled Brownie Ball into the melted chocolate, ensuring each one is completely coated. Let any excess chocolate drip off.
- Place the coated Brownie Balls back in the freezer for about 15 minutes, allowing the chocolate to set firmly.
Nutrition
Notes
- Ensure your Medjool dates are fresh for the best texture.
- Avoid over-processing your mixture to maintain fudginess.
- Melt your chocolate gently to ensure a smooth coating.
- Feel free to customize the nut butter used to your preference.
- Store in an airtight container for up to two weeks.


Leave a Reply