
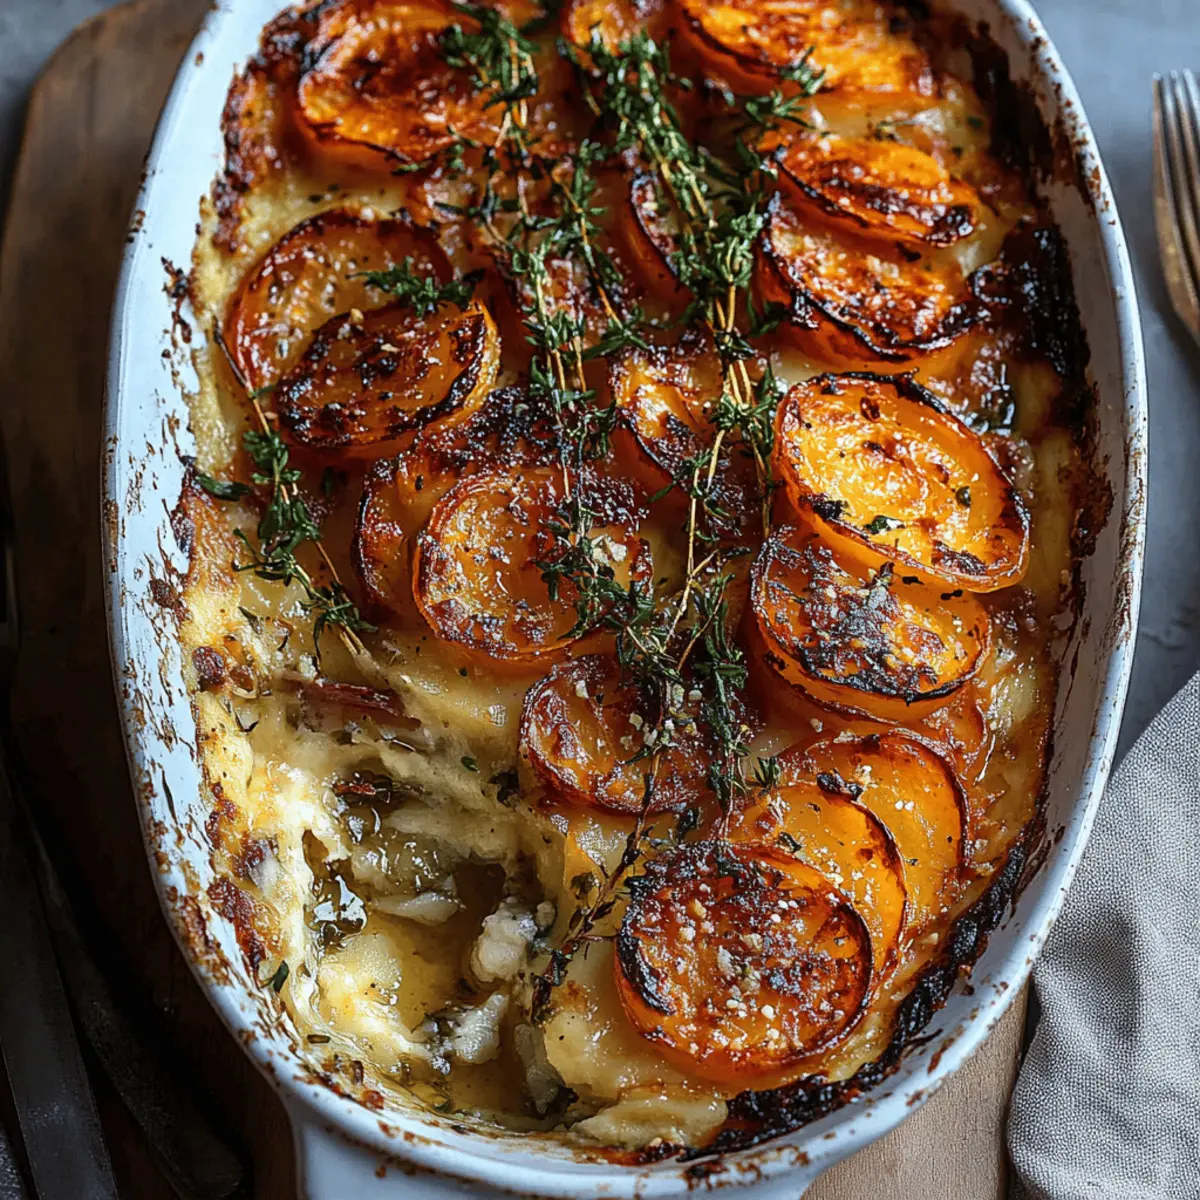
As I stood in my kitchen, the aroma of roasted vegetables filled the air, inviting memories of cozy winter evenings spent with family around the dinner table. It’s at times like these that I turn to my Cheesy Root Vegetable Gratin—a dish that transforms humble ingredients into a comforting feast. This gratin not only showcases the sweetness of root vegetables like parsnips, sweet potatoes, and beets, but it’s also a crowd-pleaser that requires just 15 minutes of prep time. Imagine impressing your guests with a beautifully layered dish, all while sneaking in nutritious veggies! Plus, it can easily be prepped ahead of time, saving you stress during busy evenings. Are you ready to bring a taste of warm nostalgia to your dining experience? Let’s dive into this delicious recipe!
Why is Cheesy Root Vegetable Gratin Irresistible?
Comforting, this gratin is the epitome of home-cooked bliss, perfect for cozy nights in. Flavor-packed, layers of sweet potatoes, parsnips, and beets come alive with rich cream and savory cheeses. Versatile, it can adapt to whatever root vegetables you have on hand, making it a fantastic pantry dish. Easily make-ahead, you can prepare it the day before, allowing you to spend quality time with loved ones. Crowd-pleasing, it’s a beautiful centerpiece that’s sure to impress everyone at your table. If you enjoyed this, check out my tips for make-ahead options to maximize your meal prep!
Cheesy Root Vegetable Gratin Ingredients
Transform your baking experience with this delicious Cheesy Root Vegetable Gratin!
For the Gratin
- Unsalted butter – 1 tablespoon, softened; perfect for greasing your baking dish and adding a rich flavor.
- Long sweet potatoes – 1–2 (about 2 inches thick), peeled; these add a delightful sweetness and creaminess to the dish.
- Large parsnips – 3–4, peeled and trimmed; they bring a subtle warmth and depth to the gratin.
- Small beets – 3–5, peeled; these not only add a pop of color but also earthy sweetness to balance the flavors.
- Heavy cream – 14 tablespoons, divided (or whole milk); it creates a luscious texture that binds all the ingredients beautifully.
- Grated Parmesan – 4 ounces, divided; this sharp cheese enhances the gratin’s savory profile.
- Fresh minced thyme – 1 tablespoon, divided, plus more for garnish; it infuses the dish with aromatic herby notes.
- Garlic clove – 1, minced; it adds a wonderful depth of flavor that complements the sweetness of the vegetables.
- Shredded gruyère – 1 ounce; this melt-in-your-mouth cheese brings a nutty richness to the top layer.
- Salt and pepper – to taste; essential for balancing and enhancing the overall flavors of the dish.
Step‑by‑Step Instructions for Cheesy Root Vegetable Gratin
Step 1: Preheat the Oven and Prepare the Dish
Preheat your oven to 400˚F (200˚C) and while it's heating up, take a 3-quart oval baking dish and grease it with the softened unsalted butter. Make sure to coat the bottom and sides well, ensuring a rich flavor and preventing sticking. This step is crucial for creating that lovely, golden crust on your Cheesy Root Vegetable Gratin.
Step 2: Slice the Vegetables
Using a sharp knife or a mandoline for efficiency, thinly slice the sweet potatoes, parsnips, and beets into very thin rounds. Each slice should be about ⅛ inch thick for even cooking. After slicing, transfer each vegetable to its own bowl to keep them organized, which will make assembly easier later on.
Step 3: Season the Vegetables
In each bowl, pour the designated amount of cream over the sweet potatoes and parsnips, adding 4 tablespoons in total, while drizzling 2 tablespoons over the beets. Sprinkle in the appropriate amounts of grated Parmesan and minced thyme along with generous pinches of salt and pepper. Toss everything gently until the vegetables are well-coated in the creamy mixture.
Step 4: Layer the Base
Pour the remaining ¼ cup of cream evenly into the bottom of your prepared baking dish. Sprinkle it with ½ ounce of Parmesan cheese and add the minced garlic. This creamy base will infuse flavor directly into the vegetables from below, enhancing the overall richness of the Cheesy Root Vegetable Gratin.
Step 5: Arrange the Vegetables
Stand the slices of sweet potatoes in a slight diagonal in the dish, followed by layers of parsnips and beets. Continue this pattern, creating six vertical rows until all the vegetables are layered neatly. Finish the top layer by seasoning it generously with salt, pepper, and the remaining Parmesan cheese to create a deliciously cheesy crust.
Step 6: Cover and Bake
Cover the assembled dish tightly with aluminum foil, which helps to keep moisture in and allows the vegetables to steam. Bake it in the preheated oven for 30 minutes, or until the vegetables are tender; you can check for tenderness by inserting a fork into the layers. This step creates a beautifully cooked base for your gratin.
Step 7: Add Gruyère and Brown the Top
After the initial baking time, carefully remove the foil and sprinkle the shredded gruyère cheese evenly across the top of the dish. Return the uncovered gratin to the oven for an additional 18 to 20 minutes, until the cheese is melted, bubbly, and the top is lightly browned. You’re looking for a golden color that indicates deliciousness!
Step 8: Garnish and Serve
Once baked to perfection, remove your Cheesy Root Vegetable Gratin from the oven and allow it to cool slightly. For a fresh burst of flavor, finish it off with a sprinkle of fresh thyme leaves. Serve warm, ensuring everyone gets a taste of those beautifully layered root vegetables, bursting with cheesy goodness!

What to Serve with Cheesy Root Vegetable Gratin
Elevate your meal with delightful sides and pairings that enhance the cozy flavors of your gratin.
- Roasted Garlic Bread: This warm, buttery delight complements the creamy texture of the gratin, perfect for soaking up every bite.
- Mixed Green Salad: A fresh salad with crisp greens and a zesty vinaigrette adds brightness and balances the rich flavors of the dish.
- Apple Cider: The sweet, tangy notes of apple cider bring a refreshing contrast, making it a wonderful sipping companion to your gratin.
- Herbed Quinoa: Nutty quinoa, tossed with fresh herbs, provides a lovely texture and rounds out the meal with added nutrition.
- Sautéed Brussels Sprouts: Caramelized Brussels sprouts offer a savory crunch that perfectly complements the creamy layers of the gratin.
- Dessert Wine: A glass of dessert wine, like Sauternes, pairs beautifully, enhancing the sweetness of the root vegetables while adding a touch of elegance.
- Baked Apples: For a warm and comforting dessert, baked apples sprinkled with cinnamon create a delightful finish to your meal.
Cheesy Root Vegetable Gratin Variations
Feel free to make this dish your own with these exciting variations that will elevate your Cheesy Root Vegetable Gratin experience!
-
Dairy-Free: Substitute heavy cream with coconut milk and use nutritional yeast instead of cheese for a creamy, plant-based option.
For a zing of flavor, add a touch of garlic powder to truly enhance the dish, making it rich and fulfilling without any dairy. -
Spicy Kick: Mix in your favorite hot peppers or a sprinkle of red pepper flakes to bring a delightful heat to the gratin.
Adjust the amount based on your preference, and balance it out with a bit of extra cream if the spice gets a little too intense! -
Herb Infusion: Experiment with different herbs like rosemary or sage instead of thyme for an aromatic twist.
These herbs not only provide wonderful flavors but also enhance the comforting aroma that fills your kitchen while it bakes. -
Texture Boost: Add a layer of crushed crackers or breadcrumbs on top before the final baking to create a satisfying crunch.
Mix in some grated Parmesan with the crumbs for added cheesiness, making every bite an exciting contrast in texture. -
Root Vegetable Substitutes: Try swapping out the beets with colorful carrots or adding rutabagas for a different flavor profile.
These vegetables will not only add visual appeal but also exciting new tastes to this classic dish. -
Cheese Lovers' Delight: Combine different cheeses like Gouda, Monterey Jack, or even a sharp cheddar to create a flavorful medley.
This cheese variation will surprise and delight everyone at the table with each decadent bite! -
Add Protein: Incorporate cooked diced chicken or crumbled bacon for a heartier gratin that satisfies even the hungriest.
This twist transforms it into a complete meal, perfect for a cozy family dinner or gathering. -
Nutty Flavor: Top with chopped pecans or walnuts for a uniquely nutty taste paired beautifully with the creamy base.
This addition not only enhances the flavor but also gives an unexpected crunch that contrasts delightfully with the soft veggies.
How to Store and Freeze Cheesy Root Vegetable Gratin
-
Fridge: Store any leftovers of your Cheesy Root Vegetable Gratin in an airtight container in the fridge for up to 3 days. This keeps the flavors intact and ready for your next meal!
-
Freezer: To freeze, wrap the dish tightly with plastic wrap or aluminum foil after it has cooled. It can be stored in the freezer for up to 3 months. Just be sure to use an airtight container for best results.
-
Reheating: When you're ready to enjoy your gratin again, thaw in the fridge overnight before reheating. Bake at 350˚F (175˚C) for about 20-30 minutes until heated through and bubbly, bringing back that comforting warmth.
-
Serving Suggestions: Freshly garnished with thyme leaves and a drizzle of cream, it's perfect for a cozy dinner.
Expert Tips for Cheesy Root Vegetable Gratin
-
Prepping Ahead: Assemble the Cheesy Root Vegetable Gratin up to a day in advance and refrigerate it tightly covered. Just add 5–7 extra minutes to the baking time when cooking.
-
Even Slices Matter: Use a mandoline to create uniform slices of the root vegetables. This ensures even cooking and a beautiful presentation—no one wants mushy veggies!
-
Preventing Beet Bleed: To stop beets from turning your gratin pink, lightly coat them in cream before adding them. This keeps your dish vibrant and appealing.
-
Cheese Swaps: If you're in the mood for something different, try substituting gruyère with Fontina, Gouda, or Swiss cheese for a unique flavor twist.
-
Vegetable Variations: Feel free to mix it up! Turnips or rutabagas can replace any root vegetables for a delightful change while still keeping the comforting taste of this cheesy gratin.
Make Ahead Options
These Cheesy Root Vegetable Gratin layers are perfect for meal prep enthusiasts! You can assemble the entire dish up to 24 hours in advance. Simply follow the recipe until Step 5, then cover it tightly with foil and refrigerate. This method ensures the flavors deepen while maintaining the vegetables' integrity. When you’re ready to bake, simply add an extra 5–7 minutes to the cooking time to account for the chill from the fridge. As a critical tip, avoid seasoning the top until right before baking to keep the vegetables fresh and juicy. By adopting these make-ahead options, you’ll have a comforting, home-cooked meal ready with minimal stress on busy weeknights!

Cheesy Root Vegetable Gratin Recipe FAQs
How do I choose the best sweet potatoes and root vegetables?
Absolutely! When selecting sweet potatoes, look for those that feel firm, have smooth skin, and avoid any with dark spots or bruises. For parsnips and beets, ensure they are similarly firm and free from soft or dark spots, which can indicate spoilage. Fresh produce will provide the best flavor and texture in your Cheesy Root Vegetable Gratin.
Can I store my Cheesy Root Vegetable Gratin leftovers?
Very! To store leftovers, place them in an airtight container in the fridge and enjoy them within 3 days. Keeping it sealed helps maintain its delicious flavors. Reheat in the oven for great texture; simply cover with foil to prevent over-browning while warming!
Is it possible to freeze Cheesy Root Vegetable Gratin?
Yes, indeed! To freeze your gratin, make sure it's cooled completely first. Wrap the dish tightly in plastic wrap or aluminum foil, then place it in an airtight container. You can keep it frozen for up to 3 months. When you're ready to eat, thaw it in the fridge overnight, and then reheat in the oven at 350˚F (175˚C) for 20-30 minutes until heated through and bubbly.
What should I do if my vegetables are overcooked in the gratin?
If you find your vegetables have cooked too much, don’t worry! This can happen if the slicing isn’t uniform, so in the future, ensure even slices using a mandoline. To salvage, you can add a bit more cream or cheese on top and bake until the cheese is melted and bubbling. This adds richness and helps mask any overcooked texture, creating a delightful topping!
Are there any dietary considerations I should keep in mind for this gratin?
Definitely! If you’re cooking for someone with lactose intolerance, you can easily substitute the heavy cream and cheeses with lactose-free versions. For those with a dairy allergy, consider using plant-based cream and nutritional yeast for a cheesy flavor without the dairy. Always ensure to check for any specific vegetable allergies as well.
Can I make this gratin ahead of time?
Absolutely! You can assemble your Cheesy Root Vegetable Gratin up to a day in advance. Just cover it tightly with plastic wrap and refrigerate it. When you’re ready to bake, add an extra 5-7 minutes to the cooking time to ensure it heats all the way through. This make-ahead method is wonderfully convenient for busy evenings!

Cheesy Root Vegetable Gratin for Cozy Comfort Food Bliss
Ingredients
Equipment
Method
- Preheat your oven to 400˚F (200˚C) and grease a 3-quart oval baking dish with the softened unsalted butter.
- Thinly slice the sweet potatoes, parsnips, and beets into very thin rounds using a sharp knife or a mandoline.
- In each bowl, pour the designated amount of cream over the sweet potatoes and parsnips, adding 4 tablespoons in total, while drizzling 2 tablespoons over the beets. Add Parmesan and thyme and season with salt and pepper.
- Pour ¼ cup of cream into the bottom of the baking dish, sprinkle with ½ ounce of Parmesan cheese and add the minced garlic.
- Arrange the slices of sweet potatoes, parsnips, and beets in diagonal layers in the dish, seasoning generously with salt and pepper and adding remaining Parmesan on top.
- Cover the dish tightly with aluminum foil and bake for 30 minutes or until tender.
- Remove the foil and sprinkle shredded gruyère cheese over the top, baking uncovered for an additional 18 to 20 minutes until golden brown.
- Allow to cool slightly, garnish with fresh thyme, and serve warm.


Leave a Reply