
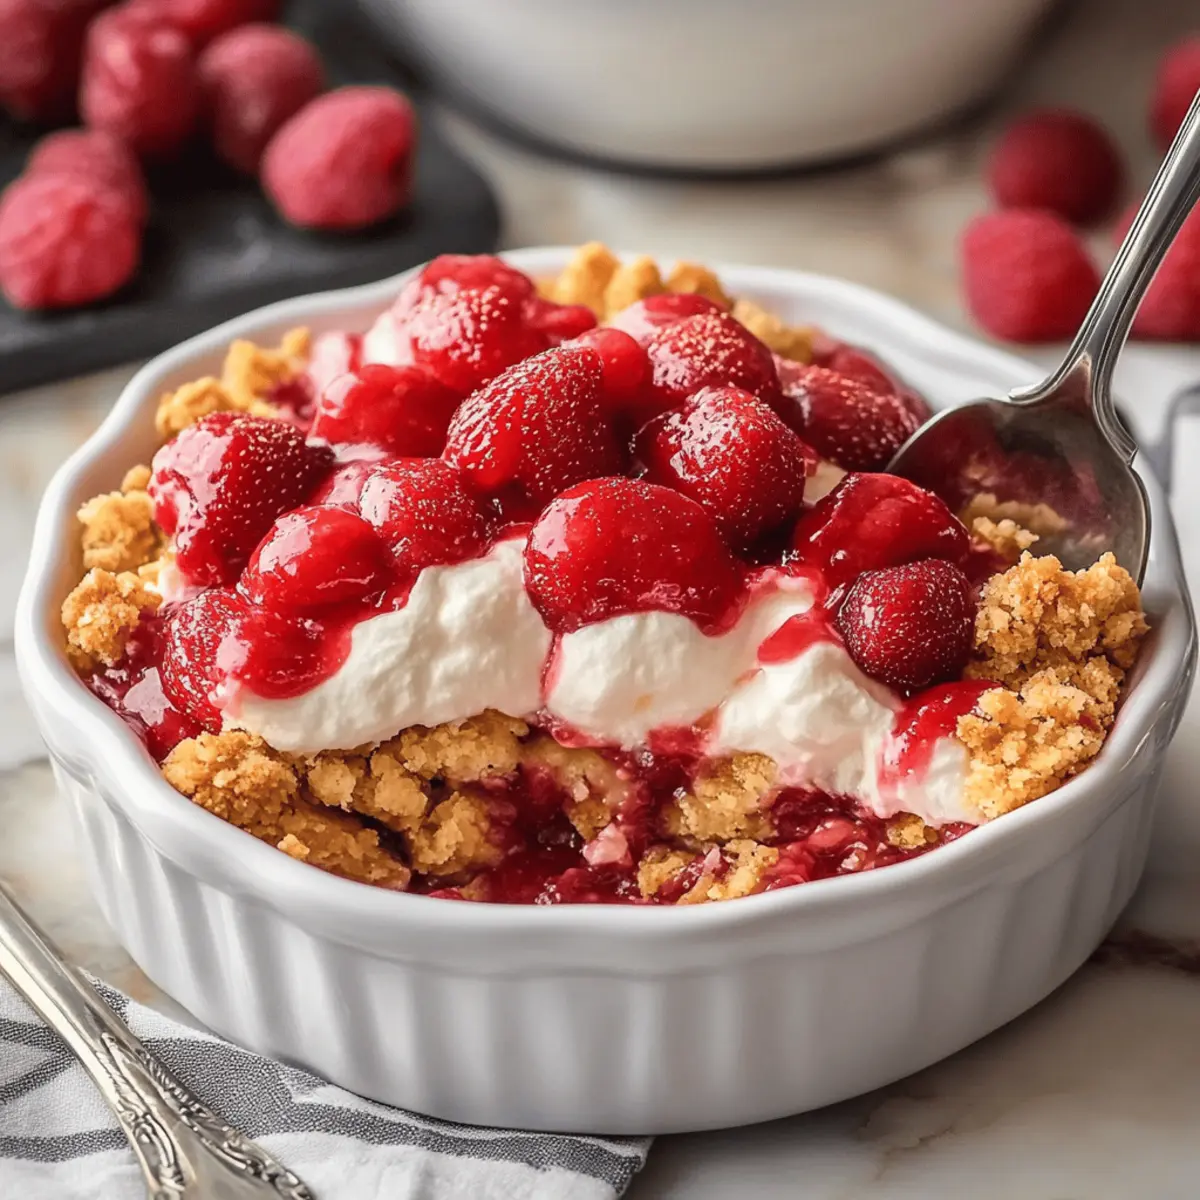
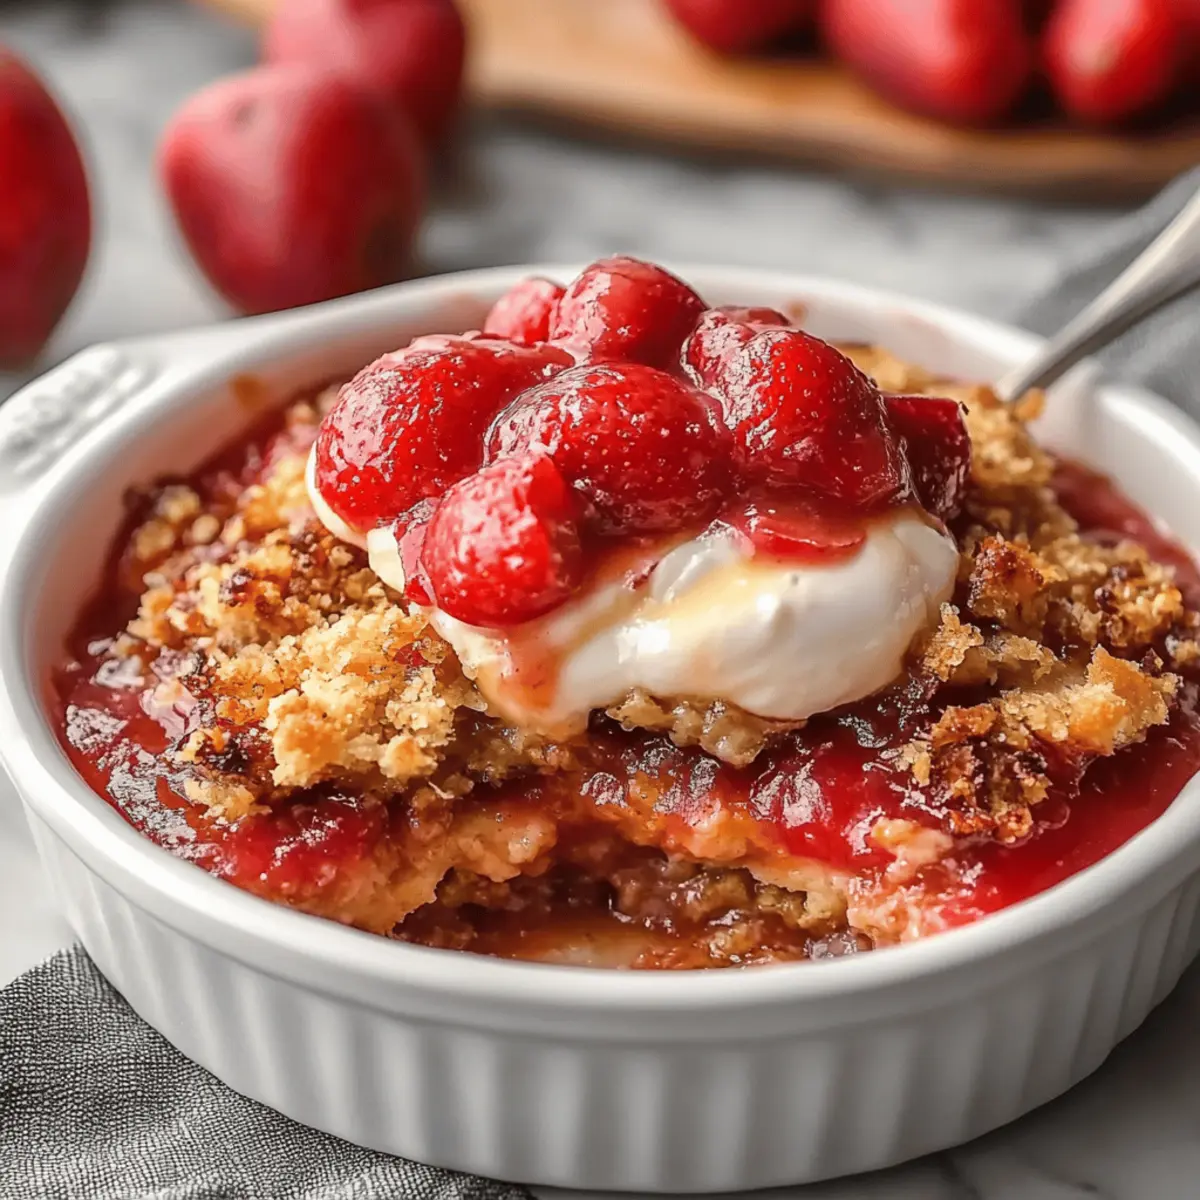
There I was, standing in my kitchen surrounded by the comforting scents of baking cherry crumble, a classic that never fails to evoke warm memories. This Homemade Cherry Crumble recipe has become a cherished staple in my home, capturing not just the essence of sweet cherries but also the joy of creating something from scratch. Combining quick prep with the promise of satisfaction for any sweet tooth, this delightful dessert is perfect for gatherings or a cozy night in. With just a handful of ingredients, you'll bring together the tangy flavor of cherry pie filling and a buttery, crumbly topping that pairs beautifully with a scoop of vanilla ice cream. Ready to transform the ordinary into the extraordinary? Let’s get baking!
Why is Cherry Crumble So Irresistible?
Comforting nostalgia: Each bite of this cherry crumble transports you back to simpler times, evoking cherished memories of family gatherings. Quick prep time: With only 20 minutes of hands-on preparation, you can enjoy this mouthwatering dessert without spending hours in the kitchen. Crowd-pleasing treat: Perfect for parties or a cozy night in, this dish pleases both kids and adults alike. Endless versatility: While this recipe highlights cherry pie filling, feel free to experiment with other fruits, giving you a new favorite every season. Pair it with vanilla ice cream, and you've got a warm, delectable dessert that’s sure to impress!
Cherry Crumble Ingredients
For the Filling
• Cherry pie filling – provides the sweet and tangy base for your crumble masterpiece.
• Granulated sugar – enhances the sweetness of the filling; adjust based on your cherry filling’s tartness.
• Cornstarch – thickens the filling, ensuring it's perfectly gooey without being runny.
• Lemon juice – adds a bright acidity that balances the sweetness; fresh-squeezed is best!
• Vanilla extract – infuses a warm, rich flavor that complements the cherries beautifully.
For the Topping
• All-purpose flour – forms the base for your crumble, creating that delightful texture.
• Rolled oats – add chewiness and heartiness to the topping, making every bite satisfying.
• Brown sugar – brings a rich, caramel-like sweetness; you can substitute light brown for a milder flavor.
• Ground cinnamon – spices up the crumble with warmth; it also pairs wonderfully with cherry flavors.
• Salt – elevates all the flavors in your beautiful dessert; a little goes a long way!
• Cold cubed butter – the key to achieving a crumbly topping; be sure it’s ice-cold for the best texture.
This cherry crumble will have your taste buds singing! Enjoy the delightful blend of flavors in this comforting dessert!
Step‑by‑Step Instructions for Cherry Crumble
Step 1: Preheat the Oven
Begin by preheating your oven to 375°F (190°C). This ensures it reaches the perfect baking temperature while you prepare the filling and topping. If using a glass or ceramic baking dish, lightly grease it to prevent sticking. A 9x13-inch pan works beautifully for this homemade cherry crumble.
Step 2: Prepare the Cherry Filling
In a large mixing bowl, gently combine 21 oz of cherry pie filling with 1 cup of granulated sugar, 3 tablespoons of cornstarch, 1 teaspoon of lemon juice, and 1 teaspoon of vanilla extract. Stir until all ingredients are evenly mixed, creating a luscious, sweet-sour filling. The mixture should look glossy and stick together nicely.
Step 3: Make the Crumble Topping
In another mixing bowl, blend together 1 cup of all-purpose flour, ½ cup of rolled oats, ½ cup of brown sugar, ½ teaspoon of ground cinnamon, and ¼ teaspoon of salt. Next, add ½ cup of cold cubed butter to the mixture. Use a pastry cutter or your fingers to blend until crumbly, resembling coarse crumbs that will create that delightful topping on your cherry crumble.
Step 4: Assemble the Dish
Pour the cherry filling mixture evenly into your prepared baking dish, spreading it out to ensure even coverage. Then, take your crumble topping and sprinkle it generously over the cherry filling. Aim for an even layer, ensuring that some cherries peek through for that inviting look as it bakes.
Step 5: Bake to Perfection
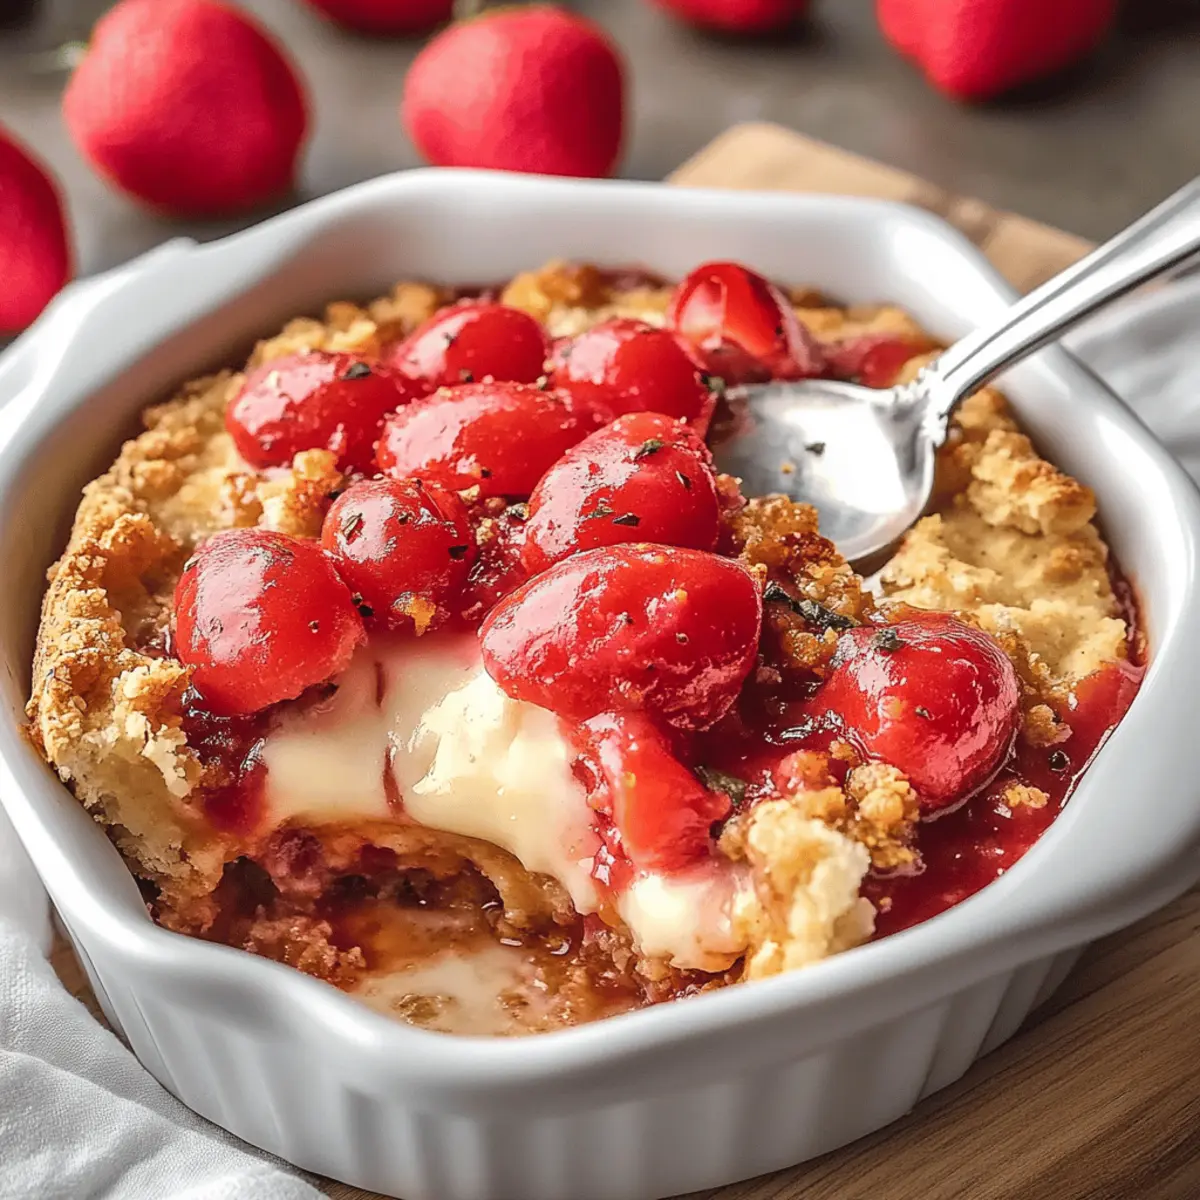
Place the assembled cherry crumble in the preheated oven and bake for 50-60 minutes. You'll know it's done when the cherry filling is bubbling up around the edges and the crumble topping has turned a lovely golden brown. Keep an eye on it to prevent over-browning as ovens can vary.
Step 6: Cool and Serve
Once baked, carefully remove the cherry crumble from the oven and let it cool for a few minutes. This short waiting period allows the filling to set up a bit. Serve it warm or let it cool to room temperature, and enjoy with a generous scoop of vanilla ice cream or a dollop of whipped cream for that luscious finishing touch!

Helpful Tricks for Cherry Crumble
-
Perfect Filling: Make sure to mix the cherry pie filling thoroughly with sugar and cornstarch. This prevents any lumps and ensures a smooth, gooey texture once baked.
-
Cold Butter: Use cold, cubed butter for the topping. This is crucial for creating that signature crumble texture. Room temperature butter won’t yield the same delightful results!
-
Oven Checks: Keep an eye on your crumble while it bakes; ovens can vary significantly. If the topping browns too quickly, cover it loosely with aluminum foil to prevent burning.
-
Serving Suggestions: For a delicious twist, serve warm cherry crumble with vanilla ice cream or freshly whipped cream. It complements the flavors beautifully and elevates your dessert experience!
-
Storage Tips: If you happen to have leftovers (though unlikely!), store them in an airtight container. Reheat in the oven for that fresh-baked flavor, instead of the microwave, to maintain the crumble's texture.
Enjoy your homemade cherry crumble and the smiles it brings!
Cherry Crumble Variations & Substitutions
Feel free to unleash your creativity and personalize your cherry crumble with these delightful swaps and enhancements.
-
Gluten-Free: Substitute all-purpose flour with a 1:1 gluten-free flour blend for a safe and satisfying option.
-
Sugar-Free: Use a sugar substitute like erythritol or stevia for a guilt-free version that still tastes sweet.
-
Oat-Free: Replace rolled oats with crushed nuts for a crunchy texture alternative that adds a healthful twist.
-
Fruity Fusion: Swap out the cherry pie filling for blueberry or mixed berry filling for a vibrant, tangy treat bursting with flavor. The versatility of the crumble makes it a year-round favorite!
-
Coconut Topping: Add shredded coconut to the crumble mixture for a tropical twist that complements the sweet cherries beautifully. It brings a chewy element and hints of tropical flavor.
-
Spicy Kick: Mix a pinch of cayenne or jalapeño powder into the crumble for a surprising hint of heat that pairs wonderfully with the sweetness of the cherries.
-
Chocolate Drizzle: Drizzle melted dark chocolate over the top right before serving for an indulgent finish that chocolate lovers will adore. The harmony of cherry and chocolate is simply divine!
-
Dairy-Free: Use coconut oil or a dairy-free butter substitute in the topping to make this cherry crumble vegan-friendly while still keeping it delicious.
No matter the variation, these twists ensure that your cherry crumble remains a cherished treat in any form! Also, remember to check out my tips on how to store and freeze cherry crumble for delicious leftovers!
Make Ahead Options
These Homemade Cherry Crumble options are perfect for meal prep, allowing busy cooks to enjoy this delightful dessert with minimal effort! You can prepare the cherry filling up to 24 hours in advance; combine the cherry pie filling, sugar, cornstarch, lemon juice, and vanilla extract, then refrigerate it in an airtight container. The crumble topping can also be made ahead and stored in the fridge for up to 3 days; keep it in a separate container to maintain its texture. When you’re ready to bake, simply pour the chilled cherry filling into your greased baking dish, sprinkle the crumble on top, and pop it in the oven for that warm, comforting treat that’s just as delicious as if you made it fresh!
What to Serve with Homemade Cherry Crumble?
Imagine the cozy aroma of cherry crumble filling your kitchen, paired with delightful sides that elevate your dessert experience.
- Vanilla Ice Cream: A classic combination, the creamy texture of vanilla ice cream contrasts beautifully with the warm, crumbly topping.
- Whipped Cream: Light and fluffy, a dollop of fresh whipped cream adds to the dessert's indulgence, making each bite even more heavenly.
- Chocolate Sauce: Drizzling some rich chocolate sauce over your cherry crumble creates a deliciously decadent fusion, pleasing chocolate lovers.
- Coffee: A warm cup of coffee balances the sweetness and enhances the cherry flavor, making it a perfect pairing for afternoon tea.
- Almond Cookies: These nutty, crunchy bites complement the cherry crumble's soft texture while subtly enhancing the dessert's sweet notes.
- Fruit Salad: A refreshing mix of seasonal fruits adds a vibrant touch and a burst of contrasting flavors to your cherry crumble experience.
- Sparkling Water: A bubbly drink like sparkling water cleanses the palate, keeping the meal light and enjoyable, especially after a rich dessert.
- Cheese Platter: For something unexpected, a mild cheese platter can offer a savory flair, balancing the sweetness of the cherry crumble beautifully.
- Ice Cream Float: Combining cherry soda and a scoop of vanilla ice cream, this treat can echo the cherry crumble flavors while adding an exciting twist.
How to Store and Freeze Cherry Crumble
Room Temperature: Enjoy your cherry crumble fresh, but if you need to store it, cover it loosely and keep it at room temperature for up to 2 days.
Fridge: For best results, store leftovers in an airtight container in the fridge for up to 5 days. This keeps the crumble topping nice without drying it out too much.
Freezer: You can freeze the unbaked cherry crumble for up to 3 months. Just assemble it in a freezer-safe dish and cover tightly. Bake directly from frozen, adding a few extra minutes to the baking time.
Reheating: When ready to enjoy, reheat leftover cherry crumble in a preheated oven at 350°F for about 15-20 minutes, until warmed through. This keeps every bite delightful!
Homemade Cherry Crumble Recipe FAQs
How do I choose the best cherry pie filling?
When selecting cherry pie filling, look for jars that boast a rich, vibrant red color without any dark spots or excessive liquid at the bottom. Brands often flaunt their fruit content, so opt for those with whole or thick cherries for the best flavor. If you prefer a more natural option, you can also use homemade cherry filling made from fresh or frozen cherries, sugar, and cornstarch.
What is the best way to store leftover cherry crumble?
To keep your cherry crumble fresh, store leftovers in an airtight container in the refrigerator for up to 5 days. This will help maintain the integrity of the crumble topping while preventing it from drying out. If you have leftover cherry filling, make sure it's covered well and can additionally last for about 3 to 4 days.
How do I freeze cherry crumble?
Absolutely! To freeze your cherry crumble, assemble it in a freezer-safe dish without baking it first. Cover tightly with plastic wrap or aluminum foil to prevent freezer burn. You can store it in the freezer for up to 3 months. When you’re ready to bake, simply remove it from the freezer, unwrap, and bake directly from frozen, adding 10-15 extra minutes to the baking time. Enjoy fresh and warm crumble any time!
What should I do if my crumble topping is too dry?
If your crumble topping turns out too dry, it may be due to overmixing or not incorporating enough butter. To remedy this, simply add a tablespoon or two of cold water or milk, mixing gently until the texture improves. Additionally, using cold butter cut into the mixture creates more moisture in your topping, so make sure your butter is the right temperature next time!
Can I make this cherry crumble gluten-free?
Very! To make a gluten-free version of the cherry crumble, substitute regular all-purpose flour with gluten-free all-purpose flour. Ensure all other ingredients, like oats and baking powder, are certified gluten-free as well. The flavor and texture will still be delightful, and everyone can enjoy it!
Is cherry crumble safe for pets?
Cherry crumble is best kept away from pets. While cherries themselves can be harmful to dogs and cats, as they contain cyanogenic compounds, the sugar and other ingredients in the crumble can lead to upset stomachs or even more serious conditions. Always keep human desserts safely out of reach to ensure your furry friends remain happy and healthy!
Irresistible Cherry Crumble That Melts in Your Mouth
Ingredients
Equipment
Method
- Preheat your oven to 375°F (190°C) and lightly grease a 9x13-inch baking dish.
- In a large mixing bowl, combine cherry pie filling, granulated sugar, cornstarch, lemon juice, and vanilla extract. Stir until well mixed.
- In another bowl, blend all-purpose flour, rolled oats, brown sugar, ground cinnamon, and salt. Then mix in cold cubed butter until crumbly.
- Pour the cherry filling into the prepared baking dish, then sprinkle the crumble topping evenly over it.
- Bake for 50-60 minutes until the filling is bubbling and the topping is golden brown.
- Let cool for a few minutes before serving with vanilla ice cream or whipped cream.


Leave a Reply