
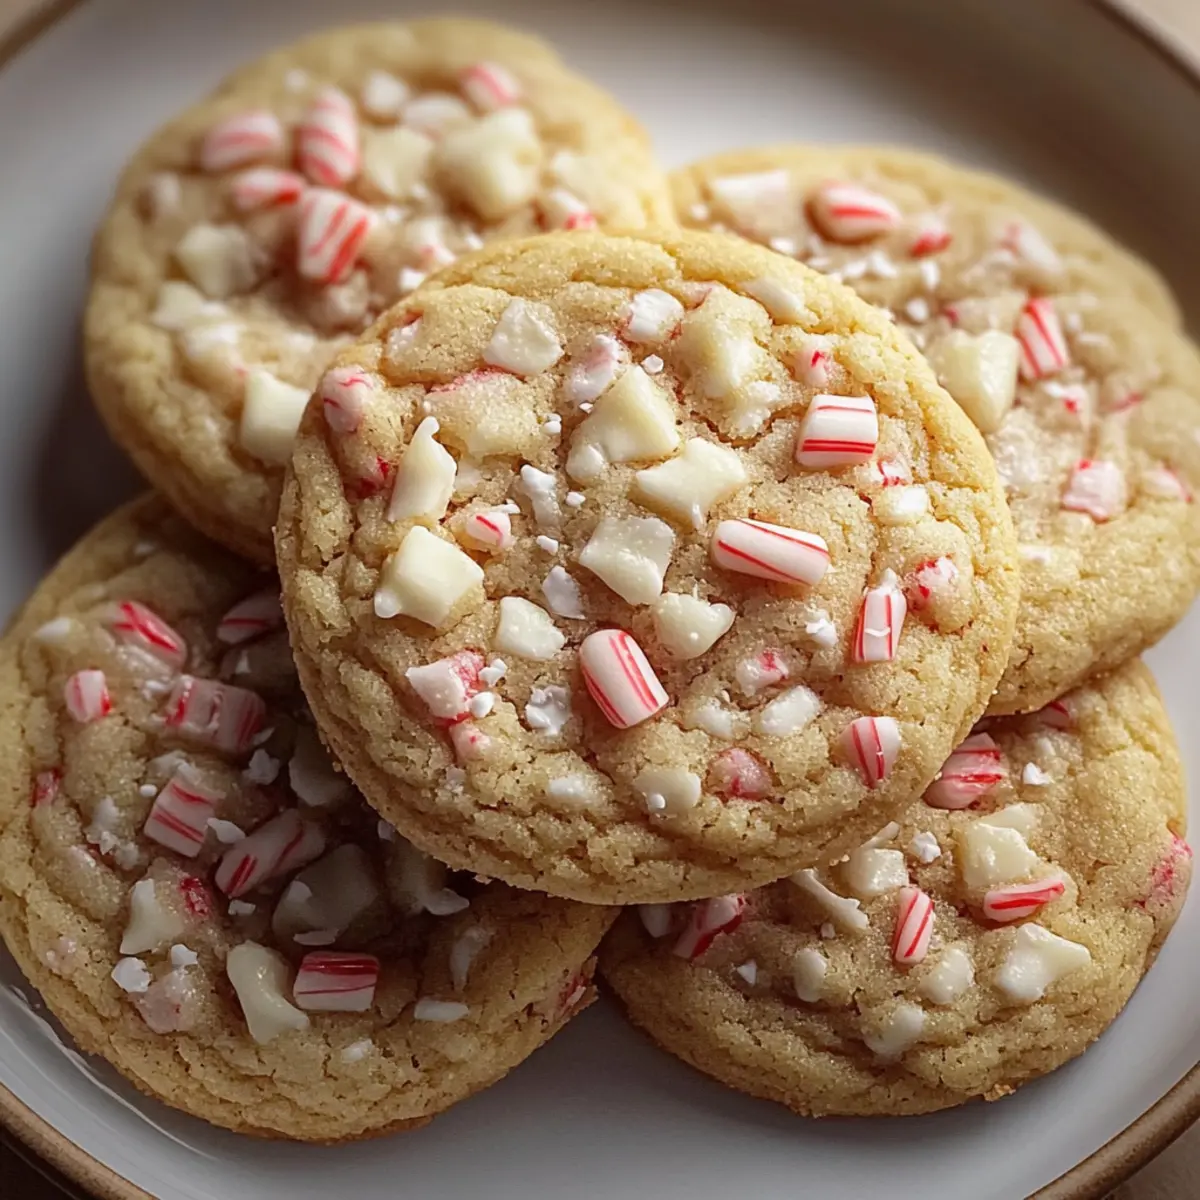
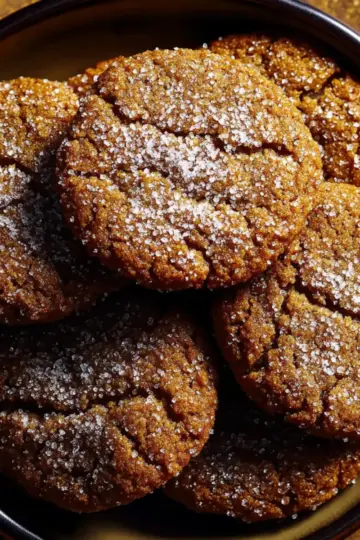
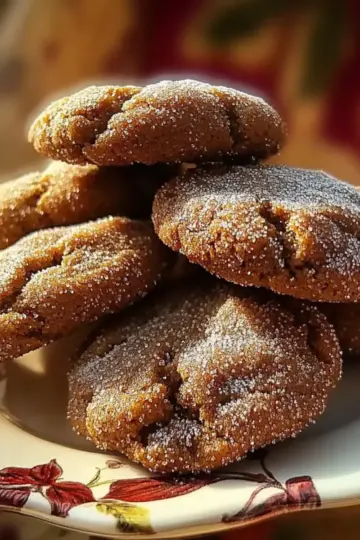
Amidst the hustle and bustle of the holiday season, there's nothing quite like the sweet, minty aroma of freshly baked White Chocolate Peppermint Cookies wafting through your kitchen. These delightful treats are a holiday staple that not only satisfy your sweet tooth but also warm your heart with every bite. With just 20 minutes of prep time and an easy baking process, you'll find yourself creating a batch that is bound to impress your family and friends—or simply indulge your cravings. The combination of rich white chocolate and refreshing peppermint not only creates a comforting flavor profile but also makes these cookies a festive favorite, perfect for sharing (or keeping all to yourself!). Ready to elevate your cookie game and spread some holiday cheer? Let’s get baking!
Why are White Chocolate Peppermint Cookies Perfect?
Cozy, Festive Flavor: The delightful blend of rich white chocolate and refreshing peppermint creates an irresistible taste that embodies the holiday spirit.
Quick and Easy: With just 20 minutes of prep, these cookies are a time-saver, letting you enjoy homemade treats without the hassle.
Crowd-Pleasing Goodness: Perfect for sharing at gatherings, these cookies will have everyone asking for seconds—just like my favorite Peppermint Chocolate Chip cookies!
Versatile Treat: Enjoy them as a delightful dessert or a sweet snack throughout the day.
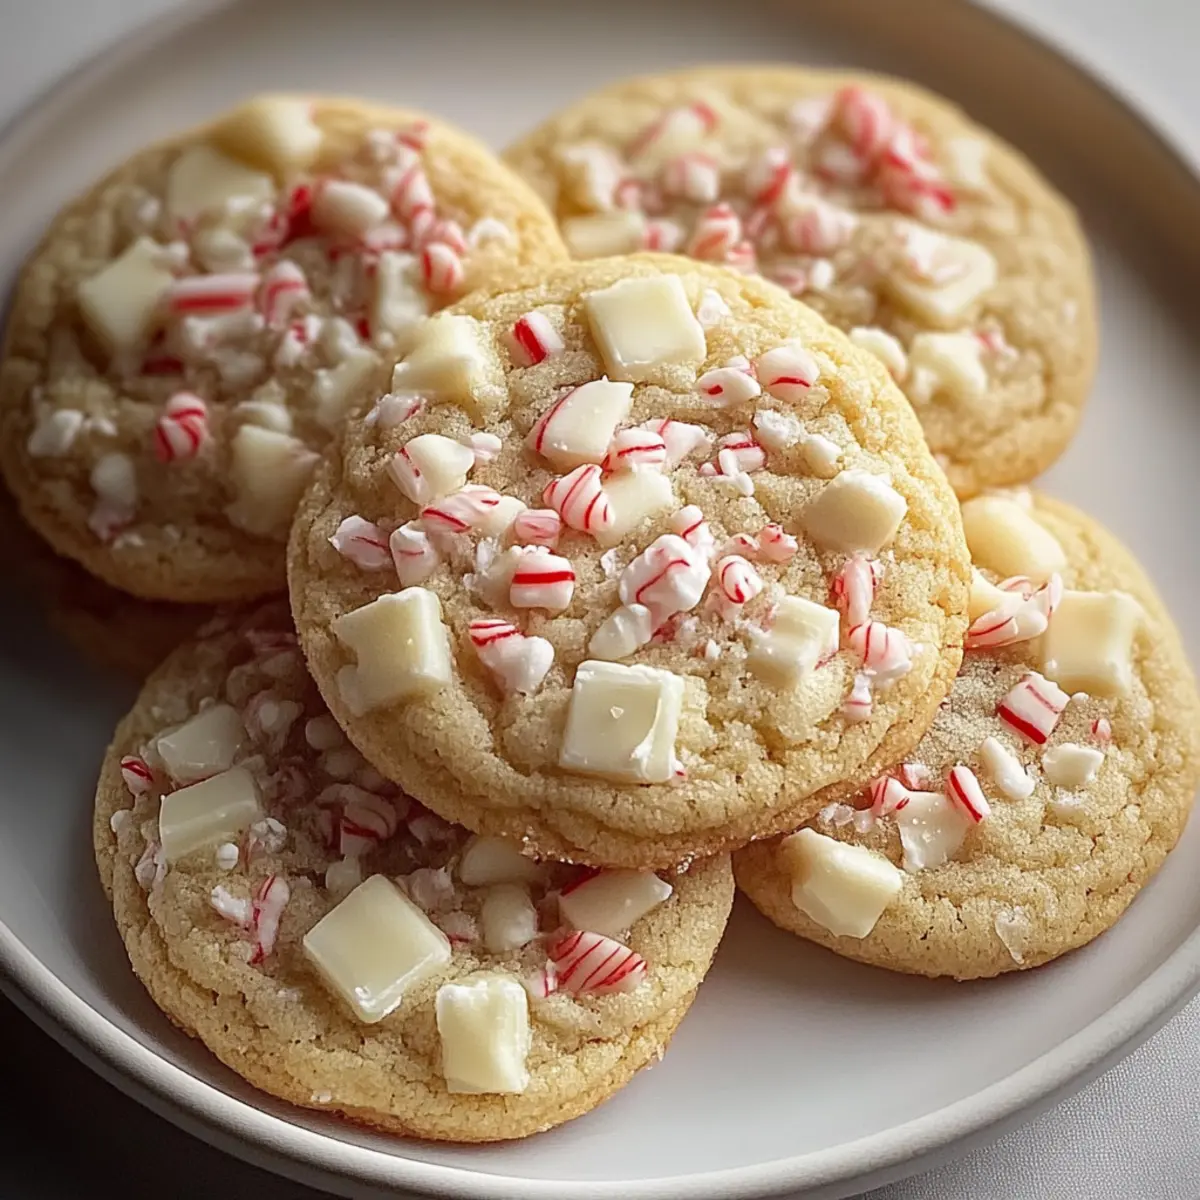
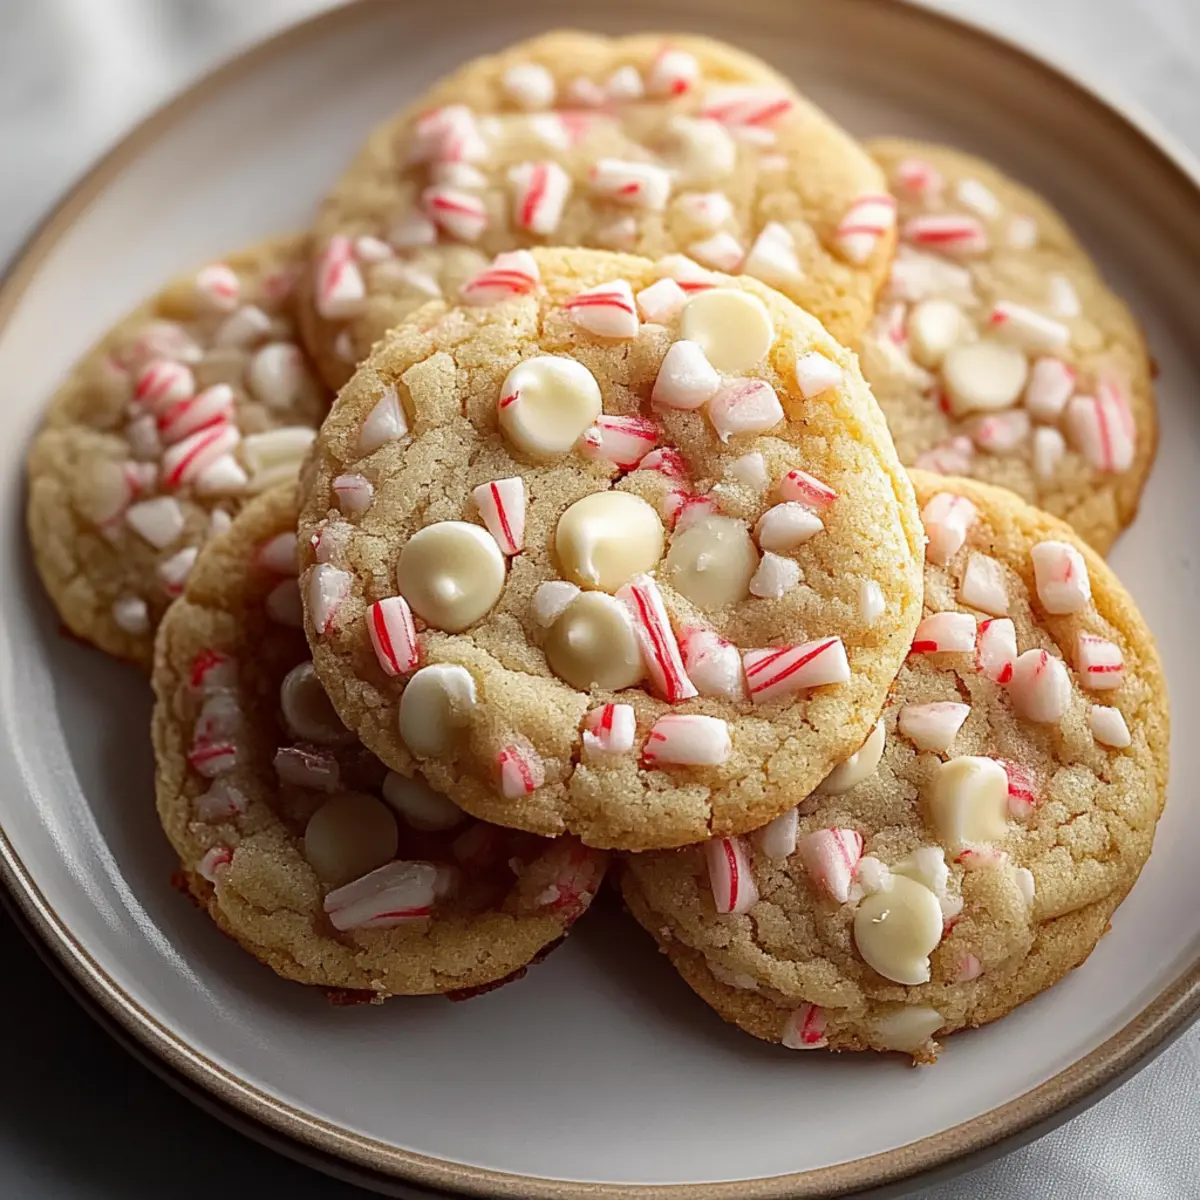
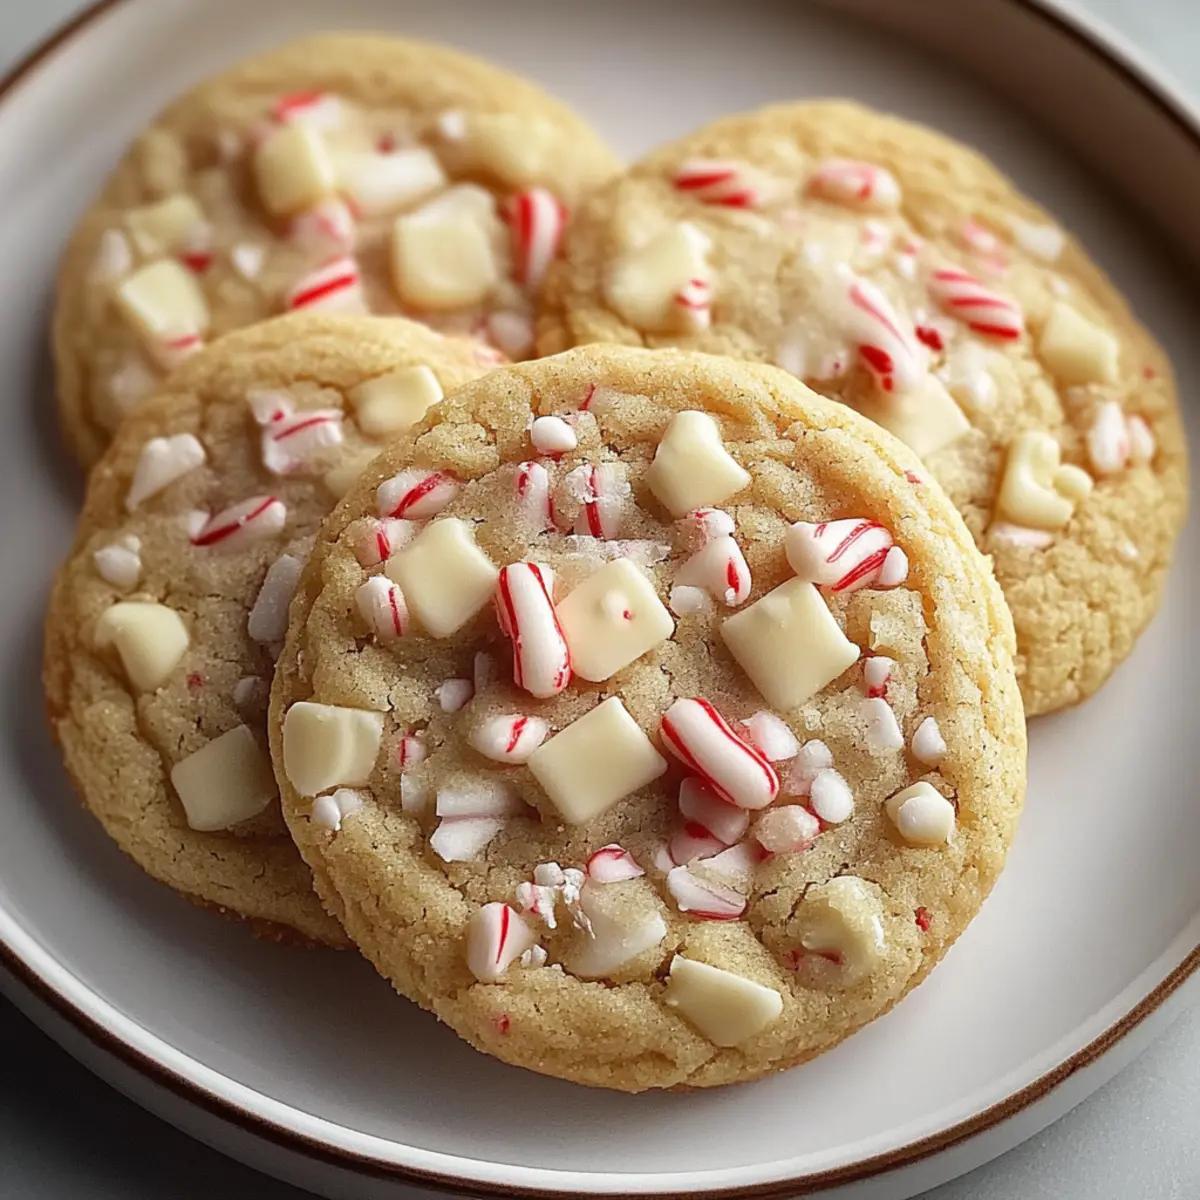
Beautiful Presentation: The vibrant crushed peppermint not only tastes amazing but also looks stunning on any holiday table.
Get ready to bake a batch that will have both family and friends raving about their delightful flavor!
White Chocolate Peppermint Cookies Ingredients
• Get ready to create a delightful treat with these simple yet delicious ingredients!
For the Dough
- Unsalted butter – Softened for easy creaming and a rich flavor.
- Granulated sugar – Adds sweetness and helps achieve the perfect texture.
- Brown sugar – Adds moisture and a lovely caramel-like flavor.
- Large eggs – Essential for binding and contributing to the cookie’s richness.
- Pure vanilla extract – Enhances the overall sweetness and aroma.
- All-purpose flour – Provides structure and ensures your cookies hold their shape.
- Baking soda – Helps the cookies rise and achieve a light, fluffy texture.
- Salt – Balances sweetness; just a pinch makes a world of difference.
For the Sweet Additions
- White chocolate chips – Adds a creamy sweetness that pairs perfectly with peppermint.
- Peppermint extract – Infuses a refreshing, festive flavor that defines these cookies.
- Crushed peppermint candies or candy canes – For that delightful crunch and a pop of color; these make your White Chocolate Peppermint Cookies festive indeed!
Gather these ingredients, and let's embark on this sweet culinary adventure together!
Step‑by‑Step Instructions for White Chocolate Peppermint Cookies
Step 1: Preheat and Prepare
Begin by preheating your oven to 350°F (175°C) and lining two baking sheets with parchment paper. This important first step ensures your cookies bake evenly and don’t stick to the sheets, making cleanup a breeze. While the oven heats, gather your ingredients to streamline the process and set a cozy baking atmosphere.
Step 2: Cream the Butters and Sugars
In a large mixing bowl, combine the softened unsalted butter, granulated sugar, and brown sugar. Using a hand mixer or stand mixer, cream these together on medium speed for about 3-4 minutes, until the mixture is light and fluffy. This vital step helps incorporate air into the dough, resulting in soft and chewy White Chocolate Peppermint Cookies.
Step 3: Incorporate the Eggs and Flavors
Add the large eggs one at a time to the butter and sugar mixture, beating well after each addition. Next, mix in the pure vanilla extract and peppermint extract until fully combined. These flavors are what make your cookies special, giving them that unforgettable holiday aroma that will fill your kitchen with warmth and joy.
Step 4: Mix Dry Ingredients
In a separate bowl, whisk together the all-purpose flour, baking soda, and salt until well combined. This step ensures that the baking soda is evenly distributed, allowing your cookies to rise properly and maintain the perfect texture. Once blended, you are ready to combine the dry ingredients with the wet ones.
Step 5: Combine Wet and Dry Ingredients
Gradually add the dry ingredient mixture to the wet ingredients, stirring gently with a spatula until just incorporated. It’s important not to over-mix here; you want to maintain a light texture. This rich dough will be the canvas for your delightful White Chocolate Peppermint Cookies, ready for the sweet additions.
Step 6: Fold in Sweet Additions
Carefully fold in the white chocolate chips and the crushed peppermint candies using a spatula, ensuring they’re evenly distributed throughout the dough. This step not only contributes sweetness but also adds a delightful crunch, making every bite of your cookies festive and bursting with flavors.
Step 7: Scoop the Dough
Using a cookie scoop or a tablespoon, drop rounded balls of dough onto the prepared baking sheets, leaving about 2 inches of space between each cookie. This spacing allows the cookies to spread beautifully while baking, ensuring they don’t merge into each other, helping you achieve those perfect looking White Chocolate Peppermint Cookies.
Step 8: Bake to Perfection
Place the baking sheets in the preheated oven and bake for 10-12 minutes, or until the edges of the cookies are lightly golden. The centers may appear slightly undercooked, which is just fine; they will firm up as they cool. Keep an eye on them for that perfect comforting golden ring!
Step 9: Cool and Enjoy
Once baked, remove the cookies from the oven and let them cool on the baking sheets for about 5 minutes. This step allows them to set properly before transferring them to a wire rack to cool completely. Enjoy the delightful aroma that fills your kitchen as you await your decadent White Chocolate Peppermint Cookies to cool and be ready for devouring!
Expert Tips for White Chocolate Peppermint Cookies
Avoid Over-Mixing: When combining the wet and dry ingredients, mix just until incorporated. Over-mixing may result in tough cookies.
Perfect Baking Time: Keep an eye on the cookies as they bake; pull them out when the edges are golden and the centers look slightly undercooked for the best texture.
Chill the Dough: If you have time, chill the dough for 30 minutes before baking. This helps the cookies maintain their shape and enhances the flavor.
Spacing Matters: Be mindful of your cookie spacing on the sheets; at least 2 inches apart ensures they don’t merge and helps them bake evenly.
Serve with a Twist: For a fun presentation, drizzle melted white chocolate over cooled cookies and sprinkle extra crushed peppermint on top—an eye-catching way to enjoy these White Chocolate Peppermint Cookies!
How to Store and Freeze White Chocolate Peppermint Cookies
Room Temperature: Store cooled cookies in an airtight container at room temperature for up to 3 days to keep them soft and delicious.
Fridge: For longer freshness, place the cookies in the refrigerator where they will last up to 1 week. Just remember to let them come back to room temperature for optimal flavor.
Freezer: Freeze unbaked cookie dough balls in a zip-top bag for up to 3 months. When ready to bake, simply pop them in the oven without thawing, adding a couple of extra minutes to the baking time.
Reheating: Warm leftover cookies in the microwave for about 10-15 seconds for that fresh-out-of-the-oven taste before enjoying your White Chocolate Peppermint Cookies again!
What to Serve with White Chocolate Peppermint Cookies
As the aroma of freshly baked cookies fills your kitchen, it’s the perfect moment to think about what will elevate your delightful treats into a full festive feast.
-
Hot Chocolate Station: A rich and creamy hot chocolate pairs wonderfully, enhancing the cozy experience as you indulge in the sweet flavors.
-
Whipped Cream: A light dollop of freshly whipped cream adds a fluffy texture, creating a delightful contrast with the chewy cookies.
-
Peppermint Tea: A soothing cup of peppermint tea complements the cookies wonderfully, highlighting that holiday flavor in a warm, comforting way.
-
Holiday Fruit Salad: Bright, zesty fruits like oranges and pomegranates provide a refreshing balance to the sweetness of the cookies, making each bite feel light.
-
Cheesecake Bites: Decadent cheesecake bites add a richness that marries beautifully with the white chocolate and peppermint, creating a playful dessert spread.
-
Nutty Biscotti: Crunchy almond or hazelnut biscotti offer a satisfying crunch that contrasts with the softness of the cookies, perfect for dipping in coffee or tea.
-
Eggnog: Creamy eggnog with a sprinkle of nutmeg enhances the festive spirit, turning your cookie moment into a joyous celebration.
-
Chocolate Dipped Pretzels: For those who love a sweet and salty experience, chocolate-dipped pretzels bring an extra layer of flavor and texture that perfectly complements these cookies.
-
Peppermint Ice Cream: Cool peppermint ice cream is a delicious way to extend the festive experience beyond the cookies. Enjoy a scoop atop your cookies for an indulgent twist.
Make Ahead Options
These White Chocolate Peppermint Cookies are perfect for busy bakers who want to save time during the holiday rush! You can prepare the cookie dough up to 24 hours in advance by mixing all ingredients and storing it in an airtight container in the refrigerator—this keeps the dough fresh and flavors meld beautifully. Alternatively, you can scoop the dough into balls and freeze them for up to 3 months; just arrange the balls on a baking sheet to freeze individually, then transfer them to a freezer-safe bag. When you're ready to bake, simply place the frozen dough on lined baking sheets and add a couple of extra minutes to the baking time for delicious results just as fresh as if you made them today!
White Chocolate Peppermint Cookies Variations
Feel free to play with this recipe and customize it to your taste—each twist adds a delightful surprise!
- Gluten-Free: Substitute all-purpose flour with a 1:1 gluten-free baking blend for a safe and delicious option.
- Dairy-Free: Use coconut oil or dairy-free butter and dairy-free white chocolate chips for a vegan-friendly treat.
- Minty Green: Swap crushed peppermint candies for green candy canes for a festive twist and vibrant color.
- Nutty Surprise: Add ½ cup of chopped walnuts or pecans for a crunchy texture that perfectly complements the softness of the cookies.
- Chewy Delight: For a chewier cookie, use brown sugar exclusively and reduce the flour to 2½ cups—an irresistible change!
- Chocolate Accents: Mix in dark or semi-sweet chocolate chips alongside the white chocolate for a rich flavor contrast.
- Spicy Kick: Add a pinch of cayenne pepper to the dough for a surprising warm kick that pairs beautifully with the peppermint.
- Citrus Zest: For a fresh twist, incorporate 1 tablespoon of orange or lemon zest into the dough, elevating the flavor profile beautifully.
Whichever variation you choose, you can’t go wrong! If you're feeling adventurous, how about trying them with a scoop of ice cream, similar to our delicious Cake Batter Chocolate cookies? Enjoy exploring!
White Chocolate Peppermint Cookies Recipe FAQs
How do I select the best peppermint candies for my cookies?
Absolutely! When choosing peppermint candies or candy canes, look for those that are vibrant in color and free from dark spots. Fresh candies will provide the best flavor and crunch. Crush them into small bits for even distribution throughout the dough for that delightful crunch!
What’s the best way to store leftover cookies?
Very good question! After your White Chocolate Peppermint Cookies have cooled, place them in an airtight container at room temperature. They will stay fresh and delicious for up to 3 days. For even longer storage, consider refrigerating them in an airtight container for up to 1 week—just remember to let them reach room temperature before enjoying!
Can I freeze White Chocolate Peppermint Cookies?
Indeed, you can! To freeze unbaked cookie dough, scoop the dough into balls and place them on a parchment-lined baking sheet. Freeze for about 1 hour, then transfer them to a zip-top bag, where they can be stored for up to 3 months. When ready to bake, just pop the frozen dough directly into the oven, adding a couple of extra minutes to the baking time to ensure they're baked to perfection!
What if my cookies turn out flat?
No worries! If your cookies spread too much in the oven, it might be due to melted butter. Make sure your butter is softened (not melted) before creaming. Also, double-check that you’re using the correct ratio of flour. You could also chill the dough for about 30 minutes to help your cookies keep their shape during baking.
Are there any dietary considerations I should keep in mind?
Certainly! If you have friends or family members with allergies, be cautious with the white chocolate chips as they may contain dairy. For a dairy-free version, use dairy-free white chocolate chips, and ensure the peppermint candies are also suitable for their diet. Always read labels to accommodate any dietary needs!
How long do these cookies last when stored properly?
When well-stored in an airtight container at room temperature, these delightful White Chocolate Peppermint Cookies can remain fresh for about 3 days. If refrigerated, they can last up to a week. Just a quick tip: reheating them in the microwave for 10-15 seconds can bring back that freshly baked taste!
Creamy White Chocolate Peppermint Cookies for Cozy Joy
Ingredients
Equipment
Method
- Preheat your oven to 350°F (175°C) and line two baking sheets with parchment paper.
- In a large mixing bowl, cream together the softened unsalted butter, granulated sugar, and brown sugar until light and fluffy.
- Add the eggs one at a time, beating well after each. Mix in vanilla extract and peppermint extract until combined.
- In another bowl, whisk together the flour, baking soda, and salt.
- Gradually add the dry ingredients to the wet ingredients, stirring gently until just incorporated.
- Fold in the white chocolate chips and crushed peppermint candies.
- Scoop rounded balls of dough onto the baking sheets, spacing them about 2 inches apart.
- Bake for 10-12 minutes until edges are golden and centers are slightly undercooked.
- Let cool on baking sheets for 5 minutes before transferring to a wire rack.
Leave a Reply