
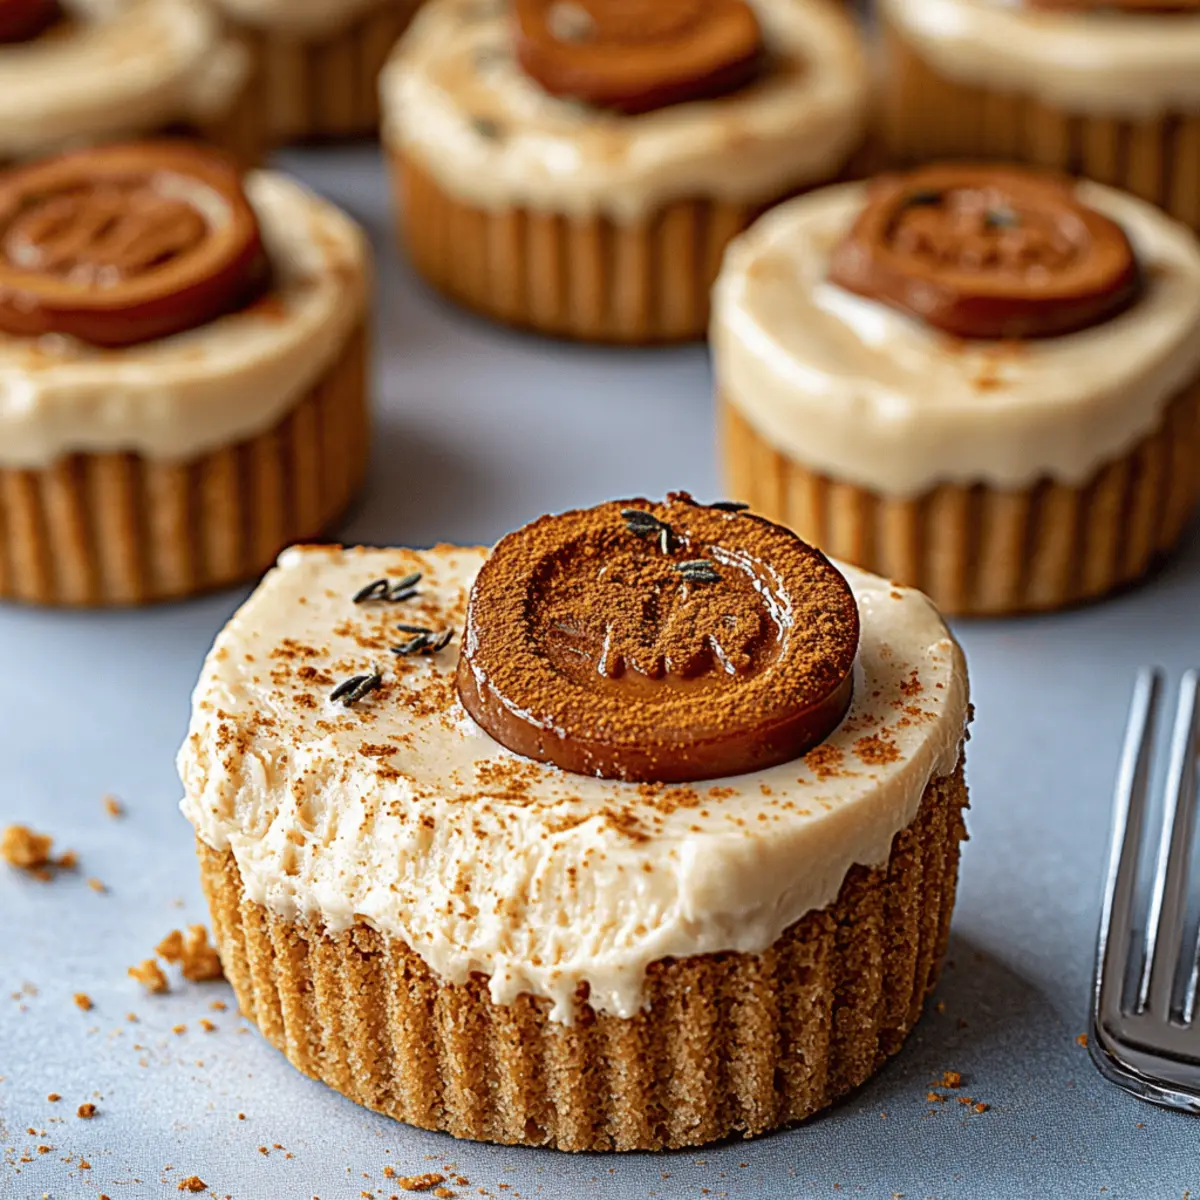
As the gentle aroma of Biscoff cookies wafted through my kitchen, I felt an irresistible pull to create something special. These No Bake Mini Biscoff Cheesecakes have quickly become my go-to dessert, perfect for any occasion. Not only are they delightfully easy to whip up—with a mere 20 minutes of prep time—but they also offer a creamy, decadent indulgence without the need for an oven. Each mini cheesecake features a delectable crust made from crushed Biscoff cookies, layered with a velvety filling that will leave your taste buds dancing. Plus, they can be made ahead of time, making them an ideal choice for entertaining guests or enjoying a quiet night in. Ready to elevate your dessert game? Let me show you how to make these irresistible treats!
Why are these cheesecakes so irresistible?
Decadent, with a creamy filling that melts in your mouth, these No Bake Mini Biscoff Cheesecakes are truly a treat for dessert lovers. Simplicity is key; requiring just 20 minutes of active prep, which makes them perfect for busy days. Versatile too, you can customize toppings to suit any occasion—think fresh berries or a drizzle of chocolate. Crowd-pleaser appeal is guaranteed; guests will be raving over these bite-sized delights! For more easy dessert ideas, check out my no-bake cheesecake recipes that you can whip up in no time!
No Bake Mini Biscoff Cheesecakes Ingredients
For the Crust
• Biscoff cookie crumbs – Use about 20 Biscoff cookies crushed into fine crumbs for a decadent crust.
• Unsalted butter – Helps hold the crust together; melted for easy mixing.
• Brown sugar (optional) – Adds a touch of richness and depth to the crust.
For the Filling
• Cream cheese – Ensure it’s softened to room temperature for a smooth and creamy texture.
• Biscoff cookie butter – Choose the smooth variety for a velvety cheesecake filling; it's the star of this recipe!
• Powdered sugar – Sweetens the filling while ensuring a silky smooth finish.
• Vanilla extract – Enhances the flavor profile, making each bite more delightful.
• Heavy whipping cream – Whipped to stiff peaks for that airy, light cheesecake texture.
For the Topping
• Biscoff cookie butter – Melted slightly for drizzling on top, creating a deliciously rich layer.
• Extra Biscoff cookie crumbs – Use for garnishing to add a lovely crunch and visual appeal.
• Whipped cream (optional) – A dollop or swirl can elevate presentation and taste when serving.
Dive into creating these No Bake Mini Biscoff Cheesecakes, and let their creamy goodness take center stage at your next gathering!
Step‑by‑Step Instructions for No Bake Mini Biscoff Cheesecakes
Step 1: Prepare the Muffin Pan
Begin by lining a muffin pan with cupcake liners or using silicone molds for easy removal later. This step sets the stage for your No Bake Mini Biscoff Cheesecakes, ensuring they release smoothly without any hassle when finished. Set the pan aside while you prepare the crust.
Step 2: Make the Crust
In a mixing bowl, combine the Biscoff cookie crumbs, melted unsalted butter, and optional brown sugar. Stir the mixture until it resembles wet sand, which indicates it’s ready to form into a crust. If the crumbs hold together when squeezed, you know it’s perfect.
Step 3: Press the Crust into the Liners
Scoop approximately 1 ½ tablespoons of the crust mixture into each lined muffin cup. Press down firmly with your fingers or a small glass to create a compact base, ensuring an even layer. Once all cups are filled, place the pan in the refrigerator to chill while you prepare the cheesecake filling.
Step 4: Beat the Cream Cheese
In a large mixing bowl, beat the softened cream cheese using a hand mixer or stand mixer until it becomes smooth and creamy, about 2 minutes on medium speed. This texture is key for your cheesecake filling, which should be fluffy and inviting once fully mixed.
Step 5: Incorporate Cookie Butter and Sugar
Add the Biscoff cookie butter, powdered sugar, and vanilla extract to the cream cheese. Beat on medium speed until the ingredients are fully combined and the mixture is fluffy, which should take 2–3 minutes. You’ll notice a delightful aroma as this mixture comes together, signaling it’s ready.
Step 6: Whip the Heavy Cream
In a separate bowl, pour in the cold heavy whipping cream and begin to whip it using a hand mixer or whisk. Whip the cream until stiff peaks form, about 3-5 minutes. This step is crucial for achieving a light and airy texture in your cheesecake filling, enhancing its decadence.
Step 7: Combine Cream Mixtures
Gently fold the whipped cream into the Biscoff cheesecake mixture using a spatula. Be careful to maintain the airiness of the whipped cream; this will give your filling the perfect light texture. Continue to fold until the two mixtures are well blended, ensuring there are no visible streaks.
Step 8: Fill the Cheesecake Bases
Spoon or pipe the creamy cheesecake filling atop the chilled crusts in the muffin pan. Smooth the tops with a spoon or an offset spatula for an even finish. This step transforms your crusts into delightful mini cheesecakes, ready for the refrigerator to set.
Step 9: Chill for Firmness
Cover the muffin pan with plastic wrap or aluminum foil, then chill in the refrigerator for at least 4 hours, or overnight if you can wait! This allows the cheesecake filling to firm up and develop its wonderful flavors, making each bite even more enjoyable.
Step 10: Prepare the Topping
Just before serving, take the remaining Biscoff cookie butter and gently warm it in the microwave for about 10–15 seconds until it’s pourable. This will create a lush topping for your No Bake Mini Biscoff Cheesecakes, adding an extra layer of sweetness.
Step 11: Drizzle the Cookie Butter
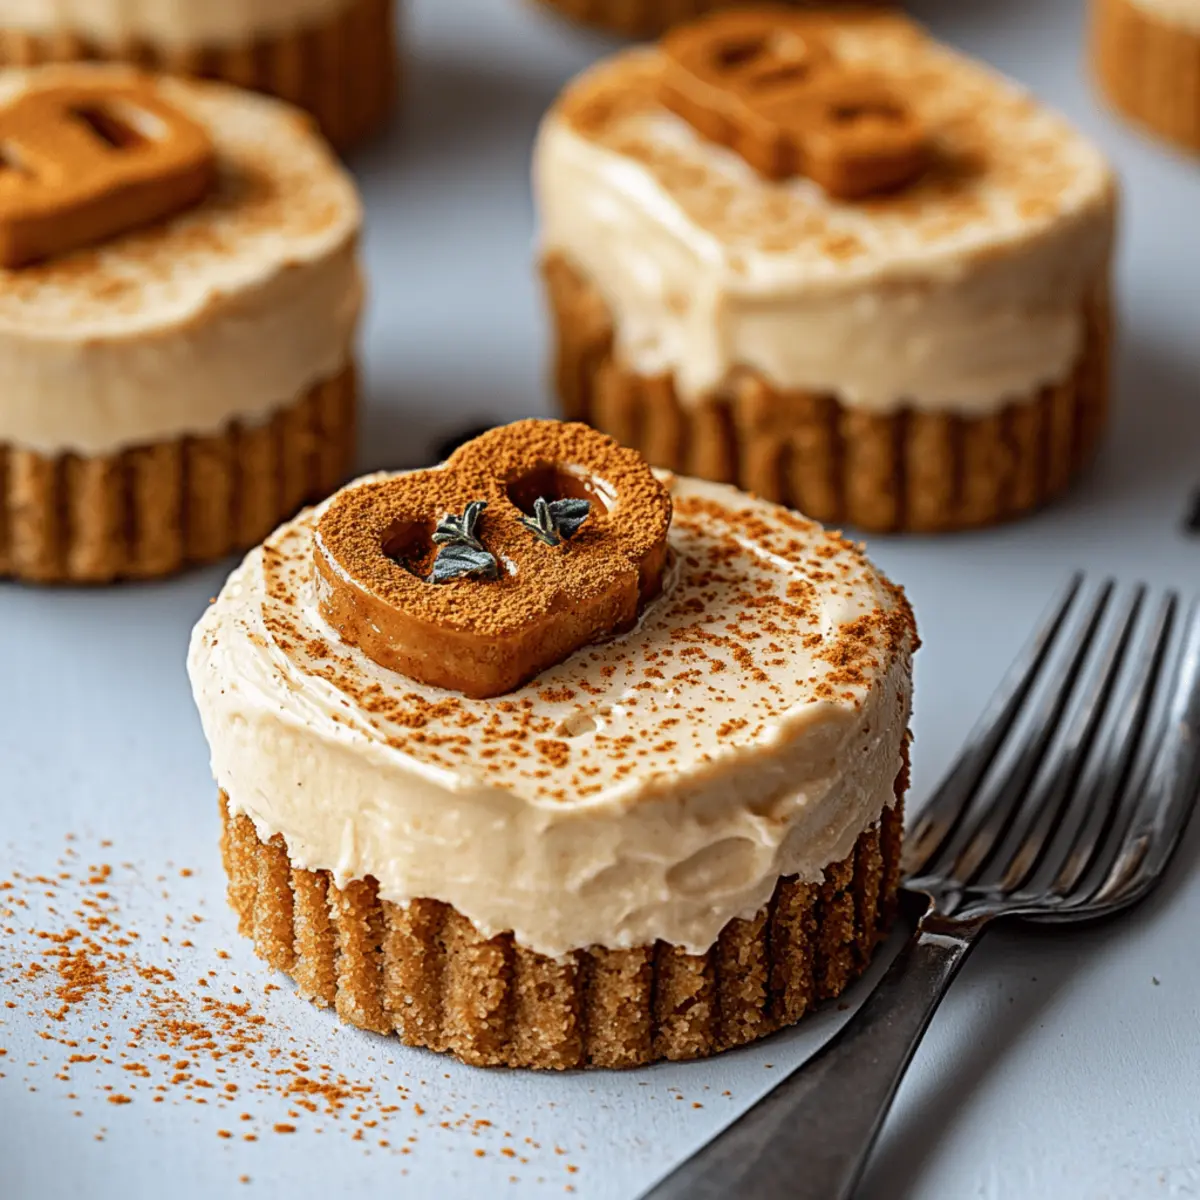
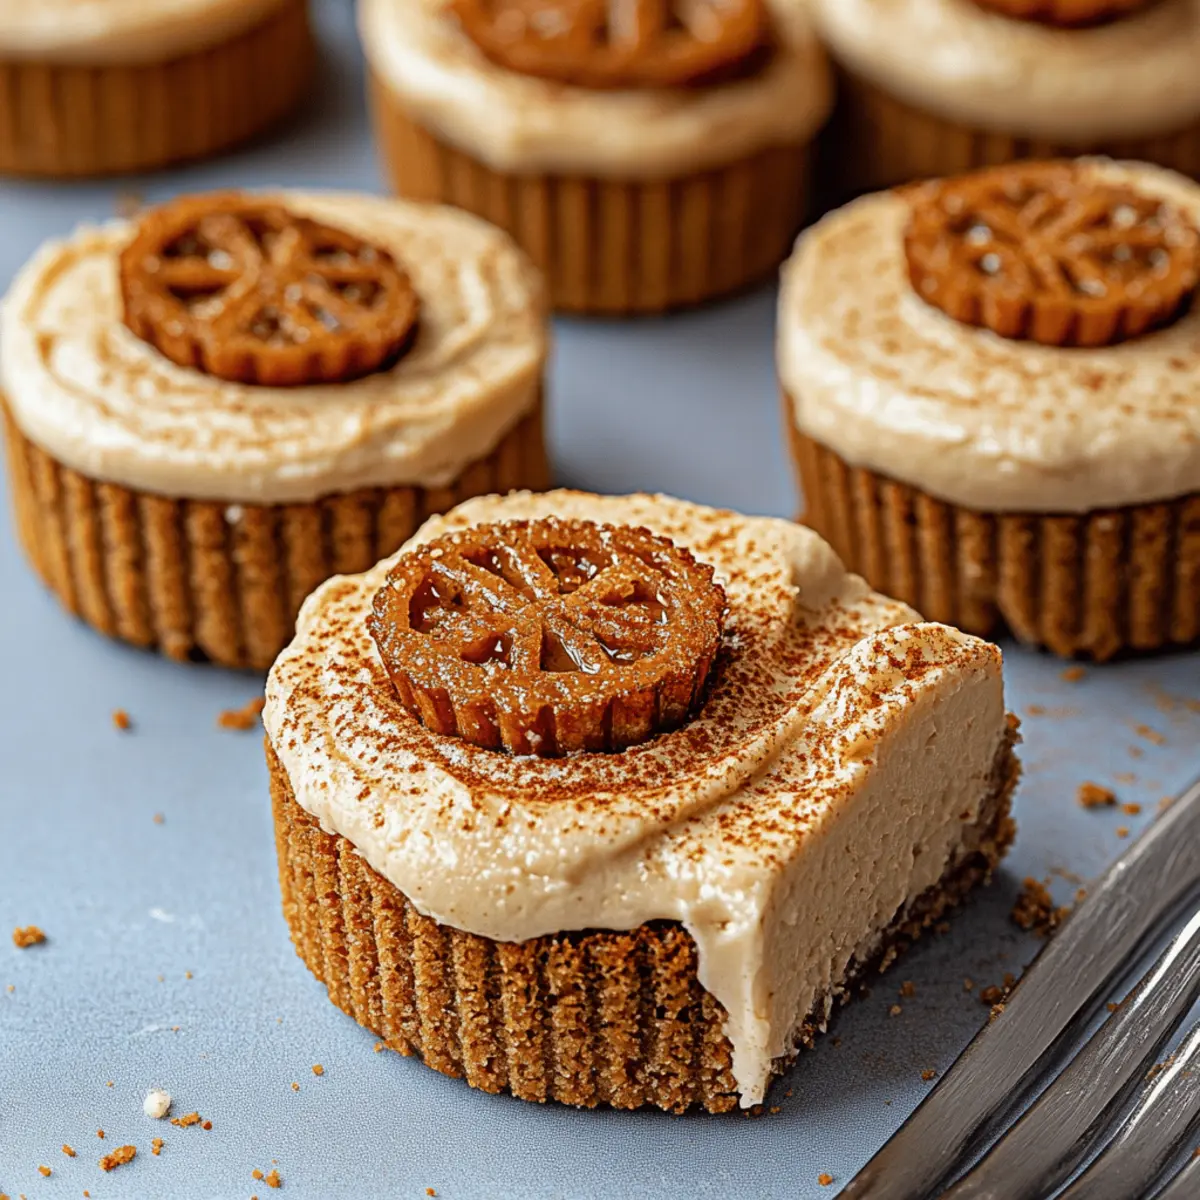
Carefully drizzle or spread the warmed Biscoff cookie butter over each mini cheesecake, creating a visually appealing layer. Allow it to flow slightly down the sides for that lush look that will have everyone eager to dive in.
Step 12: Garnish and Serve
Finish by garnishing each cheesecake with crushed Biscoff cookies and a dollop of whipped cream if desired. This adds a delightful crunch and completes the presentation. Your No Bake Mini Biscoff Cheesecakes are now ready to be served chilled, promising an indulgent treat with every bite.

What to Serve with No Bake Mini Biscoff Cheesecakes
Indulging in these delightful confections can be even more enjoyable when paired with complementary dishes that elevate your dessert experience.
-
Fresh Berries: Juicy raspberries or strawberries add a burst of freshness that balances the richness of the cheesecake.
-
Coffee or Espresso: A warm cup of coffee or espresso cuts through the sweetness while enhancing the flavors of the Biscoff cookie butter.
-
Chocolate Drizzle: A rich chocolate sauce can introduce a contrasting flavor, creating a deliciously decadent combination.
-
Ice Cream: Creamy vanilla bean ice cream serves as a classic pairing, offering a cool contrast to the warm notes of the Biscoff.
-
Fruit Compote: A tart fruit compote brings a tangy element that brightens the dessert, making each bite a little more complex.
-
Nutty Biscotti: Serve with crunchy almond or hazelnut biscotti for an added texture and flavor that complements the soft mini cheesecakes beautifully.
How to Store and Freeze No Bake Mini Biscoff Cheesecakes
Fridge: Keep your No Bake Mini Biscoff Cheesecakes covered in an airtight container for up to 3 days. This ensures they stay fresh and delicious for whenever you crave a sweet treat.
Freezer: If you want to store them longer, freeze the cheesecakes without toppings in a single layer for up to 2 months. Wrap each one in plastic wrap and place them in a freezer-safe container to prevent freezer burn.
Thawing: To enjoy your frozen cheesecakes, transfer them to the fridge for several hours to thaw. Avoid using a microwave, as it may alter the texture and creaminess.
Reheating: These treats are best served chilled directly from the fridge. If desired, warm the drizzled Biscoff cookie butter in the microwave before serving for that gooey finish!
Expert Tips for No Bake Mini Biscoff Cheesecakes
- Perfect Crust: Use fine Biscoff cookie crumbs for a more cohesive crust that won’t crumble when serving. Avoid using large chunks to prevent a sandy texture.
- Cheese Temperature: Make sure your cream cheese is at room temperature for easier blending. Cold cream cheese can result in a lumpy filling, affecting the creamy consistency.
- Whip Carefully: When whipping the heavy cream, don’t overbeat; stop as soon as you achieve stiff peaks. This keeps the filling light and airy, rather than dense.
- Chill Time Matters: For the best results, allow the cheesecakes to chill overnight. This will enhance the flavors and help the filling set nicely, ensuring each mini cheesecake holds its shape.
- Garnish Wisely: When garnishing with extra Biscoff crumbs, do it just before serving. This ensures they stay crunchy, adding a wonderful texture to each bite of your No Bake Mini Biscoff Cheesecakes.
No Bake Mini Biscoff Cheesecakes Variations
Feel free to play around with these delicious twists to make your cheesecakes uniquely yours!
-
Dairy-Free: Substitute cream cheese with a dairy-free alternative like cashew cream for a light yet creamy texture. Using almond or oat milk in whipped cream can complement the flavor beautifully as well.
-
Gluten-Free: Swap Biscoff cookie crumbs with gluten-free cookies to create a gluten-friendly version of these treats. Just ensure the cookies you choose have a similar taste to maintain the delicious flavor profile.
-
Chocolate-Lovers: Add melted chocolate into the cheesecake mixture for an intense chocolatey experience. You can also drizzle dark chocolate over the top along with the Biscoff for a decadent twist!
-
Nutty Crunch: Incorporate crushed pecans or walnuts into the crust for added texture. The nutty flavor will beautifully complement the sweetness of the Biscoff and add a delightful crunch.
-
Caramel Swirl: Include a swirl of caramel sauce through the cheesecake filling before chilling. This adds a sweet surprise in each bite and pairs perfectly with the flavors of the Biscoff.
-
Spicy Kick: Blend in a pinch of cinnamon or nutmeg for a warm, spicy flavor that takes this dessert to the next level. This twist enhances the cozy holiday vibes of the cheesecake.
-
Fruit Topping: Replace the crushed Biscoff garnish with a layer of fresh fruit like raspberries or strawberries. The tartness will balance the sweet filling nicely, making every bite refreshing.
-
Salted Caramel: Drizzle each cheesecake with salted caramel sauce instead of warmed Biscoff cookie butter. The salty-sweet combo will drive your taste buds wild!
Whatever variation you choose, these No Bake Mini Biscoff Cheesecakes will remain an irresistible delight! For more scrumptious ideas, explore my no-bake cheesecake recipes to inspire your next sweet creation!
Make Ahead Options
These No Bake Mini Biscoff Cheesecakes are perfect for meal prep enthusiasts! You can prepare the cookie crust and cheesecake filling up to 24 hours ahead of time. Just follow the initial steps of making the crust and filling, then layer them in the muffin pan. Cover the pan tightly with plastic wrap and refrigerate until you're ready to serve. This method helps maintain the cheesecakes’ creamy texture and delicious flavor, ensuring they taste just as delightful the next day. When you’re ready to enjoy, simply drizzle the warmed Biscoff cookie butter on top, garnish, and serve—making dessert effortlessly easy for busy weeknights or gatherings!
No Bake Mini Biscoff Cheesecakes Recipe FAQs
How do I select ripe ingredients for my cheesecakes?
Absolutely! To ensure your No Bake Mini Biscoff Cheesecakes turn out beautifully, use fresh, high-quality ingredients. When selecting cream cheese, ensure it's at room temperature for easy blending and a smooth texture. The Biscoff cookie butter should be freshly opened for the best flavor. If using any additional toppings, like fruits, opt for ones that are firm yet ripe, free from dark spots, and giving off a sweet aroma.
How should I store the cheesecakes, and how long will they last?
Very! To store your No Bake Mini Biscoff Cheesecakes, keep them covered in an airtight container in the fridge for up to 3 days. This keeps them fresh and tasty, ready for those sweet cravings. If making ahead of time, you can also freeze them for longer-term storage.
Can I freeze my No Bake Mini Biscoff Cheesecakes?
Certainly! You can freeze these delightful desserts for up to 2 months. Just make sure to freeze them without any toppings. To do this, place them in a single layer on a baking sheet until solid, then wrap each cheesecake in plastic wrap and transfer them to a freezer-safe container. This way, they won’t stick together or suffer from freezer burn.
What should I do if my cheesecake filling is too lumpy?
No worries! If your filling turns out lumpy, it may be due to cold cream cheese. Always ensure it’s softened before mixing. If it happens, simply transfer the mixture to a blender or food processor and blend until smooth. You can also try re-beating it with the mixer at a low speed for a couple of minutes. Just remember to fold in the whipped cream gently afterward to maintain that airy texture.
Are there any dietary considerations I should keep in mind?
Yes! If you're preparing these No Bake Mini Biscoff Cheesecakes for guests with dietary restrictions, note that they contain gluten and dairy. For a gluten-free version, consider using gluten-free cookie crumbs instead of regular Biscoff cookies. Also, if anyone has dairy allergies, you can experiment with lactose-free cream cheese and whipped cream alternatives to create a similar texture while catering to their needs.
Is it safe to serve these cheesecakes to pets?
Definitely not! While the Biscoff cookies and cookie butter are delicious for humans, they are not safe for pets, particularly those with sensitive stomachs. Always keep these tasty treats away from pets and opt for pet-friendly snacks if you’d like to share the love with your furry friends!
Decadent No Bake Mini Biscoff Cheesecakes in Just 20 Minutes
Ingredients
Equipment
Method
- Prepare the Muffin Pan by lining it with cupcake liners or using silicone molds.
- Make the Crust by mixing Biscoff cookie crumbs, melted unsalted butter, and optional brown sugar until resembling wet sand.
- Press the crust mixture into each muffin cup, ensuring an even layer. Chill in the refrigerator.
- Beat the softened cream cheese until smooth and creamy, about 2 minutes.
- Incorporate Biscoff cookie butter, powdered sugar, and vanilla extract, beating until fluffy for 2-3 minutes.
- Whip the heavy cream in a separate bowl until stiff peaks form, about 3-5 minutes.
- Gently fold whipped cream into the cheesecake mixture until well blended.
- Fill the cheesecake bases with the creamy filling, smoothing the tops.
- Cover the muffin pan and chill for at least 4 hours or overnight.
- Prepare the topping by warming the remaining Biscoff cookie butter in the microwave for 10-15 seconds.
- Drizzle the warmed Biscoff cookie butter over each cheesecake.
- Garnish with crushed Biscoff cookies and whipped cream if desired before serving.


Leave a Reply