
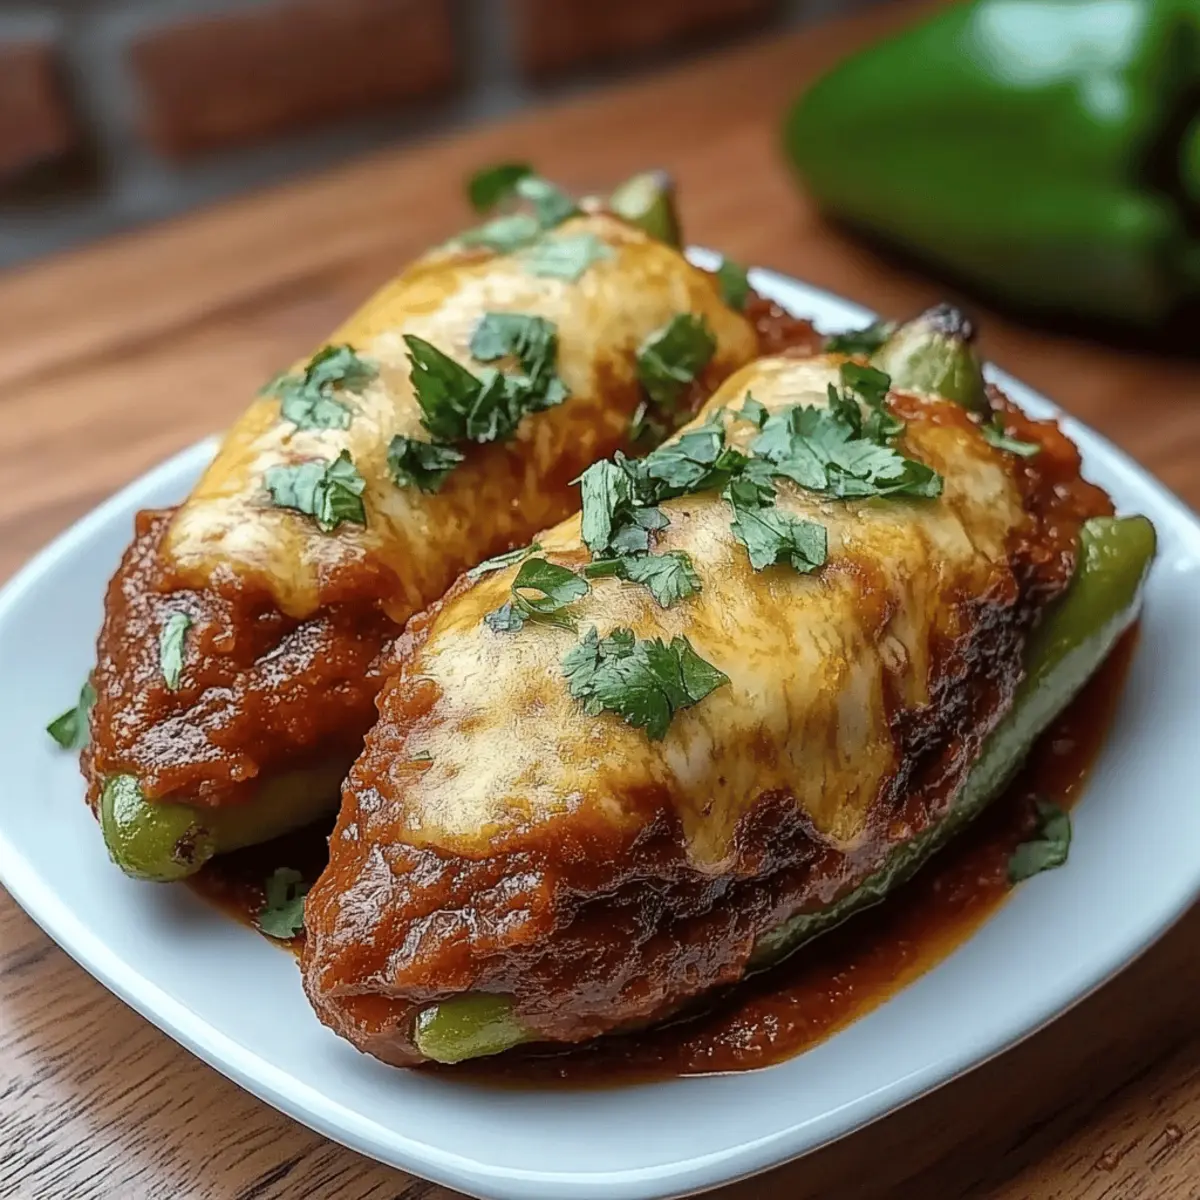
The first time I bit into a Cheesy Hatch Chile Relleno, it felt like I was exploring the vibrant streets of New Mexico without leaving my kitchen. These delightful stuffed chiles offer a wonderful twist on traditional comfort food, perfectly marrying the rich, melting Oaxaca cheese with the subtle heat of hatch green chiles. What’s even better? This crowd-pleasing recipe comes together in just over an hour and is freezer-friendly, making it a fantastic option for busy weeks or unexpected guests. There’s something truly special about the crispy exterior cradling a cheesy treasure that brings joy to every bite. Ready to turn your kitchen into a culinary escape? Let’s dive in!
Why are Cheesy Hatch Chile Rellenos a Must-Try?
**Flavorful **: Each bite bursts with the warmth of melting Oaxaca cheese, complemented by the smokiness of roasted hatch chiles.
**Crowd-Pleaser **: These rellenos are a sure way to impress family and friends, making any dinner feel like a fiesta.
**Quick Prep **: With just over an hour from start to finish, you can enjoy a satisfying meal without extensive time commitments.
**Versatile **: Whether served as a main dish or a delightful appetizer, these chiles fit any occasion perfectly.
**Make-Ahead **: You can easily prepare and freeze extra servings for busy nights, helping you skip the takeout temptation. For those who love easy, delicious meal prep, these Oaxaca cheese recipes will also inspire you!
Cheesy Hatch Chile Rellenos Ingredients
Elevate your cooking game with these essential ingredients!
For the Chiles
- Hatch green chiles – These flavorful chiles are the star of the dish, providing the perfect spice and smokiness.
- Oaxaca cheese – This melting cheese creates a creamy, delicious filling; you can substitute with Monterey Jack if needed.
For the Batter
- Eggs – The egg whites provide a fluffy texture, while the yolks add richness to the batter.
- All-purpose flour – This helps create a crispy coating for the chiles when fried.
- Salt – Enhances the flavor of the batter and stuffed chiles.
- Garlic powder – Adds a lovely depth of flavor to the batter mixture.
For Frying
- Vegetable oil – Use for frying until the chiles are golden brown and crispy.
For the Sauce
- Tomatoes – Fresh tomatoes provide a vibrant base for your red sauce, bringing freshness to the dish.
- Onion – Adds a sweet, aromatic flavor to your sauce.
- Garlic cloves – Infuses the sauce with warm, savory notes.
- Chopped cilantro – A sprinkle of fresh cilantro balances the flavors and adds a burst of color.
- Salt – Essential for seasoning the sauce to perfection.
- Sliced jalapenos (optional) – Adds an extra kick if you enjoy a bit more heat in your dish.
Get ready to experience the mouthwatering joy of Cheesy Hatch Chile Rellenos!
Step‑by‑Step Instructions for Cheesy Hatch Chile Rellenos
Step 1: Roast the Chiles
Position the hatch green chiles on a foil-lined baking sheet and broil them for 5-10 minutes until the skins are blackened and blistered. Keep an eye on them, flipping the chiles after the first 5 minutes to ensure even roasting. The goal is a smoky, charred exterior that adds depth to the Cheesy Hatch Chile Rellenos.
Step 2: Steam the Chiles
Transfer the charred chiles to a gallon-sized ziplock bag, sealing it to trap steam. Allow the chiles to steam for 10-15 minutes to loosen the skins, making them easier to peel. When removing them, the skin should gently come off, revealing the tender, flavorful chile inside, perfect for stuffing.
Step 3: Prepare the Chiles for Stuffing
Once the chiles are cool enough to handle, carefully peel off the skins. Make a slit down one side of each chile and remove the seeds to create space for the delicious Oaxaca cheese. This step is essential for achieving perfectly stuffed Cheesy Hatch Chile Rellenos that are bursting with flavor.
Step 4: Stuff the Chiles
Generously fill each prepared chile with the creamy Oaxaca cheese, ensuring they are well-stuffed. To keep the filling secured, use 1-2 toothpicks to seal the slit. This is a crucial step, as it ensures none of that gooey goodness escapes during frying, making every bite a cheesy delight.
Step 5: Prepare the Batter
In a mixing bowl, place the egg whites and in a separate cup, the yolks. Beat the egg whites on high speed until stiff peaks form, which will create a light batter. Gradually incorporate the yolks, mixing gently until combined, creating a fluffy batter that will coat the Cheesy Hatch Chile Rellenos perfectly.
Step 6: Set Up the Dredging Station
In a shallow dish, combine the all-purpose flour, salt, and garlic powder. Set up an assembly line with the stuffed chiles, the flour mixture, and the egg batter to streamline the frying process. This organized setup will make it easy to get the chiles coated evenly for that crispy crust.
Step 7: Heat the Oil
In a deep pan, heat vegetable oil to 350°F (175°C). Use a thermometer to ensure the oil is at the right temperature for frying. Proper heating is crucial, as it creates a crispy exterior that will beautifully contrast with the melting cheese inside your Cheesy Hatch Chile Rellenos.
Step 8: Dredge and Coat the Chiles
Take each stuffed chile and dredge it in the flour mixture, shaking off any excess. Then, dip the chile into the egg batter, fully coating it. This double coating will ensure a luscious crunch when fried, contributing to the overall deliciousness of your dish.
Step 9: Fry the Chiles
Carefully place the coated chiles in the hot oil and fry for 2-3 minutes until golden brown on one side. Flip them and fry for another 2-3 minutes. To maintain even cooking and avoid overcrowding, fry in small batches, ensuring that every Cheesy Hatch Chile Relleno gets the attention it deserves.
Step 10: Drain Excess Oil
Once the chiles are beautifully golden brown, remove them from the oil and let them drain on paper towels. This step is essential for achieving a non-greasy texture, ensuring your Cheesy Hatch Chile Rellenos are crispy on the outside and perfectly cheesy on the inside.
Step 11: Blend the Sauce
In a blender, combine tomatoes, onion, garlic cloves, cilantro, and salt, and blend until smooth. If you desire extra heat, add the sliced jalapenos. This vibrant sauce is the perfect complement to your fried chiles, bringing the dish together with fresh flavors.
Step 12: Heat the Sauce
Transfer the blended sauce to a medium saucepan and heat it over medium heat until it begins to boil. Once boiling, reduce to a low simmer until ready to serve. This step allows the flavors to meld beautifully, creating a delicious sauce that enhances your Cheesy Hatch Chile Rellenos.
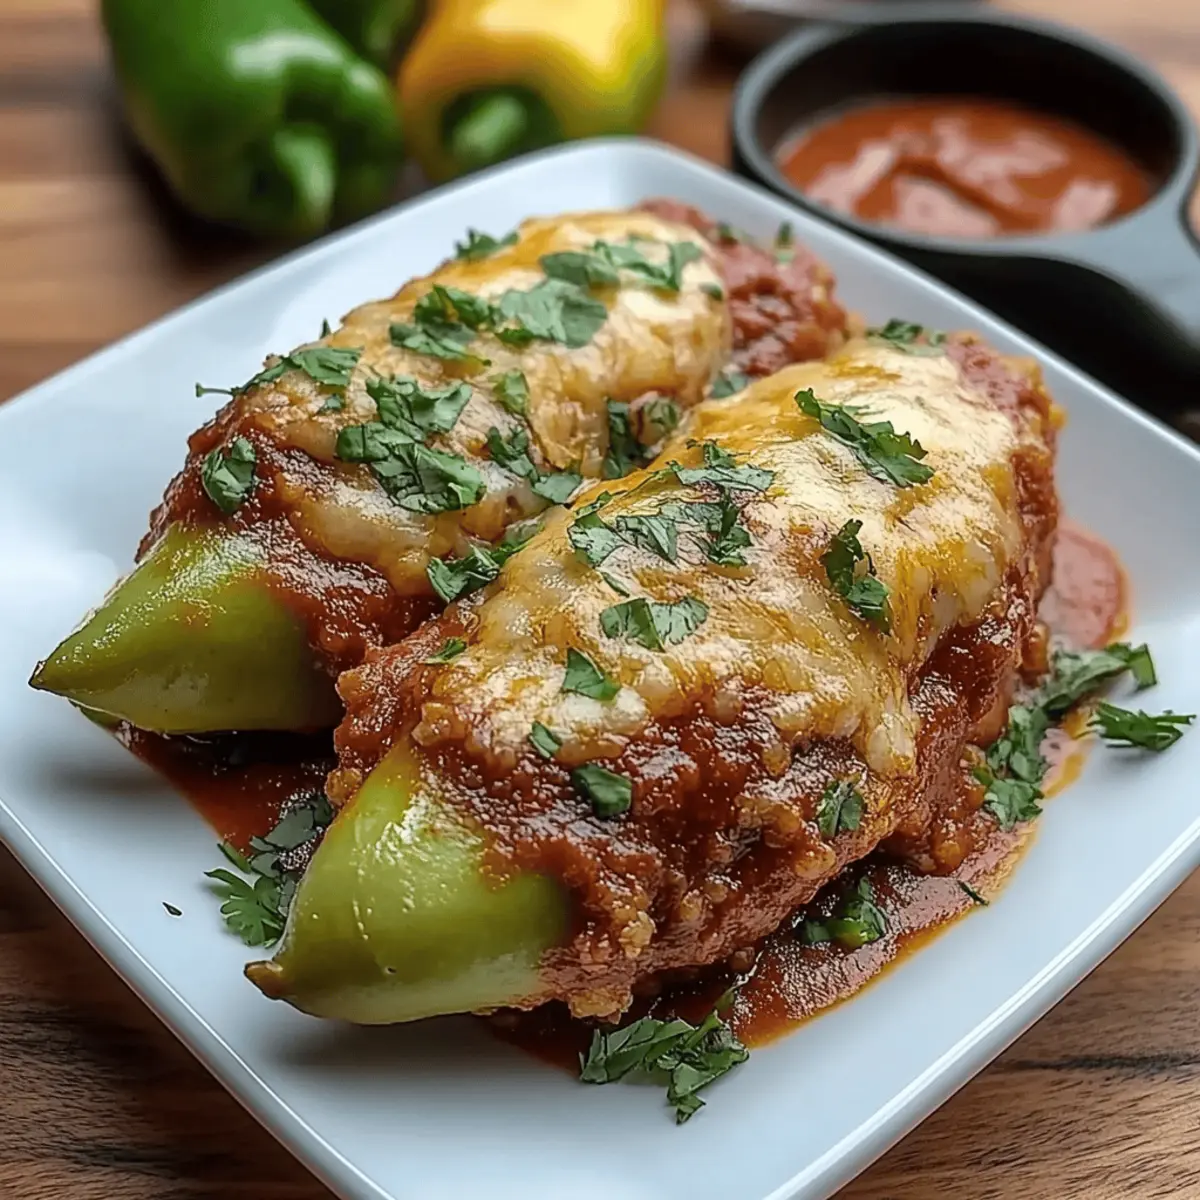
Step 13: Serve and Enjoy
Plate your fried Cheesy Hatch Chile Rellenos and ladle the warm sauce over them. Serve immediately for the best experience, as the crispiness of the chiles perfectly contrasts with the creamy cheese and flavorful sauce, making for a stunning presentation and delightful meal.

Variations for Cheesy Hatch Chile Rellenos
Get creative with your Cheesy Hatch Chile Rellenos and elevate this dish with a few fun twists!
- Spicy Kick: Add finely chopped serrano chiles to the cheese filling for a fiery version that burns with delicious flavor.
- Vegetable-Packed: Mix in sautéed spinach and mushrooms with the cheese for a delightful veggie boost that's both nutritious and filling.
- Corny Surprise: Fold in some roasted corn into your cheese filling, creating a sweet and savory marriage that celebrates the harvest.
- Gluten-Free: Swap all-purpose flour for almond flour or a gluten-free flour blend to accommodate dietary needs without sacrificing taste.
- Herbaceous Twist: Stir fresh herbs like basil or oregano into the cheese mixture for an aromatic experience that brightens every bite.
- Crispy Topping: After frying, sprinkle crushed tortilla chips on top for an extra crunch that adds contrast and flavor.
- Cheese Galore: Combine Oaxaca cheese with other melting cheeses like Monterey Jack or cheddar for a flavor explosion that cheese lovers will adore.
- Make It Vegan: Replace the Oaxaca cheese with cashew cheese or a store-bought vegan cheese alternative, perfect for those following a plant-based diet.
Now you're equipped with delicious variations to make your Cheesy Hatch Chile Rellenos even more exciting! Feeling adventurous? Try pairing these with fresh guacamole or a side of homemade salsa for a complete feast!
Make Ahead Options
These Cheesy Hatch Chile Rellenos are perfect for busy weeknights and meal prep enthusiasts! You can roast, steam, and stuff the chiles up to 24 hours in advance, placing them in an airtight container in the refrigerator to maintain quality. Additionally, you can prepare the batter and sauce up to 3 days ahead, storing them separately to keep the flavors fresh. When you're ready to enjoy this delightful dish, simply dredge and fry the chiles as directed, then heat the sauce, and you'll have mouthwatering Cheesy Hatch Chile Rellenos ready to impress your family in no time!
Expert Tips for Cheesy Hatch Chile Rellenos
Choose Fresh Chiles: Always opt for ripe hatch green chiles. Fresher chiles will have a better flavor and texture, enhancing your Cheesy Hatch Chile Rellenos.
Avoid Overcrowding: When frying, don't crowd the pan. Fry in batches to maintain the oil temperature, ensuring a crispy outer layer on each chile.
Perfect Temperature: Use a thermometer to check oil temperature before frying. If the oil is too cool, the chiles will absorb excess oil and become greasy instead of crispy.
Secure Them Well: Make sure to seal the chiles tightly with toothpicks after stuffing them to prevent cheese from leaking during frying—no one wants a cheesy disaster!
Make-Ahead Options: You can prep and stuff the chiles the night before. Just keep them covered in the fridge until you’re ready to fry, saving you time on busy nights.
Customize the Spice: Adjust the amount of jalapeños in your sauce to control the heat level. Enjoy milder flavors or spice it up—your Cheesy Hatch Chile Rellenos, your way!
How to Store and Freeze Cheesy Hatch Chile Rellenos
Fridge: Store leftover Cheesy Hatch Chile Rellenos in an airtight container for up to 3 days. To retain crispness, avoid stacking them too tightly.
Freezer: For longer storage, freeze the cooled stuffed chiles in a single layer on a baking sheet. Once frozen, transfer them to a freezer-safe bag for up to 3 months.
Reheating: To reheat, bake frozen chiles directly in a preheated oven at 375°F (190°C) for 20-25 minutes until heated through and crispy. Avoid microwave reheating for best texture.
Make-Ahead: Feel free to prep and stuff the chiles ahead of time. Store them covered in the fridge until you’re ready to fry them for a last-minute meal!
What to Serve with Cheesy Hatch Chile Rellenos
Pairing your delightful stuffed chiles with the right sides elevates the whole meal experience and brings out their rich flavors.
- Creamy Guacamole: The smooth, cool avocado topping contrasts beautifully with the crispy chiles, adding a refreshing note to each bite.
- Mexican Rice: Fluffy and slightly spiced, this hearty side is perfect for soaking up your vibrant sauce while complementing the cheese.
- Refried Beans: A velvety scoop of beans adds a savory depth to your meal and rounds out the Mexican-inspired flavors wonderfully.
- Corn Salad: Fresh corn mixed with lime, cilantro, and diced peppers brings a crunchy sweetness that offsets the chiles’ heat.
- Cilantro Lime Rice: This zesty rice complements the smokiness of the chiles perfectly, adding a bright burst of flavor. The citrus notes balance the richness of the cheese beautifully.
- Fresh Salsa: A vibrant, chunky salsa provides a wonderful contrast in texture, adding a layer of freshness to the dish.
- Margaritas: A refreshing cocktail with a tangy twist enhances the flavors and adds a festive touch to your dinner table.
- Chocolate Flan: For dessert, this creamy, decadent treat serves as a delightful finale, balancing the savory meal with a sweet finish.

Cheesy Hatch Chile Rellenos Recipe FAQs
How do I select the best Hatch green chiles?
Absolutely! When choosing hatch green chiles, look for ones that are firm with a vibrant green color. Avoid chiles with dark spots or wrinkles, as these might indicate overripeness. The more aromatic they are, the fresher they likely are, which will enhance your Cheesy Hatch Chile Rellenos!
What is the best way to store leftover Cheesy Hatch Chile Rellenos?
You can store leftover Cheesy Hatch Chile Rellenos in an airtight container in the fridge for up to 3 days. To help maintain their crispiness, try not to stack them too tightly. Ensure they are completely cooled before sealing to prevent condensation.
Can I freeze Cheesy Hatch Chile Rellenos? If so, how?
Yes! To freeze Cheesy Hatch Chile Rellenos, allow them to cool completely after frying. Arrange them in a single layer on a baking sheet to freeze for about an hour. Once firm, transfer the chiles to a freezer-safe bag or container, and they can last up to 3 months! When you’re ready to enjoy, just bake them from frozen at 375°F (190°C) for about 20-25 minutes until heated through and crispy.
What should I do if the filling leaks out during frying?
Oh no, that can happen! If you find that your cheese is leaking out while frying, ensure you’ve securely sealed the chiles with toothpicks after stuffing them. For added security, you can either use less cheese or chill the stuffed chiles in the fridge for 30 minutes before frying, as this helps to firm up the filling.
Are there any dietary considerations for Cheesy Hatch Chile Rellenos?
Definitely! If you or your guests have dietary restrictions, consider using lactose-free cheese or a vegan cheese alternative if dairy is an issue. Also, check that your chosen vegetable oil is suitable for any dietary needs. For those concerned about the heat level, you can always adjust the number of jalapenos or omit them entirely!
Delicious Cheesy Hatch Chile Rellenos for Cozy Nights
Ingredients
Equipment
Method
- Roast the Hatch green chiles on a foil-lined baking sheet under the broiler for 5-10 minutes, flipping after 5 minutes.
- Transfer the charred chiles to a gallon-sized ziplock bag and seal to steam for 10-15 minutes.
- Once cool, peel off the skins, make a slit, and remove seeds for stuffing.
- Stuff each chile with Oaxaca cheese and secure with toothpicks.
- Beat the egg whites until stiff peaks form, then mix in the yolks.
- Combine flour, salt, and garlic powder in a shallow dish.
- Heat vegetable oil to 350°F (175°C) in a deep pan.
- Dredge each stuffed chile in the flour mixture, then coat in egg batter.
- Fry the coated chiles for 2-3 minutes on each side until golden brown.
- Allow the fried chiles to drain on paper towels.
- Blend tomatoes, onion, garlic, cilantro, and salt until smooth.
- Heat the blended sauce in a saucepan until boiling, then reduce to a simmer.
- Plate the fried chiles and ladle the warm sauce over them. Serve immediately.


Leave a Reply