
As the sun sets, painting the sky in hues of orange and pink, I often find myself dreaming of far-off places filled with tantalizing culinary delights. One such gem that’s captured my heart is Chicken Onigiri. This delightful Japanese snack is not only a feast for the eyes but also a profound experience for the taste buds. With just a little time and a handful of ingredients, you can whip up these delightful rice balls that are as convenient as they are comforting—a true time-saver when life gets busy. Plus, they’re a fantastic way to use leftover chicken, transforming it into something that’s both portable and delicious. Will you join me in creating this perfect blend of flavor and nostalgia?

Why is Chicken Onigiri a Must-Try?
Delicious, hearty taste: The gentle combination of tender chicken and subtly seasoned rice creates a flavor that's simply irresistible.
Quick to prepare: In just 35 minutes, you can enjoy these delightful rice balls, making this a perfect weeknight meal.
Creative and versatile: Personalize your Chicken Onigiri by experimenting with different fillings or spices, accommodating varying dietary preferences.
Easy to make: No advanced cooking skills are needed; this recipe is perfect for both novice cooks and experienced chefs!
Portable snack: Ideal for lunchboxes or picnics, these rice balls make enjoying home-cooked comfort food on-the-go a breeze.
Crowd-pleaser: Impress friends and family with this unique treat that offers a taste of Japan right from your kitchen! Consider pairing with other delicious recipes to create a full meal, like a fresh salad or savory soup.
Chicken Onigiri Ingredients
For the Rice
• Sushi rice – This specific type of rice is crucial for achieving the right sticky texture.
• Water – The key to cooking your rice perfectly, ensuring it’s fluffy and not too dry.
• Salt – Enhances the overall flavor of the rice for a well-rounded taste.
• Rice vinegar – Adds a hint of acidity and balances the flavor.
• Sugar – Provides a touch of sweetness that complements the vinegar.
For the Filling
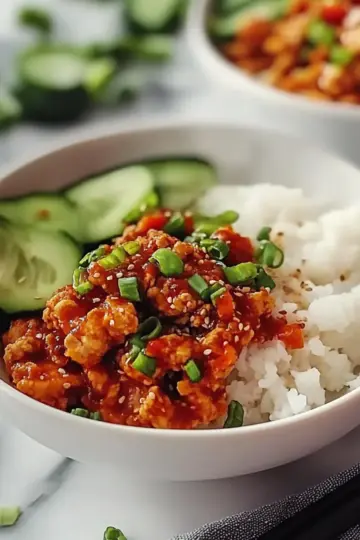
• Cooked chicken – A great way to use up leftovers; feel free to substitute with tofu for a vegetarian option.
• Soy sauce – Imparts a savory depth, essential for a flavorful filling.
• Sesame oil – Brings a nutty fragrance to the filling, elevating the dish further.
Optional Topping
• Nori (seaweed) – Adds a delightful texture and a burst of umami when wrapped around your rice balls.
For Boiling
• Water – Used for boiling your rice if you choose a method that involves pre-soaking, ensuring your rice remains moist while cooking.
Transforming your chicken into these delightful Chicken Onigiri just got a whole lot easier with these fresh ingredients at your fingertips!
Step‑by‑Step Instructions for Chicken Onigiri
Step 1: Rinse the Rice
Start by rinsing 2 cups of sushi rice under cold water in a fine mesh strainer. Gently stir the rice with your fingers until the water runs clear, ensuring that excess starch is removed. This process takes about 5 minutes and is crucial for achieving perfectly sticky rice, the foundation of your Chicken Onigiri.
Step 2: Cook the Rice
In a medium pot, combine the rinsed sushi rice with 2 ½ cups of water. Bring this mixture to a boil over medium-high heat, then immediately reduce the heat to low. Cover with a lid and let it simmer for 20 minutes. After 20 minutes, remove from heat and allow the rice to steam in the covered pot for an additional 10 minutes, creating fluffy rice.
Step 3: Prepare the Vinegar Mixture
While the rice is resting, mix together 1 teaspoon of salt, 1 tablespoon of rice vinegar, and 1 tablespoon of sugar in a small bowl. Stir until the salt and sugar fully dissolve, resulting in a clear mixture—this adds flavor and a touch of acidity to your Chicken Onigiri.
Step 4: Combine Rice and Vinegar
Once the rice has finished steaming, transfer it to a large mixing bowl. Gently fold the vinegar mixture into the warm rice using a spatula, being careful not to mash the grains. You want the rice to remain fluffy and slightly sticky, setting the perfect stage for molding your Chicken Onigiri.
Step 5: Mix the Chicken Filling
In a separate bowl, combine 1 cup of shredded cooked chicken with 2 tablespoons of soy sauce and 1 tablespoon of sesame oil. Mix well until the chicken is evenly coated; this flavorful filling brings delicious depth to your Chicken Onigiri and enhances the overall taste of the dish.
Step 6: Form the Onigiri
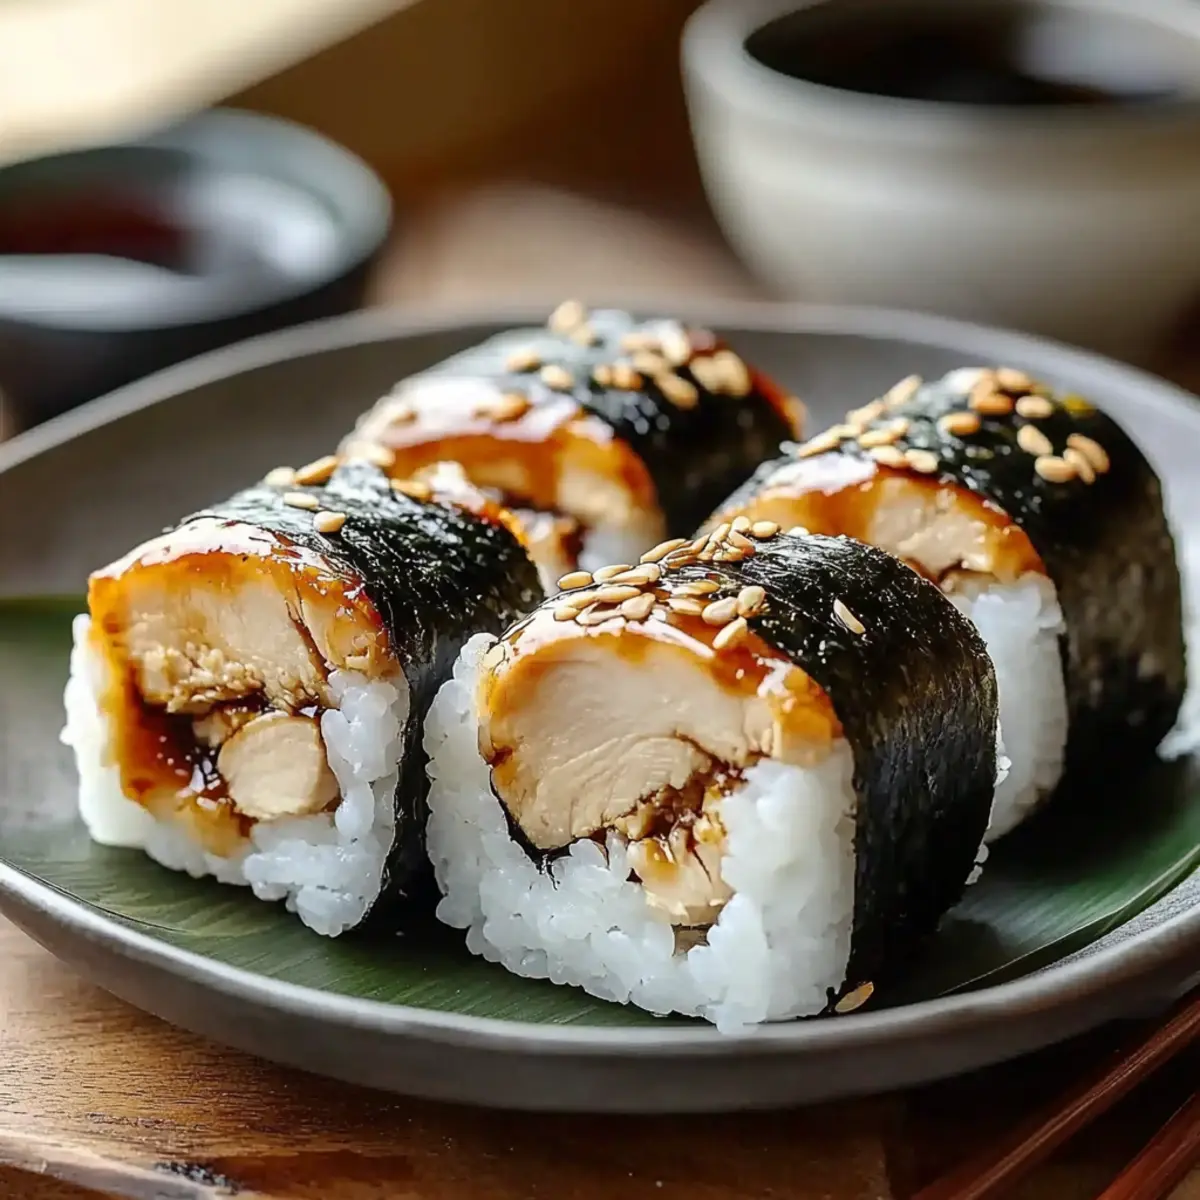
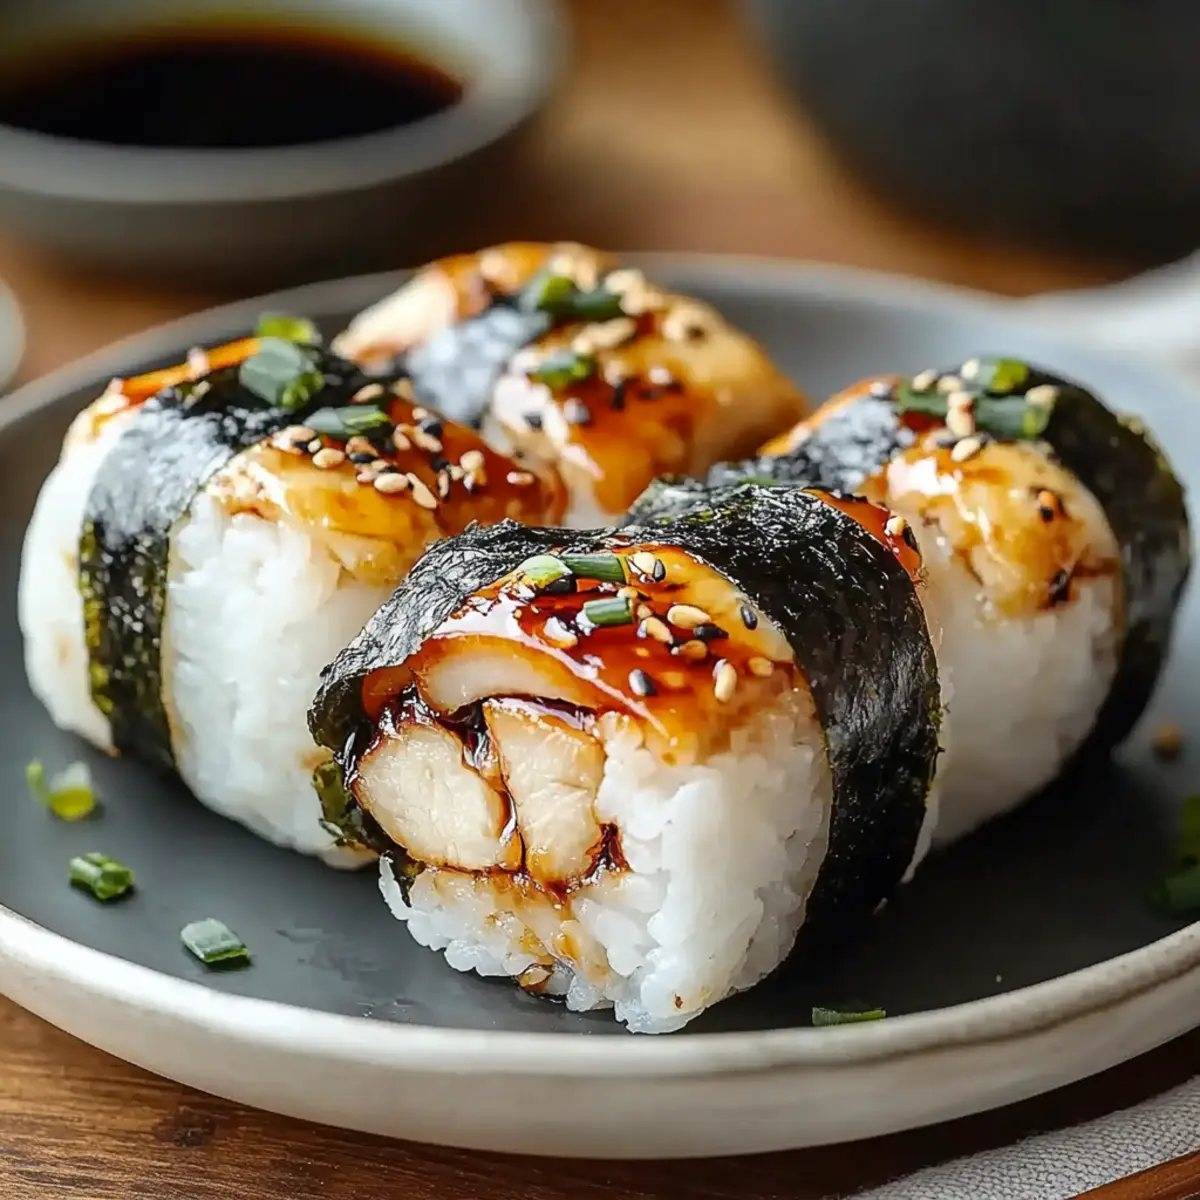
Wet your hands with water to prevent the rice from sticking. Take about ¼ cup of the seasoned rice and gently flatten it in your palm. Place a spoonful of the chicken mixture in the center, then carefully mold the rice around the filling, forming a compact ball. Ensure it’s sealed well to hold the filling.
Step 7: Add Nori Strips (Optional)
If desired, take a strip of nori and wrap it around each rice ball for added flavor and texture. This will elevate your Chicken Onigiri, providing a delightful contrast with the tender rice and savory filling. A single strip around the base is generally sufficient for a perfect bite.
Step 8: Repeat and Serve
Continue the process with the remaining rice and chicken filling until all ingredients are used. Arrange your beautiful Chicken Onigiri on a serving plate, ready to be enjoyed. These delightful rice balls are perfect as a snack, meal prep, or a portable lunch option!
Expert Tips for Chicken Onigiri
Rinse Rice Thoroughly: Always rinse the sushi rice until the water is clear. This removes excess starch, ensuring a better texture in your Chicken Onigiri.
Mind the Heat: Simmer the rice on low heat without lifting the lid. This traps steam and helps create fluffy grains—don't peek until the timer goes off!
Cool Before Molding: Allow the seasoned rice to cool slightly before forming your rice balls. This prevents burns and helps the rice hold its shape better when molded.
Seal Well: Make sure to compact the rice tightly around the filling. If the rice balls aren’t sealed properly, the filling may ooze out when you bite into your Chicken Onigiri.
Get Creative: Feel free to customize the filling! Experiment with different proteins or veggies to match your palate, ensuring you enjoy every bite of your Chicken Onigiri.
What to Serve with Chicken Onigiri
Delight your senses by complementing the savory flavors of these Japanese rice balls with some beautifully curated sides.
- Miso Soup: This warm and comforting soup brings a mild yet rich umami flavor, perfectly balancing the seasoning of the Chicken Onigiri.
- Pickled Vegetables: The tart crunch of pickled veggies adds a welcome contrast to the soft texture of the rice balls, refreshing your palate with each bite.
- Seaweed Salad: Packed with nutrients and brimming with oceanic flavors, this salad harmonizes beautifully with the sesame notes in your Chicken Onigiri, elevating the entire meal.
- Stir-Fried Greens: Sautéed bok choy or spinach with garlic adds a vibrant pop of color and a nutritious side, complementing the soft rice with a delightful crunch.
- Teriyaki Tofu Skewers: For a protein-packed option, sweet and savory tofu skewers are an excellent choice that marries well with the chicken's flavor profile.
- Sake or Green Tea: Pair your meal with a chilled glass of sake or a warm cup of green tea to enhance the overall dining experience, introducing traditional Japanese elements.
With these pairings alongside your Chicken Onigiri, you’ll create a comforting feast that’s simply unforgettable!
How to Store and Freeze Chicken Onigiri
Fridge: Store any leftover Chicken Onigiri in an airtight container in the fridge for up to 3 days. This keeps them fresh and ready for a quick snack or meal.
Freezer: For longer storage, wrap each Onigiri tightly in plastic wrap and place in a freezer-safe container. They can be frozen for up to 1 month, preserving their delightful flavors.
Reheating: To enjoy your frozen Chicken Onigiri, simply thaw in the fridge overnight and reheat in the microwave for 30-60 seconds until warmed through. This brings them back to their comforting best!
Serve Fresh: While Chicken Onigiri is delicious warm, it's perfectly acceptable to enjoy them cold, making them a versatile addition to your meals or snacks!
Chicken Onigiri Variations You’ll Love
Feel free to put your own spin on this delightful Chicken Onigiri recipe, creating an experience that's truly unique!
-
Vegetarian: Replace shredded chicken with cubed tofu or lentils for a plant-based version that retains the comforting flavors.
-
Spicy Twist: Add a teaspoon of sriracha or your favorite hot sauce to the chicken mixture for an extra kick that’ll tantalize your taste buds.
-
Herb Infusion: Mix in finely chopped green onions or cilantro with your rice for a fresh, zesty aromatic touch that truly elevates each bite.
-
Miso Magic: Incorporate a tablespoon of miso paste into the chicken filling for deep umami flavors; this addition takes your Chicken Onigiri to another level.
-
Nutty Crunch: Sprinkle in toasted sesame seeds to the rice for an added texture and nutty flavor, giving undercurrents of excitement in every rice ball.
-
Umami Boost: Substitute soy sauce with tamari for a gluten-free variation while keeping the savory essence intact—perfect for those with dietary restrictions.
-
Pineapple Surprise: For a tropical twist, mix in diced pineapple with the filling for a refreshing contrast that pairs beautifully with the savory notes.
-
Seaweed Seasoning: Instead of strips, crumble nori directly into the rice mixture to enhance the overall flavor profile and infuse those delightful oceanic notes.
Additionally, don’t forget to try pairing these onigiri with a refreshing cucumber salad or a comforting miso soup to round out your meal beautifully!
Make Ahead Options
Chicken Onigiri is ideal for meal prep, allowing you to enjoy these delicious rice balls even on the busiest days! You can prepare the vinegar-seasoned sushi rice and the chicken filling up to 24 hours in advance. Store the cooled rice in an airtight container in the refrigerator and keep the chicken mixture (shredded chicken, soy sauce, and sesame oil) separate to maintain freshness. When you're ready to serve, simply mold the rice around the filling, add nori if desired, and your Chicken Onigiri will be just as delightful as when freshly made! Reheating is not recommended for best quality—enjoy them at room temperature for a perfect snack!
Chicken Onigiri Recipe FAQs
How do I choose the right sushi rice for my Chicken Onigiri?
Absolutely! For the best Chicken Onigiri, select high-quality sushi rice that is short-grain. This type of rice has the perfect starch content, resulting in a sticky texture that helps the rice hold together well when molded. Look for options labeled "sushi rice" at your grocery store—brands like Nishiki or Kokuho are great choices!
How can I store leftover Chicken Onigiri?
Very well! Leftover Chicken Onigiri can be stored in an airtight container in the fridge for up to 3 days. Just be sure to separate layers with parchment paper to prevent them from sticking. If you’re planning to keep them longer, wrap each Onigiri tightly in plastic wrap and place them in a freezer-safe container to chill out in the freezer for up to 1 month.
Can I freeze Chicken Onigiri? If so, how?
Absolutely! To freeze Chicken Onigiri, start by wrapping each rice ball tightly in plastic wrap to prevent freezer burn. Then, place the wrapped Onigiri in a freezer-safe bag or container, squeezing out as much air as possible. They can be kept in the freezer for up to 1 month. When you're ready to enjoy them, simply thaw in the fridge overnight and reheat them in the microwave for 30-60 seconds until warmed through.
What should I do if my Chicken Onigiri is falling apart?
If you’re finding that your Chicken Onigiri is falling apart, it might be due to the rice being too dry or not compacted enough. To remedy this, make sure to rinse the rice thoroughly and cook it until it’s fluffy yet sticky. When shaping the Onigiri, wetting your hands will help prevent the rice from sticking too much, and compacting it tightly around the filling is essential to hold it together.
Can I make Chicken Onigiri dairy-free or gluten-free?
Certainly! For a dairy-free option, use ingredients that don’t have dairy derivatives. For gluten-free Chicken Onigiri, simply substitute soy sauce with gluten-free tamari and ensure your other ingredients are free from gluten. This way, everyone can savor the delightful taste of Chicken Onigiri!

Delicious Chicken Onigiri: Your New Go-To Comfort Food
Ingredients
Equipment
Method
- Rinse the rice under cold water in a fine mesh strainer until the water runs clear, about 5 minutes.
- Combine the rinsed sushi rice with 2 ½ cups of water in a medium pot. Bring to a boil, then reduce the heat to low, cover, and simmer for 20 minutes.
- Mix 1 teaspoon of salt, 1 tablespoon of rice vinegar, and 1 tablespoon of sugar in a small bowl until dissolved.
- Fold the vinegar mixture into the warm rice gently using a spatula.
- Mix shredded cooked chicken with 2 tablespoons of soy sauce and 1 tablespoon of sesame oil until evenly coated.
- Wet your hands and take about ¼ cup of seasoned rice, flatten it, place a spoonful of chicken mixture in the center, and mold the rice around it.
- Wrap a strip of nori around each rice ball if desired.
- Continue until all ingredients are used and arrange the rice balls on a serving plate.


Leave a Reply