
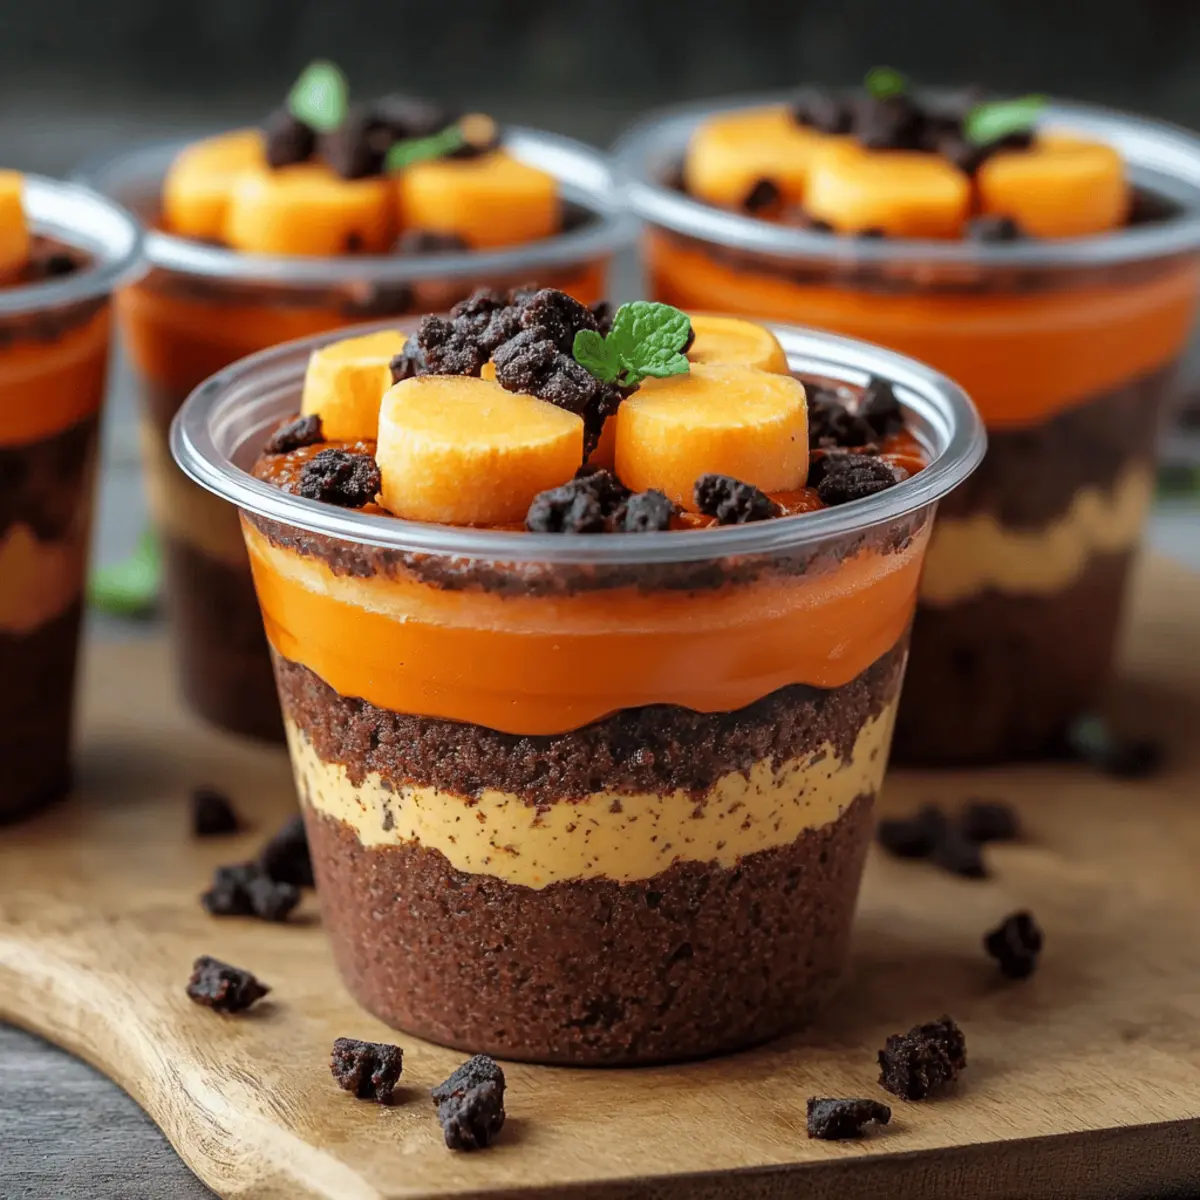
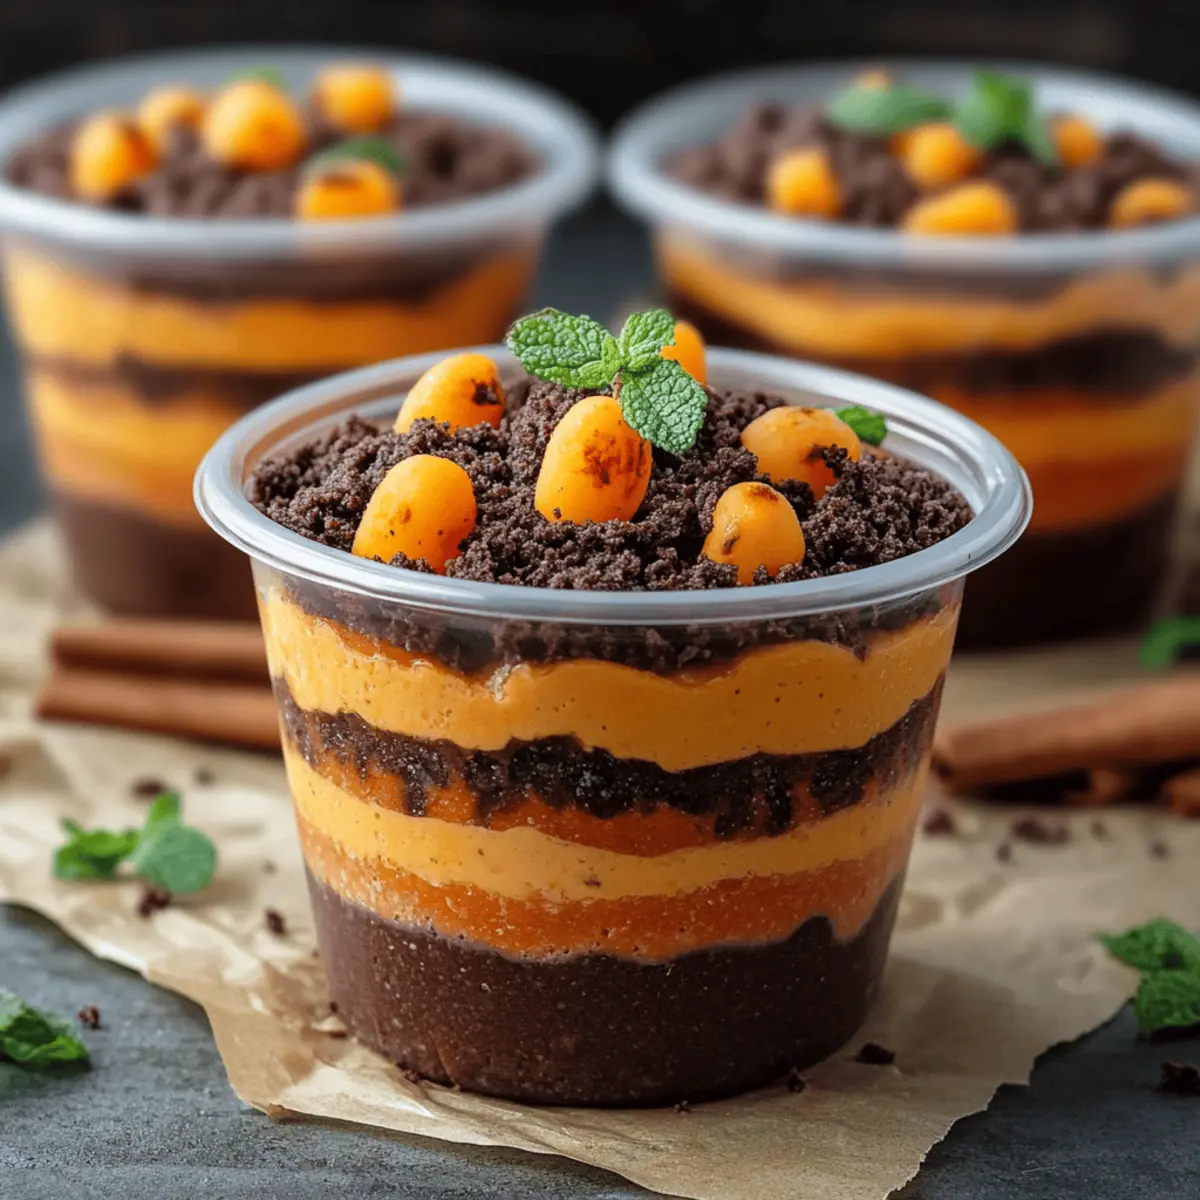
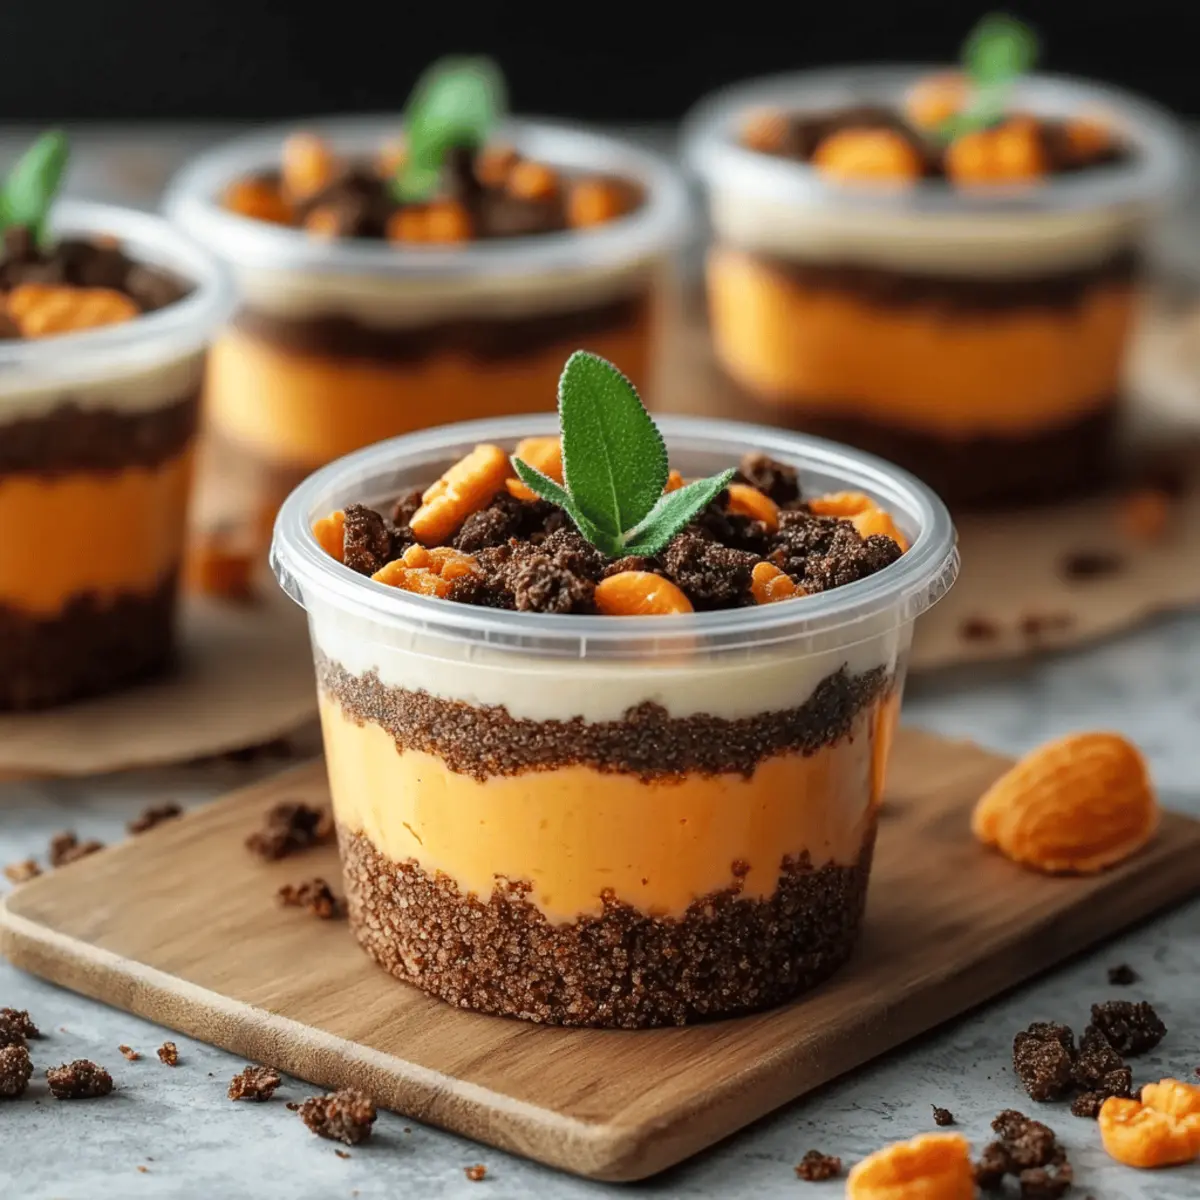
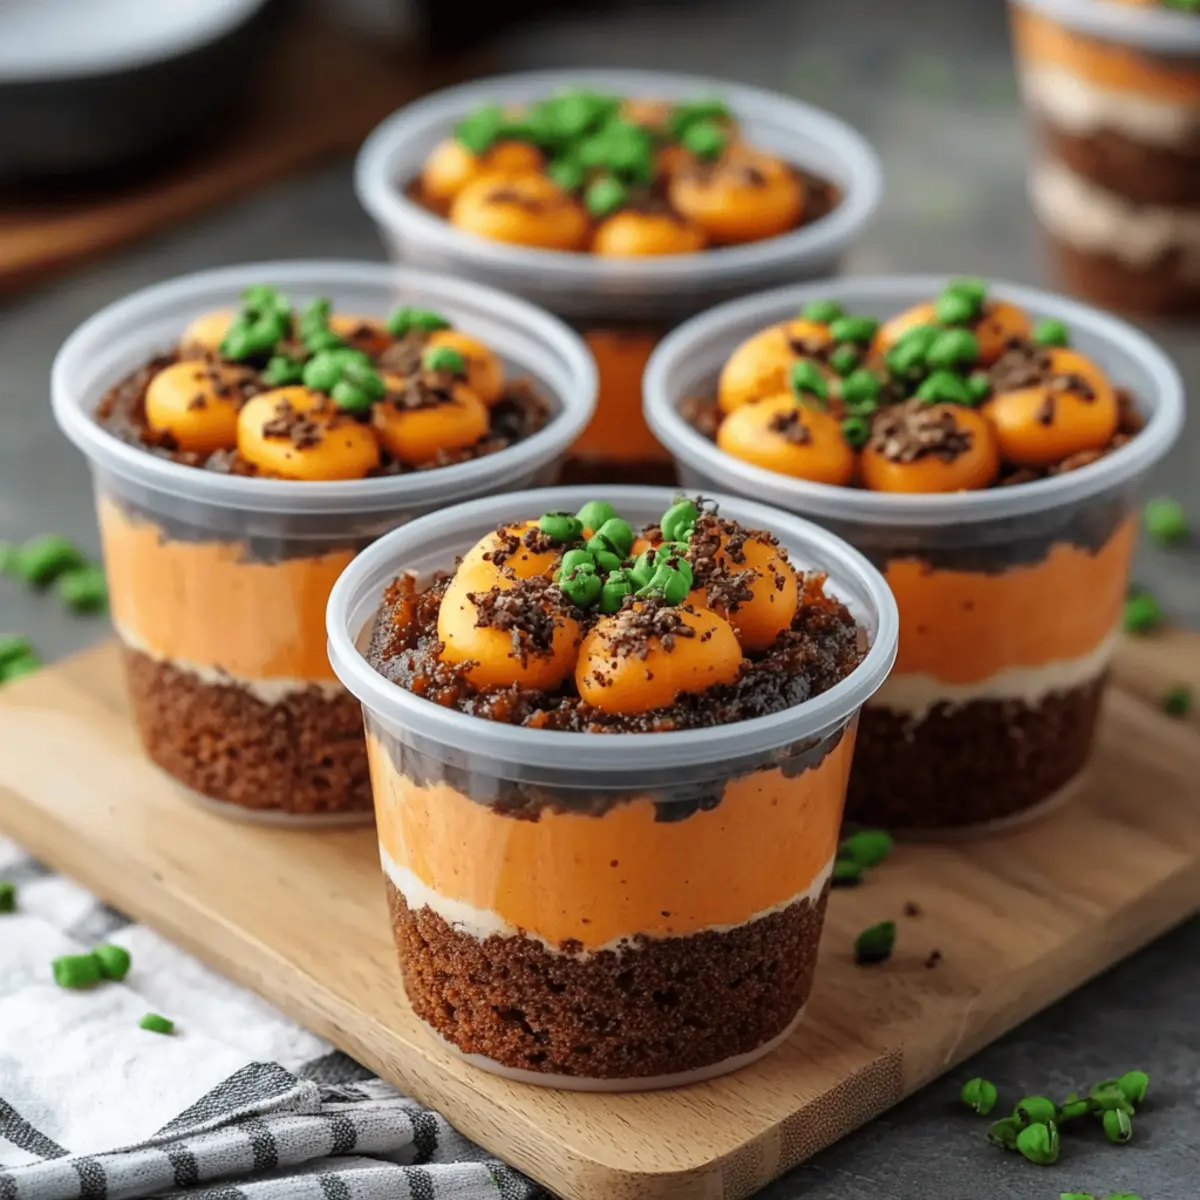
The kitchen was filled with giggles and chocolatey chaos as I gathered the kids for a fun dessert project. That’s when we decided to whip up some delightful Pumpkin Patch Dirt Cups. These charming little desserts not only bring a smile to faces of all ages but are also a breeze to prepare, making them perfect for any home chef looking to create a special treat without fuss. With layers of rich chocolate pudding and crushed Oreos, they offer a comforting twist on classic desserts. Plus, the added decorative candy pumpkins bring an inviting seasonal flair that makes each cup a little masterpiece! Ready to make memories while cooking? Let’s dive into this deliciously messy adventure!
Why are Pumpkin Patch Dirt Cups a must-try?
Fun and Festive: Perfect for fall gatherings and Halloween parties, these cups bring a playful spirit to your dessert table.
Easy to Assemble: With just 15 minutes of prep time, this recipe is incredibly simple, making it perfect for novice cooks or busy home chefs.
Decadent Layers: Enjoy the delightful contrast of creamy chocolate pudding and crunchy Oreos in every bite!
Customizable: Feel free to swap out Oreos for gluten-free cookies or add your favorite decorations—these cups are as versatile as your creativity!
Crowd-Pleaser: Kids and adults alike will be fighting for the last cup, ensuring it becomes a staple at your family gatherings!
For more easy and delicious dessert ideas, check out our guide on easy no-bake treats and bring some variety to your menu!
Pumpkin Patch Dirt Cups Ingredients
• Get ready to create a delightful treat!
For the Chocolate Pudding
- Chocolate pudding mix – This is the star ingredient that brings the rich, creamy texture to your Pumpkin Patch Dirt Cups.
- Milk – Use whole milk for a creamier pudding, or opt for almond milk for a dairy-free option.
For the Layering
- Whipped cream – Adding this gives the cups a light, fluffy finish that balances the richer pudding perfectly.
- Oreos – Crushing these will add a delightful crunch; you can substitute with gluten-free cookies for those with dietary restrictions.
For the Decorations
- Candy pumpkins – These sweet little treats not only add color but make your Pumpkin Patch Dirt Cups festive and fun!
- Gummy worms – For a whimsical touch, toss in a few of these creepy crawlers!
Now it’s your turn! Gather your ingredients and prepare for some delicious fun with these Pumpkin Patch Dirt Cups.
Step‑by‑Step Instructions for Pumpkin Patch Dirt Cups
Step 1: Prepare the Pudding
In a large mixing bowl, whisk together 2 cups of chocolate pudding mix and 2 cups of milk. Continue whisking until the mixture is smooth and well combined, which should take about 2-3 minutes. Allow the pudding to sit for about 5 minutes to thicken, giving it a creamy texture perfect for your Pumpkin Patch Dirt Cups.
Step 2: Fold in Whipped Cream
Once the pudding has thickened, gently fold in 1 cup of whipped cream into the mixture. Use a spatula to carefully combine the whipped cream, ensuring a light and airy texture. This step is key to achieving the creamy layers that make your Pumpkin Patch Dirt Cups so delightful.
Step 3: Create the Layers
Grab your clear plastic cups or dessert glasses, and start layering! Spoon a generous layer of the pudding mixture into each cup, filling them about one-third full. Next, add a layer of crushed Oreos on top. Repeat this process until the cups are filled to the rim, finishing with a layer of crushed Oreos for that delicious crunch.
Step 4: Add Finishing Touches
Top each cup of your Pumpkin Patch Dirt Cups with a generous dollop of whipped cream. Get creative by placing candy pumpkins on each cup, and if you want to add a playful touch, toss in a few gummy worms. These decorations will bring your dessert to life, making them inviting and fun!
Step 5: Chill and Serve
Cover the assembled cups with plastic wrap and place them in the refrigerator for at least 30 minutes. This chilling time allows the flavors to meld beautifully. When you’re ready to serve, take them out and enjoy the delightful layers of chocolate and crunch that your Pumpkin Patch Dirt Cups offer!
Storage Tips for Pumpkin Patch Dirt Cups
Fridge: Keep your leftover Pumpkin Patch Dirt Cups in the refrigerator, covered with plastic wrap, for up to 2 days to maintain their freshness and flavor.
Make-ahead: You can prepare the pudding and layer the cups a day in advance, storing them in the fridge. Just don’t add the decorations until ready to serve to keep them looking their best!
Freezer: While freezing is not ideal for these dessert cups due to the texture changes in whipped cream and pudding, you can freeze the pudding mixture for up to 1 month. Thaw it in the fridge overnight before assembling.
Reheating: Since these cups are served cold, there’s no need for reheating. Simply unwrap and enjoy your sweet, seasonal treat straight from the fridge!
Tips for the Best Pumpkin Patch Dirt Cups
• Pudding Consistency: Ensure your pudding mix is whisked thoroughly with milk. Let it sit to thicken properly; thin pudding won't hold layers well.
• Whipped Cream Folding: Gently fold in the whipped cream to keep it light and fluffy. Overmixing can deflate the airy texture that makes these Pumpkin Patch Dirt Cups so delightful.
• Layer Neatly: Use clear cups to show off those beautiful layers. Start with pudding, then crushed Oreos, and repeat, finishing with Oreos for a great crunch.
• Chill Time Matters: Allow at least 30 minutes in the fridge before serving. This chilling not only enhances flavor but helps the layers set beautifully!
• Creative Toppings: Get playful with decorations! Besides candy pumpkins, consider adding chocolate sprinkles or other seasonal candies to personalize your Pumpkin Patch Dirt Cups.
Pumpkin Patch Dirt Cups Variations
Feel free to get creative and make this recipe your own with these fun twists and substitutions!
-
Dairy-Free: Substitute regular milk with almond or coconut milk and use dairy-free whipped cream for a delightful treat that everyone can enjoy.
-
Gluten-Free: Swap out Oreos for your favorite gluten-free chocolate cookies to maintain that delicious crunch while accommodating dietary needs.
-
Nutty Addition: Fold in some chopped pecans or almonds into the pudding for an added crunch and flavor boost.
-
Flavor Infusion: Add a few drops of vanilla or almond extract to the pudding for a flavor twist that enhances the chocolatey goodness.
-
Chocolate Lovers: For an extra chocolatey experience, mix in mini chocolate chips with the whipped cream before layering.
-
Spicy Kick: Sprinkle a pinch of cinnamon or nutmeg into the pudding to give your cups a warm, autumn-inspired flavor.
-
Fruit Twist: Layer in some fresh berries or sliced bananas between the pudding and Oreos for a refreshing, fruity boost that balances the richness.
-
Creative Decorations: Instead of candy pumpkins, consider using crushed Halloween-themed candies or spooky sprinkles to give your cups a unique flair.
These variations not only enhance the Pumpkin Patch Dirt Cups but allow you to tailor them for every occasion. If you’re looking for more inspired creations, you can explore our guide on easy no-bake treats for additional sweet ideas!
What to Serve with Pumpkin Patch Dirt Cups
Delight in the sweet, chocolatey bliss of these whimsical cups by pairing them with the perfect accompaniments that elevate your dessert experience.
- Crispy Apple Slices: Bright and refreshing, they provide a crunchy contrast that balances the richness of the pudding.
- Warm Cinnamon Donuts: These sugary treats add a cozy, spiced element, making any fall gathering feel even more festive!
- Vanilla Ice Cream: A scoop of creamy vanilla on the side can turn this sweet treat into a decadent dessert for those who crave extra indulgence.
- Caramel Sauce: Drizzling caramel over the cups enhances the flavor profile, adding a tantalizing sweetness that’s hard to resist.
- Pumpkin Spice Latte: This beloved seasonal drink beautifully complements the pumpkin theme while offering warming spices that enhance the overall mood.
- Chocolate-Covered Strawberries: The freshness of strawberries, dipped in rich chocolate, introduces a fruity twist that pairs wonderfully with the dirt cups.
- Ginger Snap Cookies: Their spiced, bold flavor adds a delightful contrast to the creamy layers of the pudding, evoking autumn vibes.
- Pumpkin Cheesecake Bars: For the ultimate fall dessert table, these pumpkin-infused bars bring a rich and creamy delight to pair with your dirt cups.
- Spiced Chai Tea: Warm and aromatic, this beverage offers a comforting pairing that enhances the enjoyment of your festive dessert.
Make Ahead Options
These Pumpkin Patch Dirt Cups are perfect for meal prep, saving you time on busy weeknights or festive gatherings! You can prepare the chocolate pudding mixture and layer the cups up to 24 hours in advance. Simply whip up the pudding, fold in the whipped cream, and layer the Oreo crumbs in your cups. For best quality, cover the cups with plastic wrap and refrigerate them to maintain freshness. When you're ready to serve, finish by adding the final layer of whipped cream and decorating with candy pumpkins and optional gummy worms just before serving. This way, you'll have delicious, crowd-pleasing treats ready to impress with minimal effort!
Pumpkin Patch Dirt Cups Recipe FAQs
What type of milk should I use for the pumpkin patch dirt cups?
I recommend using whole milk for a richer, creamier pudding, but you can also substitute almond milk or any other non-dairy milk if you're looking for a dairy-free option. Just keep in mind that the flavor may vary slightly.
How should I store leftover pumpkin patch dirt cups?
Absolutely! Store your leftover Pumpkin Patch Dirt Cups in the refrigerator, covered with plastic wrap. They can last for up to 2 days. This helps to maintain their freshness and flavor, making them a delightful treat even on the next day!
Can I freeze the pumpkin patch dirt cups?
While it’s best not to freeze the assembled cups due to the potential texture changes in whipped cream and pudding, you can freeze just the pudding mixture for up to 1 month. To do this, pour the prepared pudding into an airtight container, then thaw it in the fridge overnight before layering with the Oreos and decorations.
What if my pudding isn't thickening?
If your pudding mix isn’t thickening, it’s possible that it wasn't whisked well with the milk, or it hasn’t set long enough. Make sure to whisk vigorously for 2-3 minutes until fully combined and then let it sit for about 5 minutes to allow it to thicken properly. If it's still too runny, consider adding a bit more pudding mix according to package instructions.
Are there any allergy considerations for pumpkin patch dirt cups?
Certainly! If you're making these for someone with allergies, be cautious with your ingredients. The primary concern would be the cookies—ensure they’re gluten-free if necessary, and double-check the pudding mix for potential allergens like dairy or eggs if you're using a powdered mix. You can also get creative with toppings, opting for candy that is nut-free or allergy-friendly as needed.
Delicious Pumpkin Patch Dirt Cups for Fun Fall Treats
Ingredients
Equipment
Method
- In a large mixing bowl, whisk together chocolate pudding mix and milk until smooth and combined, about 2-3 minutes. Let sit for 5 minutes to thicken.
- Gently fold in whipped cream into the pudding mixture until well combined.
- Layer pudding mixture into cups, filling one-third full, then add crushed Oreos. Repeat layers until cups are filled.
- Top with whipped cream, decorate with candy pumpkins and gummy worms.
- Cover with plastic wrap and chill for at least 30 minutes. Serve and enjoy!
Leave a Reply