
As the holiday season approaches, there's something magical about the aroma of sweet peppermint wafting through the house. It’s hard to resist making Christmas Peppermint Sticks when the festive spirit fills the air. Not only are these treats a delightful nod to cherished childhood memories, but they're also a fantastic way to bring your family together. With just a handful of ingredients and a little patience, you’ll whip up a batch that not only serves as a charming decoration but also makes for a fun holiday activity. Plus, they’re perfect for gift-giving or adding a personal touch to your festivities! So, are you ready to create some holiday magic in your kitchen? Let’s dive into this sweet adventure together!
Why make Christmas Peppermint Sticks?
Unique flavors: The blend of peppermint extract and colors gives these sticks a refreshing burst that embodies the holiday spirit.
Fun family activity: This recipe is an excellent opportunity for family bonding—kids love twisting and shaping the candy!
Great for gifting: Wrap them up for friends and family; they’re an adorable and edible holiday present.
Easy to master: With simple ingredients and straightforward steps, even novice cooks can create these festive treats.
Customizable colors: Get creative by mixing different colors or flavors to suit your holiday theme! Make it a magical season with these delightful Christmas Peppermint Sticks.
Christmas Peppermint Sticks Ingredients
• Get ready to create homemade magic!
For the Candy Mixture
- Granulated sugar – a key ingredient that provides sweetness and body to your Christmas Peppermint Sticks.
- Light corn syrup – helps prevent crystallization and gives the candy its chewy texture.
- Water – essential for dissolving the sugar and achieving the right consistency.
For Flavor and Color
- Peppermint extract – imparts that delightful, refreshing minty flavor that screams holiday cheer.
- Red food coloring – adds a festive touch, making your candy visually appealing.
- White food coloring – perfect for creating a classic peppermint look!
For Dusting
- Powdered sugar – dusting your work surface prevents the sticks from sticking and keeps them nice and clean.
Step‑by‑Step Instructions for Christmas Peppermint Sticks
Step 1: Prepare the Cooling Surface
Begin by preparing a clean surface for cooling the Christmas Peppermint Sticks. Lightly dust your countertop or a baking sheet with powdered sugar to prevent sticking. This will make it easier to remove the sticks later without any mess. Have your equipment ready, including a spatula for handling the hot candy.
Step 2: Combine the Ingredients
In a medium-sized saucepan, combine 2 cups of granulated sugar, ½ cup of light corn syrup, and ½ cup of water. Stir the mixture over medium heat, ensuring the sugar completely dissolves, which should take about 5 minutes. The mixture will appear clear and slightly thickened.
Step 3: Monitor the Boil
Once the sugar has dissolved, stop stirring and let the mixture come to a boil. Utilize a candy thermometer to keep track of the temperature, allowing it to reach 260°F (the hard-ball stage). This boiling phase will take about 10 minutes, and you’ll see large, bubbling bubbles forming on the surface.
Step 4: Add Flavor and Cool
After reaching the correct temperature, remove the saucepan from the heat and let it sit undisturbed for about 5 minutes. The mixture will settle, and steam will subside. This is crucial as it will prevent the peppermint extract from excessively bubbling and creating a mess when added next.
Step 5: Incorporate the Peppermint Extract
Carefully stir in 1 teaspoon of peppermint extract into the hot candy mixture. Be cautious, as it may bubble up upon contact. The rich peppermint aroma will fill your kitchen, making the spirit of peppermint sticks come alive. Stir until it's well combined and remove any foam that may have formed.
Step 6: Divide and Color the Mixture
Once fully mixed, divide the hot candy evenly into two bowls. In one bowl, add ¼ teaspoon of red food coloring, and in the other, incorporate ¼ teaspoon of white food coloring. Mix each bowl until the colors are vibrant and well distributed, creating a beautiful base for your Christmas Peppermint Sticks.
Step 7: Cool Until Handleable
Let the bowls of candy cool for about 10-15 minutes until the candy is safe to touch but still pliable. You'll want it warm enough to stretch but cool enough to avoid burns. This waiting time is pivotal for the next stages of shaping and twisting your peppermint sticks.
Step 8: Prepare Your Hands and Stretch
Lightly grease your hands with vegetable oil to prevent the candy from sticking. Take each color of the candy separately and begin stretching and pulling them, working each until they become shiny and smooth, approximately 5–7 minutes for each color. This technique helps achieve the perfect texture.
Step 9: Roll and Twist the Colors
Once the candy is pliable, roll each colored mixture into long ropes. Place the red and white ropes side by side, then twist them together to create a lovely spiral effect. Ensure the colors are tightly intertwined to form the characteristic look of your Christmas Peppermint Sticks.
Step 10: Shape and Cut
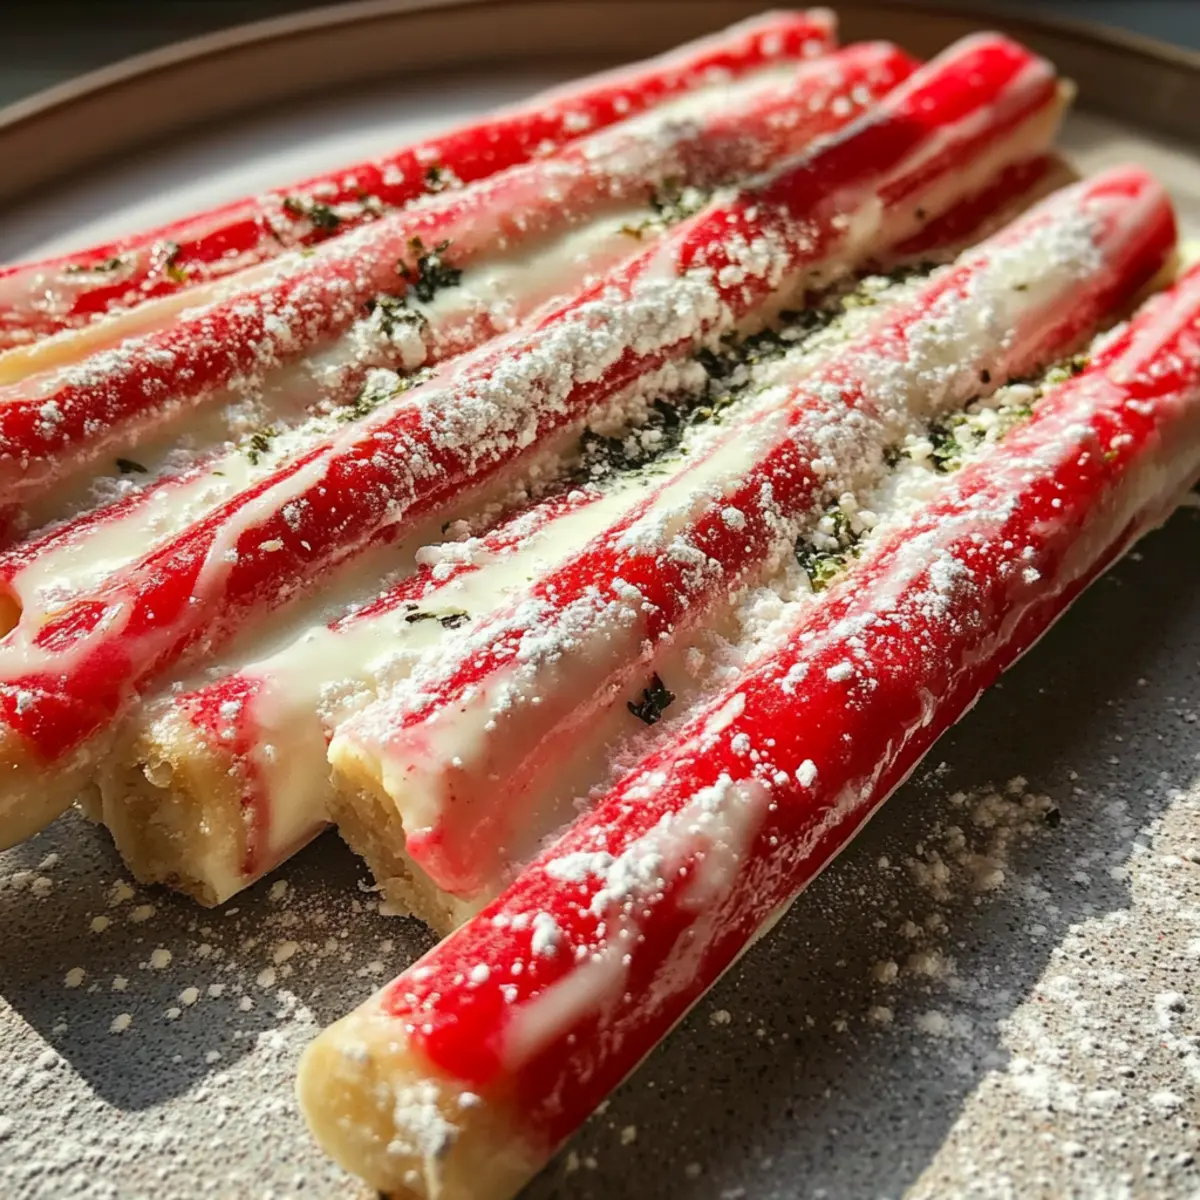
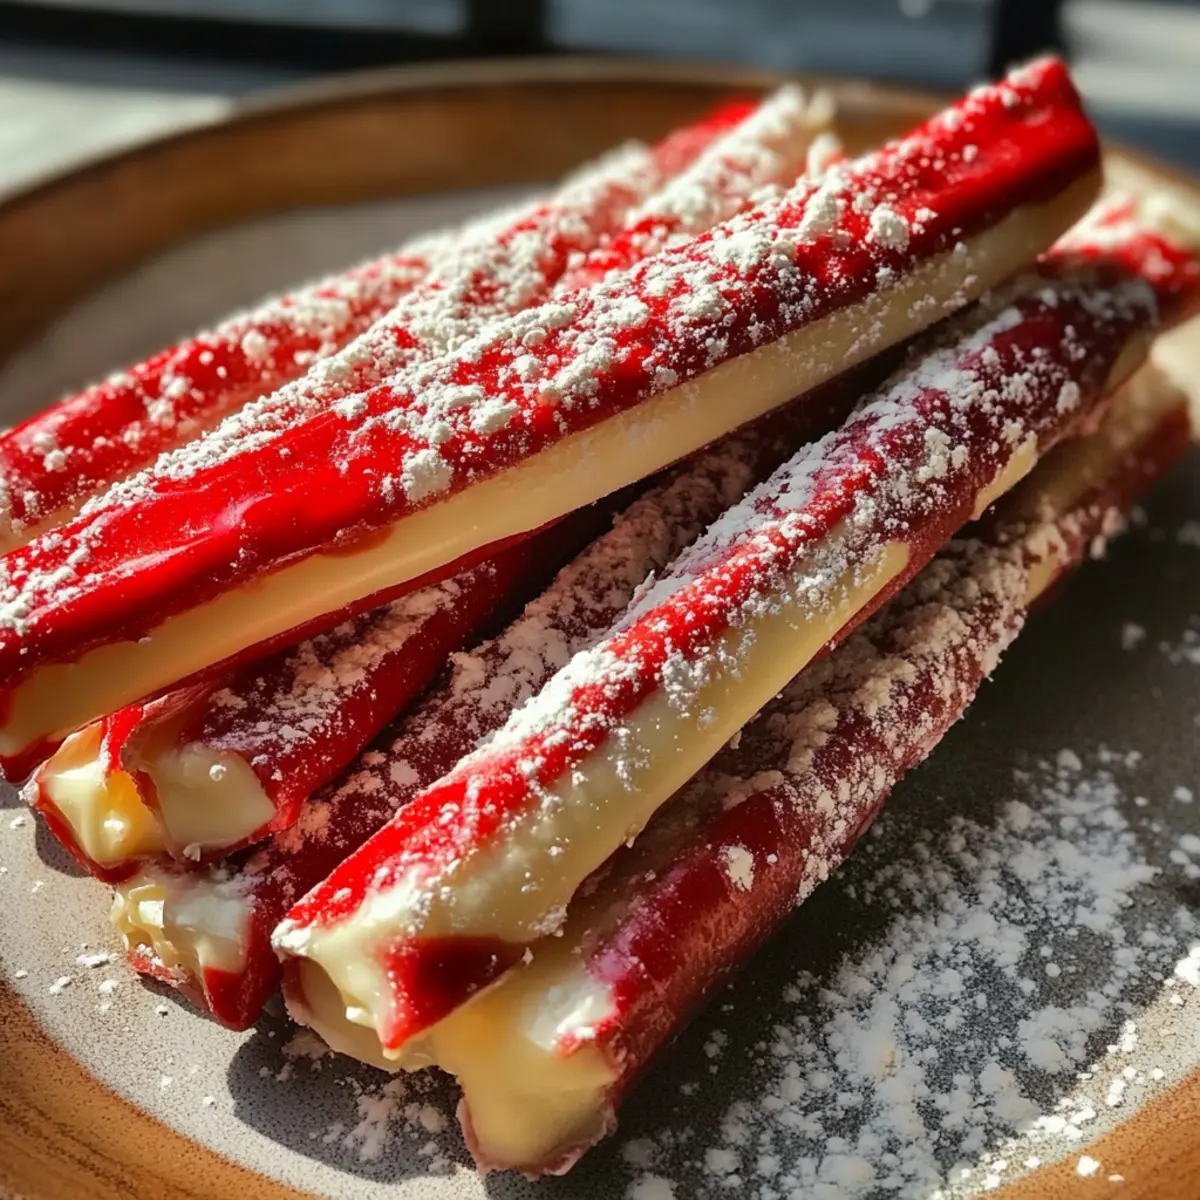
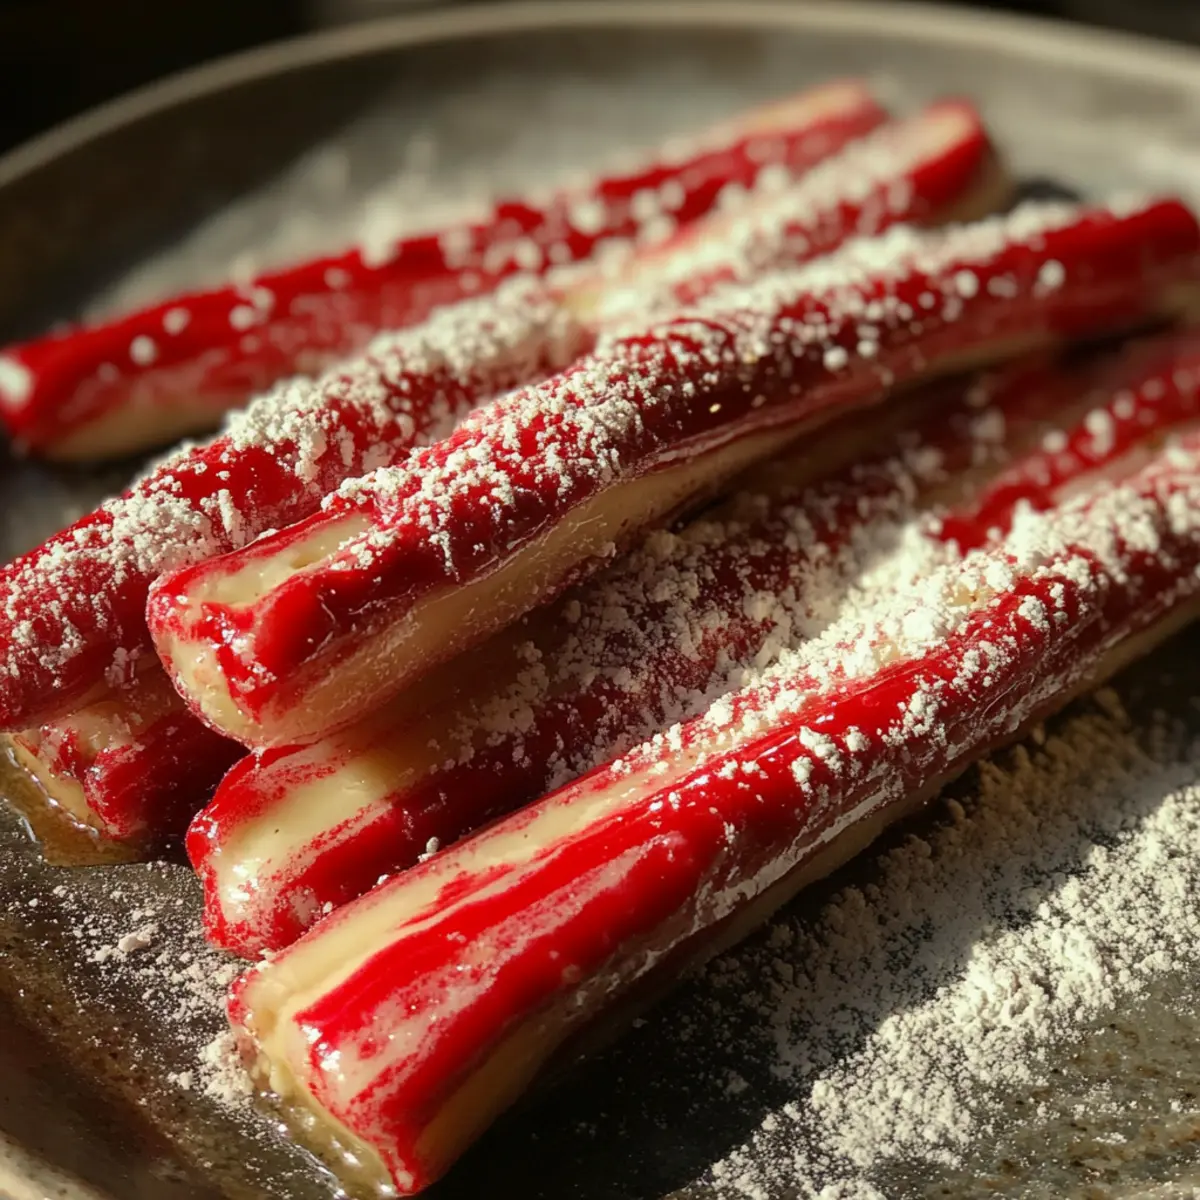
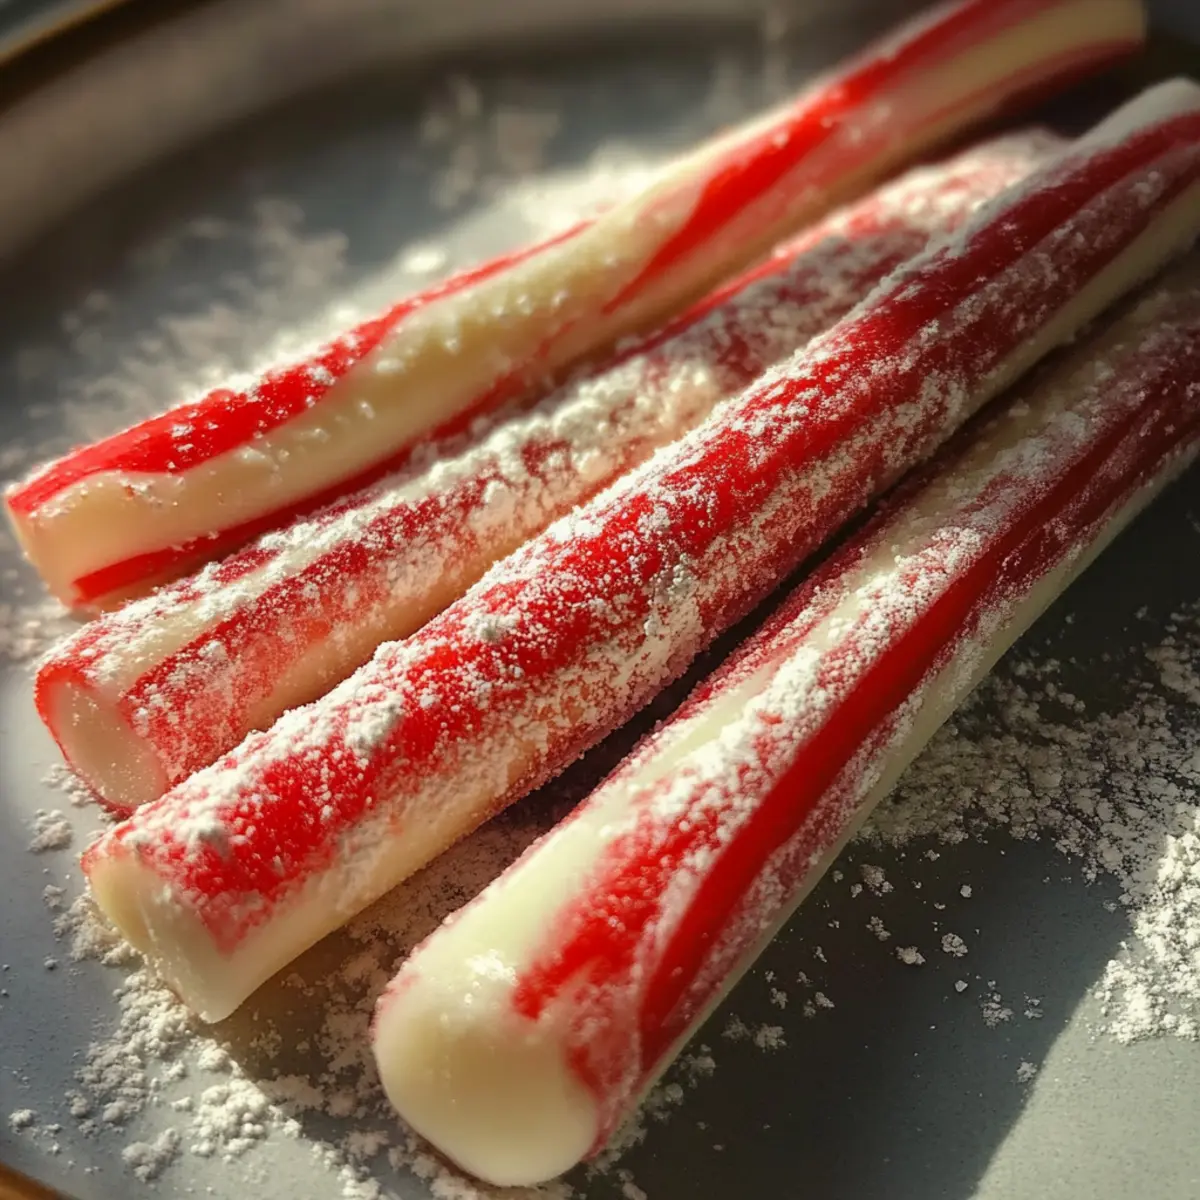
Using a sharp knife, cut the twisted ropes into 6-inch pieces. If desired, pinch the ends to form lovely hooks, resembling traditional candy canes. Place them on your prepared cooling surface. The candies will begin to harden and take on their definitive shape as they cool.
Step 11: Final Cooling Period
Allow the shaped Christmas Peppermint Sticks to cool completely on the prepared surface, which should take about 30 minutes. As they cool, they will firm up, becoming ready for holiday festivities. Make sure they’re spaced out to prevent any sticking.
Step 12: Dust with Powdered Sugar
Once fully set and cooled, sprinkle additional powdered sugar over the peppermint sticks. This last dusting will ensure they don’t stick together while adding a lovely touch of sweetness. Now, your delightful Christmas Peppermint Sticks are ready to be enjoyed or packaged for gift-giving!
Make Ahead Options
These delightful Christmas Peppermint Sticks are perfect for making ahead, saving you precious time during the busy holiday season! You can prepare the candy mixture up to 24 hours in advance. Simply follow steps 1 through 6, then store the divided colors in airtight containers at room temperature to maintain their quality. When you're ready to shape and cut the sticks, let the candy cool briefly and then stretch, twist, and shape as instructed in steps 7-12. This way, your homemade treats will still be just as delicious, ready to bring joy and cheer with minimal effort when it's time to celebrate!
Christmas Peppermint Sticks Variations
Feel free to add your personal touch to these delightful treats and make them your own!
- Dairy-Free: Substitute with coconut syrup for a unique flavor twist that everyone can enjoy.
- Vegan: Use agave syrup instead of corn syrup, keeping the delight and ensuring vegan-friendly treats!
- Chocolate-Dipped: Melt dark or white chocolate for coating to create a luxurious, sweeter experience.
- Flavor Infusion: Experiment with different extracts such as almond or vanilla to create unique peppermint blends that dazzle.
- Color Variety: Use various food coloring shades—think pastels or vibrant neon—to match any holiday theme or celebration decor.
- Spicy Variation: Add a pinch of cayenne pepper or crushed red pepper flakes for a delightful kick that dances on the palate.
- Crunchy Add-in: Fold in crushed peppermint candy canes or nuts into the warm mixture before cooling for added texture.
- Mini Size: Roll smaller ropes for bite-sized treats or use them as festive tree decorations for a charming holiday display.
As you customize these Christmas Peppermint Sticks, think about pairing them with our delightful Hot Chocolate or gifting them alongside some scrumptious Homemade Biscotti. Let your creativity shine this holiday season!
How to Store and Freeze Christmas Peppermint Sticks
Room Temperature: Store your Christmas Peppermint Sticks in an airtight container, and they will stay fresh for up to 2 weeks. Keep them in a cool, dry place away from direct sunlight.
Fridge: Storing in the fridge can extend their freshness for up to 4 weeks. Place them in a sealed container with layers of parchment paper to keep them from sticking together.
Freezer: If you want to store them longer, freeze the peppermint sticks for up to 3 months. Wrap each stick in plastic wrap and place them in a freezer-safe bag.
Reheating: There's no need to reheat; simply let them come to room temperature after removing from the fridge or freezer before enjoying!
Expert Tips for Christmas Peppermint Sticks
-
Temperature Check: Always use a candy thermometer to ensure the mixture reaches 260°F. This is key to achieving the perfect hard-ball consistency for your Christmas Peppermint Sticks.
-
Cooling Time: Allow the candy mixture to cool for 10-15 minutes before handling. If it's too hot, it can be difficult to stretch and shape properly, resulting in a less than perfect texture.
-
Coloring Caution: When adding food coloring, start with a small amount and gradually mix it in. You can always add more to achieve your desired vibrancy in your Christmas Peppermint Sticks.
-
Greasing Hands: Lightly grease your hands with vegetable oil to prevent the candy from sticking while shaping. This simple step makes the process much easier and more enjoyable!
-
Cutting Technique: Use a sharp knife to cut the twisted ropes into 6-inch pieces. Be firm but gentle; this helps maintain the beautiful swirl of colors in each stick for a festive presentation.
What to Serve with Christmas Peppermint Sticks?
Indulge in a festive array of flavors and textures that will perfectly complement your delightful candy creation.
-
Rich Hot Chocolate: A warm, creamy mug of hot chocolate pairs wonderfully, enhancing the peppermint flavor and creating cozy vibes. The sweetness of the chocolate contrasts beautifully with the refreshing mint.
-
Gingerbread Cookies: Serve alongside these classic cookies for a delightful blend of spices that balances the sweet, minty notes. The chewy gingerbread adds an enjoyable texture and festive charm to your holiday spread.
-
Spiced Apple Cider: A hot glass of spiced apple cider offers a perfect balance of sweet and tangy, echoing the holiday spirit. The warm spices in the cider harmonize beautifully with the cool peppermint.
-
Holiday Fruit Platter: Fresh fruits like oranges, strawberries, and apples brighten up the table, providing a refreshing contrast to the sweet sticks. Their natural sweetness can enhance the overall festive experience.
-
Chocolate Dipped Pretzels: The salty crunch of pretzels dipped in chocolate adds a delightful texture that contrasts with the candy's smooth sweetness. This duo creates a perfect sweet and salty snack option.
-
Eggnog: A classic holiday beverage that combines creaminess and spice, eggnog pairs perfectly with peppermint sticks, offering a creamy base for the refreshingly minty treat. It's the taste of Christmas in every sip!
-
Festive Sugar Cookies: Soft, buttery sugar cookies with decorative icing are a wonderful addition. Their delicate sweetness complements the peppermint sticks while adding colorful flair to your holiday table.
-
Vanilla Ice Cream: On warmer holiday days, a scoop of vanilla ice cream can be the perfect cooling counterpart to your Christmas Peppermint Sticks. The creaminess enhances the refreshing mint flavor beautifully.
Christmas Peppermint Sticks Recipe FAQs
How do I know when my sugar mixture is ready?
Absolutely! You’ll know your sugar mixture is ready when it reaches a temperature of 260°F, which is the hard-ball stage. A candy thermometer is essential here—when it bubbles and the mixture is large and frothy, that means you're almost there! Just remember to stop stirring once it begins to boil.
How do I store my Christmas Peppermint Sticks?
Very straightforward! Store your Christmas Peppermint Sticks in an airtight container at room temperature for up to 2 weeks. If you'd like to keep them fresh longer, move them to the fridge, where they'll stay delicious for up to 4 weeks. Just be sure to layer them with parchment paper to prevent any sticking.
Can I freeze the peppermint sticks?
Absolutely! Freezing is a great option if you want to enjoy your Christmas Peppermint Sticks longer. Wrap each stick tightly in plastic wrap, then place them in a freezer-safe bag. They can be frozen for up to 3 months. When you’re ready to enjoy, just remove them from the freezer and let them thaw at room temperature!
What should I do if my candy mixture crystallizes?
Great question! If you find your candy mixture crystallizes, it can be quite frustrating. To avoid this, make sure you do not stir the mixture while it’s boiling, as stirring can cause sugar crystals to form. If you still notice crystallization, you can add a small amount of water and reheat it gently until the sugar dissolves again.
Is this recipe safe for pets?
It's important to be cautious! Christmas Peppermint Sticks contain sugar and may not be suitable for pets, especially if they have dietary restrictions or health issues. Always keep them out of paw's reach and reserve these delightful treats for human enjoyment!
Can I use different flavors instead of peppermint?
The more the merrier! You can certainly experiment with other extracts, like vanilla or almond, if peppermint isn't to your taste. Just remember, when trying a different flavor, stick to the same measurement to ensure your candy maintains its consistency. Enjoy the creativity!
Delightful Christmas Peppermint Sticks for Festive Fun
Ingredients
Equipment
Method
- Prepare a clean surface for cooling the Christmas Peppermint Sticks by dusting it with powdered sugar.
- In a medium-sized saucepan, combine 2 cups of granulated sugar, ½ cup of light corn syrup, and ½ cup of water. Stir until sugar is dissolved.
- Let the mixture come to a boil and monitor with a candy thermometer until it reaches 260°F.
- Remove from heat and let it sit undisturbed for about 5 minutes.
- Stir in 1 teaspoon of peppermint extract carefully, as it may bubble up.
- Divide the hot candy into two bowls, adding ¼ teaspoon of red food coloring to one and ¼ teaspoon of white food coloring to the other.
- Let the bowls cool for about 10-15 minutes until the candy is warm but pliable.
- Lightly grease your hands and stretch each color until shiny and smooth.
- Roll each colored mixture into long ropes, twist them together to form a spiral.
- Cut the twisted ropes into 6-inch pieces and place them on the cooling surface.
- Allow to cool completely for about 30 minutes.
- Dust with additional powdered sugar to prevent sticking before serving or gifting.
Leave a Reply