
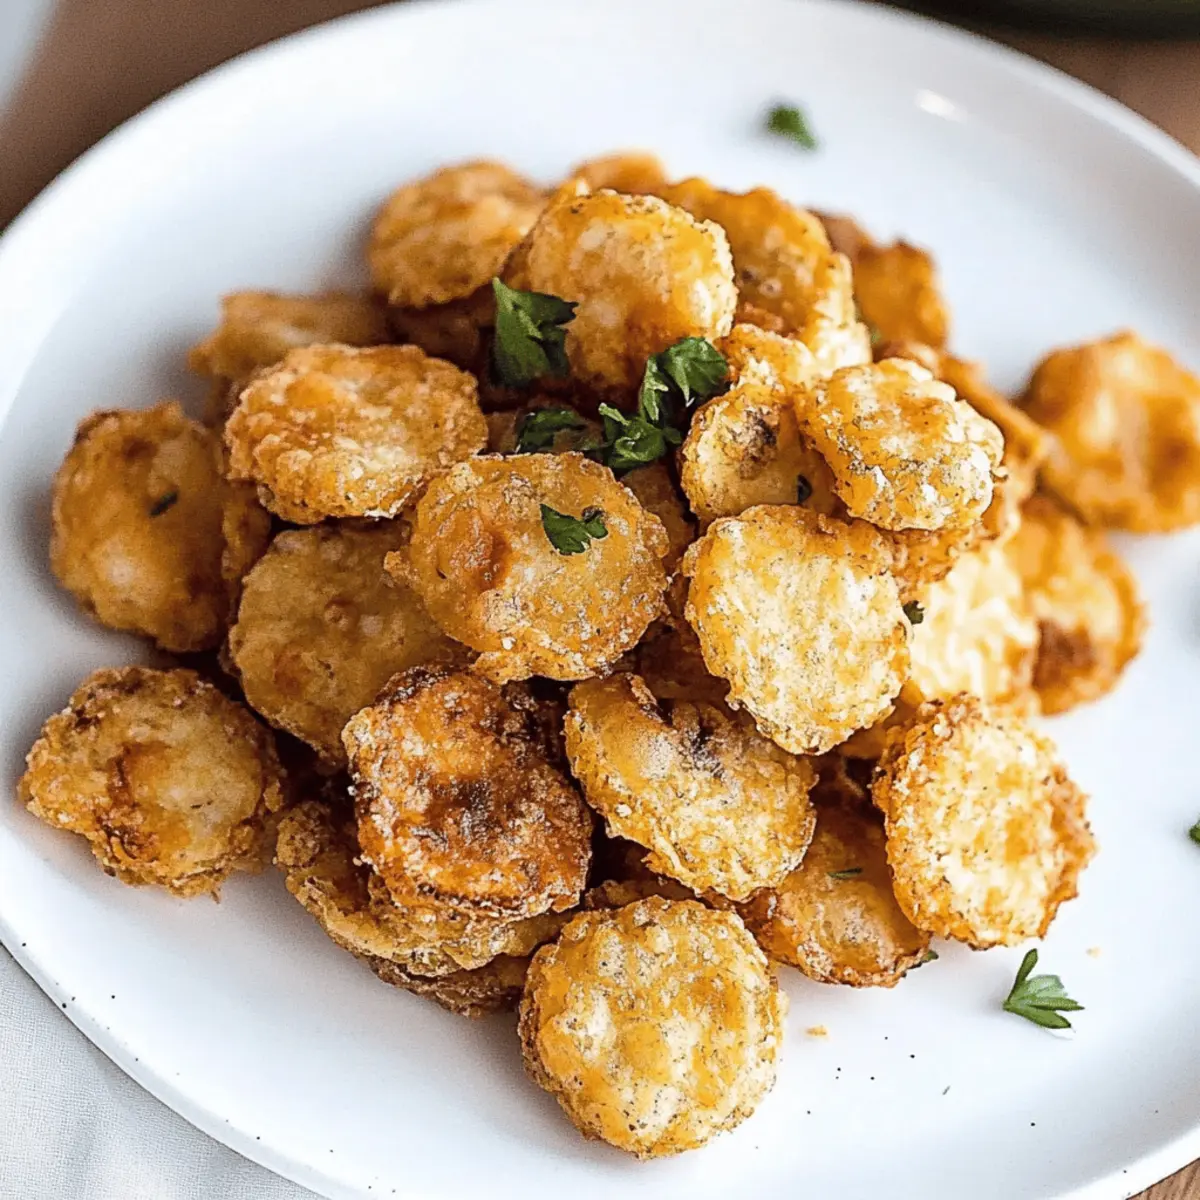
There’s magic in the simple act of frying; just ask the golden, crunchy fried pickles that transform any gathering into a jubilant celebration! With just a handful of ingredients, whipping up these crispy delights is surprisingly quick—and believe me, they’re a fantastic way to elevate your snack game. Each bite offers a perfect balance of tangy pickle flavor encased in a deliciously crispy shell, making fried pickles not only a crowd-pleaser but an unforgettable side dish for your next backyard barbecue or game night. You’re going to love how easy they are to make at home, steering you away from greasy takeout in favor of a delightful homemade treat. Are you ready to dive into this crispy goodness?
Are Fried Pickles Your New Favorite Snack?
Crispiness that makes each bite an adventure: these fried pickles boast a delightful crunch that you won't be able to resist. Quick and easy to prepare, you'll have them ready in just 35 minutes—perfect for unexpected guests or a weekend treat. Flavor-packed with savory spices, they bring a zesty twist to your snack table. Whether you're hosting a backyard barbecue or indulging during a cozy movie night, fried pickles offer a unique flavor that sets them apart from typical options. You'll love how they satisfy your cravings without taking hours in the kitchen!
Fried Pickles Ingredients
For the Pickles
• 16-oz jar sliced pickles – use your favorite variety for the best flavor.
For the Coating
• Vegetable oil – essential for frying, providing that perfect crisp.
• 1 cup all-purpose flour – helps create a delightful crunchy texture.
• 1 teaspoon salt – enhances overall flavor; feel free to adjust to taste.
• ½ teaspoon ground black pepper – adds a kick of spice to your batter.
• ½ teaspoon garlic powder – delivers a subtle, savory background flavor.
• ½ teaspoon onion powder – complements the garlic for added depth.
• ½ teaspoon paprika powder – introduces a mild smokiness to the profile.
• ¼ teaspoon baking powder – promotes extra fluffiness in the coating.
For the Batter
• 1 cup milk – creates a smooth batter and helps bind the coating.
• 2 large eggs – ensures the flour clings well to the pickles for that unforgettable finish.
Get ready to whip up some irresistible fried pickles that will not only wow your taste buds but also keep you away from endless fast-food runs!
Step‑by‑Step Instructions for Fried Pickles
Step 1: Heat the Oil
Begin by pouring vegetable oil into a deep frying pan or pot, filling it to about 2 inches deep. Heat the oil over medium heat, monitoring the temperature until it reaches approximately 350°F (175°C). You can test if the oil is ready by dropping in a small pinch of flour; it should sizzle immediately.
Step 2: Prepare the Dry Ingredients
In a mixing bowl, combine 1 cup of all-purpose flour, 1 teaspoon of salt, ½ teaspoon of ground black pepper, ½ teaspoon of garlic powder, ½ teaspoon of onion powder, ½ teaspoon of paprika powder, and ¼ teaspoon of baking powder. Whisk these dry ingredients together until well blended, ensuring an even distribution of spices for your flavorful fried pickles.
Step 3: Whisk the Wet Ingredients
In a separate bowl, whisk together 1 cup of milk and 2 large eggs until the mixture is smooth and well combined. This egg mixture will help create a lovely batter that clings to the pickles, enhancing their crunch. Make sure the egg is fully incorporated with the milk for the best results.
Step 4: Dredge the Pickles
Take each drained pickle slice and dip it into the egg mixture, ensuring it’s fully coated. Next, dredge the pickles in the flour mixture, pressing gently to ensure a solid covering. This step is crucial for achieving that satisfying crunch once you fry your fried pickles to perfection.
Step 5: Fry the Pickles
Carefully place the coated pickle slices into the hot oil, working in small batches to prevent overcrowding. Fry the pickles for about 2-3 minutes, or until they turn a beautiful golden brown and develop a crispy exterior. Use a slotted spoon to occasionally turn them for even cooking.
Step 6: Drain and Serve
Once golden and crispy, remove the fried pickles from the oil using a slotted spoon and transfer them onto a plate lined with paper towels. This will absorb excess oil, keeping them crunchy. Allow them to cool slightly before serving, and enjoy these delightful fried pickles as a fun appetizer or snack!
Fried Pickles Variations & Substitutions
Feel free to experiment with these ideas to make your fried pickles suit your taste and dietary needs!
- Gluten-Free: Substitute all-purpose flour with a gluten-free blend or almond flour for a crunchy coating.
- Spicy Heat: Add cayenne pepper to the dry mixture for a fiery kick that'll make your taste buds dance!
- Herbaceous Twist: Mix in dried herbs like dill or oregano into the flour for an aromatic flavor that elevates each bite.
- Cheesy Delight: Incorporate grated Parmesan or cheddar cheese into the flour mix for a rich, cheesy crust.
- Batter Variations: Swap milk for buttermilk or a plant-based milk for a slightly different texture and flavor.
Buttermilk brings a lovely tang and extra richness; it’s a cherished favorite! - Veggie Pickles: Use pickled green beans or jalapeños dipped in the same batter for a unique spin on classic fried pickles.
- Vegetable Oil Replacement: Try using canola or peanut oil for frying, which can give a different flavor subtlety while maintaining that crispy texture.
- Sweet Kick: Drizzle some honey or serve with a sweet dipping sauce for a uniquely sweet contrast to the tangy pickles.
Just imagine dipping those crispy bites into a sweet sauce—delightful!
No matter which twist you choose, each variation will bring its own charm, making your homemade fried pickles even more delightful! Enjoy customizing this recipe and tasting new adventures!
Make Ahead Options
These fried pickles are perfect for meal prep enthusiasts! You can prepare the dry coating mixture (1 cup flour, spices) up to 3 days in advance, storing it in an airtight container to maintain freshness. Additionally, you can coat the pickle slices but refrigerate them uncooked for up to 24 hours. This not only makes dinner time less hectic but also keeps everything ready for frying. When you're ready to serve, just heat your oil and fry the pickles straight from the fridge; they’ll turn out just as crispy and delicious as if freshly made. This simple method ensures that your fried pickles will wow your guests without the last-minute rush!
How to Store and Freeze Fried Pickles
Room Temperature: Store leftover fried pickles in a covered container at room temperature for up to 4 hours; they are best enjoyed fresh, but you can eat them at room temp.
Fridge: Keep fried pickles in an airtight container in the fridge for up to 3 days. To maintain their crunch, reheat them in the oven or air fryer instead of the microwave.
Freezer: Freeze cooked fried pickles in a single layer on a baking sheet until firm, about 1 hour. Once frozen, transfer them to a freezer-safe bag for up to 2 months.
Reheating: For outstanding texture, reheat frozen fried pickles in the oven or an air fryer at 375°F (190°C) for about 10-15 minutes until crispy, and enjoy your flavorful fried pickles once again!
What to Serve With Fried Pickles
Fried pickles are a delightful starter that magically pairs with various dishes, turning any meal into a festive affair.
- Creamy Ranch Dip: This cool, tangy dip complements the fried pickles beautifully, enhancing their flavor while adding a refreshing twist.
- Spicy Buffalo Wings: The crispy, zesty nature of buffalo wings pairs perfectly with fried pickles, creating a savory, spicy appetizer platter to share.
- Coleslaw: A crunchy, creamy coleslaw adds freshness and balance, cutting through the richness of the fried pickles while keeping things light and tasty.
- Grilled Cheese Sandwich: The gooey, melty cheese and crispy bread enhance the crispy pickles, creating a nostalgic comfort combo that's always a hit.
- Sweet Tea: A refreshing glass of sweet tea will bring the Southern charm to your meal, balancing the tartness with its sugary notes.
- Potato Wedges: These crispy-on-the-outside, fluffy-on-the-inside potato wedges are a fantastic companion, adding heartiness to your snack experience.
- Fresh Garden Salad: A vibrant mix of greens and veggies offers a light contrast to the fried pickles, refreshing your palate between bites.
- Beer: A cold lager or pale ale works wonders as it enhances the crunchy texture while providing a nice contrast to the tangy flavor.
- Apple Pie: Serve warm as a surprising dessert that ties back to the fried pickles' South-inspired origins, creating a satisfying sweet finish.
- Hot Sauce: A drizzle of your favorite hot sauce can elevate the flavor of fried pickles, adding a spicy kick that adventurous eaters will love!
Expert Tips for Perfect Fried Pickles
• Pickle Choice: Use thicker pickle slices for better crunch and flavor; they hold up well during frying.
• Oil Temperature: Ensure oil is at 350°F (175°C) for optimal frying—too cool will make them soggy, and too hot may burn them.
• Batch Frying: Avoid overcrowding the pan when frying; this keeps the temperature consistent and ensures crispy fried pickles.
• Coating Technique: Make sure each pickle slice is fully coated in the egg and flour mixture for that satisfying crunch; don’t rush this step!
• Cooling Method: Drain fried pickles on paper towels to absorb excess oil. Serve immediately for the best texture and freshness.
Fried Pickles Recipe FAQs
How do I choose the best pickles for frying?
Absolutely! For the best flavor and texture, I recommend using thicker slices of pickles—this helps them hold up during frying while providing a delightful crunch. Look for dill pickles or your favorite variety; just make sure they are well-drained to prevent excess moisture that may cause sogginess.
How should I store leftover fried pickles?
Very! Store leftover fried pickles in an airtight container in the refrigerator for up to 3 days. To maintain their crunch, reheat them in the oven or air fryer instead of the microwave, as this helps to keep them crispy and delicious!
Can I freeze fried pickles for later?
Absolutely! To freeze cooked fried pickles, first lay them in a single layer on a baking sheet and flash freeze them for about 1 hour. Once they are firm, transfer them to a freezer-safe bag for up to 2 months. This method helps to keep them from sticking together, making it easy to grab a few whenever the cravings hit!
What should I do if my fried pickles are soggy?
It happens to the best of us! If your fried pickles turn out soggy, make sure your oil is hot enough at 350°F (175°C) before frying. Also, avoid overcrowding the pan, as it can drop the oil temperature. For soggy leftovers, a quick reheat in the oven or air fryer can help restore their crispiness.
Are fried pickles safe for pets?
Not really! Fried pickles contain garlic powder and onion powder, which can be harmful to dogs and cats. It's best to keep these tasty treats for yourself and stick to pet-friendly snacks for your furry friends!
Can I adjust the spiciness of the coating?
You bet! Feel free to adjust the spice levels in the coating to your preference. If you like some heat, add a pinch of cayenne pepper or use spicy pickles for an extra kick. Explore and have fun with different flavors—you might just discover a new favorite twist on your fried pickles!
Crispy Fried Pickles That Will Wow Your Taste Buds
Ingredients
Equipment
Method
- Pour vegetable oil into a deep frying pan or pot, filling it to about 2 inches deep. Heat over medium heat until it reaches approximately 350°F (175°C).
- In a mixing bowl, combine 1 cup of all-purpose flour, 1 teaspoon of salt, ½ teaspoon of ground black pepper, ½ teaspoon of garlic powder, ½ teaspoon of onion powder, ½ teaspoon of paprika powder, and ¼ teaspoon of baking powder. Whisk together until well blended.
- In a separate bowl, whisk together 1 cup of milk and 2 large eggs until the mixture is smooth and well combined.
- Dip each drained pickle slice into the egg mixture, ensuring it’s fully coated. Dredge the pickles in the flour mixture, pressing gently for a solid covering.
- Carefully place the coated pickle slices into the hot oil, working in small batches. Fry for about 2-3 minutes, or until golden brown and crispy.
- Remove the fried pickles from the oil using a slotted spoon and place onto a plate lined with paper towels to absorb excess oil. Allow to cool slightly before serving.
Leave a Reply