
As I stood in my kitchen, the scent of freshly baked dough mingling with the teased anticipation of Halloween festivities, I felt a jolt of excitement. This year, I decided to take our spooky celebrations to a new level with Halloween Mini Pizzas that not only bring delight to the table but also foster creativity. With quick prep and endless decorating possibilities, these bite-sized treats make it easy for everyone to join in the fun, whether you're crafting scary “mummies” or adorable jack-o'-lanterns. Kids and adults alike will be enchanted by their charm, making them the perfect crowd-pleaser for any gathering. What festive designs will you come up with?

What makes Halloween Mini Pizzas special?
Creativity, these mini pizzas allow you to unleash your imagination with fun toppings and designs that engage kids and adults alike! Speedy prep means you can whip them up in just 15 minutes, making it perfect for busy weeknights or last-minute Halloween gatherings. Delicious flavors come from fresh ingredients like melted mozzarella, pepperoni, and vibrant bell peppers that create a festive touch. Customizable options ensure everyone gets their favorite toppings, making these a hit for any crowd. Plus, they're a delightful alternative to typical fast food, giving you a chance to enjoy homemade flavors without the fuss—check out more easy recipes here.
Halloween Mini Pizzas Ingredients
Get ready to gather everything you need for a spooky feast!
For the Pizzas
- Mini pizza crusts – 8–10 crusts create the perfect base for your Halloween Mini Pizzas!
- Pizza sauce – ¾ cup ensures that every bite is flavorful and fun.
- Mozzarella cheese – 1 cup shredded for that gooey, melty texture we all love.
For the Decorating
- Black olives – ¼ cup sliced, ideal for adding spooky spider eyes!
- Mini pepperoni – ¼ cup (optional) for cheeky little smiles on your creations!
- Orange & green bell peppers – Thin strips help craft cheerful jack-o’-lantern faces.
- String cheese – 4 sticks, pulled apart to create ‘mummy’ bandages wrapped around your pizzas.
For the Garnish
- Fresh basil – 2 tablespoon chiffonade to add a fresh finish before serving.
For Baking
- Olive oil spray – A light mist for greasing the baking sheet helps prevent sticking.
Let the fun begin as you transform these simple ingredients into Halloween masterpieces!
Step‑by‑Step Instructions for Halloween Mini Pizzas
Step 1: Preheat the Oven
Begin by preheating your oven to 425°F (220°C). While the oven warms up, grab a baking sheet and lightly mist it with olive oil spray to ensure your Halloween Mini Pizzas don’t stick. This preparation sets the stage for achieving perfectly crispy mini pizzas.
Step 2: Add the Pizza Sauce
Once the oven is preheated, take your mini pizza crusts and spread 1–2 tablespoons of pizza sauce on each one. Make sure to leave a small border around the edges, allowing the crusts to rise and crisp up nicely. This step is essential for ensuring every bite is bursting with flavor.
Step 3: Sprinkle the Cheese
Now it's time to create that gooey goodness! Generously sprinkle shredded mozzarella over half of your mini pizzas. For the others, take your string cheese and lay the strands in a criss-cross fashion to create fun “bandages” for magical mummies. This will add to the festive spirit of your Halloween Mini Pizzas.
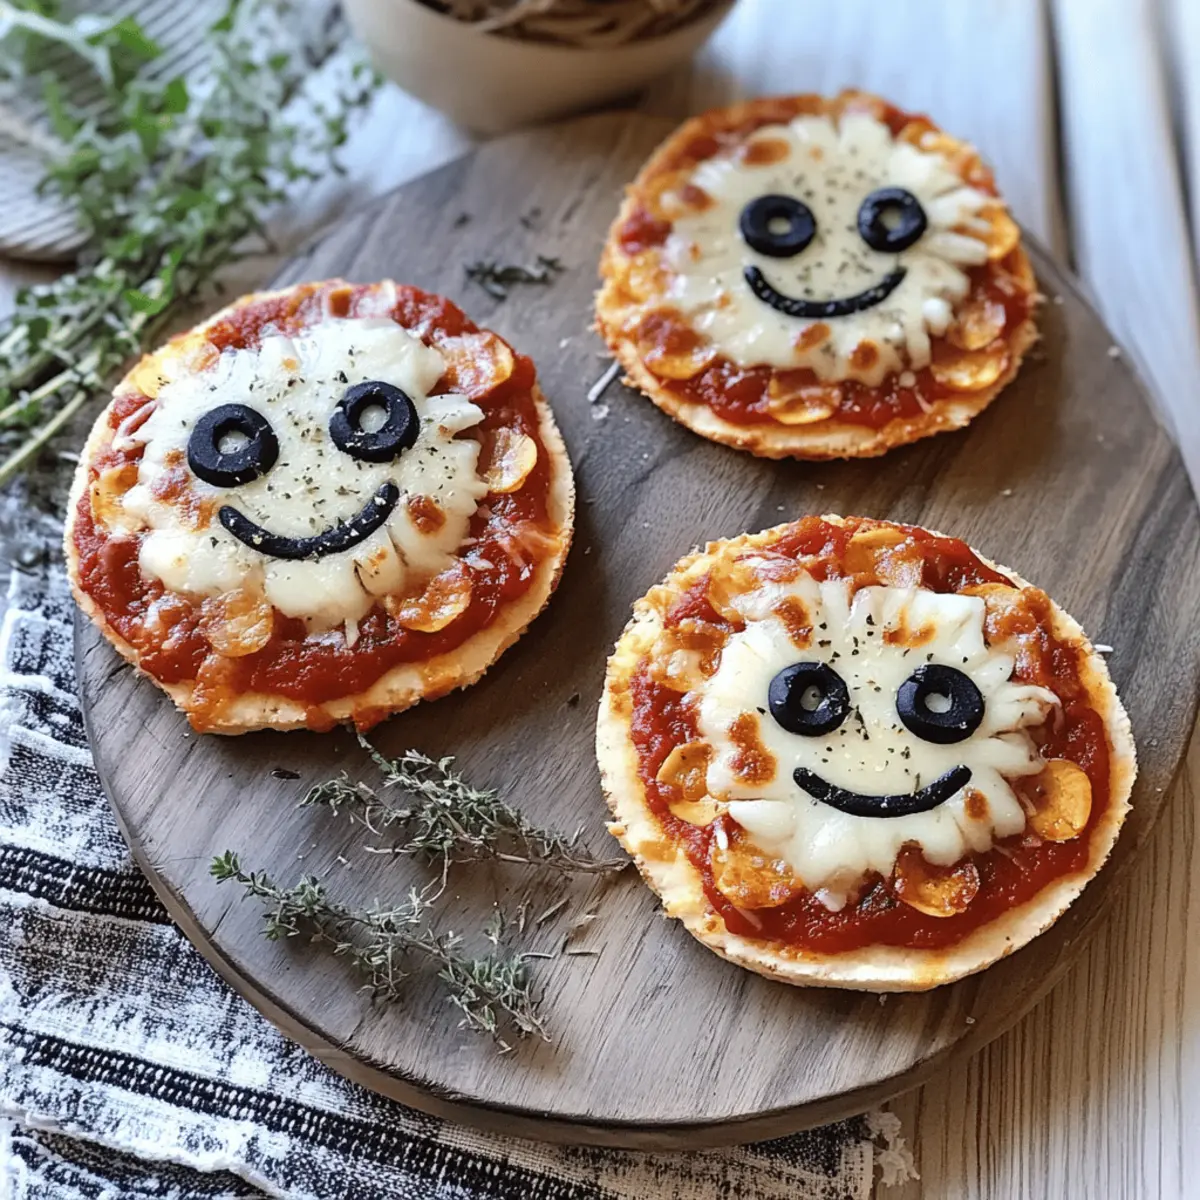
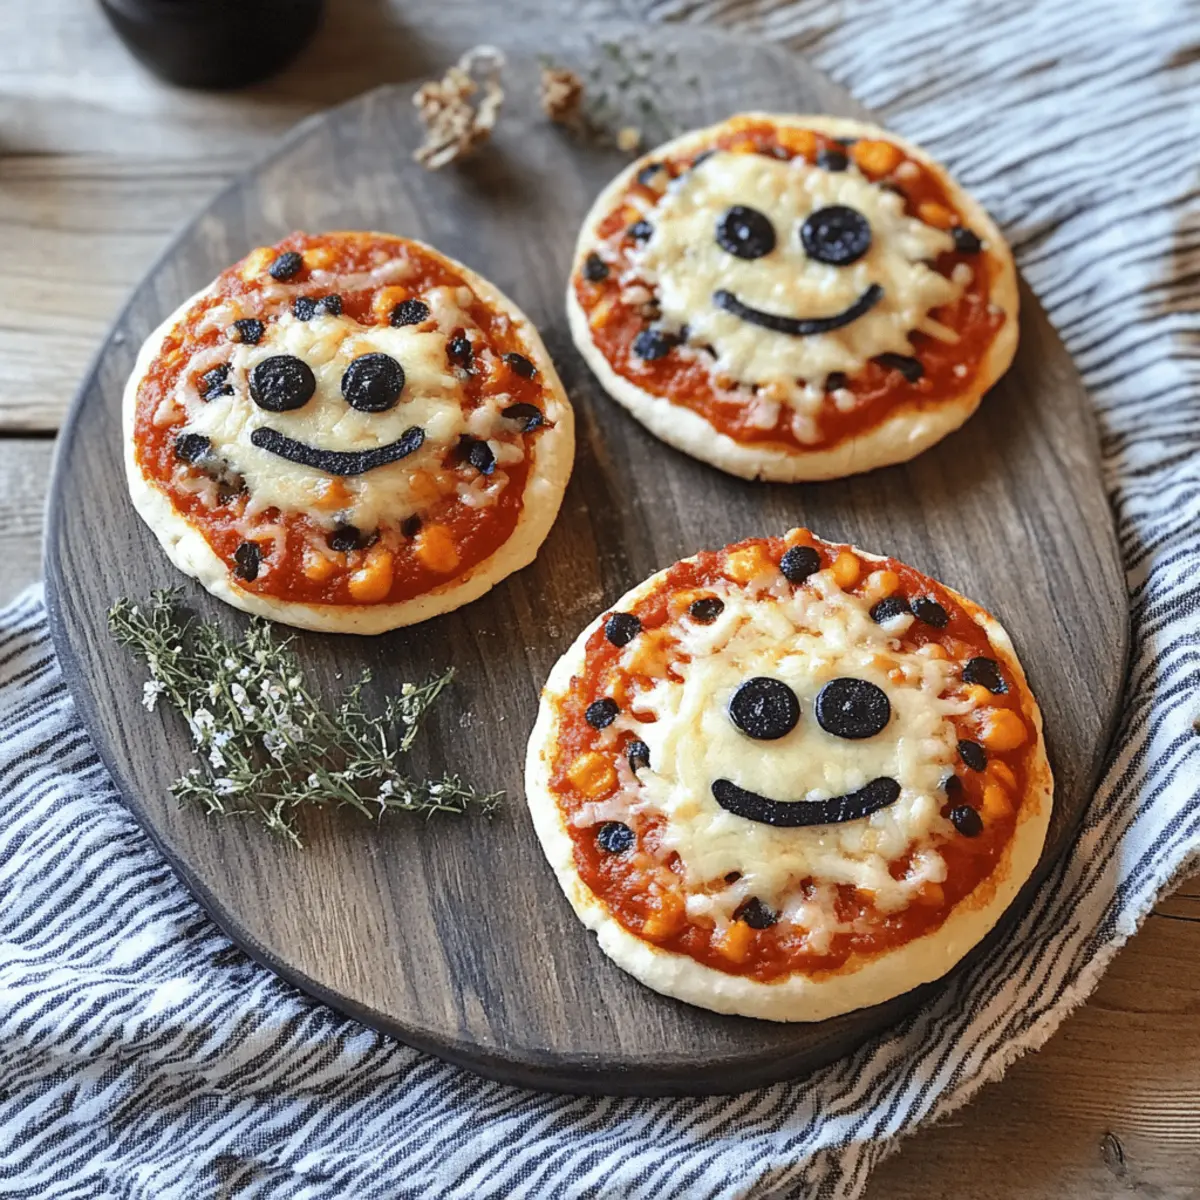
Step 4: Decorate Your Pizzas
Get creative! Use sliced black olives to depict spider bodies or eyes, and add strips of orange and green bell peppers to craft smiles on your jack-o'-lantern faces. You can also place mini pepperoni pieces as cheeky accents. This is where your imagination truly shines as you transform each pizza into a spooky masterpiece.
Step 5: Bake to Perfection
Carefully place your decorated mini pizzas in the oven for 10–12 minutes. Keep an eye on them as they bake; they should turn golden brown and bubbly. To avoid uneven cooking, remember to rotate the baking sheet halfway through, ensuring that all your Halloween Mini Pizzas are perfectly cooked.
Step 6: Cool and Garnish
After the baking time is up, remove your mini pizzas from the oven and let them cool for about 2 minutes. This brief cooling period allows the cheese to set. Before serving, garnish with freshly chiffonade basil for an aromatic finish, and get ready to delight your family with these fun Halloween Mini Pizzas!

What to Serve with Halloween Mini Pizzas
As the aroma of freshly baked treats fills your home, consider these delightful pairings to create a memorable meal.
- Crispy Salad: A light mixed greens salad with a tangy vinaigrette offers a refreshing contrast to cheesy savory bites.
- Garlic Bread Sticks: Soft, buttery garlic bread sticks are a classic favorite that pair wonderfully with pizza festivities. They add a delightful texture to the meal!
- Fruit Platter: A colorful selection of seasonal fruits brings sweetness and balance to the table, making it an enticing option for guests of all ages.
- Spooky Punch: Serve a festive Halloween-themed punch, perhaps with floating fruit eyeballs, to add a fun and whimsical drink choice for kids and adults alike!
- Veggie Dippers: A platter of crunchy carrots, celery, and cucumber with a dip creates a crunchy, healthful option, pulling everything together with fresh flavors.
- Chocolate-Covered Pretzels: As a sweet treat, chocolate-covered pretzels offer a delightful salty and sweet experience, perfect for festive snacking alongside your mini pizzas.
- Caramel Apple Slices: These sweet slices are not only delicious but also fit with the Halloween theme, bringing fall flavors to your spooky dinner!
- Pumpkin Spice Cookies: Embrace autumn vibes with soft pumpkin spice cookies as a dessert option to end your Halloween feast on a sweet note.
- Sparkling Lemonade: A fizzy sparkling lemonade is the perfect effervescent drink to cleanse the palate between bites of cheesy goodness.
How to Store and Freeze Halloween Mini Pizzas
Fridge: Keep leftover Halloween Mini Pizzas in an airtight container for up to 3 days. Be sure to separate layers with parchment paper to prevent sticking.
Freezer: For longer storage, wrap mini pizzas individually in plastic wrap and then place them in a freezer-safe bag. They can be frozen for up to 2 months.
Reheating: When you’re ready to enjoy them again, heat frozen mini pizzas in the oven at 350°F (175°C) for about 15-20 minutes or until heated through. Enjoy that freshly baked taste!
Tips for the Best Halloween Mini Pizzas
- Perfect Sauce Spread: Make sure to leave a small border when spreading the pizza sauce; this allows the crust to rise and stay crispy.
- Cheese Control: Don’t overload with mozzarella; about a cup should suffice for gooey goodness without overwhelming the crust.
- Creative Decorations: Let your imagination run wild! Use various toppings to transform each pizza into unique Halloween characters.
- Even Baking: Rotate your baking sheet halfway through to ensure all the Halloween Mini Pizzas bake evenly, avoiding any burned edges.
- Cooling Time: Allow your pizzas to cool for about 2 minutes after baking; this helps set the cheese and makes them easier to handle.
Make Ahead Options
These Halloween Mini Pizzas are a fantastic meal prep option that saves time and adds fun to your holiday gatherings! You can prepare the mini pizza crusts with sauce and toppings up to 24 hours in advance—just assemble the pizzas, cover them tightly with plastic wrap, and refrigerate. This allows the flavors to meld beautifully while keeping the crusts fresh. When you're ready to bake, simply pop them in the oven at 425°F (220°C) for 10–12 minutes, just until they're golden and bubbly. For best results, remember to bake straight from the fridge to maintain that delicious crunch. Enjoy the ease of meal prep while delighting in these festive treats that kids and adults will love!
Halloween Mini Pizzas Variations
Get ready to make these Halloween Mini Pizzas even more exciting with a few delightful twists!
- Veggie Delight: Add more sliced veggies like mushrooms, spinach, or zucchini for a colorful, healthy boost. The added crunch and flavor give each bite a delightful surprise!
- Cheesy Garlic: Mix minced garlic with your pizza sauce for an aromatic, savory base that elevates the flavor. Your kitchen will smell amazing while you bake these up!
- Meat Lovers: Top your pizzas with cooked sausage or diced ham for a heartier meal. These options add a satisfying protein punch, pleasing the meat lovers in your family.
- Gluten-Free: Substitute regular mini pizza crusts with gluten-free alternatives for a scrumptious option that everyone can enjoy. Making these mini pizzas inclusive will win over all your guests!
- Spicy Kick: Sprinkle some red pepper flakes or jalapeño slices for a zesty touch that spice enthusiasts will love! This adds warmth without overpowering the festive spirit of the pizzas.
- Sweet Twist: Drizzle a bit of honey or fig jam over the finished pizzas for a sweet contrast. It’s unexpected but creates a unique flavor profile you won’t forget!
- Herb-Infused: Use pesto instead of pizza sauce for a fresh and aromatic twist. The vibrant herbiness gives these mini pizzas a delightful Mediterranean flair.
- Dessert Option: Transform them into dessert pizzas! Top crusts with Nutella, banana slices, and a sprinkle of powdered sugar for a fun, sweet version. Perfect for ending your spooky feast on a sweet note!
These simple variations let you play with flavors and ingredients, ensuring that every batch of Halloween Mini Pizzas feels fresh and exciting.
Halloween Mini Pizzas Recipe FAQs
How do I choose the right mini pizza crusts?
Absolutely! Look for mini pizza crusts that are golden and crisp, which indicates freshness. Check the expiration date on the packaging, and if possible, choose those with a higher fiber content for a healthier option. Homemade crusts are great too if you have the time!
What’s the best way to store leftover Halloween Mini Pizzas?
I recommend placing any leftovers in an airtight container in the fridge, where they can stay fresh for up to 3 days. Make sure to separate layers with parchment paper to prevent sticking; this will keep them ready for a quick snack or meal!
Can I freeze Halloween Mini Pizzas, and how?
Of course! First, let the baked mini pizzas cool completely. Then, wrap each one individually in plastic wrap, ensuring it's tightly sealed. Next, place them in a freezer-safe bag and label with the date. They’ll keep in the freezer for up to 2 months. When you're ready to enjoy them, simply bake from frozen in a preheated oven at 350°F (175°C) for about 15-20 minutes, or until hot and crispy!
What if the cheese is burning while baking?
If you notice the cheese starting to burn, it's best to lower the oven temperature to 400°F (200°C) and keep an eye on them. You can also lightly tent the pizzas with aluminum foil during the last few minutes of baking to prevent direct heat from browning the cheese too quickly. Remember to rotate the baking sheet halfway through for even cooking!
Are these Halloween Mini Pizzas suitable for children with allergies?
Yes, but be sure to check the ingredient labels closely. For dairy allergies, lactose-free cheese or a dairy-free alternative works wonder. For gluten concerns, using gluten-free mini pizza crusts is a fantastic option. Always customize toppings to accommodate any personal dietary restrictions, and feel free to swap out any ingredient that doesn't work for your family!
Spooky Halloween Mini Pizzas That Kids Will Love
Ingredients
Equipment
Method
- Preheat your oven to 425°F (220°C) and lightly mist a baking sheet with olive oil spray.
- Spread 1-2 tablespoons of pizza sauce on each mini pizza crust, leaving a small border.
- Sprinkle shredded mozzarella over half of the mini pizzas and lay string cheese in a criss-cross for the others.
- Decorate with sliced black olives, bell pepper strips, and mini pepperoni for creative designs.
- Bake in the oven for 10-12 minutes until golden brown and bubbly, rotating halfway through.
- Remove from oven, let cool for 2 minutes, and garnish with chiffonade basil before serving.


Leave a Reply