
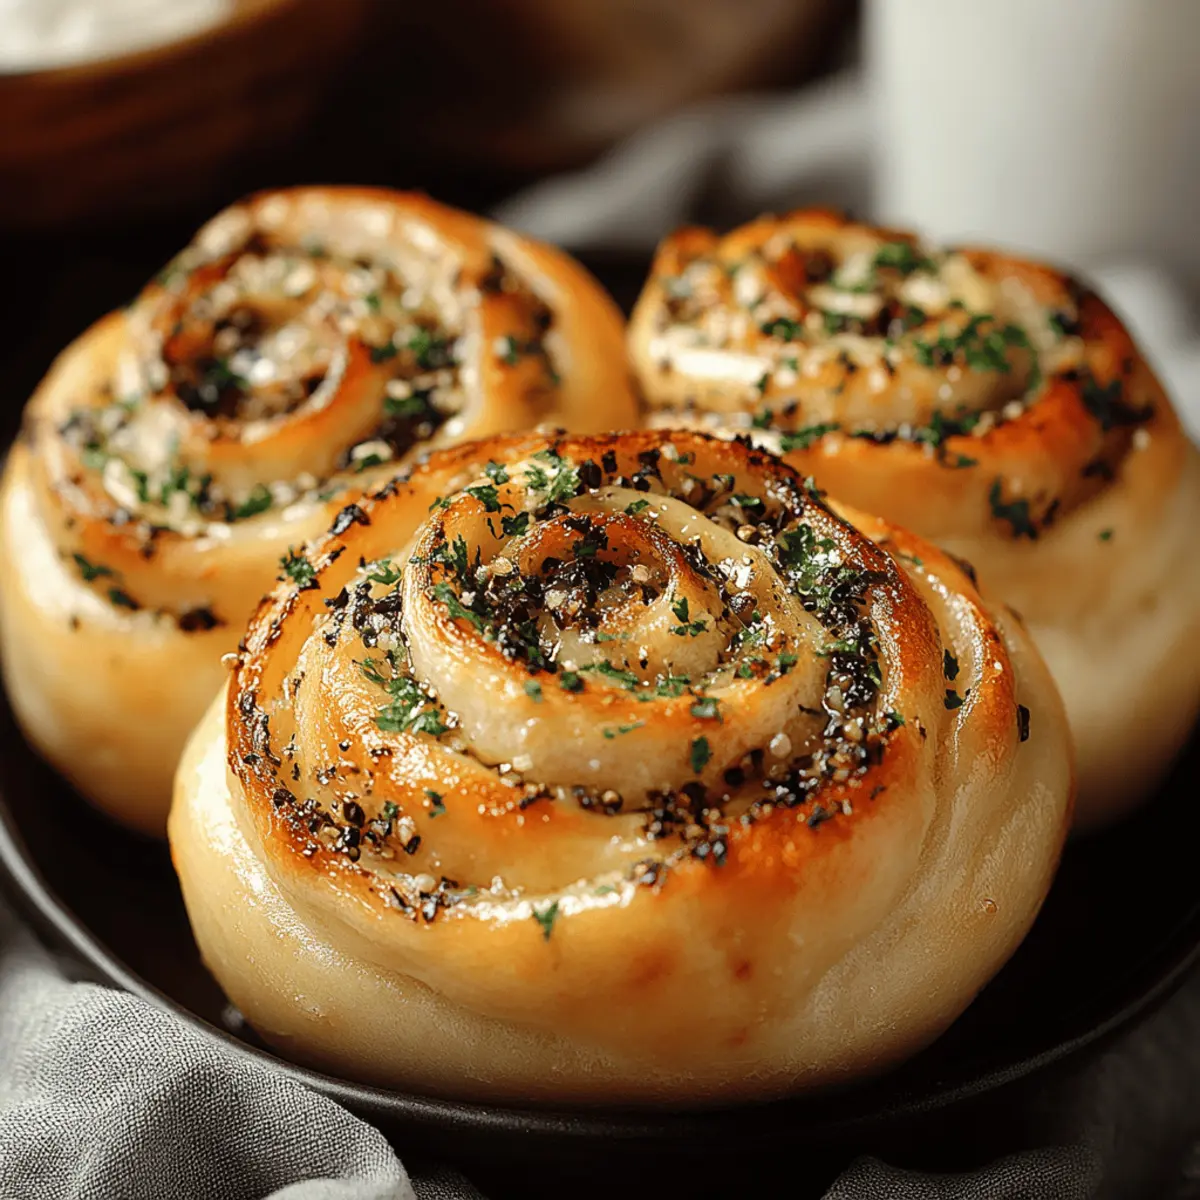
As I stood in my kitchen, the warm aroma of freshly baked bread quickly enveloped me, reminding me of family gatherings where laughter mingled with the scent of something magical. Today, I'm thrilled to share my recipe for Garlic-Swirl Rolls, which have the uncanny ability to transform an ordinary meal into a centerpiece that sparks joy and conversation. These rolls are not only a delightful comfort food but also a quick crowd-pleaser that can elevate any dinner to a special occasion. With just a handful of ingredients and a little bit of patience, you'll create fluffy, garlicky spirals that your family and friends won't soon forget. Ready to roll up your sleeves and dive into a world of homemade goodness? Let’s get started!
Why are Garlic-Swirl Rolls a must-try?
Comforting, these Garlic-Swirl Rolls fill your home with an irresistible aroma that instantly makes everyone feel cozy and welcomed. Quick and Easy, this recipe streamlines baking, requiring minimal effort for maximum flavor—perfect even for novice chefs. Versatile enough to complement any meal, they make a delightful side for pasta or a touching addition to a family gathering. Don’t forget, these rolls are showstoppers that impress guests at dinner parties without the hassle—just pair them with your favorite dip or a simple salad! For more homemade delights, check out my baking tips for achieving fluffy breads every time.
Garlic-Swirl Rolls Ingredients
For the Dough
- All-purpose flour – This is the foundation for your rolls, providing structure and fluffiness.
- Active dry yeast – Essential for leavening, helping your rolls rise to fluffy perfection.
- Warm water – Activates the yeast; make sure it’s not too hot to keep the yeast alive.
- Sugar – Adds a hint of sweetness and helps with the fermentation process.
- Salt – Balances flavors while strengthening the dough.
- Olive oil – Makes the dough tender and imparts a rich flavor.
For the Filling
- Garlic cloves – Freshly minced garlic delivers a bold flavor that makes these rolls irresistible.
- Butter – Adds a rich, savory note, helping the garlic to mingle beautifully.
- Parsley – Fresh parsley brightens and adds a pop of color to your rolls.
- Parmesan cheese – Grated for an extra layer of flavor that enhances the garlic.
For Brushing
- Butter – A final brush of melted butter makes the rolls golden-brown and extra delicious.
Now that your taste buds are tingling, you’ll see how easy it is to whip up these Garlic-Swirl Rolls that become the star of any meal!
Step‑by‑Step Instructions for Garlic-Swirl Rolls
Step 1: Prepare the Dough
In a large mixing bowl, combine warm water and sugar, then sprinkle the active dry yeast over the top. Let this mixture sit for about 5-10 minutes until frothy, indicating the yeast is activated. Gradually stir in all-purpose flour, salt, and olive oil, mixing until a soft dough forms. Knead the dough on a floured surface for about 8-10 minutes until smooth and elastic.
Step 2: Prepare the Filling
While the dough is rising, melt butter in a small saucepan over low heat. Add the freshly minced garlic and sauté for about 2-3 minutes until fragrant, but not browned. Remove from heat and mix in chopped parsley and grated Parmesan cheese. Set this flavorful filling aside to cool slightly before spreading.
Step 3: Shape the Rolls
Once the dough has doubled in size, punch it down gently and roll it out on a floured surface into a rectangle about ¼-inch thick. Spread the garlic filling evenly across the dough, leaving a small border. Roll the dough tightly into a log, then slice into equal pieces, approximately 1.5 inches wide. Place the rolls cut-side up in a greased baking pan.
Step 4: Allow for a Second Rise
Cover the shaped rolls with a clean kitchen towel and let them rise in a warm area for about 30-40 minutes, or until doubled in size. This step is essential for achieving fluffy Garlic-Swirl Rolls, so be patient and allow the rolls to puff up beautifully during this time.
Step 5: Bake the Rolls
Preheat your oven to 375°F (190°C). Once the rolls have risen, brush the tops with melted butter to add a golden shine. Bake in the preheated oven for 20-25 minutes, until they are golden brown and the aroma of garlic fills your kitchen. Allow the rolls to cool slightly before serving to enjoy that perfect swirl of flavor.
Expert Tips for Garlic-Swirl Rolls
- Dough Temperature: Use warm water around 110°F (43°C) to activate the yeast properly; too hot may kill it, while too cold will stall the rising process.
- Knead Well: Make sure to knead the dough for a full 8-10 minutes; this develops gluten, ensuring your Garlic-Swirl Rolls are light and fluffy.
- Let it Rise: Don't rush the second rise; allow the rolls to double in size for optimal fluffiness and texture—it's worth the wait!
- Uniform Slices: When cutting the rolls, aim for uniform pieces to ensure even baking. This way, all Garlic-Swirl Rolls will have that signature golden-brown finish.
- Storage Tip: If you have leftovers, store them in an airtight container at room temperature, and reheat in the oven to maintain that delightful texture.
Variations & Substitutions for Garlic-Swirl Rolls
Feel free to explore and personalize these Garlic-Swirl Rolls to ignite your taste buds and create your own masterpiece!
-
Gluten-Free: Substitute all-purpose flour with a 1:1 gluten-free flour blend for delicious, gluten-free rolls that everyone can enjoy.
-
Vegan: Replace butter with vegan margarine and use plant-based milk instead of regular butter for a wholesome vegan twist on the classic recipe.
-
Cheesy Delight: Add extra cheese by folding in shredded mozzarella or cheddar into the filling for an extra indulgent, cheesy flavor and melty goodness.
-
Herb-Infused: Experiment with fresh herbs like dill or thyme in the filling for a unique herbal depth that complements the garlic beautifully.
-
Spicy Kick: Incorporate red pepper flakes or finely diced jalapeño into the filling for a delightful surprise that elevates the flavor profile with heat.
-
Caramelized Onions: Sauté and add caramelized onions to the garlic filling for added sweetness and depth, creating a rich and savory flavor explosion.
-
Nutty Crunch: Fold in finely chopped walnuts or pecans in the filling to introduce a delightful crunch that contrasts with the soft rolls.
-
Honey Drizzle: Sweeten the experience by drizzling a little honey or agave syrup over the warm rolls right before serving, enhancing the garlic with a sweet finish.
Each of these variations will help you invent a new family favorite while staying true to the heartwarming essence of Garlic-Swirl Rolls. If you enjoy baking, don't forget to check out my baking tips for additional techniques and tricks!
Make Ahead Options
These Garlic-Swirl Rolls are perfect for meal prep enthusiasts looking to save time on busy weeknights! You can prepare the dough and filling up to 24 hours in advance. Simply follow the steps to make the dough, cover it tightly with plastic wrap, and refrigerate until ready to shape. The filling can also be made ahead; just store it in an airtight container in the fridge for up to 3 days. When you're ready to serve, roll out the dough, spread the filling, shape the rolls, and let them rise before baking. This way, you'll achieve that delightful, fluffy texture while enjoying the deliciousness of homemade garlic-rich goodness—just as if you made them fresh that day!
How to Store and Freeze Garlic-Swirl Rolls
Room Temperature: Store leftover Garlic-Swirl Rolls in an airtight container at room temperature for up to 3 days to maintain their fluffy texture.
Fridge: If you want to keep them longer, you can refrigerate the rolls in an airtight container for up to a week; however, they may lose some of their softness.
Freezer: For best results, freeze Garlic-Swirl Rolls wrapped tightly in plastic wrap and then placed in a freezer bag for up to 3 months.
Reheating: To reheat, allow frozen rolls to thaw in the fridge overnight, then warm them in the oven at 350°F (175°C) for about 10-15 minutes until heated through.
What to Serve with Garlic-Swirl Rolls?
Elevate your meal with delightful pairings that perfectly complement the warm, garlicky goodness of these rolls.
-
Creamy Tomato Soup: This classic pairing creates a comforting bowl of luscious flavor that hugs your taste buds. Dip the warm rolls into the soup for a magical experience.
-
Fresh Garden Salad: A vibrant salad adds crunch and freshness, balancing the rich garlic flavors while brightening up your plate. Toss in your favorite veggies and a tangy vinaigrette!
-
Savory Meatballs: Juicy meatballs in marinara sauce not only harmonize with the rolls but also make for a hearty meal that satisfies any appetite. The garlic pairs beautifully with the spices of the meatballs.
-
Garlic Butter Asparagus: A perfect veggie side, the sautéed asparagus cooked in garlic butter echoes the flavors of the rolls, creating a cohesive dining experience.
-
Roasted Root Vegetables: Sweet and savory roasted carrots, potatoes, and beets add earthy notes that enhance your meal, bringing warmth and texture to the table.
-
Herb-Infused Olive Oil: A small bowl of fragrant olive oil infused with herbs is perfect for dipping. The richness enhances the garlic flavor in the rolls, creating an irresistible experience.
-
Sparkling Lemonade: Quench your thirst with a refreshing glass of sparkling lemonade, for a bright and refreshing drink that cuts through the richness of the rolls.
-
Vanilla Ice Cream: For dessert, a scoop of creamy vanilla ice cream drizzled with warm chocolate sauce offers a delightful and indulgent finish to your comforting meal.
-
Wine Pairing: A crisp Chardonnay or a light-bodied red wine complements the flavors of the Garlic-Swirl Rolls beautifully, making your dinner feel even more special.
Garlic-Swirl Rolls Recipe FAQs
How do I know if my yeast is active?
Absolutely! To check if your active dry yeast is alive, mix it with warm water (around 110°F) and a bit of sugar. Let it sit for about 5-10 minutes. If it becomes frothy and bubbly, your yeast is good to go!
How should I store leftover Garlic-Swirl Rolls?
You can store leftover Garlic-Swirl Rolls in an airtight container at room temperature for up to 3 days. If you prefer, they can also be kept in the fridge for up to a week; just keep in mind that this might make them slightly less fluffy.
Can I freeze Garlic-Swirl Rolls?
Yes, you can! To freeze, wrap each roll tightly in plastic wrap and then place them in a freezer-safe bag. This keeps them fresh for up to 3 months. When you’re ready to enjoy, let them thaw in the fridge overnight and warm up in the oven at 350°F for about 10-15 minutes.
Why are my rolls not rising as expected?
If your Garlic-Swirl Rolls aren't rising, it might be due to the temperature of your yeast mixture. Ensure that you're using warm water, not hot, as water that's too hot can kill the yeast. Additionally, be patient during the rising process—sometimes it just takes a little more time, especially if your kitchen is colder.
Are Garlic-Swirl Rolls suitable for those with dietary restrictions?
When it comes to dietary considerations, Garlic-Swirl Rolls made with all-purpose flour and butter may not be suitable for gluten-free or dairy-free diets. However, you can easily adapt this recipe by using gluten-free flour blends and dairy-free butter alternatives. Just be sure to check any alternative product labels for allergens!
What can I do if I have leftover filling?
If you happen to have leftover garlic filling, don’t throw it away! You can use it to enhance other dishes like pasta or roasted vegetables. Just store it in the fridge for up to a week in an airtight container. That way, you get to savor those garlicky flavors in your other meals too!
Irresistible Garlic-Swirl Rolls That Bring Comfort Home
Ingredients
Equipment
Method
- In a large mixing bowl, combine warm water and sugar, then sprinkle the active dry yeast over the top. Let sit for about 5-10 minutes until frothy.
- Gradually stir in all-purpose flour, salt, and olive oil, mixing until a soft dough forms. Knead for about 8-10 minutes until smooth and elastic.
- Melt butter in a small saucepan over low heat. Add minced garlic and sauté for about 2-3 minutes until fragrant. Remove from heat and mix in parsley and Parmesan cheese. Set aside to cool.
- Once the dough has doubled in size, punch it down gently and roll it out on a floured surface into a rectangle about ¼-inch thick. Spread the garlic filling evenly across the dough, leaving a small border.
- Roll the dough tightly into a log, then slice into pieces approximately 1.5 inches wide. Place rolls cut-side up in a greased baking pan.
- Cover with a clean kitchen towel and let rise in a warm area for about 30-40 minutes, until doubled in size.
- Preheat your oven to 375°F (190°C). Brush the tops of the rolls with melted butter and bake for 20-25 minutes until golden brown.
- Allow rolls to cool slightly before serving.


Leave a Reply