
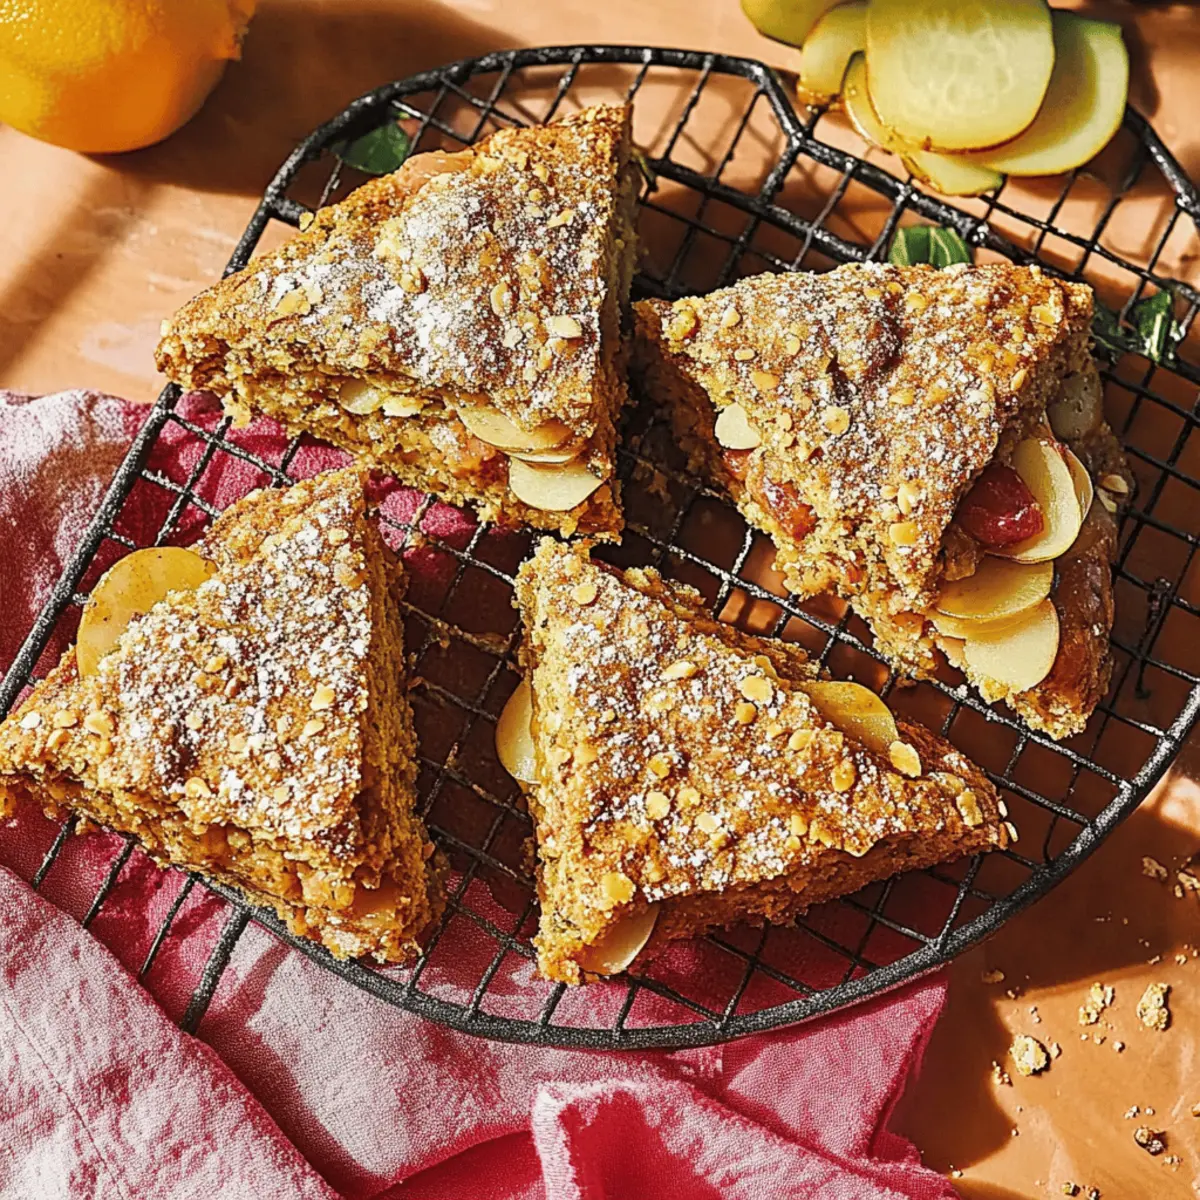
As the scent of warm ginger fills the air, my heart knows we're about to embark on a delightful journey of flavor. These Ginger Scones are not just any ordinary baked good; they evoke cozy mornings and luxurious tea times, all while coaxing you away from those boring fast-food runs. The beauty of this recipe lies in its quick preparation and the joy it brings as a comforting treat. With just a handful of ingredients, you can whip up eight perfectly spiced scones that are sure to impress your loved ones. So, are you ready to fill your kitchen with an aromatic tapestry and create something truly special? Let’s dive in and make magic happen!

What Makes Ginger Scones So Special?
Irresistible warmth: The rich aroma of ginger and spices envelops your kitchen, creating a welcoming environment.
Quick to make: In just 47 minutes, you can create a delightful treat that’s perfect for any time of day.
Comforting texture: These scones boast a flaky, tender crumb that simply melts in your mouth.
Versatile delight: Enjoy them plain, or elevate your experience with your favorite jam or butter, making them a delightful breakfast or afternoon snack.
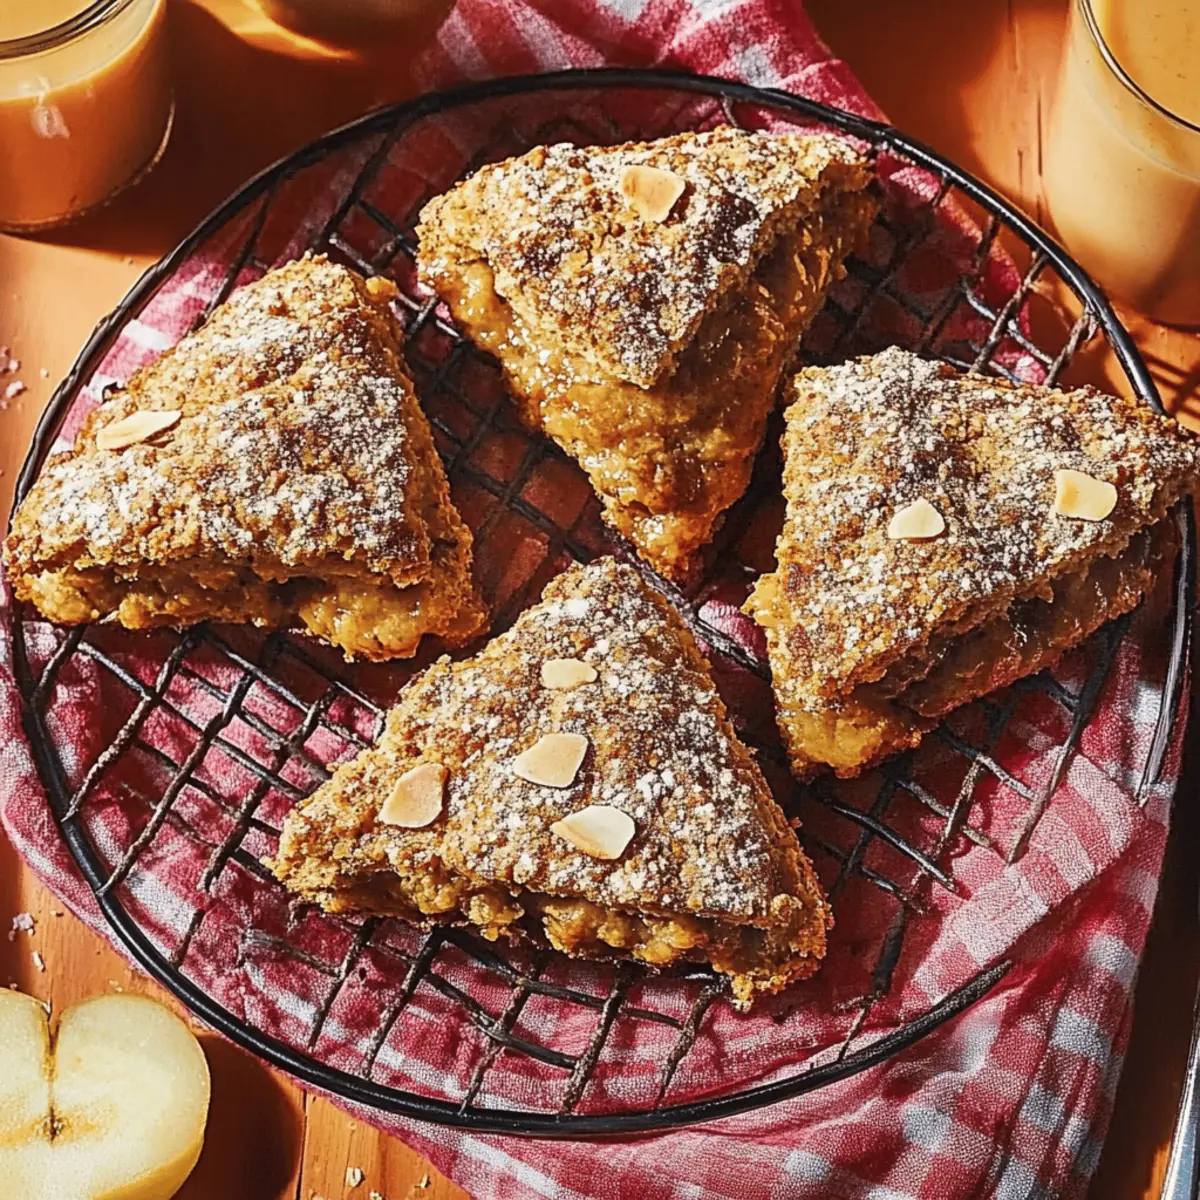
Crowd-pleaser: Whether you’re hosting a tea party or simply treating yourself, these scones will impress family and friends alike. Try serving them alongside a warm cup of chai or coffee for the perfect pairing!
Ginger Scone Ingredients
• Get ready to create something wonderful!
For the Scone Base
• All-purpose flour – essential for that perfect flaky texture.
• Baking powder – helps the scones rise beautifully.
• Baking soda – balances the acidity of other ingredients for optimal texture.
• Salt – a pinch enhances overall flavor.
For the Spices
• Ground ginger – the star of the show that gives these Ginger Scones their distinctive kick.
• Ground cinnamon – adds a warm, comforting sweetness.
• Ground cardamom – a hint of exotic spice that elevates the flavor profile.
For the Fats
• Cold butter – ensures a light, flaky texture; keep it chilled for best results.
For the Sweetness
• Diced ginger – bursts of flavor that bring a delightful chewiness.
• Brown sugar – imparts a rich sweetness and moisture.
• Coarse sugar – for topping, adding a lovely crunch on the outside.
For the Creaminess
• Heavy cream – provides the necessary fat for a rich, tender scone.
• Egg – for an egg wash that creates a glossy, golden finish.
Let’s get baking and experience the joy of homemade Ginger Scones together!
Step‑by‑Step Instructions for Ginger Scones
Step 1: Preheat the Oven
Set your oven rack in the top third of the oven and preheat to 425°F. This high temperature is key to achieving that deliciously flaky texture in your Ginger Scones. While the oven warms up, lightly grease a baking sheet or line it with parchment paper for easy cleanup when your scones are ready.
Step 2: Mix Dry Ingredients
In a medium bowl, whisk together 2 cups of all-purpose flour, 1 tablespoon of baking powder, ½ teaspoon of baking soda, ½ teaspoon of salt, 1 tablespoon of ground ginger, 1 teaspoon of ground cinnamon, and ½ teaspoon of ground cardamom. This mix of dry ingredients will create a warm and aromatic foundation for your Ginger Scones, preparing your kitchen for the magic ahead.
Step 3: Incorporate the Butter
Add ¼ cup of cold butter into your dry mixture and toss to coat the butter with the flour. Using your fingers or a pastry cutter, press the butter pieces into small flat ones. This step is crucial because cold butter helps create that light, flaky texture in your finished Ginger Scones.
Step 4: Add Diced Ginger
Fold in ¼ cup of diced ginger, ensuring it's evenly distributed throughout the mixture. This will add bursts of flavor and a delightful chewiness to your Ginger Scones. Make sure the pieces are well combined before proceeding to keep the ginger flavor prominent in every bite.
Step 5: Combine Wet Ingredients
In a small bowl, whisk together ½ cup of heavy cream and ¼ cup of brown sugar until blended. This sweet and creamy mixture will provide the necessary moisture for your scones. Pour it into the flour mixture and gently mix until just combined, making sure not to over-mix, as this will alter the texture.
Step 6: Form the Dough
Transfer the dough to a lightly floured surface and, if necessary, fold it a few times to incorporate any dry bits. Aim for a firm, cohesive dough while being careful to keep it tender. This step helps to bring everything together without overworking the dough — your Ginger Scones deserve that gentle touch!
Step 7: Shape and Chill
Pat the dough into a circle about 1 inch thick and 7 inches across. If you'd like cleaner cuts and a fluffier rise, chill the dough for 10-15 minutes in the refrigerator to help firm it up. This extra step makes cutting your scones easier, ensuring they hold their shape during baking.
Step 8: Cut the Scones
With a chef's knife, cut the dough into eight wedges, pressing directly down without sawing to preserve the layers. Each piece should look inviting, and cutting it this way helps ensure even baking. Move quickly so the dough stays cold for that perfect texture in your Ginger Scones!
Step 9: Prepare for Baking
Arrange the cut scones evenly on the prepared baking sheet. To enhance their appearance, brush them gently with an egg wash made from 1 beaten egg, then sprinkle with coarse sugar. This will create a beautiful golden color and crunchy top, setting your Ginger Scones up for success.
Step 10: Bake the Scones
Bake your Ginger Scones for 18 to 22 minutes, rotating the pan after 14 minutes to ensure even baking. They’re done when they turn light gold and feel firm to the touch. The aroma of warm ginger will fill your kitchen, making it hard to wait for them to cool!
Step 11: Cool and Serve
Once baked, remove the scones from the oven and let them cool on a wire rack. You can enjoy them warm or at room temperature, perfect for sharing with others. Keep any leftovers well-wrapped at room temperature for 2 to 3 days or freeze for longer storage, making these Ginger Scones a delicious treat whenever the craving strikes!
Ginger Scones: Variations & Substitutions
Feel free to embrace your inner chef and make these Ginger Scones uniquely yours with these delightful variations!
-
Gluten-Free: Substitute the all-purpose flour with a gluten-free blend for a scone that everyone can enjoy.
-
Vegan: Replace the butter with coconut oil and the heavy cream with coconut milk for a plant-based treat. Your scones will have a lovely tropical twist!
-
Maple-Infused: Swap the brown sugar for maple syrup to infuse a warm, earthy flavor that pairs beautifully with ginger.
-
Cheesy Twist: Add ½ cup of shredded cheddar cheese for a savory take on your Ginger Scones. The contrast between sweet and savory creates a delicious flavor explosion!
-
Extra Spicy: Increase the ground ginger to 2 tablespoons for those who enjoy a bolder kick that highlights that ginger goodness.
-
Fruity Addition: Mix in ½ cup of dried cranberries or apricots for an added sweetness and chewy texture. These fruity bites will surprise and delight!
-
Citrus Zing: Add the zest of one lemon or orange to your dough for a refreshing and zesty flavor that complements the spices perfectly.
-
Nutty Crunch: Incorporate ¼ cup of chopped pecans or walnuts for a delightful crunch that adds layers of flavor and texture to your scones.
Experiment and let your creativity flow as you create your own signature Ginger Scones. They’re perfect for cozy mornings or impromptu gatherings, especially when paired with a warm cup of chai or a sweet spread like homemade jam. Happy baking!
Make Ahead Options
These Ginger Scones are perfect for meal prep, allowing you to enjoy homemade baked goods even on your busiest days! You can prepare the dough up to 24 hours in advance by cutting it into wedges and refrigerating them in an airtight container, which helps maintain their shape and flavor. For even greater convenience, you can bake the scones in advance and store them at room temperature for up to 3 days or freeze for up to 1 month. When ready to serve, simply reheat the scones in a warm oven for about 5-10 minutes until warmed through, ensuring they remain just as delightful as when freshly baked!
What to Serve with Ginger Scones
As you pull these aromatic Ginger Scones from the oven, consider how to enhance their delightful warmth with complementary flavors and textures.
- Velvety Cream Cheese Spread: This rich and tangy topping adds a luxurious creaminess that pairs beautifully with the spice of the scones.
- Homemade Strawberry Jam: Bright, sweet, and slightly tart, this jam offers a delightful contrast to the warm ginger flavor.
- Warm Chai Tea: The fragrant spices of chai echo those in the scones, creating a cozy, comforting atmosphere perfect for any time of day.
- Citrus-Infused Butter: A mix of zesty lemon or orange with softened butter adds a fresh, bright twist to each buttery bite.
- Apple Cider: Hot or cold, this drink gives a fruity depth that balances the spiciness of the ginger, making it a delightful pairing.
- Honey Drizzle: A light drizzle of honey enhances the sweetness, inviting you to savor each flaky bite even more.
- Fresh Fruit Salad: The juiciness of seasonal fruits provides a refreshing contrast, brightening up the flavors in your scones.
- Maple Syrup: Drizzling a touch of maple syrup over your scone introduces a hint of sweetness that’s simply divine.
- Candied Ginger: For an adventurous twist, chopped pieces of candied ginger can complement the scone's flavor while providing a chewy texture.
- Salted Caramel Sauce: This rich sauce brings a luxurious finish to the scones, blending sweet and salty elements that are irresistible!
How to Store and Freeze Ginger Scones
Room Temperature: Store baked Ginger Scones wrapped in plastic wrap or in an airtight container at room temperature for up to 3 days. Enjoy them fresh for the best flavor.
Fridge: If you want a little extra time, you can refrigerate the scones in an airtight container for up to a week. They may lose some flakiness, so reheat before serving.
Freezer: Freeze Ginger Scones individually wrapped in plastic wrap and then placed in a freezer-safe bag for up to 1 month. When ready to enjoy, thaw in the fridge overnight or warm in the oven.
Reheating: To refresh your scones, preheat your oven to 350°F and warm them for 5–7 minutes. This reintroduces their delightful texture and warms up those delightful spices!
Expert Tips for Perfect Ginger Scones
Perfectly Chilled Butter: Ensure your butter is cold and cut into small pieces. This creates those flaky layers that make your Ginger Scones irresistible.
Don’t Overmix: Gently mix the wet and dry ingredients until just combined. Overmixing can lead to tough scones, so keep them tender and light.
Chill if Needed: If the dough feels sticky, chill it for 10-15 minutes before cutting. This makes it easier to handle and helps the scones maintain their shape.
Proper Cutting Technique: Use a sharp knife and press straight down to cut the wedges. Avoid sawing to keep those lovely layers intact for an optimal rise.
Mind the Baking Time: Keep an eye on your scones during baking. Remove them once they are light gold and firm, as overbaking can lead to dryness.
Serve Warm: For that truly indulgent experience, enjoy your Ginger Scones warm, perhaps with a dollop of butter or your favorite jam!
Ginger Scones Recipe FAQs
How do I select ripe ginger?
Absolutely! When choosing ginger, look for firm, plump roots that feel heavy for their size. The skin should be smooth, not wrinkled or dried out, and you want to avoid any dark spots or mold. Fresh ginger has a strong aroma and a juicy texture.
How should I store my baked Ginger Scones?
To keep your Ginger Scones at their best, wrap them tightly in plastic wrap or store them in an airtight container at room temperature for up to 2 to 3 days. If you want them to last a little longer, you can refrigerate them in an airtight container for up to a week, but they may lose some of their flaky texture.
Can I freeze Ginger Scones?
Certainly! To freeze your Ginger Scones, first cool them completely. Then, wrap each scone tightly in plastic wrap and place them in a freezer-safe bag or container. They’ll stay fresh for up to 1 month. When you’re ready to enjoy, just thaw them in the fridge overnight or pop them in a preheated 350°F oven for 5-7 minutes to refresh their warm, flaky goodness.
What can I do if my scone dough is too sticky?
If you find your scone dough is too sticky while preparing, no need to worry! Simply lightly flour your work surface and your hands before handling the dough. You can also chill it in the refrigerator for about 10-15 minutes, which will firm it up and make it much easier to cut and shape.
Are Ginger Scones pet-friendly?
It’s best to keep Ginger Scones away from pets, especially because of the sugar and butter content. While the ginger itself isn't harmful to pets in small amounts, it’s always wise to avoid giving them any baked goods that aren’t specifically made for them.
Can I substitute ingredients in the Ginger Scone recipe?
Very! You can make some substitutions in this recipe if needed. For example, if you're out of heavy cream, you can use half-and-half or whole milk. If you need a gluten-free version, try using a 1:1 gluten-free flour blend, though this may require some adjustments to the baking time. Don’t forget to adjust sugar levels if using alternatives!

Irresistible Ginger Scones That Warm Your Heart and Home
Ingredients
Equipment
Method
- Preheat your oven to 425°F and lightly grease a baking sheet.
- In a medium bowl, whisk together all-purpose flour, baking powder, baking soda, salt, ground ginger, ground cinnamon, and ground cardamom.
- Add cold butter into your dry mixture and toss to coat. Press the butter pieces into small flat pieces.
- Fold in diced ginger, ensuring it's evenly distributed throughout the mixture.
- In a small bowl, whisk together heavy cream and brown sugar until blended, then pour into the flour mixture and mix gently.
- Transfer the dough to a lightly floured surface and fold it a few times to incorporate any dry bits.
- Pat the dough into a circle about 1 inch thick and 7 inches across. Chill for 10-15 minutes if needed.
- Cut the dough into eight wedges using a chef's knife, pressing down directly to preserve layers.
- Arrange the cut scones on the baking sheet. Brush with egg wash and sprinkle with coarse sugar.
- Bake for 18-22 minutes, rotating the pan after 14 minutes. They are done when they are light gold and firm to the touch.
- Let them cool on a wire rack before serving. Store leftovers wrapped at room temperature for 2-3 days.


Leave a Reply