
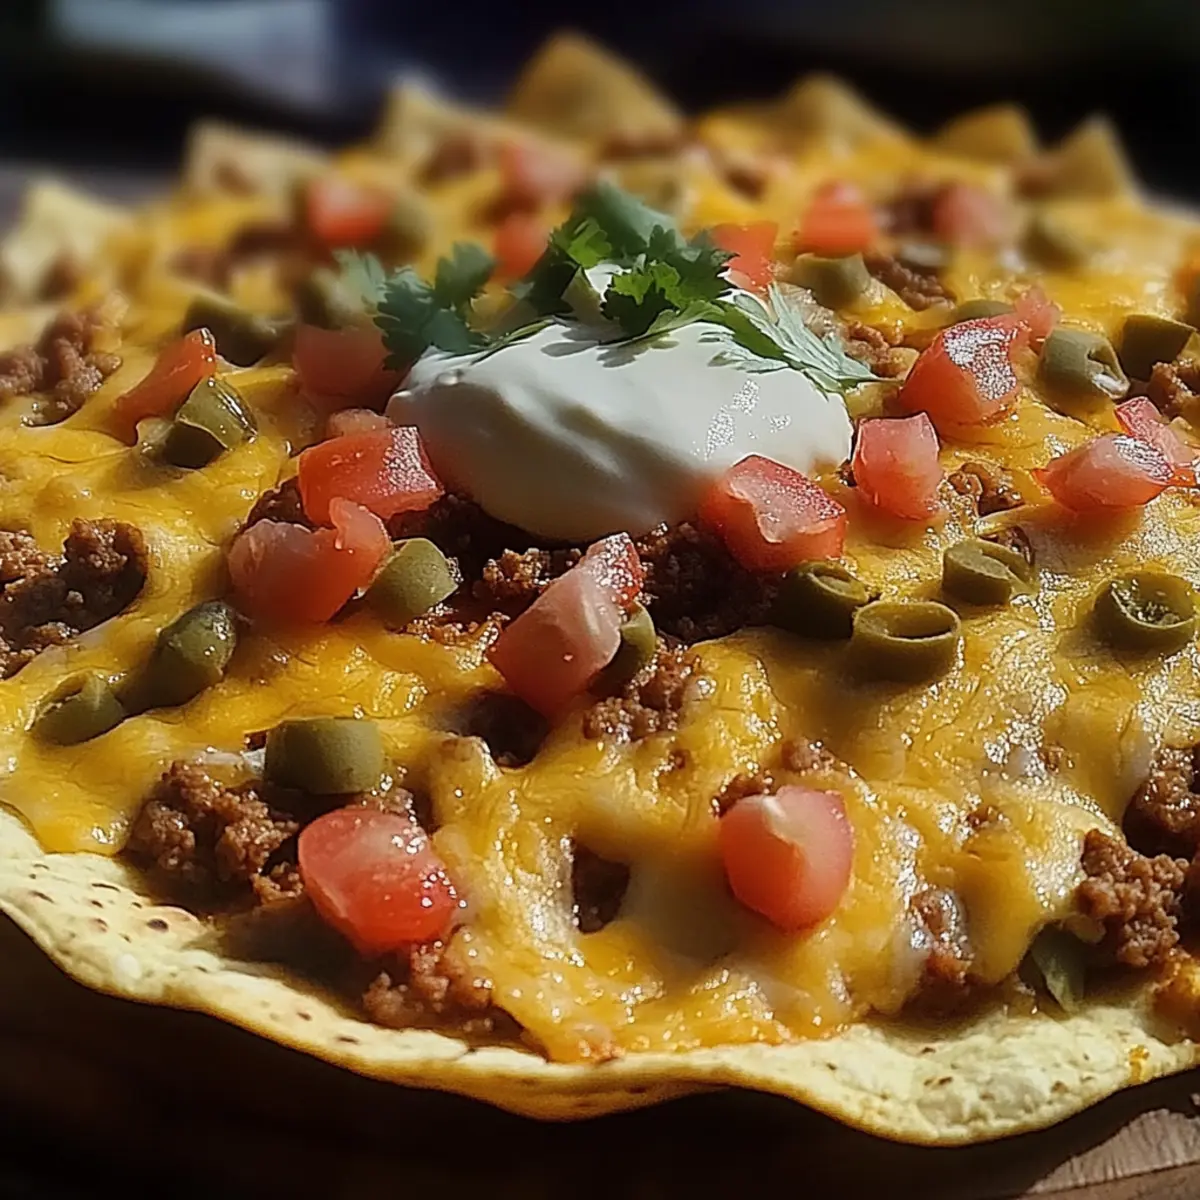
Stepping into my kitchen, the smell of sizzling beef and melting cheese takes me back to countless game days shared with friends, laughter echoing around the room. There’s something irresistible about Cheesy Beef Nachos that turns any gathering into a celebration. In just 25 minutes, you can whip up a dish that not only dazzles the taste buds but also fulfills that craving for comfort food—perfect for family nights or last-minute get-togethers. Packed with flavor and customizable to suit any palate, these nachos are sure to please everyone at the table. Ready to dive into a cheesy, meaty adventure? Let’s layer up those tortilla chips!
Why are Cheesy Beef Nachos a Must-try?
Taste Explosion: These Cheesy Beef Nachos pack a punch of flavor with perfectly seasoned ground beef and gooey melted cheese.
Quick and Easy: With just 25 minutes from prep to plate, you’ll have a delicious dish ready in no time, making it perfect for unexpected guests!
Customizable Delight: Pile on your favorite toppings like jalapeños, black olives, or fresh cilantro for a truly personalized creation that suits all taste buds.
Crowd-Pleaser: Whether for game day or a casual family dinner, these nachos always steal the show and leave everyone asking for more!
Serves a Group: Easily made to serve four, this recipe is ideal for gatherings, ensuring no one leaves hungry. For more crowd-pleasing ideas, check out my post on Easy Appetizers for Parties.
Cheesy Beef Nachos Ingredients
For the Beef
- Ground beef – a juicy choice that forms the savory base of your nachos.
- Taco seasoning – enhances the beef with bold flavors; feel free to adjust based on your spice preference.
- Salt – brings out the natural flavors of the beef.
- Black pepper – adds a bit of bite to the meat mixture.
For the Nachos
- Tortilla chips – the crunchy canvas for all the delicious toppings; choose thick ones for better support!
- Shredded cheddar cheese – adds a sharp, creamy flavor that complements the beef beautifully.
- Shredded Monterey Jack cheese – melts wonderfully, creating that gooey texture we all love in cheesy beef nachos.
For Toppings
- Diced tomatoes (optional) – adds freshness and a pop of color to your nachos.
- Sliced black olives (optional) – bring a salty tang that balances the richness of the cheese.
- Jalapeño (optional) – for those who like a little heat, these can be added fresh or pickled.
- Fresh cilantro (optional) – a sprinkle of this herb provides a burst of freshness and color.
- Sour cream – drizzled on top, it adds a creamy element and balances the spices.
- Sliced green onions – for a crunchy garnish that adds a touch of sharpness.
Dive into this flavorful feast and enjoy every cheesy bite of your homemade Cheesy Beef Nachos!
Step‑by‑Step Instructions for Cheesy Beef Nachos
Step 1: Cook the Ground Beef
In a large skillet over medium heat, add the pound of ground beef. Season it with taco seasoning, salt, and black pepper. Cook the beef for about 8-10 minutes, stirring occasionally, until it’s nicely browned and fully cooked. Make sure to crumble the meat as it cooks for even texture. Once done, drain any excess fat and remove the skillet from heat.
Step 2: Prepare the Tortilla Chips
Preheat your oven to 350°F (175°C). While the oven is warming up, take a large baking sheet and spread out your tortilla chips in an even layer. This creates the perfect base for your delicious Cheesy Beef Nachos. Ensure the chips are overlapping slightly for better support when loading them up with toppings.
Step 3: Layer the Nachos
Now it’s time to build your nacho masterpiece! Start by layering the cooked ground beef evenly over the tortilla chips. Then, sprinkle the shredded cheddar and Monterey Jack cheeses generously on top. These cheeses will melt beautifully, creating a gooey, delightful layer of flavor. Make sure to cover all the chips for even cheesiness.
Step 4: Bake the Nachos
Carefully place the loaded nachos in your preheated oven and bake for about 10 minutes. Keep an eye on them until the cheese is fully melted and bubbling, signaling that they are ready. This step transforms your Cheesy Beef Nachos into a warm, gooey delight perfect for sharing or indulging!
Step 5: Add Fresh Toppings
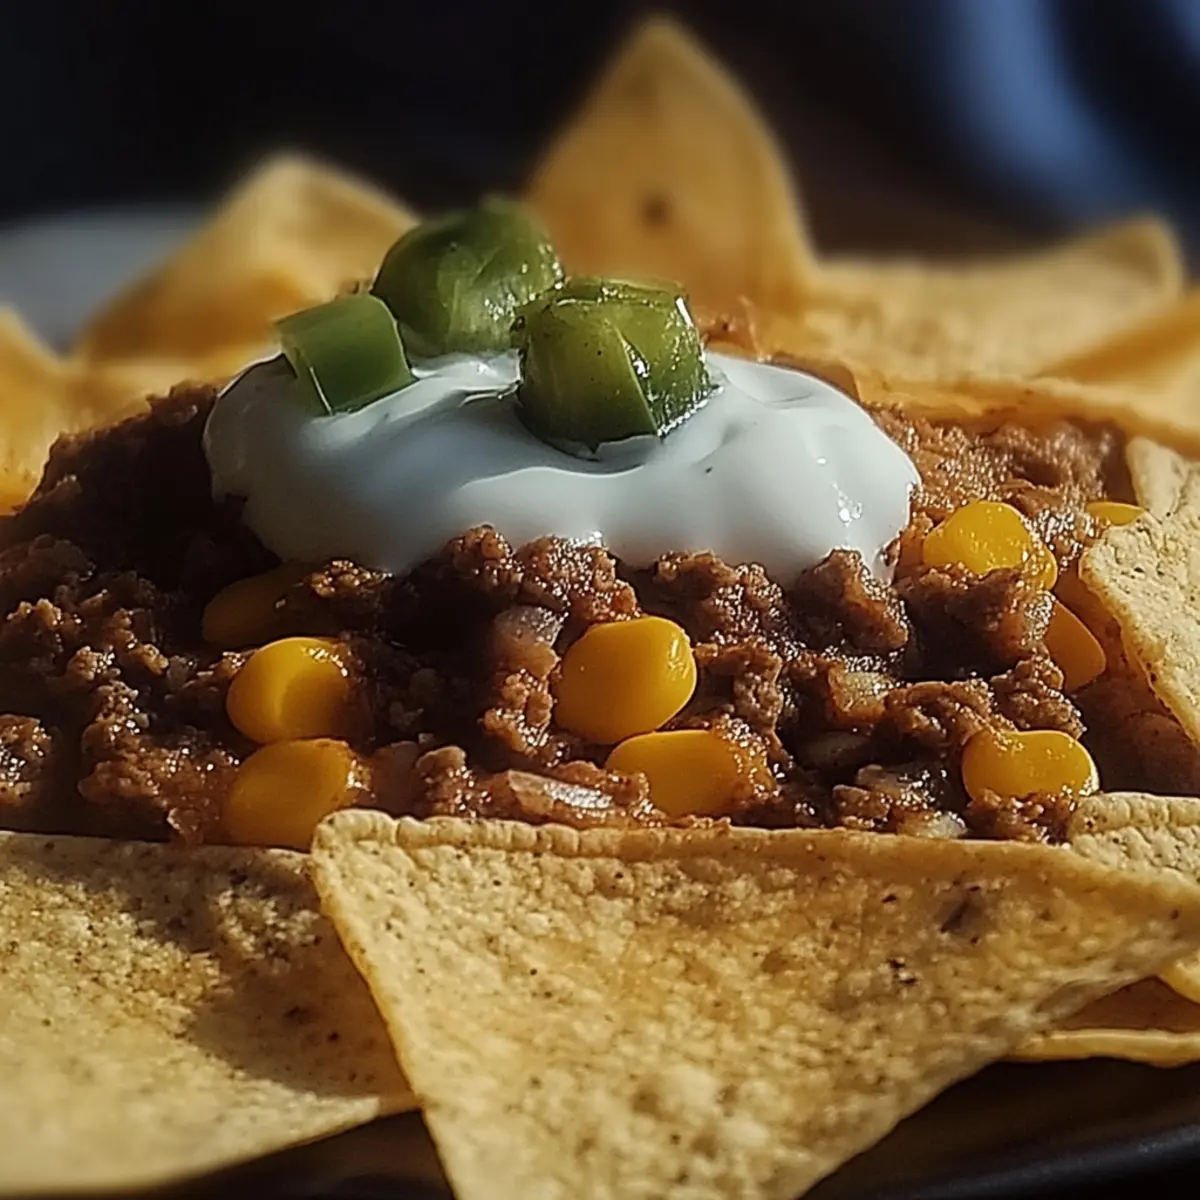
After removing the nachos from the oven, it’s time to customize! Top them with diced tomatoes, sliced black olives, jalapeños, and fresh cilantro if you like. Each of these toppings adds a refreshing contrast to the rich and cheesy layers. Scatter them generously to give your nachos a vibrant look and taste.
Step 6: Garnish and Serve
Finish off your Cheesy Beef Nachos by drizzling them with sour cream and sprinkling sliced green onions on top. This adds a creamy texture and a touch of sharpness that balances the dish perfectly. Serve them immediately while they’re warm and everything is fresh, and get ready for compliments from your happy guests!

Cheesy Beef Nachos Variations & Substitutions
Feel free to experiment with these delightful variations to make the Cheesy Beef Nachos truly your own!
-
Spicy Kick: Add diced jalapeños to the beef while cooking for an extra layer of heat that brings the nachos to life! A little spice goes a long way.
-
Vegetarian Option: Substitute the ground beef with black beans or sautéed mushrooms for a delicious vegetarian twist that still packs flavor. You'll enjoy every bit just as much!
-
Gluten-Free: Use gluten-free tortilla chips to enjoy this favorite without worry; just check the label to ensure they're safe.
-
Cheese It Up: Mix in pepper jack cheese for a creamy, spicy cheese melange that will tantalize your taste buds and leave you wanting more! The extra flavor adds that cheesy allure.
-
Herb Infusion: Mix in fresh herbs like oregano or cumin while cooking the beef for an aromatic flavor that elevates your nachos to gourmet status. The fragrance is mouthwatering!
-
Creamy Twist: Swap sour cream for Greek yogurt for a tangy, healthier alternative that still brings creaminess to the dish. This lightened option feels good without sacrificing taste!
-
Nutty Crunch: Toss in some toasted pumpkin seeds or chopped walnuts on top after baking for unexpected crunch and nutty richness that complements the cheese perfectly. It's a delightful surprise!
-
BBQ Flavor: Drizzle some BBQ sauce over the nachos before serving to give a smoky, sweet dimension that transforms your dish into a unique flavor adventure. The combination will have your guests raving!
Dive into these variations and personalize your Cheesy Beef Nachos to create a dish that reflects your culinary style. Happy cooking!
How to Store and Freeze Cheesy Beef Nachos
Fridge: Store leftover Cheesy Beef Nachos in an airtight container for up to 3 days. To reheat, place in the oven at 350°F (175°C) until warmed through.
Freezer: If you want to freeze these nachos, it's best to store the beef and chips separately. The beef can be frozen for up to 2 months, while chips are best used fresh.
Reheating: When ready to enjoy leftovers, preheat the oven and reassemble the nachos. Bake for about 10 minutes until the cheese melts again for that fresh taste.
Freshness Tip: For optimal flavor, avoid refrigerating the toppings such as fresh cilantro or diced tomatoes, as they can become mushy. Add them fresh after reheating!
What to Serve with Cheesy Beef Nachos
Nothing pairs better with cheesy, mouthwatering nachos than a collection of delightful sides and drinks that enhance the overall experience.
-
Fresh Guacamole: This creamy avocado dip adds a refreshing touch, perfectly complementing the rich flavors of the nachos. The smooth texture balances the crunch of each chip.
-
Zesty Salsa: A vibrant salsa with ripe tomatoes, onions, and cilantro brings a burst of freshness, cutting through the cheesy heaviness. It's a must-have for a satisfying contrast!
-
Crispy Onion Rings: For a crunchy side, onion rings provide a delicious bite that fits the casual vibe, drawing everyone into that comforting home-cooked atmosphere.
-
Mexican Street Corn (Elote): Grilled corn slathered in mayo, cheese, and spices offers an irresistible smoky flavor that pairs beautifully with the spices in your nachos.
-
Chilled Margaritas: Kick up the fiesta spirit with chilled margaritas; their citrusy notes pair wonderfully with the flavors of messy, cheesy goodness on game day.
-
Black Bean Salad: A colorful bean salad adds protein and fiber, enhancing your meal while providing a fresh, crunchy texture to balance the rich nachos.
-
Chocolate Brownies: For dessert, warm brownies topped with a scoop of vanilla ice cream create a delightful sweet ending to a savory meal—it’s comfort food at its finest!
-
Limeade: This refreshing drink, with its tart yet sweet flavors, cleanses the palate and keeps you refreshed as you dive into those cheesy beef nachos!
Tips for the Best Cheesy Beef Nachos
-
Meat Quality Matters: Use high-quality ground beef for a richer flavor. Lean cuts will reduce excess fat while keeping the nachos juicy.
-
Sizzling Perfection: Don't rush cooking the beef! Let it brown thoroughly to enhance flavor. A common mistake is undercooking that can leave your nachos bland.
-
Chip Selection: Choose sturdy tortilla chips! Thin chips may crumble under the weight of toppings. Look for thick, restaurant-style chips for the best support.
-
Layering Technique: Layer beef and cheese evenly across the chips—this ensures every bite is packed with cheesy goodness! Avoid just piling it in the center.
-
Oven Watch: Keep a close eye on your nachos as they bake. Cheese can go from melted to overcooked quickly, which can ruin your cheesy beef nachos!
-
Fresh Toppings: Add toppings right after baking for freshness! Ingredients like cilantro and jalapeños taste best when added last, delivering maximum flavor and zing.
Make Ahead Options
These Cheesy Beef Nachos are perfect for meal prep enthusiasts! You can cook the ground beef with taco seasoning and store it in the refrigerator for up to 3 days. Just make sure to let it cool completely before sealing it in an airtight container to maintain flavor and freshness. Additionally, you can layer the tortilla chips and cheese (skipping the baking step) on a baking sheet and refrigerate them for up to 24 hours. When you're ready to serve, simply top the nachos with your prepped beef, bake in the preheated oven for about 10 minutes until the cheese is melted, and then finish with your favorite toppings. You'll have restaurant-quality Cheesy Beef Nachos ready in no time, perfect for those busy weeknights!
Cheesy Beef Nachos Recipe FAQs
How do I choose ripe tomatoes for my nachos?
Absolutely! Look for tomatoes that are firm yet slightly soft when gently squeezed, with a vibrant color and no dark spots. This ensures they are fresh and flavorful, perfect for topping your Cheesy Beef Nachos.
What’s the best way to store leftover Cheesy Beef Nachos?
Store any leftovers in an airtight container in the fridge for up to 3 days. I recommend reheating them in the oven at 350°F (175°C) for 10 minutes to bring back that melted cheese goodness. Avoid microwaving, as it can make the chips soggy.
Can I freeze the beef for my nachos?
Yes, you can! Cook the ground beef as directed and allow it to cool completely. Then, transfer it to a freezer-safe bag, squeezing out as much air as possible. It will keep well for up to 2 months. When ready to use, simply thaw overnight in the fridge and reheat in a skillet before layering onto your nachos.
What should I do if my nachos come out soggy?
Very! If your nachos end up soggy, next time, ensure you're using thick tortilla chips to support the toppings. Also, avoid overloaded toppings and consider baking the chips for a few minutes before adding the beef and cheese to crisp them up. This prevents moisture from seeping into the chips.
Are Cheesy Beef Nachos suitable for pets?
It's best to avoid sharing nachos with pets. Ingredients like cheese and sour cream can upset their stomachs, and toppings like jalapeños can be spicy and harmful. Always keep indulgent treats like these for yourself and share the love with a pet-specific snack instead!
How can I make these nachos gluten-free?
Absolutely! To make your Cheesy Beef Nachos gluten-free, simply ensure you select tortilla chips that are certified gluten-free. Many brands offer delicious options that will maintain that satisfying crunch without compromising flavor or texture. Enjoy your nacho night worry-free!

Melt-in-Your-Mouth Cheesy Beef Nachos for Game Day Bliss
Ingredients
Equipment
Method
- In a large skillet over medium heat, add the pound of ground beef. Season it with taco seasoning, salt, and black pepper. Cook the beef for about 8-10 minutes, stirring occasionally, until it’s nicely browned and fully cooked. Make sure to crumble the meat as it cooks for even texture. Once done, drain any excess fat and remove the skillet from heat.
- Preheat your oven to 350°F (175°C). While the oven is warming up, take a large baking sheet and spread out your tortilla chips in an even layer.
- Layer the cooked ground beef evenly over the tortilla chips. Then, sprinkle the shredded cheddar and Monterey Jack cheeses generously on top.
- Carefully place the loaded nachos in your preheated oven and bake for about 10 minutes until the cheese is fully melted and bubbling.
- After removing the nachos from the oven, top them with diced tomatoes, sliced black olives, jalapeños, and fresh cilantro if desired.
- Finish off your Cheesy Beef Nachos by drizzling them with sour cream and sprinkling sliced green onions on top.


Leave a Reply