
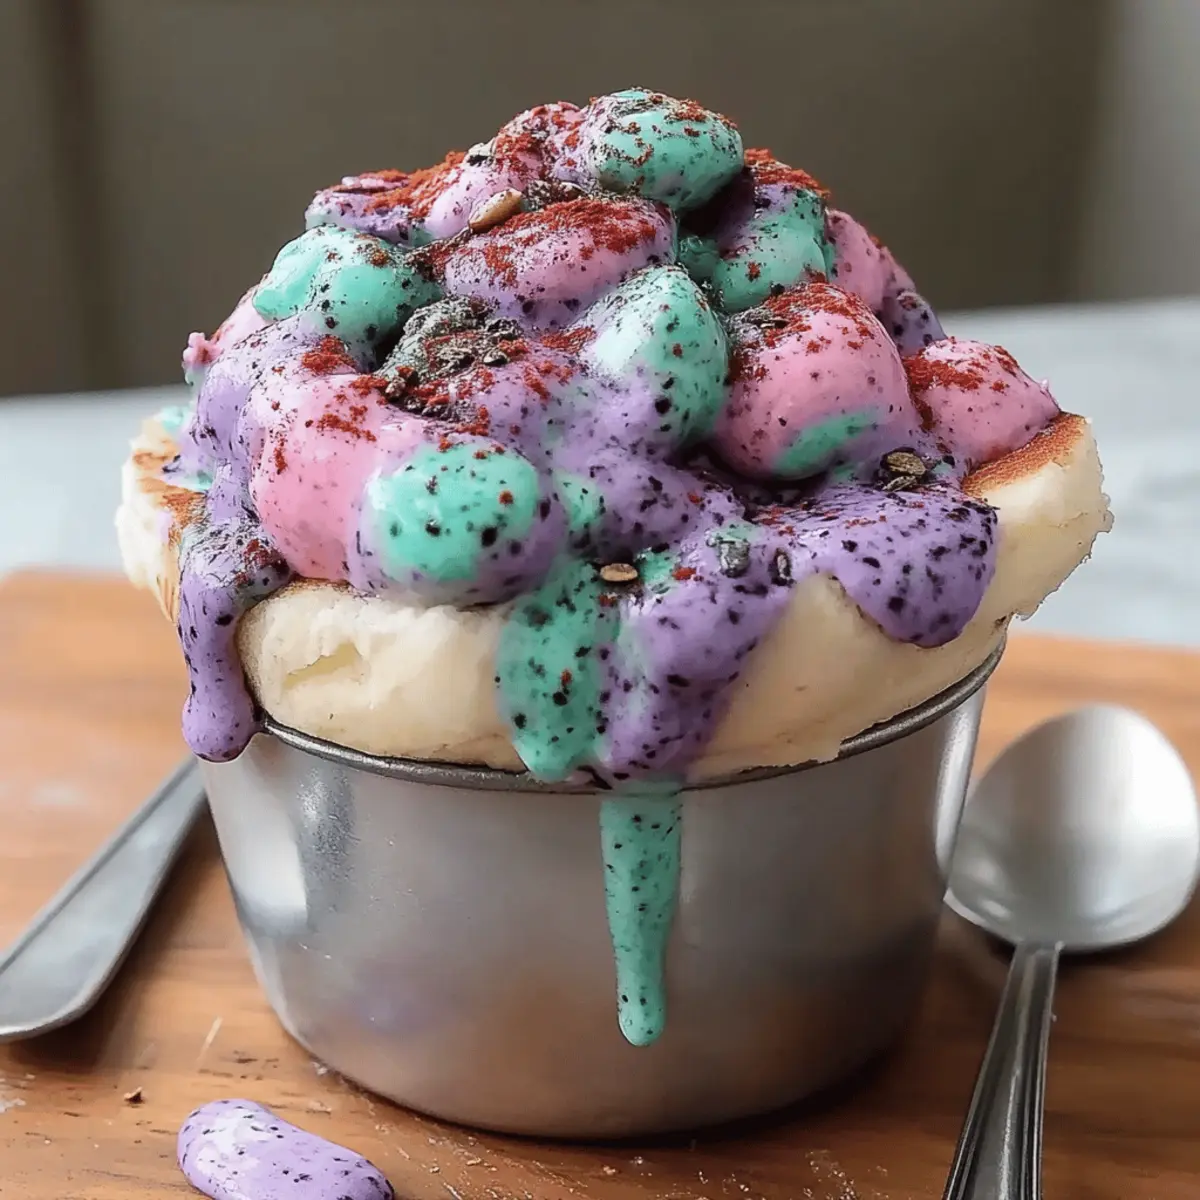
The moment I first scooped into a bowl of Mermaid Ice Cream, I felt like a kid again, instantly transported to a whimsical world where sugary dreams come true. This mesmerizing frozen treat isn't just visually stunning—layer upon layer of vibrant pink, purple, and teal—it's also a breeze to whip up at home! With just 10 minutes of prep time, you can indulge in this spectacular adventure of flavors without the fuss of an ice cream machine. Plus, it's a surefire crowd-pleaser that brings smiles to faces of all ages, making it perfect for summer gatherings or a fun family night in. Curious to learn how to create this enchanting dessert that'll make your taste buds swim with delight? Dive right in!
Why is Mermaid Ice Cream a Must-Try?
Irresistibly Fun: This delightful dessert takes ice cream to a whole new level with its stunning colors and whimsical charm. Easy to Make: With just 10 minutes of prep, you can impress family and friends without any complicated methods. Endless Customization: Feel free to experiment with other colors or toppings to make it your own! Kid-Approved: Guaranteed to be a hit with kids and adults alike, perfect for summer parties or cozy evenings. And if you're looking for more exciting ways to beat the heat, check out my posts on fun summer snacks and easy no-bake desserts!
Mermaid Ice Cream Ingredients
Get ready to create your very own whimsical dessert!
For the Ice Cream Base
• 2 cups heavy cream – whip this to fluffy perfection for a luscious texture.
• 1 (14-ounce) can sweetened condensed milk – adds rich sweetness and creaminess.
• 1 teaspoon vanilla extract – enhances the overall flavor profile spectacularly.
For the Rainbow of Colors
• Pink gel food coloring – use this to add a fun, vibrant touch to your treat.
• Purple gel food coloring – creates a magical hue that embodies the mermaid theme.
• Teal gel food coloring – this color will make your dessert look ocean-inspired and dreamy.
For the Sparkling Finish
• Edible glitter or sprinkles for decoration – sprinkle these on top for an enchanting touch that dazzles.
Now that you have your Mermaid Ice Cream ingredients, let’s dive into crafting this magical treat!
Step‑by‑Step Instructions for Mermaid Ice Cream
Step 1: Whip the Cream
In a large mixing bowl, pour 2 cups of heavy cream. Using an electric mixer, whip the cream on medium speed until stiff peaks form, which should take about 2–3 minutes. You want the cream to be airy and fluffy. This step is crucial for the light texture of your Mermaid Ice Cream.
Step 2: Combine Sweetened Ingredients
In a separate bowl, mix together the 14-ounce can of sweetened condensed milk and 1 teaspoon of vanilla extract. Stir well until fully combined for about 1 minute. This blend will add a rich and sweet foundation to your Mermaid Ice Cream, balancing the lightness of the whipped cream beautifully.
Step 3: Fold the Mixtures Together
Gently fold the whipped cream into the condensed milk mixture using a rubber spatula. Start by adding a third of the whipped cream to lighten the dense mixture, then gradually incorporate the rest. Be gentle to keep that airy texture intact, which is key for the dreamy consistency of your Mermaid Ice Cream.
Step 4: Color the Ice Cream
Divide the mixture evenly into three separate bowls. Add a few drops of pink gel food coloring to one bowl, purple to another, and teal to the last. Stir each bowl carefully until the colors are vibrant and uniform, creating three beautifully bright shades that will make your Mermaid Ice Cream visually striking.
Step 5: Assemble the Mixture
Using a loaf pan, scoop alternating dollops of each colored mixture into the pan. Continue layering the colors until the mixture is used up. The varied colors should intermix slightly. This fun, artistic process not only combines flavors but also creates a gorgeous marbled effect in your Mermaid Ice Cream.
Step 6: Create Swirls
With a knife, gently swirl through the colored layers in the loaf pan to create a marbled look. Aim for soft, sweeping motions to blend the colors without losing their distinctiveness. This swirl technique adds to the visual appeal of your Mermaid Ice Cream, making it a feast for the eyes.
Step 7: Add Finishing Touches
Sprinkle a generous amount of edible glitter or colorful sprinkles on top of your Mermaid Ice Cream for a whimsical finish. This decorative touch not only enhances the appearance but also adds a delightful crunch.
Step 8: Freeze to Perfection
Cover the loaf pan tightly with plastic wrap and place it in the freezer. Allow your Mermaid Ice Cream to freeze for at least 6 hours, or until firm. Checking that it's completely solid is important; be patient and let the magic happen as it transforms into a dreamy frozen treat.
Expert Tips for Mermaid Ice Cream
• Perfect Whipping: Make sure to use chilled heavy cream for the best volume. Whipping at room temperature can lead to less airy, flat ice cream.
• Gentle Folding: When combining the whipped cream with the condensed milk, fold gently. Over-mixing may deflate the whipped cream, resulting in a denser texture for your Mermaid Ice Cream.
• Color Mixing: Don’t be afraid to mix colors! A touch more gel food coloring can create stunning shades, but remember to start small; it’s easier to add than to adjust the color down.
• Layering Technique: Alternate dollops quickly to maintain a marbled effect. Spread too evenly can create a solid color instead of the beautiful swirls you’re aiming for in your Mermaid Ice Cream.
• Freezing Time: Allow the ice cream to freeze long enough. Rushing it can result in a soft and meltable texture, so patience is key for that perfect scoop!
How to Store and Freeze Mermaid Ice Cream
Fridge: Store in the fridge for up to 2 hours if you want to serve it slightly softer; however, it's best enjoyed straight from the freezer.
Freezer: Keep your Mermaid Ice Cream in an airtight container for up to 2 weeks. This prevents freezer burn and keeps the texture creamy.
Reheating: If you prefer a softer scoop, let the ice cream sit at room temperature for 5-10 minutes before serving. Enjoy the delightful flavors in every bite!
Make Ahead Options
Mermaid Ice Cream is perfect for busy weeknights and can be prepped in advance to save time! You can whip the heavy cream and combine it with sweetened condensed milk up to 24 hours ahead of time. Just store the mixture tightly covered in the refrigerator to maintain its light texture. When you're ready to create this enchanting dessert, simply color the mixture, layer it in the loaf pan, and swirl for that magical effect. Don't forget to freeze the assembled ice cream for at least 6 hours, or preferably overnight, to ensure it's perfectly firm and ready to impress your family or guests with minimal effort!
Mermaid Ice Cream Variations & Substitutions
Feel free to explore these fun twists and substitutions to make your Mermaid Ice Cream truly your own!
-
Dairy-Free: Swap heavy cream for coconut cream and the sweetened condensed milk for coconut milk for a tropical twist.
-
Low-Sugar: Use sugar-free sweetened condensed milk or make your own by mixing evaporated milk with a sugar substitute to reduce calories.
-
Nutty Flavor: Add ¼ cup of almond or hazelnut extract to the mixture for a delightful nutty flavor—perfect for those who enjoy a twist!
-
Berry Blast: Incorporate a cup of pureed mixed berries into the cream mixture to create a fruity version that’s equally stunning and delicious.
-
Chocolate Swirl: Layer in chocolate syrup between the colored dollops to introduce a rich chocolate flavor that pairs beautifully with the creamy colors.
-
Add Some Crunch: Toss in crushed graham crackers or mini marshmallows in between layers for a textural surprise that mimics a s’more experience!
-
Spicy Kick: For those who like a little heat, add a dash of cinnamon or cayenne pepper for a surprising contrast that wakes up your taste buds.
-
Layered Parfait: Instead of freezing, serve the colored mixtures in clear cups with layers of whipped cream and fresh fruit for a stunning dessert parfait!
Explore these variations and let your creativity swim wild! And for more fun dessert ideas, don't miss my posts on easy no-bake desserts and delicious fruity snacks—the possibilities are endless!
What to Serve with Mermaid Ice Cream
Indulging in a fantastical bowl of Mermaid Ice Cream is just the beginning of your sweet adventure—let’s create a complete experience!
- Buttery Shortbread Cookies: These crumbly delights balance the creamy richness with a delightful crunch, perfect for dipping into your vibrant ice cream.
- Fresh Fruit Salad: Brightly colored fruits like strawberries, blueberries, and kiwi offer a refreshing contrast, enhancing the fruity flavors of the ice cream.
- Chocolate Sauce: A drizzle of warm chocolate sauce adds a rich, sweet dimension that beautifully complements the whimsical charm of the ice cream.
For a whimsical twist, pair it with cotton candy or pop rocks for an explosion of flavors and textures that will delight both kids and adults alike. Enjoy a refreshing summer breeze outside as you savor these treats alongside your Mermaid Ice Cream!
- Sparkling Lemonade: A fizzy beverage like sparkling lemonade brings that extra sparkle to your dessert experience, refreshing and light with a zesty bite.
- Gummy Sea Creatures: These playful candies create a fun and nautical theme that plays into the mermaid fantasy while providing a chewy textural contrast with the ice cream.
- Chocolate-Dipped Fruit: Think strawberries or bananas dipped in chocolate—these sweet bites harmonize beautifully with your creamy treat and make for a perfect finger food pairing!
Mermaid Ice Cream Recipe FAQs
What types of heavy cream should I use for Mermaid Ice Cream?
Absolutely! I recommend using heavy cream that has at least 36% fat content for the best results. This ensures your ice cream is rich and creamy, allowing it to whip up beautifully. You can also use heavy whipping cream, which has a slightly lower fat percentage but can still work well.
How should I store Mermaid Ice Cream?
For short-term storage, keep your Mermaid Ice Cream in an airtight container in the freezer for up to 2 weeks. Make sure the container is well-sealed to prevent freezer burn, which can affect its texture. If you decide to enjoy it during a party, you can leave it in the fridge for about an hour, but I recommend serving it cold from the freezer for the best experience!
Can I freeze leftover Mermaid Ice Cream?
Yes! If you have any leftover Mermaid Ice Cream, place it in an airtight container and store it in the freezer for up to 2 weeks. If you want to make it last longer, confine it to a container that minimizes air exposure, which helps maintain its creamy texture. For best results, thaw it gently in the fridge before serving again.
What if the whipped cream doesn’t fully whip?
Very common! If you find your whipped cream isn't forming stiff peaks, it could be due to the cream being too warm or not having enough fat. Ensure your heavy cream is chilled before you begin whipping, and avoid over-whipping as that can make it grainy. If you’re still having trouble, you can start with a bit of powdered sugar to stabilize it slightly.
Can I substitute dairy-free options for Mermaid Ice Cream?
Absolutely! To make a dairy-free version of Mermaid Ice Cream, you can substitute the heavy cream with coconut cream and the sweetened condensed milk with coconut milk or a dairy-free sweetened condensed milk alternative. Just be aware that this might alter the flavor a bit, but coconut adds a tropical twist that is delicious!
Can I use different colors or flavors?
Of course! The fun part about Mermaid Ice Cream is the customization. Feel free to swap the colors for any gel food coloring you desire, such as pastel shades or even neon varieties. You can also experiment with flavors by adding extracts like almond or coconut instead of vanilla for an adventurous spin on this whimsical dessert!
Mermaid Ice Cream: Whimsical Treat That Dazzles Summer Nights
Ingredients
Equipment
Method
- In a large mixing bowl, whip 2 cups of heavy cream on medium speed until stiff peaks form, about 2–3 minutes.
- In a separate bowl, mix together 14-ounce can of sweetened condensed milk and 1 teaspoon of vanilla extract until fully combined for about 1 minute.
- Gently fold the whipped cream into the condensed milk mixture using a rubber spatula, being careful to keep the airy texture.
- Divide the mixture into three bowls. Add pink gel food coloring to one, purple to another, and teal to the last. Stir until the colors are vibrant.
- In a loaf pan, scoop alternating dollops of each colored mixture until used up, creating a marbled effect.
- Gently swirl through the colored layers in the loaf pan with a knife to blend the colors slightly.
- Sprinkle edible glitter or colorful sprinkles on top for decoration.
- Cover the loaf pan tightly with plastic wrap and freeze for at least 6 hours, or until firm.


Leave a Reply