
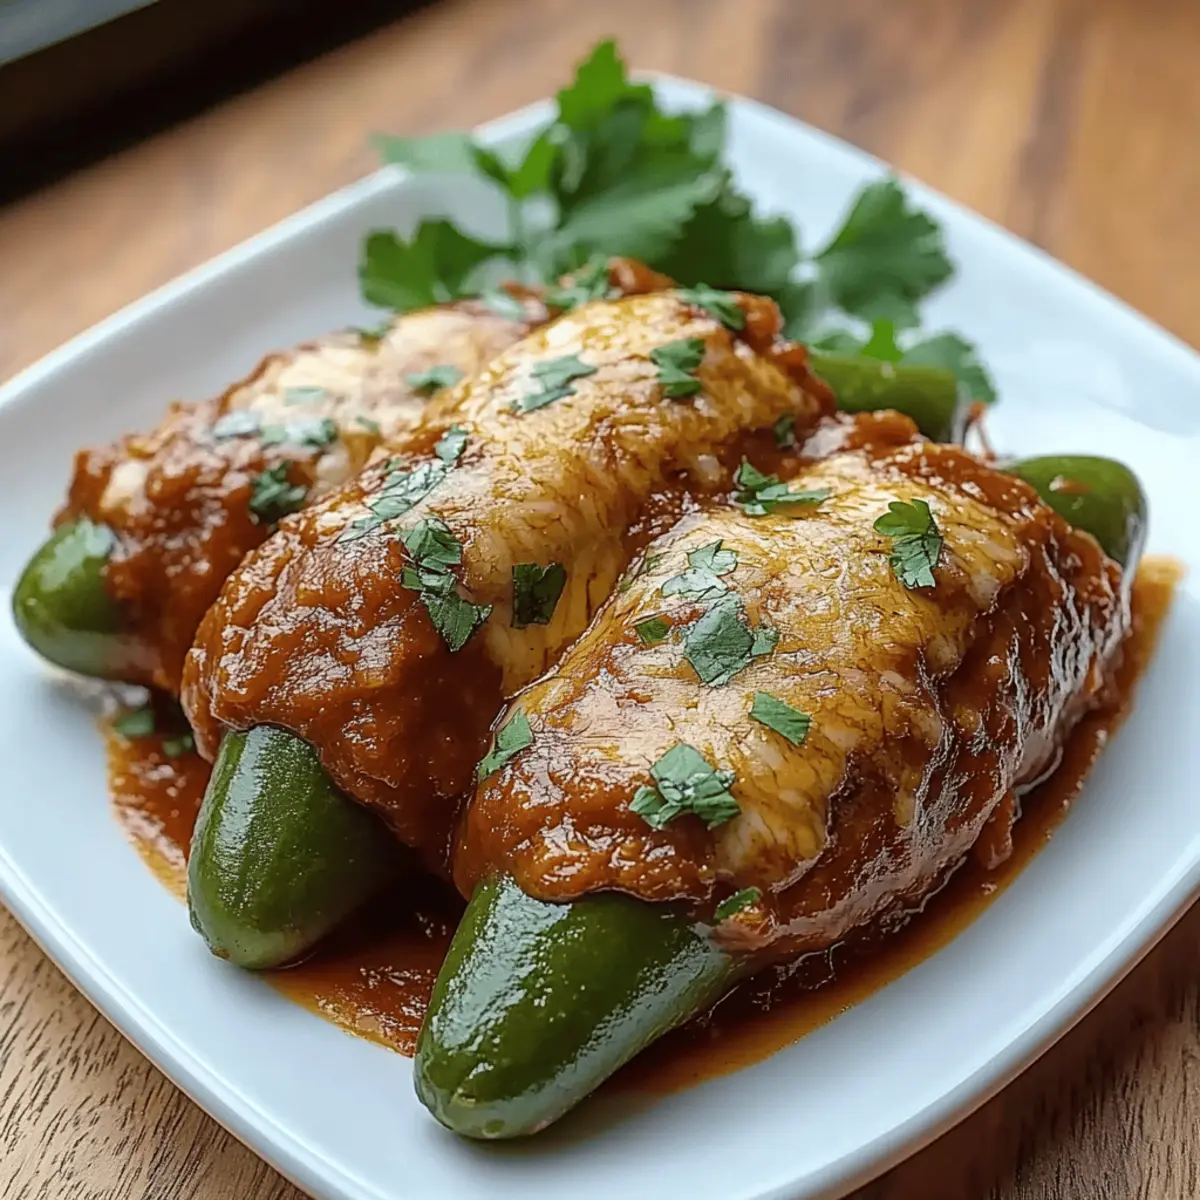
As I held the vibrant Hatch green chiles in my hand, their earthy aroma transported me to sun-soaked markets filled with culinary delights. Today, I'm excited to share my recipe for Cheesy Hatch Chile Rellenos, a dish that seamlessly blends tradition with a touch of creativity. Not only are these delightful stuffed chiles a perfect way to elevate your cooking game, but they're also a fantastic crowd-pleaser, guaranteed to impress friends and family alike. With a quick prep time and the comforting satisfaction of homemade food, you might find yourself reaching for this recipe again and again. Curious about the steps to achieve that golden, crispy exterior while keeping the cheese perfectly melted inside? Let’s dive in!
Why You'll Crave Cheesy Hatch Chile Rellenos?
Irresistible Flavor: These chiles pack a punch of flavor with a savory filling of melted Oaxaca cheese that’s simply to die for!
Ease of Preparation: With straightforward steps and accessible ingredients, you’ll be whipping up this classic dish in no time.
Crispy Perfection: The golden exterior contrasts beautifully with the gooey cheese inside, creating a delightful experience with every bite.
Versatile Serving Options: Enjoy them as a main dish or as a delightful appetizer at your next gathering—everyone will be asking for the secret!
Quick Cooking Time: With a total time of just over an hour, you can serve up this delicious meal with minimal effort.
For bonus ideas, check out my tips for perfect fried food here and discover more about using fresh ingredients here.
Cheesy Hatch Chile Rellenos Ingredients
For the Chiles
• Hatch green chiles – these are the stars of the dish, offering a distinct, delicious heat and flavor.
• Oaxaca cheese – a melty cheese that blends beautifully with the chiles; Monterey Jack is a good substitute if needed.
For the Batter
• Eggs – separating the whites from the yolks ensures a light and airy coating for crispy chiles.
• All-purpose flour – gives a nice crunch; consider using gluten-free flour for a gluten-free version.
• Salt – enhances the overall flavor, so don't skip it!
• Garlic powder – adds a touch of savory depth to the batter.
For the Sauce
• Tomatoes – fresh tomatoes bring brightness to your sauce; roasting them enhances their sweetness.
• White onion – adds sweetness and a mild onion flavor to the sauce.
• Garlic cloves – infuse the sauce with aromatic flavor; feel free to adjust based on your garlic love.
• Chopped cilantro – a fresh herb that brightens the sauce; parsley can be used for a milder taste.
• Sliced jalapeños (optional) – for those who love an extra kick in their sauce!
Dive into the process of making these Cheesy Hatch Chile Rellenos, and enjoy every step along the way!
Step‑by‑Step Instructions for Cheesy Hatch Chile Rellenos
Step 1: Broil the Chiles
Preheat your oven’s broiler. Place the Hatch green chiles on a foil-lined baking sheet and broil them for about 5-10 minutes until the skins are blistered and blackened. Carefully flip each chile and broil for another 5-10 minutes to ensure they are charred all over. This process enhances their flavor and tenderness.
Step 2: Steam the Chiles
Once charred, remove the chiles from the oven and immediately transfer them to a gallon-sized ziplock bag. Seal the bag and let the chiles steam for 10-15 minutes. This steaming process makes peeling the skins much easier. Be cautious not to over steam, as you want the chiles to retain their firmness.
Step 3: Peel and Prepare Chiles
After steaming, carefully remove the chiles from the bag. Gently peel off the charred skins and discard them. Using a sharp knife, cut a slit down one side of each chile and meticulously remove the seeds, taking care not to tear the flesh, leaving you with tender vessels for the cheese in your Cheesy Hatch Chile Rellenos.
Step 4: Stuff the Chiles
Generously fill each prepared chile with oroaxaca cheese or another similar melting cheese. Use 1 to 2 toothpicks to secure each chile shut. Make sure to pack the cheese tightly so that it melts beautifully inside as the chiles fry, creating that delectable gooey texture everyone loves.
Step 5: Prepare Egg Batter
Separate the egg whites and yolks, placing the whites in a mixing bowl and the yolks in a separate cup. Beat the egg whites on high speed until stiff peaks form, which will give your batter a fantastic lightness. Then, reduce the speed to low and gradually fold the yolks into the whites, creating a airy mixture.
Step 6: Combine Dry Ingredients
In a shallow dish, combine all-purpose flour, 1 teaspoon of salt, and garlic powder. This mixture will create a flavorful coating for your chiles. Set up an assembly line with the stuffed chiles, the flour mixture, and the egg batter to streamline the frying process.
Step 7: Heat Oil for Frying
In a deep pan, heat vegetable oil to 350°F (175°C). It’s essential to maintain this temperature for crispy results. While the oil heats up, dredge each stuffed chile in the flour mixture to coat them evenly, ensuring every part is lightly covered before dipping them into the egg batter.
Step 8: Fry the Chiles
Carefully dip each coated chile into the egg batter, fully covering them, and then gently place them in the hot oil. Fry for about 2-3 minutes on one side, and then flip and fry for another 2-3 minutes until they achieve a golden brown color. Fry in batches to avoid crowding the pan, which can lead to uneven cooking.
Step 9: Drain and Prepare Sauce
Once fried, remove the chiles from the oil and let them drain on paper towels to absorb excess oil. In a blender, combine tomatoes, white onion, garlic cloves, chopped cilantro, and salt (plus jalapeños if desired) and blend until smooth for your delicious sauce.
Step 10: Heat the Sauce
Transfer the blended sauce to a medium saucepan and heat over medium heat. Bring it to a gentle boil before reducing to a low simmer. Allow the flavors to meld while you finish any last preparations, ensuring it’s warm and ready to complement your Cheesy Hatch Chile Rellenos.
Step 11: Serve the Dish
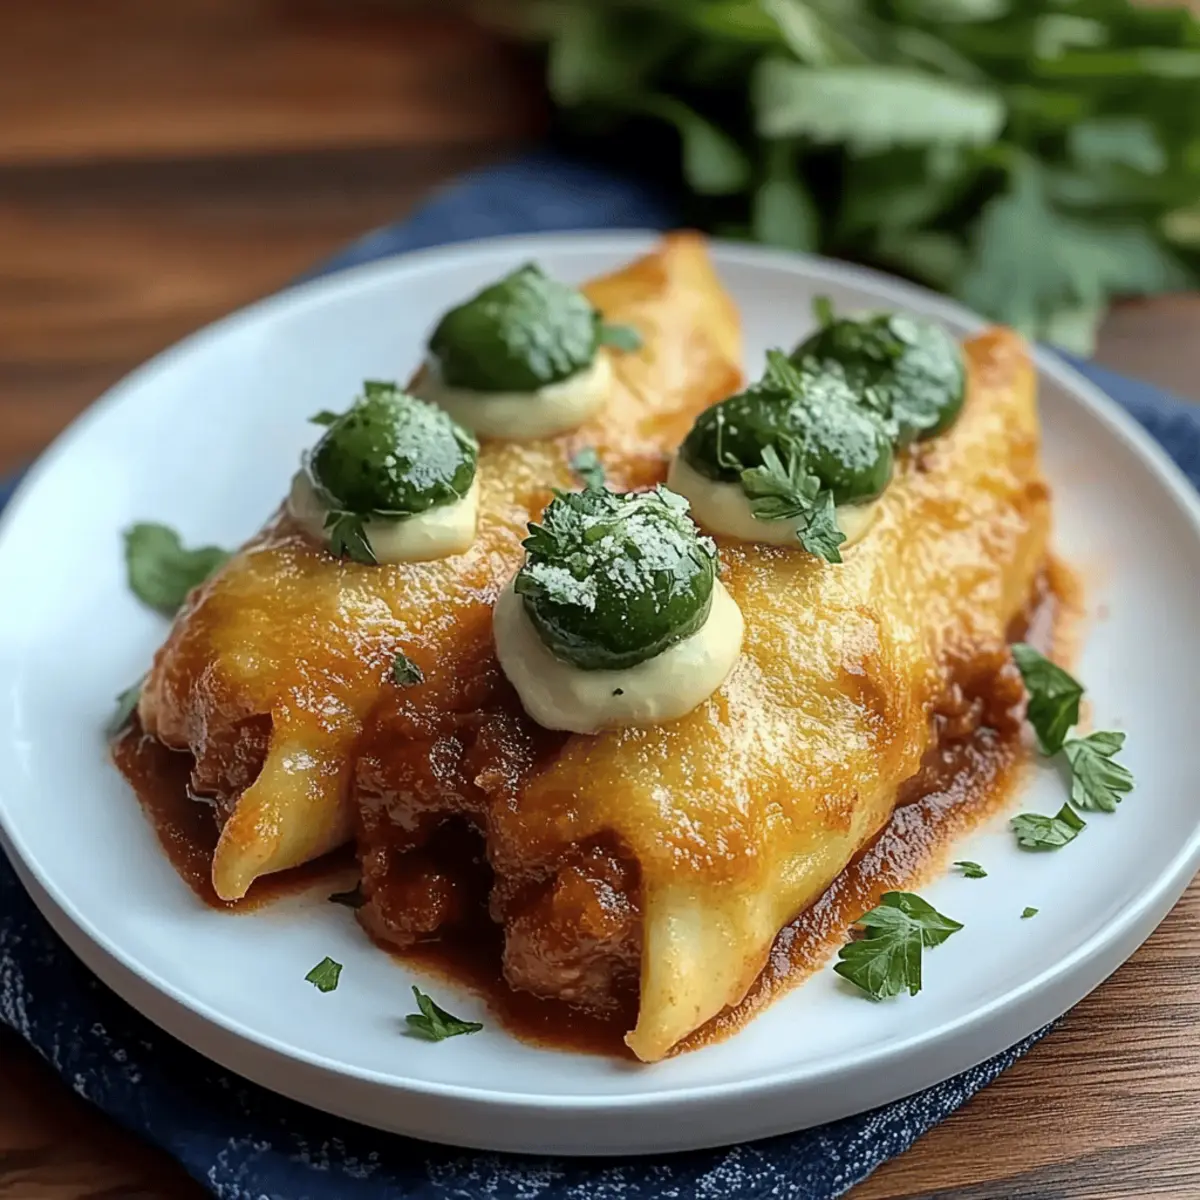
Once everything is prepared, plate your hot, fried chiles rellenos. Serve them right away with the fresh tomato sauce drizzled generously over the top. The contrasting temperatures and textures will provide a delightful experience, making your meal truly special.

Cheesy Hatch Chile Rellenos Variations
Feel free to get creative and make these Cheesy Hatch Chile Rellenos your own with these delightful twists!
- Dairy-Free: Substitute Oaxaca cheese with a dairy-free cheese blend for a vegan-friendly option.
- Spicy Kick: Add diced fresh jalapeños into the cheese filling for an extra layer of heat and flavor—it’s sure to wake up your taste buds!
- Meat Lovers: Incorporate cooked chorizo or ground beef into the cheese mixture for a heartier filling that’s bursting with savory goodness.
- Herb Twists: Mix in some fresh herbs like basil or cilantro into the cheese for an herby infusion that blends beautifully with the chiles.
- Crunchy Texture: Top with crushed tortilla chips or panko breadcrumbs before frying for an irresistible crunch that will leave you craving more.
- Sweet & Tangy: Add a touch of cream cheese with diced green chiles mixed into the filling to balance the savory flavors with a creamy, slightly tangy taste.
- Cheese Mix: Experiment with different melting cheeses, such as Monterey Jack or Pepper Jack, for varying flavors and textures.
- Roasted Veggies: Fold in some roasted corn or bell peppers with the cheese for a colorful and nutritious filling that adds depth and sweetness.
Don't forget to enhance your cooking journey by exploring my tips for perfect fried food here and how to make the most of fresh ingredients here! Enjoy customizing your Cheesy Hatch Chile Rellenos!
What to Serve with Cheesy Hatch Chile Rellenos?
Transform your dining experience into a fiesta of flavors with delightful accompaniments that enhance every bite.
-
Creamy Guacamole: A cool, creamy guacamole balances the heat of the chiles, bringing a delightful contrast to your palate.
-
Spanish Rice: Fluffy, seasoned rice soaked in bold spices rounds out the dish, providing a hearty base to complement your cheesy chiles.
-
Fresh Corn Salsa: A burst of sweetness from fresh corn, mixed with lime and cilantro, adds a refreshing crunch that brightens every forkful.
Hearty and vibrant, this salsa invites you to indulge in a fusion of textures, enhancing the traditional experience of serving chiles rellenos.
-
Refried Beans: Rich, creamy refried beans offer a satisfying side that pairs beautifully, creating a traditional Mexican feel to your meal.
-
Crisp Green Salad: A light salad with citrus vinaigrette can cleanse your palate and add a refreshing bite to offset the richness of the chiles.
-
Chilled Mexican Beer: A refreshing beer can cut through the richness and enhance the overall flavor of the meal, making every sip a celebration.
-
Chocolate Mexican Flan: For dessert, a velvety flan provides the perfect sweet finish to your meal, balancing the savory spiciness of the chiles rellenos.
A blend of these delightful options will not only elevate your Cheesy Hatch Chile Rellenos but also create a warm, satisfying gathering for friends and family.
Expert Tips for Cheesy Hatch Chile Rellenos
Choose the Right Chiles: Select firm Hatch green chiles, ensuring they have minimal blemishes and a vibrant color for the best flavor.
Proper Steaming: When steaming, be cautious of timing; over-steaming may result in mushy chiles, making them difficult to handle.
Seal Securely: Use toothpicks effectively to hold the chiles closed while frying, preventing cheese leakage and keeping the filling intact during cooking.
Maintain Oil Temperature: Use a thermometer to ensure the oil stays around 350°F (175°C) throughout frying; if it’s too hot, the batter can burn.
Fry in Batches: Avoid overcrowding the frying pan to allow for even cooking—this ensures that each Cheesy Hatch Chile Relleno gets crispy all over.
Draining Oil: Let the fried chiles drain on paper towels to eliminate excess oil, achieving that desired crispy texture without greasiness.
Make Ahead Options
These Cheesy Hatch Chile Rellenos are perfect for meal prep enthusiasts! You can prepare the chiles and stuff them up to 24 hours in advance, making your busy weeknights a breeze. Simply follow the broiling, steaming, peeling, and stuffing steps, then refrigerate the prepped chiles in an airtight container. For the batter, you can beat the egg whites and yolks and store them separately covered in the fridge for up to 3 days. When you’re ready to serve, simply dredge the stuffed chiles in the flour mixture, dip them in the egg batter, fry them until golden brown, and enjoy restaurant-quality results with minimal effort!
How to Store and Freeze Cheesy Hatch Chile Rellenos
Fridge: Store leftover Cheesy Hatch Chile Rellenos in an airtight container for up to 3 days. Keep the sauce separate to maintain crispiness.
Freezer: To freeze, individually wrap each chile in plastic wrap and place them in a freezer-safe bag for up to 3 months. Reheat from frozen, adding extra time as needed.
Reheating: To reheat, place the chiles in a preheated oven at 350°F (175°C) for about 15-20 minutes until heated through. This helps retain their crispy texture.
Cheesy Hatch Chile Rellenos Recipe FAQs
How do I choose ripe Hatch green chiles?
Selecting the right chiles is crucial for flavor! Look for firm, glossy, and vibrant chiles with minimal blemishes. The ones with a hint of color change usually indicate ripeness. Avoid any with dark spots all over, as they can be an indication of spoilage.
What is the best way to store leftover Chiles Rellenos?
Store any leftover Cheesy Hatch Chile Rellenos in an airtight container in the fridge for up to 3 days. Be sure to keep the sauce separate to maintain the crispiness of the chiles. You’ll want to layer paper towels between the chiles and lid to absorb any moisture as well.
Can I freeze Cheesy Hatch Chile Rellenos?
Absolutely! To freeze, individually wrap each chile tightly in plastic wrap, then place them in a freezer-safe bag or container. They can be frozen for up to 3 months. This method keeps them fresh and makes future meals super convenient!
How should I reheat the Chiles Rellenos?
To reheat, place your frozen or refrigerated chiles on a baking sheet and pop them in a preheated oven at 350°F (175°C) for about 15-20 minutes. This method helps to maintain their delightful crispy texture while ensuring they're warmed through.
What should I do if the batter isn’t sticking to the chiles?
If you find that the batter isn’t adhering properly, try dusting the stuffed chiles with a bit more flour before dipping them in the egg mixture. This extra coating can help the batter stick during frying, resulting in a perfect golden crust.
Are Cheesy Hatch Chile Rellenos suitable for people with certain dietary restrictions?
If you're accommodating dietary restrictions, you can use gluten-free flour in the batter to make it gluten-free. Always check for any allergies related to cheese or chiles if you're serving it to others. And if you have pets, remember that certain ingredients like garlic can be harmful to them, so keep tasty leftovers out of their reach!

Mouthwatering Cheesy Hatch Chile Rellenos You’ll Love
Ingredients
Equipment
Method
- Preheat your oven’s broiler. Place the Hatch green chiles on a foil-lined baking sheet and broil them for about 5-10 minutes until the skins are blistered and blackened.
- Remove the chiles from the oven and immediately transfer them to a gallon-sized ziplock bag. Seal the bag and let the chiles steam for 10-15 minutes.
- Carefully remove the chiles from the bag. Gently peel off the charred skins and discard them. Cut a slit down one side of each chile and remove the seeds.
- Fill each prepared chile with Oaxaca cheese or another melting cheese and secure with toothpicks.
- Separate the egg whites and yolks. Beat the egg whites until stiff peaks form, then fold in the yolks.
- In a shallow dish, combine all-purpose flour, salt, and garlic powder. Set up your assembly line for frying.
- Heat vegetable oil to 350°F (175°C). Dredge each stuffed chile in the flour mixture, then dip into the egg batter.
- Carefully fry the chiles for about 2-3 minutes on each side until golden brown.
- Remove the chiles from the oil and let them drain on paper towels.
- In a blender, combine tomatoes, white onion, garlic, chopped cilantro, salt, and jalapeños to make the sauce.
- Transfer the sauce to a saucepan and heat over medium heat until it simmers.
- Serve the hot chiles with the fresh tomato sauce drizzled over the top.


Leave a Reply