
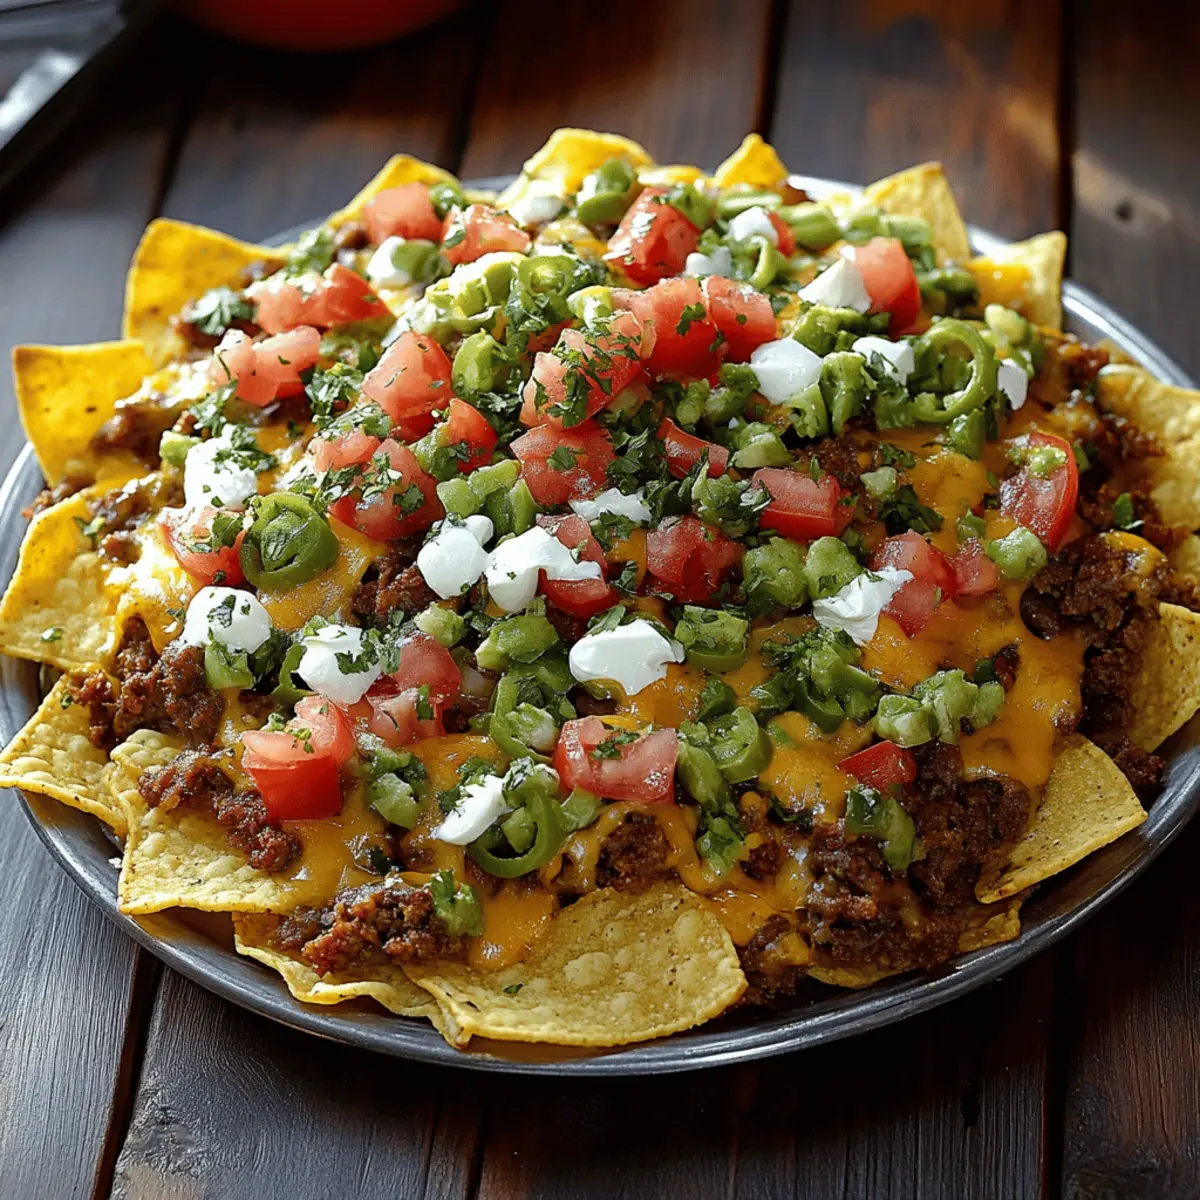
As I pulled the cheesy goodness from the oven, the warm aroma wrapped around me like a comforting hug; it was time for Oven-Baked Nachos! This crowd-favorite dish combines all the best flavors—savory seasoned beef, vibrant veggies, and layers of melt-in-your-mouth cheese—all nestled atop crispy tortilla chips. What makes this recipe even better is how quickly it comes together; you can have a delicious meal ready in under an hour, perfect for those busy weeknights or when you have friends over for game day. Plus, its impressive presentation in a springform pan makes it a showstopper that’s sure to bring everyone together. Are you ready to take your nacho game to the next level?
Why Are Oven-Baked Nachos So Popular?
Irresistible Flavor: These oven-baked nachos are bursting with flavors, thanks to a savory blend of seasoned beef, fresh veggies, and two types of ooey-gooey cheese.
Crowd-Pleasing Appeal: Perfect for any gathering, these nachos can easily satisfy a crowd and are sure to impress your guests.
Quick to Prepare: With just 45 minutes from start to finish, this dish is a great solution for busy weeknights or spontaneous get-togethers.
Unique Presentation: Serving them in a springform pan elevates your nachos from ordinary to extraordinary, making them look just as delicious as they taste.
Versatile Ingredients: Feel free to customize with your favorite toppings, like jalapeños or beans, turning this recipe into a personal favorite! If you need ideas, check out my guide on customizing your nachos.
Oven-Baked Nachos Ingredients
Get ready to create the ultimate snack!
For the Chips
• Tortilla chips – 10 oz of crispy goodness to hold all the flavors together.
For the Beef Mixture
• Ground beef – 1 lb, providing a hearty base for your nachos.
• Taco seasoning – 1 packet, adding that delicious, zesty kick.
For the Veggie Layer
• Colorful veggies – 1 cup diced (like bell peppers, onions, etc.) to bring freshness and crunch to your nachos.
For the Cheesy Delight
• Cheddar cheese – 1 cup shredded, for that classic melty flavor.
• Monterey Jack cheese – 1 cup shredded, perfectly creamy to enhance your nachos.
For Serving
• Sour cream – 1 cup, a cooling contrast to the savory flavors.
• Lime juice – 2 tbsp, adding a zesty brightness to your dish.
• Salt – 1 tsp, enhancing all those wonderful flavors.
• Avocado – 1 chopped, for a creamy texture and added nutrition.
• Fresh cilantro – For garnish, bringing a burst of color and herbaceous aroma to your nachos.
Now you're all set to gather these ingredients and dive into crafting your delicious oven-baked nachos!
Step‑by‑Step Instructions for Oven-Baked Nachos
Step 1: Preheat the Oven
Begin by preheating your oven to 350°F (175°C). While it warms up, prepare a 10-inch springform pan by lining it with a parchment collar that extends about 2 inches above the rim. This will help in easy removal and presentation of your delicious oven-baked nachos later.
Step 2: Prepare the Lime Sour Cream
In a small bowl, whisk together the sour cream, lime juice, and salt until well combined. Transfer this creamy mixture into a squeeze bottle for easy drizzling later on and refrigerate it to chill while you prepare the other components of your nachos.
Step 3: Cook the Ground Beef
Heat a medium skillet over medium-high heat. Once it's hot, add the ground beef and break it apart with a spoon. Cook for about 5-7 minutes, until the meat is nicely browned and no longer pink. After that, stir in the taco seasoning, cooking for an additional minute, and then drain any excess fat.
Step 4: Build Your Nacho Layers
Start layering your oven-baked nachos in the springform pan. Begin with a layer of tortilla chips, followed by the seasoned beef. Next, sprinkle a generous amount of diced colorful veggies and then alternate layers of shredded cheddar and Monterey Jack cheese. Repeat these layers until all ingredients are used, crushing a few extra chips on top for a delightful crunch.
Step 5: Bake the Nachos
Carefully place the springform pan into the preheated oven. Bake for 30 minutes, watching as the cheese melts and bubbles beautifully. You'll know it's ready when the cheese is fully melted and the edges start to show a little golden-brown color, filling your kitchen with an irresistible aroma.
Step 6: Remove and Serve
Once baked, take the pan out of the oven and place it on a large serving plate. Unlatch the springform ring carefully and peel off the parchment collar to unveil your stunning oven-baked nachos. The layers of cheese, beef, and veggies will look inviting.
Step 7: Add the Final Touches
Drizzle your prepared lime sour cream over the nachos, then sprinkle with chopped avocado and freshly chopped cilantro for a pop of color and flavor. Serve your oven-baked nachos immediately, allowing everyone to dive into this delightful, cheesy goodness!

Oven-Baked Nachos Variations & Substitutions
Feel free to let your creativity shine and customize your oven-baked nachos for a truly personal touch!
-
Vegetarian: Swap ground beef for black beans or lentils to create a hearty, meat-free option.
For an extra burst of flavor, add some sautéed mushrooms and corn. This twist makes your nachos just as satisfying without the meat! -
Spicy Kick: Add sliced jalapeños or your favorite hot sauce to the layers for some serious heat.
Whether you opt for fresh or pickled, those peppers will provide a zesty contrast to the creamy cheese. Spice it up to match your taste buds! -
Cheese Lovers: Feel free to mix in other cheeses like pepper jack or gouda for a bold flavor.
The creamy, melty goodness will create a luscious experience that will leave even the biggest cheese enthusiasts happy. Embrace the cheese revolution! -
Gluten-Free: Use gluten-free tortilla chips to ensure everyone at the table can indulge.
With these crispy alternatives, you won’t miss a beat in flavor or texture. Everyone can enjoy the scrumptious experience together! -
Southwestern Flair: Incorporate corn, black beans, and diced tomatoes to give your nachos an added Tex-Mex twist.
This combination brings freshness and a rainbow of flavors that will tantalize your taste buds. It’s a meal that feels like a fiesta! -
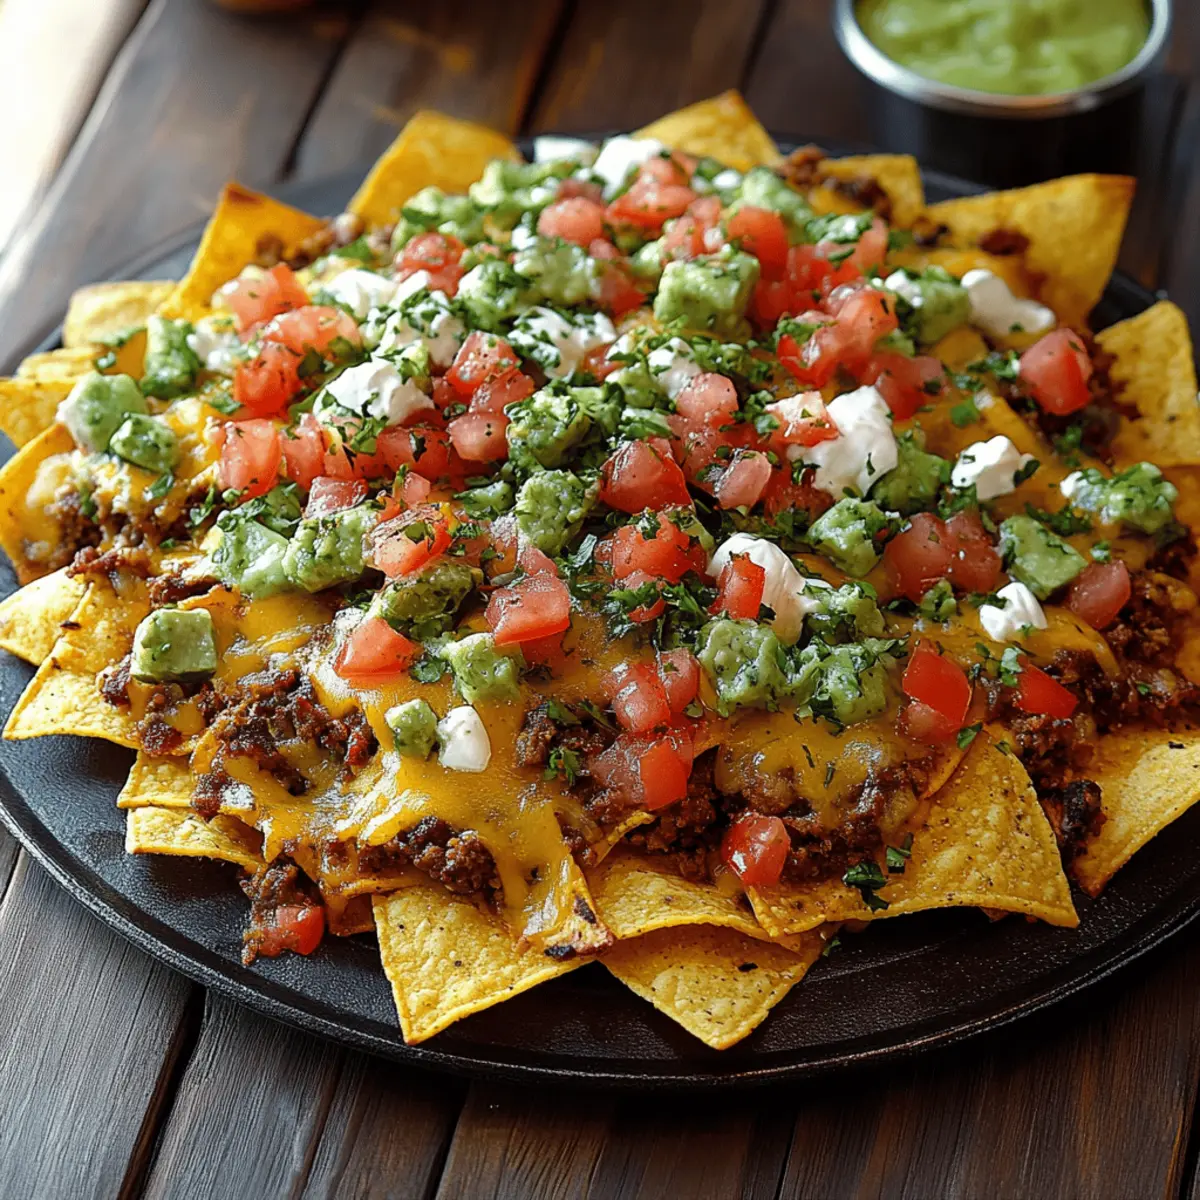
**Loaded: ** Create a loaded version by topping with guacamole and fresh pico de gallo.
This provides a vibrant finish that enhances every bite with fresh elements. Your guests may just applaud your creativity! -
Creamy Spin: Swap the sour cream with Greek yogurt for a tangy twist that’s a little healthier.
The yogurt maintains that creamy texture while boosting the nutrition factor. What’s not to love about deliciously good-for-you nachos? -
Baked Over Fried: For a lightened version, opt for homemade baked tortilla chips made from corn tortillas.
Just cut them into triangles, brush with a little oil, and bake until crispy! You'll be surprised by how satisfying a healthier option can be.
These variations invite you to explore beyond the traditional while still savoring every delicious bite of your oven-baked nachos.
How to Store and Freeze Oven-Baked Nachos
Room Temperature: Serve your oven-baked nachos immediately for the best flavor and crunch; they can sit at room temperature for up to 2 hours before they should be consumed.
Fridge: Store leftover nachos in an airtight container for up to 3 days, layering parchment paper between the nachos to help retain some crispness.
Freezer: While nachos can be frozen, it's best to freeze them before baking. Assemble layers in a freezer-safe dish, wrap tightly, and store for up to 2 months.
Reheating: To reheat baked nachos, place them on a baking sheet and warm in a preheated oven at 350°F (175°C) for about 10-15 minutes, or until heated through.
What to Serve with Oven-Baked Nachos
As you gather around for a delicious feast, let the vibrant flavors of your nachos inspire a delightful meal experience.
-
Fresh Guacamole: Perfectly creamy and rich, guacamole elevates your nachos while adding a refreshing contrast to the savory flavors. Scoop some onto your plate for a refreshing burst with every bite!
-
Zesty Salsa: Bright and tangy, salsa offers a lively accompaniment that complements the richness of the cheese and seasoned beef. It brings a splash of color and flavor, making your plate even more enticing.
-
Crispy Tortilla Salad: A light and crunchy salad drizzled in lime dressing balances the cheesy goodness of nachos. The freshness of the greens will make you feel great after indulging!
-
Fiery Jalapeño Poppers: For those who crave heat, these cheesy jalapeño bites are the perfect kick to your spread. They harmonize with the flavors while adding a crispy, spicy element to the meal.
-
Creamy Coleslaw: The cool and tangy crunch of coleslaw stands in delightful contrast to the warm, melty nachos, offering a refreshing palate cleanser.
-
Margaritas: A classic pairing, the zesty flavors of margaritas enhance the fiesta ambiance. Sipping this refreshing drink alongside your nachos creates a festive dining experience.
-
Chocolate Chip Cookies: For a sweet finish, serve warm cookies. Their gooey goodness complements the savory nachos, turning a simple meal into a dessert delight.
-
Cilantro Lime Rice: This fragrant rice dish adds a tasty side that echoes the flavors in your nachos, giving a warming comfort to those contrasting crispy layers.
-
Nacho Cheese Dip: An extra layer of cheesy goodness, this creamy dip is perfect for those who want to amp up their nacho experience. Drizzle or scoop for a delightful cheesy moment!
Make Ahead Options
These Oven-Baked Nachos are perfect for meal prep enthusiasts! You can prepare the ground beef and diced veggies up to 3 days in advance. Simply cook the beef with taco seasoning and store it in an airtight container in the refrigerator. The veggies can be chopped and kept fresh in a sealed bag. When you’re ready to enjoy your nachos, layer the chips, beef, and veggies in the springform pan, then top with cheese and bake directly from the fridge. For best results, assemble your nachos no more than 24 hours ahead to maintain the crispiness of the chips. Just pop them in the oven, and you’ll have a delightful dish ready with minimal effort!
Expert Tips for the Best Oven-Baked Nachos
Layer Wisely: Start with a solid base of tortilla chips and layer evenly. This ensures each bite provides a perfect balance of toppings without overwhelming the chips.
Avoid Soggy Chips: Let your ground beef cool slightly before layering to prevent moisture from softening the chips—and keep those crispy tortilla chips the star of the show!
Cheese Control: Use a mix of cheddar and Monterey Jack for flavor and creaminess, but don't skimp on the cheese! A generous amount makes for perfect melty goodness.
Evenly Distribute Toppings: Spread toppings and cheese evenly across all layers for a cohesive flavor in your oven-baked nachos. This avoids clumps of ingredients and ensures every bite counts.
Customize to Taste: Feel free to swap in different ingredients, like beans or jalapeños, depending on your taste preferences. Experimenting is key to finding your perfect oven-baked nachos combination!
Serve Fresh: Nachos are best enjoyed right out of the oven. Serve immediately with optional sides like salsa or guacamole for a delightful snacking experience.

Oven-Baked Nachos Recipe FAQs
How do I choose ripe ingredients for my nachos?
Absolutely! For the best results, select ripe avocados that yield slightly when pressed. Look for colorful bell peppers that are firm without dark spots. Fresh veggies should have a vibrant color, indicating great flavor and crunch.
What’s the best way to store leftover Oven-Baked Nachos?
Great question! Store any leftovers in an airtight container in the fridge, where they’ll stay fresh for up to 3 days. To help maintain some crunch, layer parchment paper between nachos.
Can I freeze Oven-Baked Nachos?
Yes, you can! However, it’s best to freeze them before baking. Assemble your nachos in a freezer-safe dish, cover tightly with plastic wrap or aluminum foil, and freeze for up to 2 months. When you’re ready to enjoy, bake them straight from the freezer, adding an extra 5-10 minutes to the cooking time.
What if my nachos turn out soggy?
No worries! To avoid soggy nachos, make sure to let your ground beef cool slightly before layering it onto the chips. Also, don’t overload the nachos with wet ingredients all at once; consider adding toppings like sour cream or guacamole right before serving to keep everything crispy.
Are Oven-Baked Nachos suitable for people with dietary restrictions?
Very much so! For gluten-sensitive individuals, choose gluten-free tortilla chips. If you're looking for healthier options, consider using ground turkey or making a vegetarian version with beans and more veggies. Just keep an eye on allergies, particularly to dairy in the cheese and sour cream.
How can I customize my Oven-Baked Nachos for kids or picky eaters?
The more the merrier! For kids or picky eaters, keep toppings simple: opt for just cheese and ground beef or go for fun shapes like diced star-shaped veggies. You can also offer toppings on the side, allowing everyone to personalize their nachos to their liking!
Savor Every Bite of These Irresistible Oven-Baked Nachos
Ingredients
Equipment
Method
- Preheat your oven to 350°F (175°C) and line a 10-inch springform pan with a parchment collar.
- Whisk together sour cream, lime juice, and salt in a bowl, transfer to a squeeze bottle, and refrigerate.
- Cook ground beef in a skillet over medium-high heat for 5-7 minutes, add taco seasoning, cook for 1 more minute, then drain fat.
- Layer tortilla chips, seasoned beef, diced veggies, cheddar, and Monterey Jack cheeses in the springform pan.
- Bake for 30 minutes until cheese melts and edges are golden brown.
- Once done, remove from oven, unlatch the springform ring, and peel off the parchment collar.
- Drizzle lime sour cream over nachos, sprinkle chopped avocado and cilantro, and serve immediately.


Leave a Reply