
As I opened my fridge, the vibrant green of Hatch chiles caught my eye, and I felt an instant wave of inspiration. What better way to showcase these beauties than in a batch of Spicy Hatch Chile Enchiladas? This recipe is a true gem for anyone looking to reinvigorate their dinner routine. Not only are these enchiladas a quick and satisfying dish that beats takeout in both flavor and nutrition, but they also bring a fun twist to the traditional enchilada experience with a kick of spice that both heats up the plate and warms the soul. So grab your tortillas and let’s make these delectable enchiladas that promise to delight your taste buds and impress your dinner guests. Ready to whip up something delicious?
Why are Spicy Hatch Chile Enchiladas a Must-Try?
Packed with Flavor: These enchiladas are bursting with the vibrant taste of Hatch chiles, creating a unique and tantalizing twist on a classic dish.
Easy to Prepare: With just a quick mix and roll, you’ll have a comforting meal ready to pop in the oven. Say goodbye to complicated recipes!
Crowd-Pleaser: Perfect for family dinners or gatherings, these enchiladas are sure to impress your guests with their mouthwatering taste and beautiful presentation.
Versatile Ingredients: Feel free to swap in your favorite proteins or veggies for a personalized touch. You could even pair them with your choice of sour cream or guacamole for added flavor.
Time-Saving: With a total time of just 1.5 hours, you’ll have a satisfying homemade meal without spending all night in the kitchen. Plus, it’s way healthier than fast food!
Dive into this delightful recipe and make your dining table the go-to spot for flavorful evenings!
Spicy Hatch Chile Enchiladas Ingredients
For the Enchiladas
• 12 corn tortillas – These provide a sturdy and tasty base for your enchiladas.
• 2 cups cooked shredded chicken (or beef) – Feel free to substitute with your favorite protein for a personalized touch.
• 1 cup shredded cheese (cheddar or Monterey Jack) – Choose a cheese that melts well to create that delicious gooey texture.
• 2 cups Hatch green chiles, roasted and chopped – The star of the show, adding a uniquely spicy flavor that'll ignite your taste buds!
• 1 cup sour cream – Adds a creamy element to balance the heat of the chiles.
• 1 cup green enchilada sauce – This brings moisture and flavor to the dish, making it irresistible!
For the Spices
• 1 teaspoon ground cumin – Offers a warm, earthy flavor that complements the chiles beautifully.
• 1 teaspoon garlic powder – A must-have for enhancing the savory goodness of the filling.
• 1 teaspoon onion powder – Adds a hint of sweetness and depth to the flavor profile.
• Salt and pepper to taste – Essential ingredients to bring out the best in your enchiladas.
For the Garnish (optional)
• Fresh cilantro – A sprinkle of green not only beautifies your dish but adds a fresh pop of flavor, too!
Now that you have all your ingredients ready, let the fun begin in the kitchen as you create these Spicy Hatch Chile Enchiladas that everyone will love!
Step‑by‑Step Instructions for Spicy Hatch Chile Enchiladas
Step 1: Preheat Your Oven
Begin by preheating your oven to 350°F (175°C). This step is essential for cooking your Spicy Hatch Chile Enchiladas evenly and ensuring a beautifully melted cheese topping. While the oven warms up, gather your ingredients and greased baking dish, setting the stage for an exciting cooking adventure.
Step 2: Prepare the Filling
In a large mixing bowl, combine the cooked shredded chicken, roasted and chopped Hatch chiles, ground cumin, garlic powder, onion powder, salt, and pepper. Mix everything thoroughly until well combined—you're aiming for a flavorful filling that packs a spicy punch! This mixture will become the heart of your enchiladas.
Step 3: Warm the Tortillas
Next, heat a dry skillet over medium heat. Warm each corn tortilla for about 30 seconds on each side until they're pliable and slightly toasted. Keeping them warm makes rolling easier and will prevent them from cracking. As you do this, keep an eye on the tortillas, flipping them when they start to bubble.
Step 4: Assemble the Enchiladas
Take a warmed tortilla, and place a generous amount of the filling in the center. Carefully roll it up tightly and place it seam-side down in your greased baking dish. Continue the process until all your tortillas are filled and snugly arranged in the dish, creating a foundation of Spicy Hatch Chile Enchiladas ready for the sauce.
Step 5: Add the Sauce
Pour the green enchilada sauce evenly over the rolled enchiladas, ensuring they are well-coated for moisture and flavor. The sauce not only enhances the dish but helps keep the tortillas moist during baking. Spread it gently with a spatula, making sure every enchilada gets a taste of that delicious sauce.
Step 6: Sprinkle the Cheese
Now it’s time to sprinkle the shredded cheese over the top of the enchiladas, covering the sauce liberally. Choose cheddar or Monterey Jack for a glorious melting effect. As the cheese combines with the enchilada sauce, it will create a golden, bubbling layer that’s simply irresistible!
Step 7: Bake to Perfection
Carefully place the baking dish in your preheated oven and bake for 25-30 minutes. Keep an eye on them as they bake; you’ll know they're done when the cheese is melted and bubbly, creating a tantalizing aroma that fills your kitchen.
Step 8: Cool and Garnish
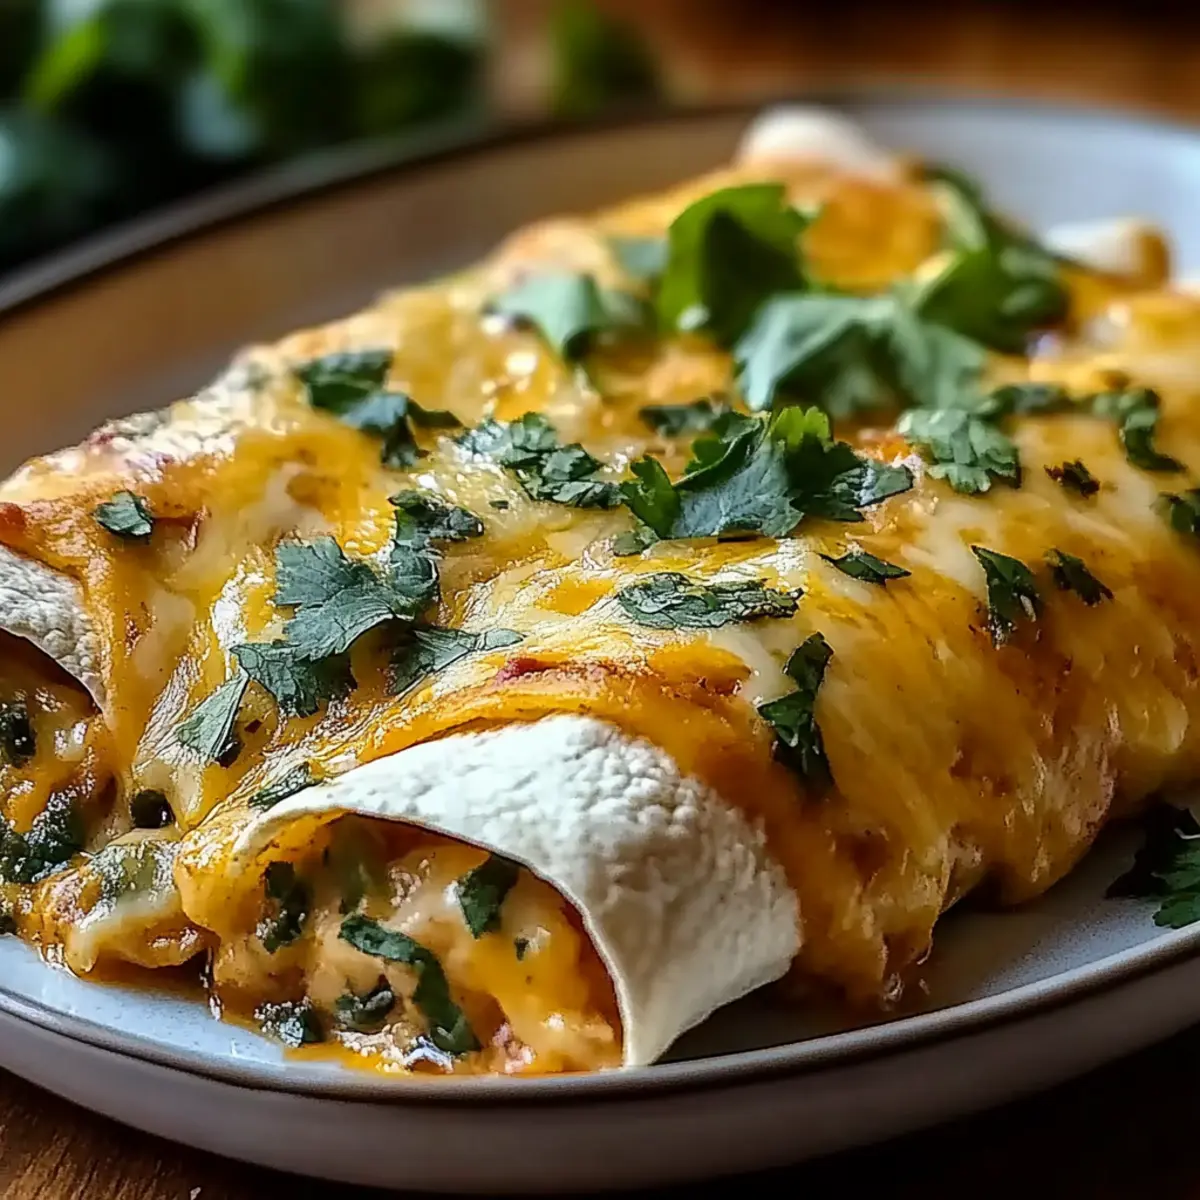
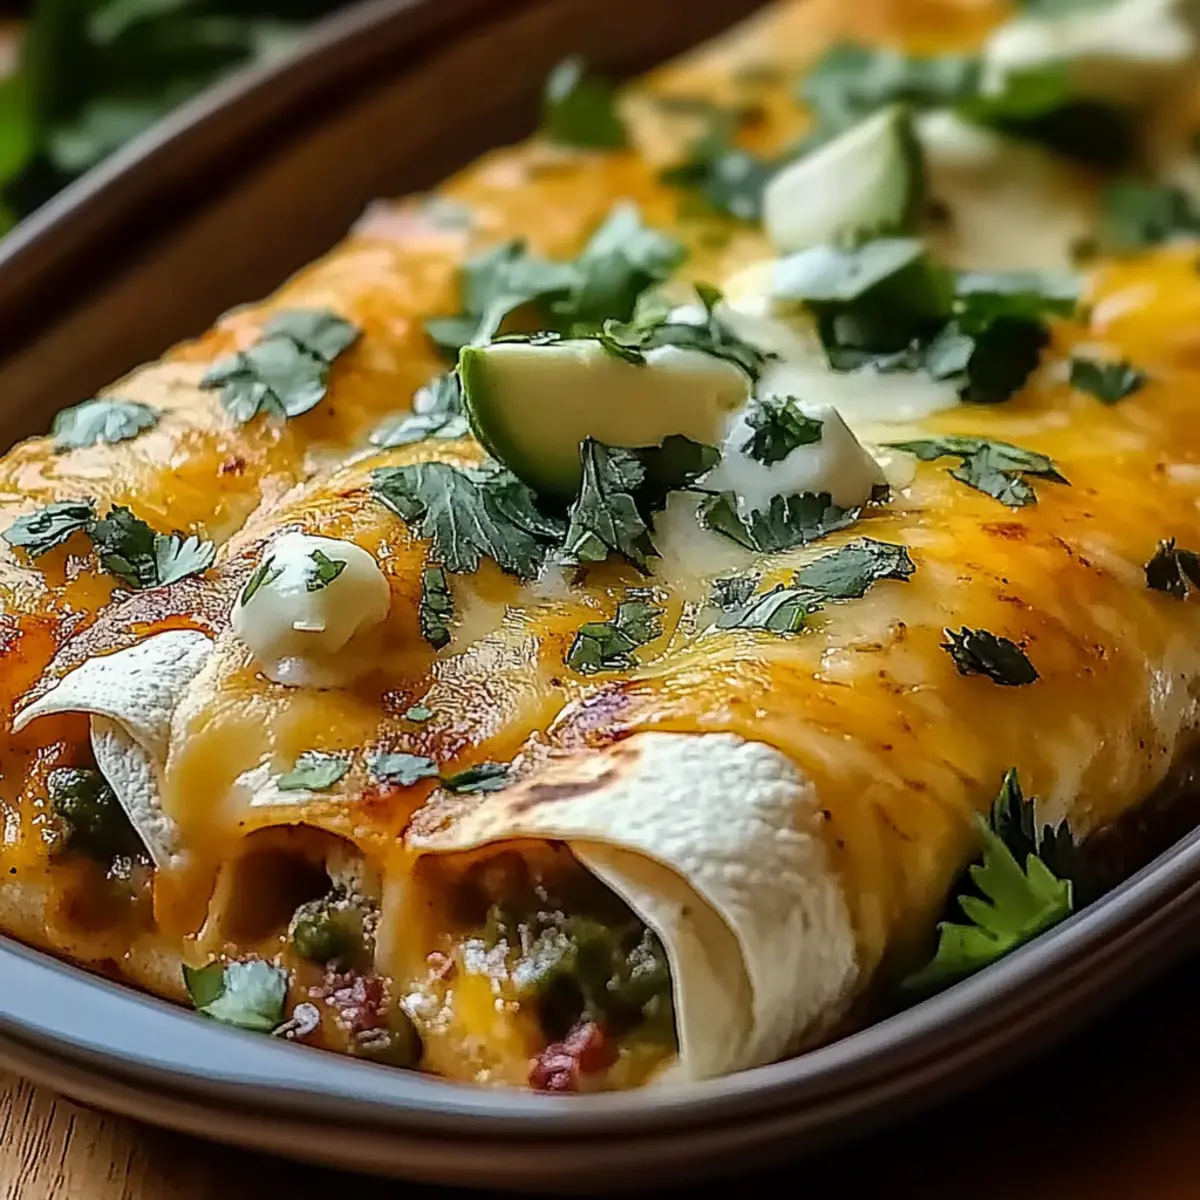
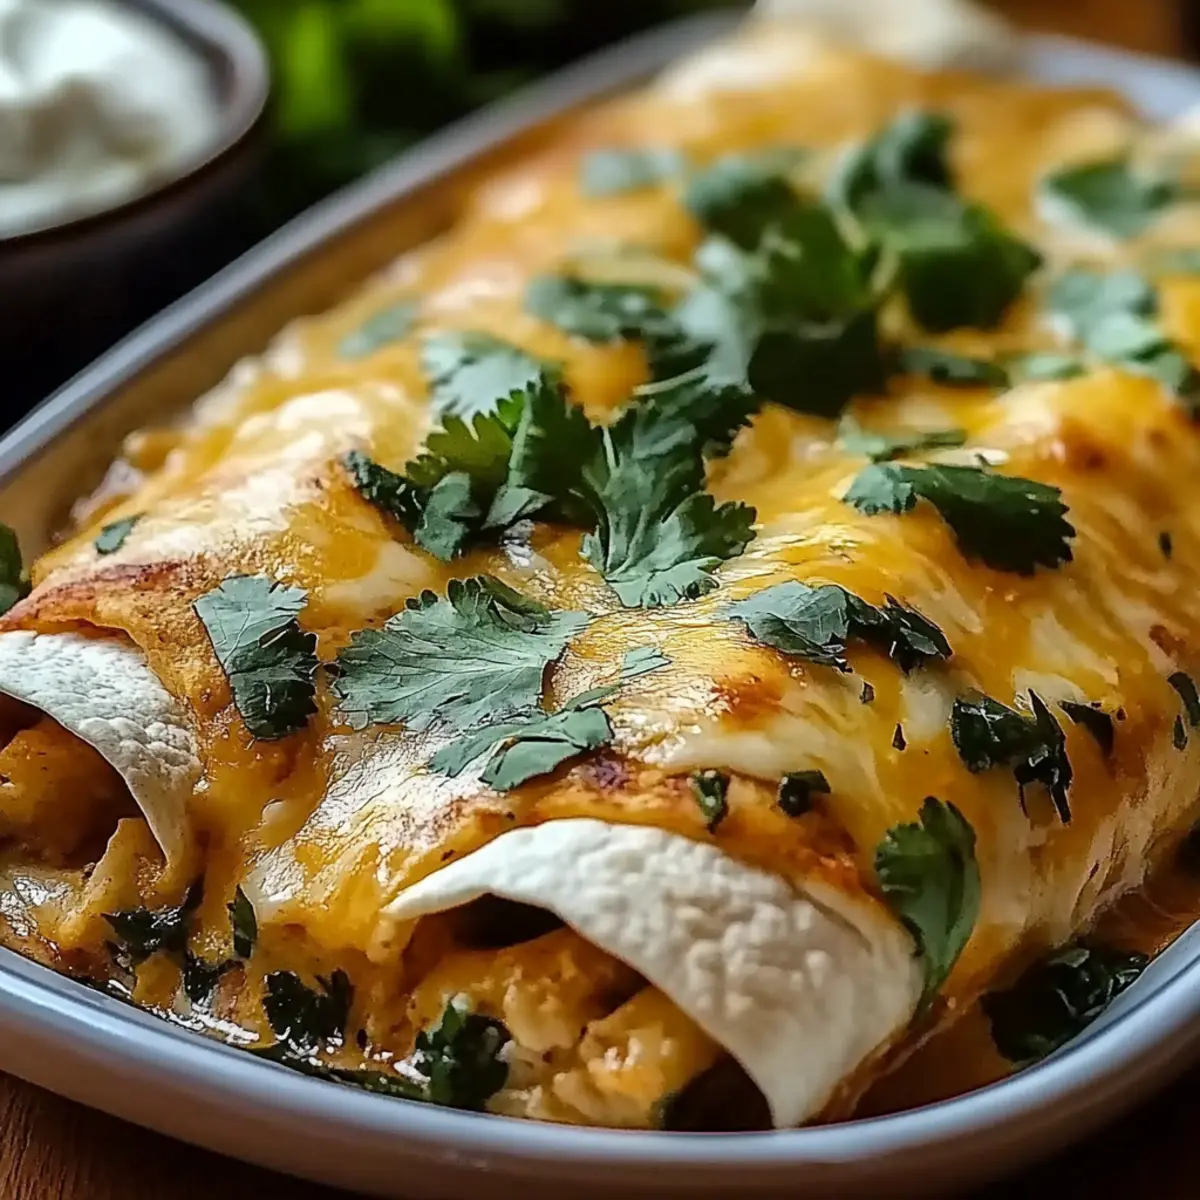
Once out of the oven, let your Spicy Hatch Chile Enchiladas cool for 10-15 minutes. This resting time makes serving easier and allows the filling to set. When ready, garnish with a dollop of sour cream and a sprinkle of fresh cilantro for a beautiful finish that adds flavor and color.
Make Ahead Options
These Spicy Hatch Chile Enchiladas are perfect for meal prep! You can assemble the enchiladas and refrigerate them for up to 24 hours before baking. To do this, simply follow the instructions until step 5, then cover the baking dish tightly with plastic wrap to keep them fresh. Alternatively, you can prepare the filling mixture (chicken, chiles, and spices) up to 3 days in advance, storing it in an airtight container in the refrigerator to maintain flavor and prevent browning. When you're ready to serve, simply pour the enchilada sauce, sprinkle the cheese, and bake them as usual. With these make-ahead tips, you’ll enjoy a rewarding and delicious homemade meal with minimal effort!
How to Store and Freeze Spicy Hatch Chile Enchiladas
Fridge: Store your Spicy Hatch Chile Enchiladas in an airtight container for up to 3 days. Ensure they are completely cooled before sealing to prevent moisture buildup.
Freezer: For longer storage, freeze the enchiladas in a single layer wrapped tightly in plastic wrap, then transfer to a freezer bag. They can last up to 3 months in the freezer.
Reheating: To reheat, thaw in the refrigerator overnight and bake at 350°F (175°C) for about 20 minutes, or until heated through. You can also microwave individual servings on medium power for about 2-3 minutes.
Avoiding Soggy Tortillas: To keep the tortillas from becoming soggy upon reheating, place a paper towel over the enchiladas in the container to absorb excess moisture before sealing.
Spicy Hatch Chile Enchiladas Variations
Feel free to let your creativity shine as you customize these enchiladas to suit your taste and dietary needs.
- Vegetarian Delight: Substitute shredded chicken with black beans or roasted vegetables for a hearty meat-free option.
- Gluten-Free: Use corn tortillas instead of wheat to keep this meal gluten-free without compromising on flavor!
- Extra Heat: Add diced jalapeños or a drizzle of hot sauce inside the enchiladas for a true firecracker kick.
- Creamy Twist: Incorporate cream cheese into the filling for a rich, velvety texture that complements the spices beautifully.
- Cheesy Goodness: Mix different cheeses like pepper jack for an unforgettable cheesy flavor explosion that melts gloriously!
- Savory Seafood: Replace chicken with shrimp or crab meat for a coastal flavor fusion that adds a luxurious twist to the dish.
- Savory Breakfast Version: Fill tortillas with scrambled eggs and chorizo, topped with Hatch chiles for a satisfying breakfast take.
- Sautéed Greens: Add a handful of sautéed spinach or kale to the filling for a nutritious boost that's packed with flavor and goodness.
Embrace these variations to create a dish that feels special and tailored just for you! Plus, don't forget to serve alongside some of your favorite sides, perhaps a refreshing Mexican Street Corn or a side of zesty Guacamole for that extra zing!
What to Serve with Spicy Hatch Chile Enchiladas?
Elevate your meal with delightful sides that perfectly complement the warmth of enchiladas.
-
Creamy Guacamole: Adds a rich and refreshing contrast to the spicy enchiladas, enhancing every bite. The coolness of avocado is simply irresistible!
-
Mexican Rice: Fluffy rice infused with lime and spices offers a delightful balance to the bold flavors. It’s the perfect base to soak up extra sauce.
-
Black Bean Salad: A zesty mix of black beans, corn, and tomatoes brings bright colors and freshness to your plate. This salad not only adds texture but is also hearty and satisfying.
-
Honey-Lime Roasted Vegetables: Roasted veggies drizzle with honey and lime provide sweetness that contrasts beautifully with the heat of the enchiladas. A crispy texture elevates the meal, making it even more enjoyable.
-
Fresh Pico de Gallo: Bursting with fresh tomatoes, cilantro, and a squeeze of lime, this salsa gives a zesty punch that brightens the dish and adds refreshing crunch. It’s a great topping or side.
-
Crispy Tortilla Chips: Serve these as a crunchy accompaniment to steal the show! Perfect for scooping up delicious bits of enchilada, they tie the meal together deliciously.
-
Classic Margarita: This refreshing cocktail with lime and tequila pairs wonderfully with the spice of the enchiladas. The acidity cleanses the palate and elevates the dining experience.
-
Churros with Chocolate Sauce: For dessert, nothing beats warm, cinnamon-dusted churros dipped in velvety chocolate sauce, wrapping up your meal with sweet comfort. Who could resist?
Expert Tips for Spicy Hatch Chile Enchiladas
• Tortilla Trick: Ensure you're warming the corn tortillas enough to make them pliable; this prevents cracking when rolling.
• Filling Balance: Avoid overfilling your tortillas! A generous amount is great, but too much will make rolling challenging.
• Chiles Choice: For milder enchiladas, choose fewer chiles or deseed the Hatch chiles before chopping, reducing heat without sacrificing flavor.
• Even Baking: Rotate the baking dish halfway through cooking to ensure even melting of the cheese on all the enchiladas.
• Garnish Generously: Don’t hold back on garnishing with sour cream and fresh cilantro; these toppings add richness and freshness to every bite of your Spicy Hatch Chile Enchiladas!
Spicy Hatch Chile Enchiladas Recipe FAQs
How do I choose ripe Hatch chiles?
When selecting Hatch chiles, look for ones that are firm with vibrant green skin. They should be free of dark spots and blemishes. A slight sheen on the skin is a good sign of freshness, and avoid any chiles that feel soft or have wrinkles, as those indicate they may be past their prime.
How long can I store leftover Spicy Hatch Chile Enchiladas in the fridge?
You can safely store your leftover Spicy Hatch Chile Enchiladas in an airtight container in the fridge for up to 3 days. Just make sure they are completely cooled before sealing the container to prevent moisture buildup, which can make the tortillas soggy.
Can I freeze Spicy Hatch Chile Enchiladas? If so, how?
Absolutely! To freeze your Spicy Hatch Chile Enchiladas, first let them cool completely. Then, wrap each enchilada tightly in plastic wrap and place them in a freezer-safe bag. They’ll stay fresh for up to 3 months. When you're ready to enjoy them again, thaw in the refrigerator overnight and reheat in the oven to maintain that delightful texture.
What if my enchiladas are too spicy?
If you find that your enchiladas are too spicy, you can add a dollop of sour cream or guacamole on top when serving. These creamy garnishes balance the heat beautifully. Additionally, you could use fewer chiles next time or remove the seeds before chopping them for a milder flavor.
Is this recipe suitable for those with gluten allergies?
Yes! Corn tortillas are gluten-free, making this recipe a great option for those who need to avoid gluten. However, always double-check your ingredients, particularly the enchilada sauce, to ensure they are labeled gluten-free.
How can I avoid my tortillas cracking while assembling?
To prevent your corn tortillas from cracking, it’s essential to warm them up in a dry skillet for about 30 seconds on each side until they’re pliable. This makes them easier to roll without breaking. Keep them wrapped in a clean kitchen towel while you work to retain heat and moisture!

Spicy Hatch Chile Enchiladas That Ignite Your Taste Buds
Ingredients
Equipment
Method
- Preheat your oven to 350°F (175°C).
- In a large mixing bowl, combine the cooked shredded chicken, roasted and chopped Hatch chiles, ground cumin, garlic powder, onion powder, salt, and pepper. Mix until well combined.
- Heat a dry skillet over medium heat. Warm each corn tortilla for about 30 seconds on each side until pliable.
- Take a warmed tortilla and place a generous amount of the filling in the center. Roll it up tightly and place it seam-side down in a greased baking dish.
- Pour the green enchilada sauce evenly over the rolled enchiladas.
- Sprinkle the shredded cheese over the top of the enchiladas.
- Bake for 25-30 minutes until the cheese is melted and bubbly.
- Let cool for 10-15 minutes. Garnish with sour cream and fresh cilantro before serving.


Leave a Reply