
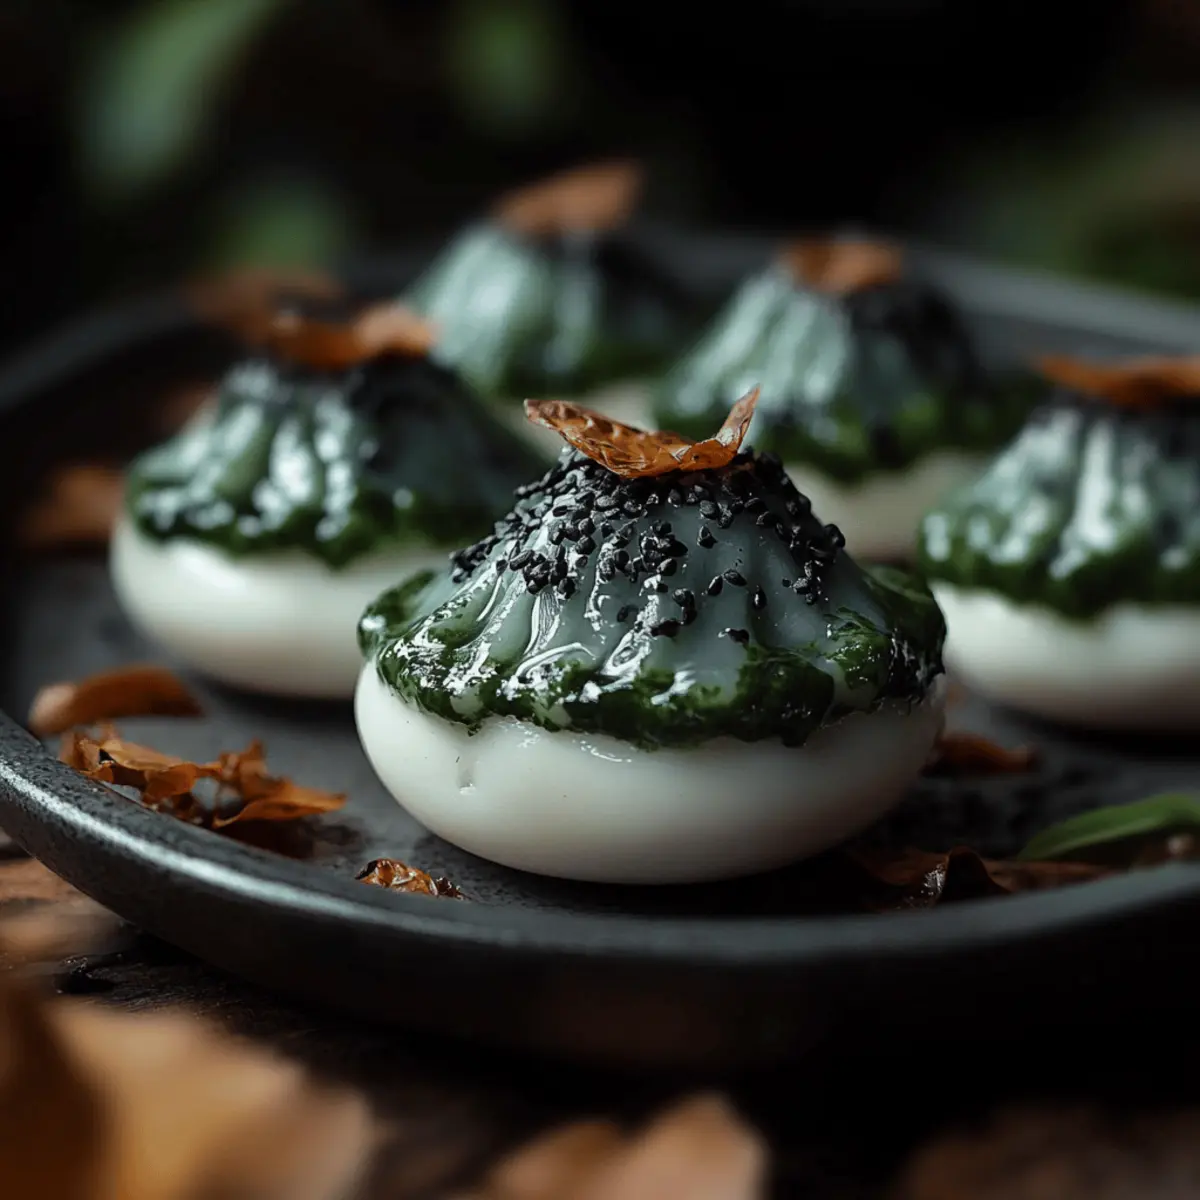
As the leaves turn and the air tinges with a chill, it’s time to conjure up some spooky delights in the kitchen! Halloween isn’t just about the candy; it’s a chance to embrace creativity and fun with dishes that surprise and amuse. Enter my Halloween Deviled Eggs, also known as Swamp Eggs—a playful twist on the classic appetizer that’ll be the talk of your haunted gathering. With the enchanting shades pulled from blueberries, these naturally dyed treats not only embrace the spirit of the season but also pack a healthy punch with fresh herbs and vibrant flavors. Plus, they’re perfect for meal prepping, making them an easy yet impressive addition to any festive spread. So, are you ready to cast a spell on your guests with these eerie delights? Let’s dive in!
Why are these Halloween Deviled Eggs perfect?
Unique Twist: These Halloween Deviled Eggs are a thrilling spin on a classic! The beautiful natural dyes not only create a spooky look but also add a hint of fruity flavor.
Healthy Ingredients: Packed with fresh herbs and nutritious ingredients, these eggs are a guilt-free indulgence.
Easy Preparation: The simple steps ensure that even novice cooks can master this recipe, allowing you to whip up a festive dish without stress.
Versatile Appeal: Ideal for a spooky party, casual gatherings, or as a delightful snack at home.
Make Ahead Friendly: Prepare them a day in advance for a time-saving treat that keeps well, letting you enjoy more time with your guests!
For more fun ideas for your Halloween menu, check out our guide on festive finger foods!
Halloween Deviled Eggs Ingredients
• Get ready to create the spookiest treat!
For the Eggs
- 12 large eggs – A classic base for making these spooky delights!
For the Dye
- 1 ½ cups frozen blueberries – These berries add a naturally vibrant color.
- 1 ½ cups hot water – Helps release the beautiful color from the blueberries.
- 3 tablespoons distilled white vinegar – Enhances the dyeing process for richer shades.
For the Filling
- 12 large egg yolks – Use the yolks from your dyed hard-boiled eggs for flavor and creaminess.
- 9 tablespoons mayo – For a creamy texture and tangy flavor balance.
- 2 tablespoons liquid chlorophyll – Adds a hint of color and a nutritious twist.
- ¼ teaspoon salt – Enhances all the flavors in the filling.
- ¼ teaspoon black pepper – A dash of heat to elevate the taste.
- 3 tablespoons minced fresh dill – Infuses a refreshing herbal note.
- 2 tablespoons minced fresh chives – Adds a mild onion flavor for a burst of freshness.
- 1 large clove garlic, crushed – For an extra kick of bold flavor.
For Garnish
- ½ tablespoon poppy seeds – These tiny seeds add a fun crunch and visual appeal.
With these ingredients, your Halloween Deviled Eggs are bound to wow your guests while delivering delightful flavors!
Step‑by‑Step Instructions for Halloween Deviled Eggs
Step 1: Hard-Boil the Eggs
Begin by placing the 12 large eggs in a pot, covering them with cold water. Bring the water to a boil over medium heat, then reduce to a simmer for 10-12 minutes. Once cooked, transfer the eggs to an ice bath for about 5-10 minutes, allowing them to cool completely. You want them cold to the touch, making peeling easier for your Halloween Deviled Eggs.
Step 2: Prepare the Dye
In a medium bowl, combine the 1½ cups of thawed blueberries, 1½ cups of hot water, and 3 tablespoons of distilled white vinegar. Stir gently to release the vibrant colors from the blueberries, keeping an eye out for deep purple hues. Let this mixture sit while you prepare the eggs for dyeing, ensuring it’s ready for the next step in creating your spooky treat.
Step 3: Crack the Egg Shells
Once the hard-boiled eggs are cool, gently tap each egg’s shell on a hard surface to create a crackled effect. Be cautious not to peel the shell at this stage; instead, aim for even cracks all around. This step adds a unique look to your Halloween Deviled Eggs, allowing the dye to penetrate nicely and create that enchanting, spooky appearance.
Step 4: Dye the Eggs
Carefully submerge the cracked eggs in the dye mixture, ensuring they’re fully immersed. Let them soak for at least 2-3 hours at room temperature or, for more intense color, refrigerate them overnight. Check them occasionally for the desired color—remember, those vibrant shades will enhance the spooky reveal when you peel them for the filling!
Step 5: Peel and Separate
Once dyed, gently peel the eggs under running water to help remove any stubborn bits of shell. Place the peeled egg whites in a separate bowl and set aside. Carefully separate the yolks from the whites, placing the yolks into a mixing bowl. This mixture will become the creamy filling for your Halloween Deviled Eggs, so take care as you separate them.
Step 6: Prepare the Filling
In the bowl with the 12 large egg yolks, add 9 tablespoons of mayo, 2 tablespoons of liquid chlorophyll, ¼ teaspoon of salt, ¼ teaspoon of black pepper, 3 tablespoons of minced fresh dill, 2 tablespoons of minced fresh chives, and 1 crushed garlic clove. Using a fork or a mixer, blend the ingredients until the mixture is smooth and creamy, creating a vibrant filling for your spooky delight.
Step 7: Fill the Egg Whites
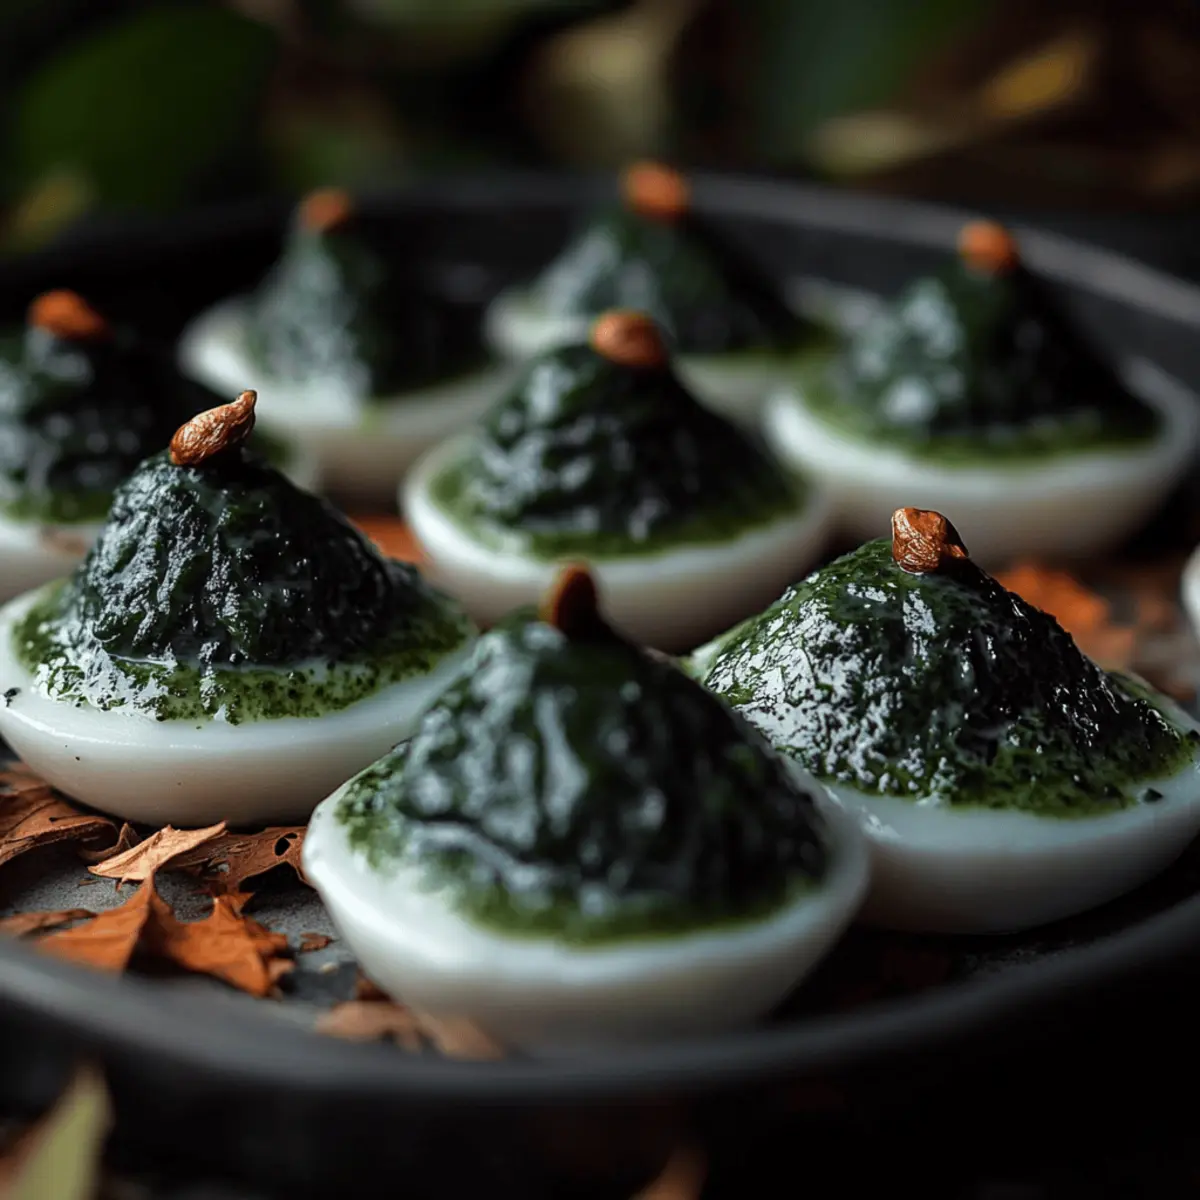
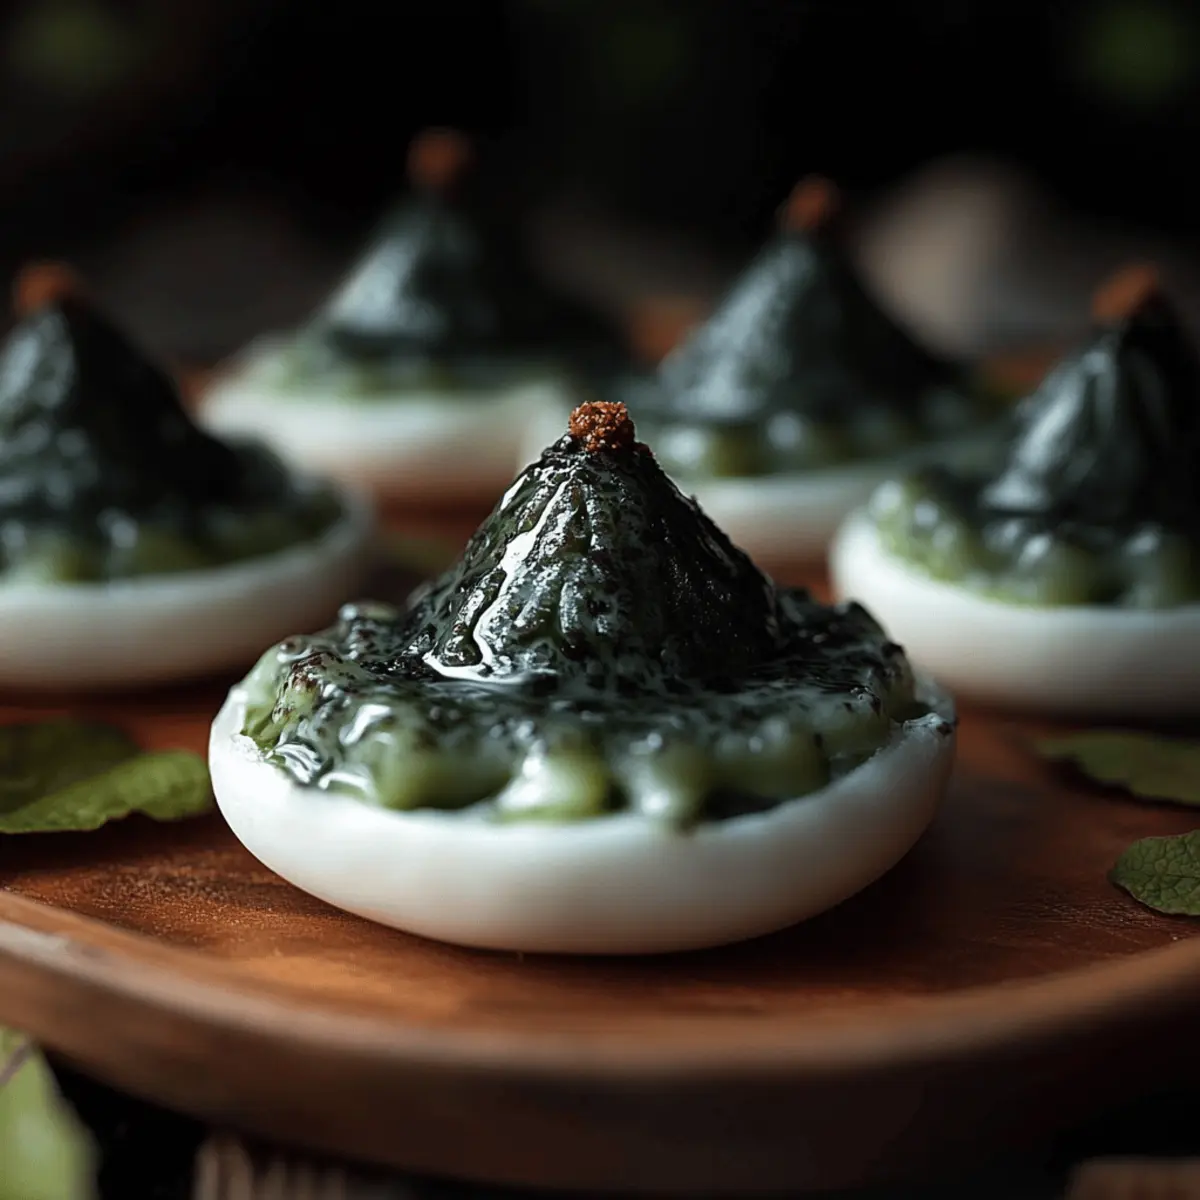
Now it’s time to fill the hollowed-out egg whites with your delicious yolk mixture. You can use a spoon to gently scoop the filling in, or for a more decorative touch, place the filling in a piping bag and pipe it in. Make sure to fill each egg white generously, showcasing the vibrant green filling, which gives your Halloween Deviled Eggs a festive and spooky flair.
Step 8: Garnish and Serve
Finish off your Halloween Deviled Eggs by sprinkling ½ tablespoon of poppy seeds over the filled eggs for a lovely garnish. This adds a nice visual contrast and a satisfying crunch. Arrange your spooky eggs on a platter and let them chill until serving. Your Halloween gathering is now ready for a delightful and eerie appetizer that will be the center of attention!
Make Ahead Options
These Halloween Deviled Eggs are perfect for busy cooks looking to save time without sacrificing flavor! You can easily hard-boil and dye the eggs up to 24 hours in advance, letting them soak in the dye overnight for richer colors. Once dyed, simply peel and separate the yolks from the whites, then refrigerate the components separately in airtight containers for up to 3 days. When it's time to serve, combine the yolk mixture ingredients and fill the egg whites just before your guests arrive to ensure they’re as fresh as possible. This method keeps your Halloween Deviled Eggs just as delicious and visually stunning, allowing you to enjoy the festivities more!
How to Store and Freeze Halloween Deviled Eggs
Fridge: Keep your Halloween Deviled Eggs in an airtight container for up to 3 days. Make sure they're sealed to prevent any of that creepy fridge odor from affecting their taste!
Freezer: While it’s not recommended to freeze the entire eggs once filled, you can freeze the yolk mixture separately for up to 1 month. Thaw it in the fridge overnight before filling the egg whites.
Reheating: These eggs are best enjoyed cold, but if you want to warm them slightly, place them in the fridge for a short while and serve them at room temperature.
Prep Ahead: Pre-dyed egg whites can be stored in the fridge for up to 2 days before filling, making it super convenient for your Halloween party prep!
Expert Tips for Halloween Deviled Eggs
-
Perfect Boiling: Ensure eggs are cooked just right for easy peeling. Use an ice bath immediately after boiling to prevent overcooking.
-
Dye Time: For the best color, let the eggs soak in the dye mixture overnight. Patience will bring out beautiful, spooky hues that will wow your guests!
-
Crack with Care: When cracking the shells, aim for even cracks without peeling. This creates a unique, mesmerizing pattern perfect for your Halloween Deviled Eggs.
-
Smooth Filling: For a creamy texture, mix yolks thoroughly with mayo and other ingredients until completely smooth. Avoid lumpy fillings for an elegant presentation.
-
Creative Garnish: Don’t shy away from changing up the garnish! While poppy seeds are festive, consider using edible flowers or black sesame seeds for even more Halloween charm.
What to Serve with Swamp Eggs
Create a memorable feast to accompany these enchanting treats!
-
Crispy Veggie Platter: A colorful selection of fresh vegetables adds crunch and nutrients while balancing the creamy texture of the deviled eggs. Pair with a zesty dip for added flavor.
-
Herbed Garlic Bread: This warm, toasted bread, infused with garlic and herbs, invites warmth and comfort to your Halloween spread, making each bite more satisfying.
-
Spooky Beet Salad: A vibrant salad featuring roasted beets, goat cheese, and walnuts offers a beautifully contrasting color and earthy sweetness that complements the Swamp Eggs perfectly.
-
Pumpkin Soup: Cozy up with a bowl of velvety pumpkin soup, its rich flavors providing a warming contrast to the tangy filling of the deviled eggs. It’s the comfort food we all crave during the fall!
-
Apple Cider Punch: Serve this refreshing fall-inspired drink that is light, fruity, and just a bit spiced. It’s the perfect way to cleanse your palate between bites of the deviled eggs.
-
Ghostly Cheesecake Bites: End the meal with these irresistible mini cheesecakes festively decorated for Halloween! Their sweetness is a perfect counterpoint to the savory deviled eggs.
With these lively pairings, your Halloween gathering will be filled with joy and flavor, creating unforgettable memories with every bite!
Halloween Deviled Eggs Variations
Feel free to mix and match these suggestions to customize your spooky treats and make them even more delightful!
-
Dairy-Free: Substitute mayo with mashed avocado for a creamy texture without the dairy. The result is a rich, green filling full of healthy fats!
-
Spicy Twist: Add a teaspoon of sriracha or your favorite hot sauce to the yolk mixture for a fiery kick. This will thrill those who love a little heat in their appetizers!
-
Herb Boost: Experiment with different herbs! Try basil or parsley for a fresh twist that pairs beautifully with the egg's natural flavors. This change adds depth and makes each bite fragrant.
-
Vegan Version: Use chickpea puree blended with vegan mayo for a plant-based alternative. Not only is it healthier, but it offers a fantastic flavor that even meat lovers will enjoy!
-
Savory Addition: Fold in crumbled bacon or finely chopped olives for an added crunch and savory depth. These additions are sure to draw in all the flavor seekers at your party.
-
Nutty Flavor: Incorporate a tablespoon of tahini in place of some mayo for a nutty twist while keeping things creamy. This swap brings a layer of richness that is simply irresistible.
-
Something Sweet: For an unusual but delightful twist, add a bit of honey or agave syrup to the yolk mix for natural sweetness. This could surprise your guests in the best way!
-
Colorful Curry: Mix a dash of curry powder into the yolk filling for an unexpected flavor twist. It gives both a wonderful hue and a unique taste that will intrigue your guests.
For a complete Halloween feast, consider pairing your Halloween Deviled Eggs with some spine-chilling cocktail ideas. Check out our fabulous Halloween drink recipes for spooky sips that will set the mood!
Halloween Deviled Eggs Recipe FAQs
What type of eggs should I use for Halloween Deviled Eggs?
Absolutely opt for large eggs, as they provide enough surface area for a satisfying filling. Fresh eggs are preferable; ensure they're not past their expiration date for the best results.
How long can I store my Halloween Deviled Eggs?
You can keep your Halloween Deviled Eggs in an airtight container in the fridge for up to 3 days. Make sure they’re sealed to avoid any unwanted odors from the fridge affecting their freshness and flavor.
Can I freeze my Halloween Deviled Eggs?
It's not ideal to freeze the entire filled eggs. However, you can freeze the yolk mixture separately for up to 1 month. Just be sure to thaw it in the fridge overnight before filling the egg whites—this allows for the best texture and flavor!
What should I do if my dye doesn’t work well?
If the dye doesn’t take on your eggs, don’t worry! Ensure your dye mixture is adequately mixed and the eggs have enough cracks. For vibrant colors, allow the eggs to soak longer in the dye (up to overnight) to achieve a more intense hue.
Can my pets eat these Halloween Deviled Eggs?
It's best to avoid sharing your Halloween Deviled Eggs with pets, as some ingredients like garlic can be harmful to them. Stick to pet-friendly treats to keep your furry friends safe while you enjoy these spooky delights!
How can I achieve a smoother filling for my deviled eggs?
For a perfectly smooth filling, I recommend using a hand mixer or food processor to thoroughly blend the yolks with mayo and other ingredients until creamy. This will ensure there are no lumps, providing an elegant and delicious filling that’s a feast for both the eyes and the palate!

Spooky Halloween Deviled Eggs That Wow the Taste Buds
Ingredients
Equipment
Method
- Begin by placing the 12 large eggs in a pot, covering them with cold water. Bring the water to a boil over medium heat, then reduce to a simmer for 10-12 minutes. Once cooked, transfer the eggs to an ice bath for about 5-10 minutes, allowing them to cool completely.
- In a medium bowl, combine the 1½ cups of thawed blueberries, 1½ cups of hot water, and 3 tablespoons of distilled white vinegar. Stir gently to release the vibrant colors from the blueberries, and let this mixture sit.
- Once the hard-boiled eggs are cool, gently tap each egg’s shell on a hard surface to create a crackled effect.
- Carefully submerge the cracked eggs in the dye mixture, ensuring they’re fully immersed. Let them soak for at least 2-3 hours or refrigerate overnight for more intense color.
- Once dyed, gently peel the eggs under running water to help remove any stubborn bits of shell. Place the peeled egg whites in a separate bowl and separate the yolks into a mixing bowl.
- In the bowl with the egg yolks, add mayo, liquid chlorophyll, salt, black pepper, minced dill, minced chives, and crushed garlic. Blend until smooth and creamy.
- Fill the hollowed-out egg whites with the yolk mixture using a spoon or piping bag.
- Finish by sprinkling poppy seeds over the filled eggs and arrange on a platter to chill until serving.


Leave a Reply