
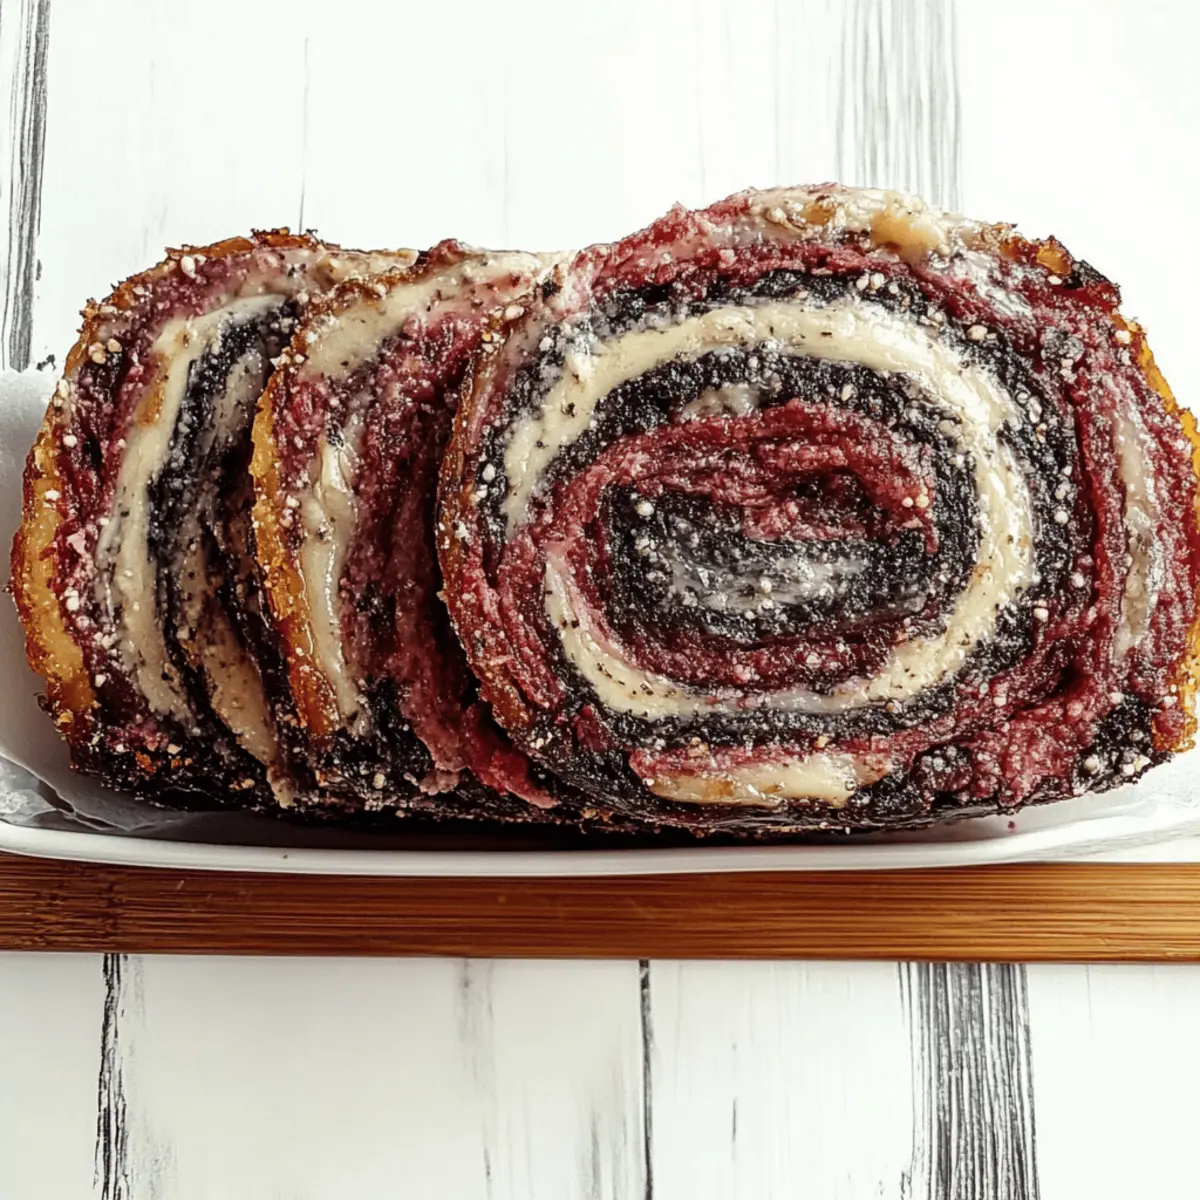
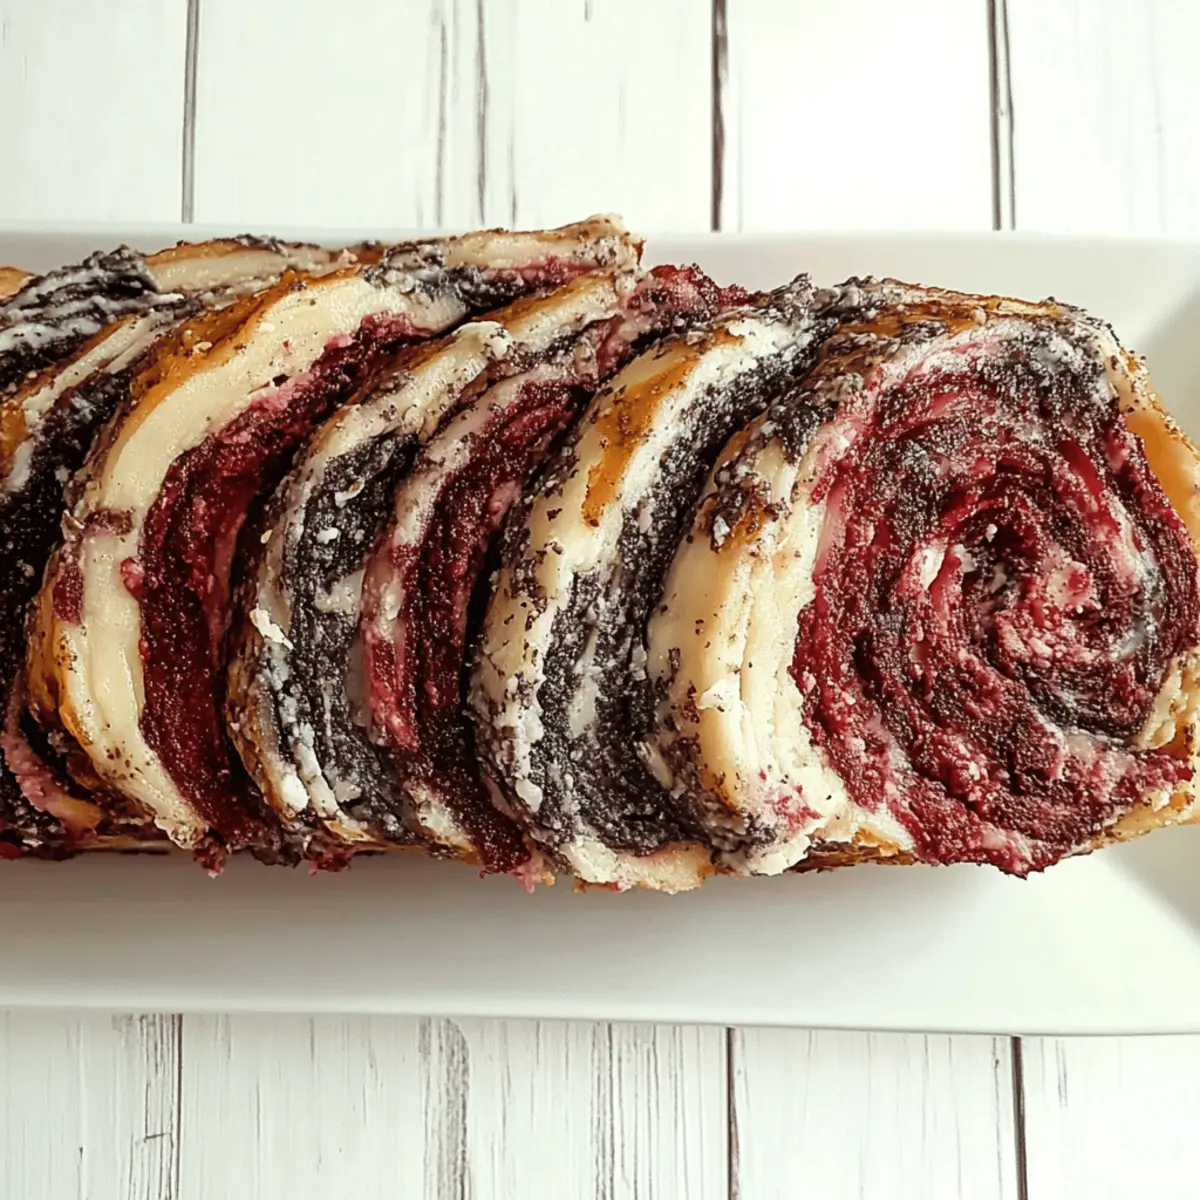
As I twisted strands of vibrant dough, I couldn’t help but feel like a mad scientist in the kitchen. This Vampire Bread recipe is not only a feast for the eyes, with its striking red and black hues, but it also transforms your usual bread-making routine into a delightful experience. Perfect for Halloween gatherings or just when you crave something unique, this bread is surprisingly easy to whip up, requiring just five minutes of active prep time! With its chewy texture and beautiful appearance, it’s bound to impress friends and family, making it a crowd-pleaser at any table. Are you ready to unleash your inner baker and add a playful twist to your homemade bread? Let's get started!
Why Is Vampire Bread So Special?
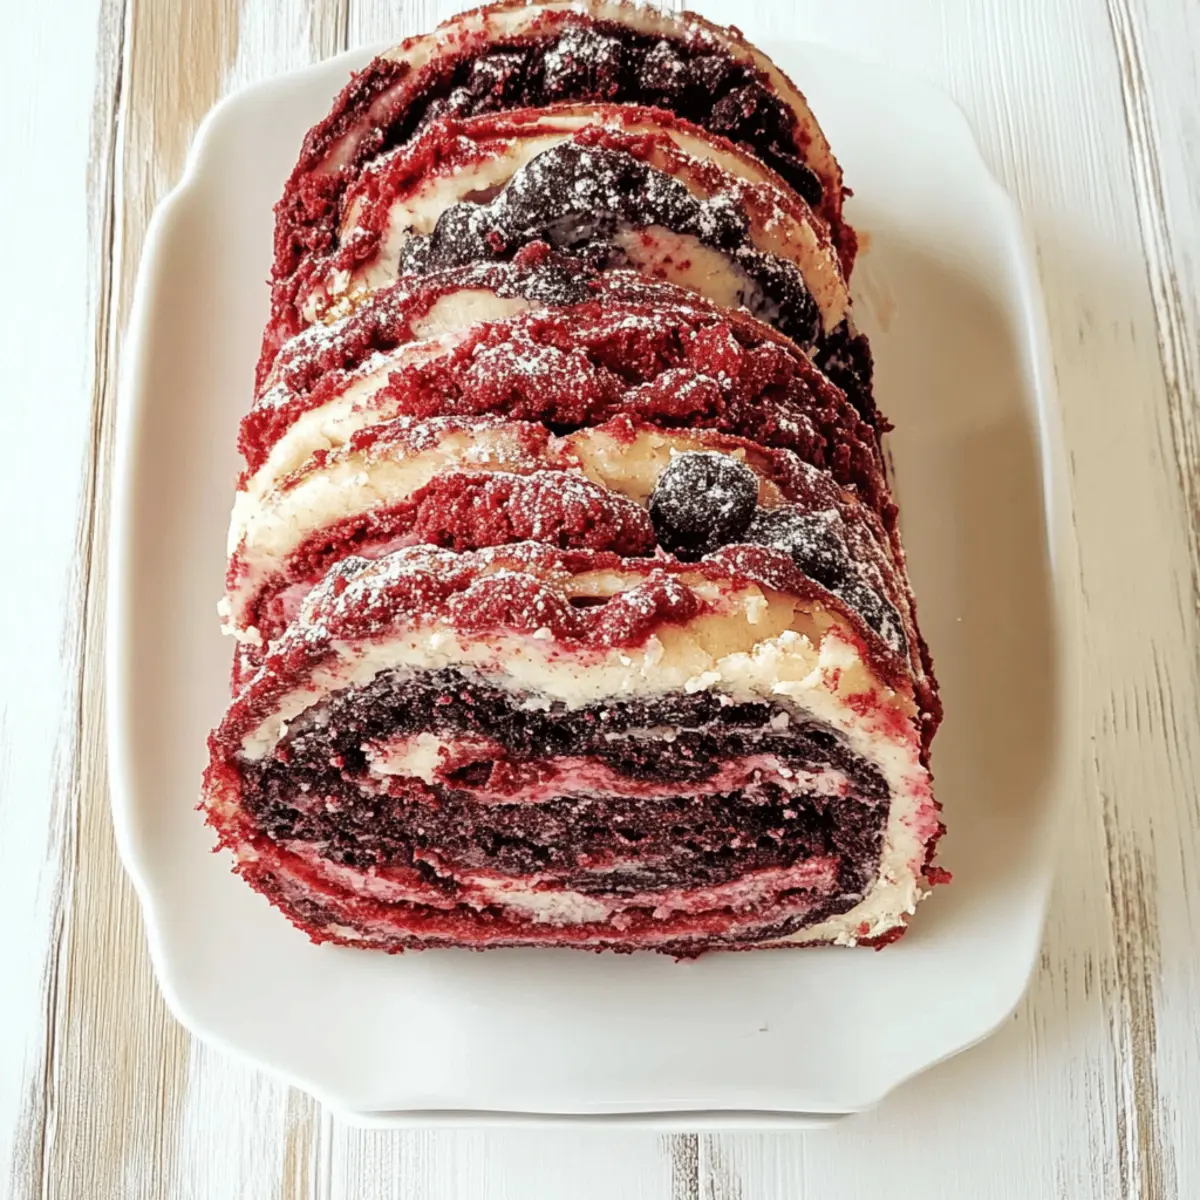
Visual Appeal: Right from the slicing, this bread is a showstopper! The vibrant red and black swirl makes it perfect for Halloween or any fun gathering.
Simplicity: You’ll find that the process is straightforward, making it ideal for both beginners and seasoned bakers. With just a few simple ingredients, including active dry yeast, you can whip up this striking loaf in no time.
Family-Friendly: Fun to make with kids, this recipe is sure to become a family favorite. The playful colors spark creativity in the kitchen and can inspire many baking adventures together.
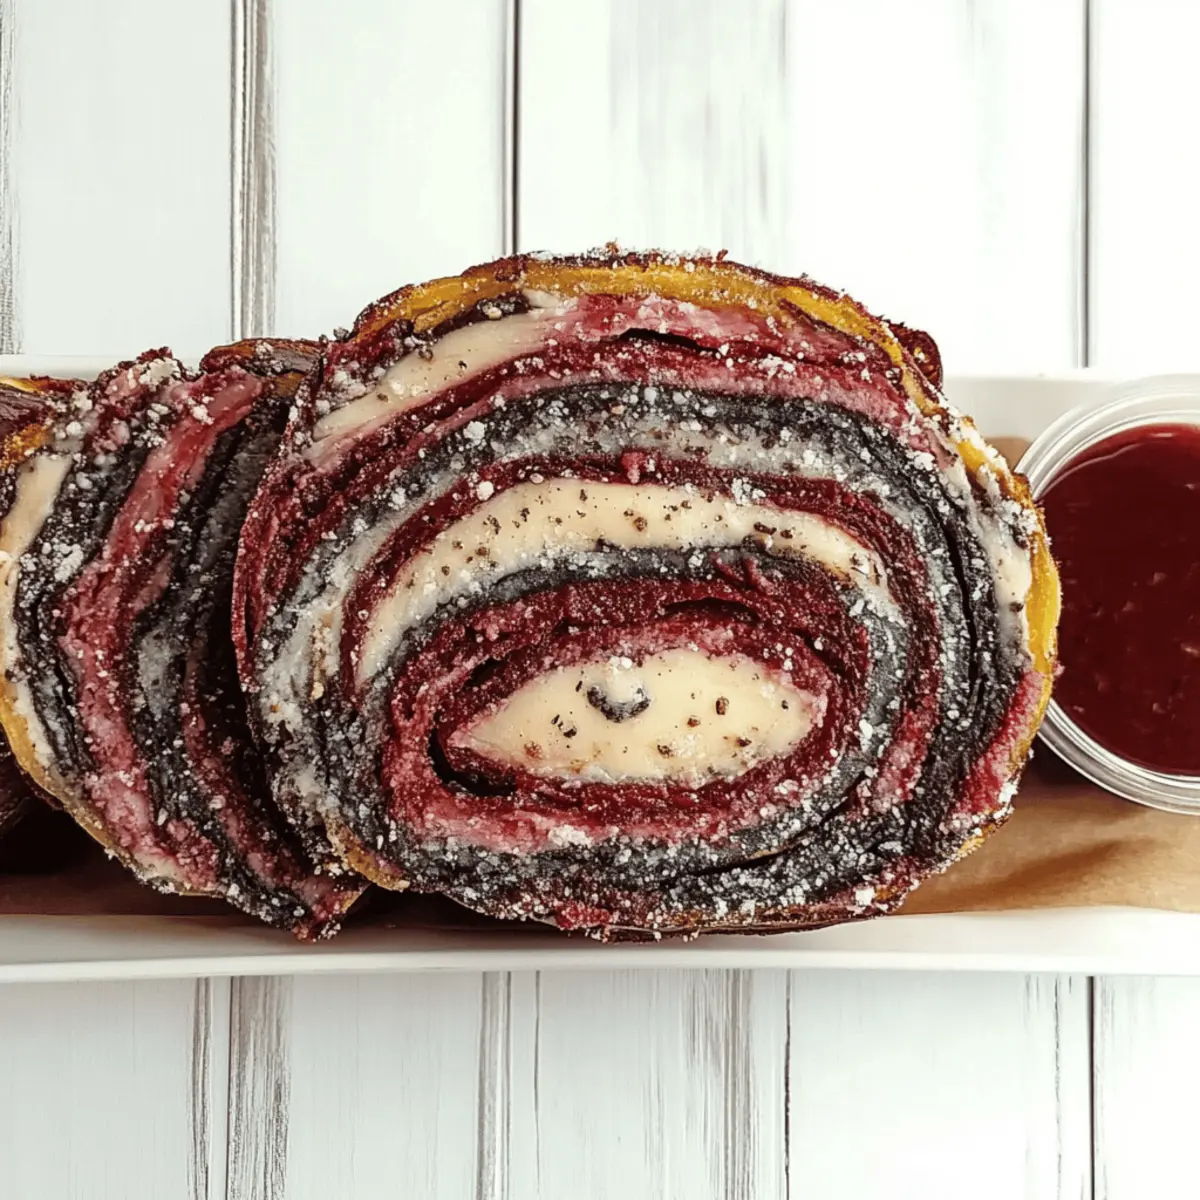
Versatile Serving: Serve it as part of a festive breakfast, pair it with soups, or toast it for scrumptious sandwiches. This bread’s unique flavor will fit right in any meal!
A Creative Activity: Baking Vampire Bread isn’t just about the end result; it’s about the experience. Turn a regular day into a memorable one by experimenting with colors and shapes.
Dive into the joy of homemade bread and elevate mealtime with this fun recipe!
Vampire Bread Ingredients
• Let’s gather what you need for this spooky delight!
For the Dough
• 3 cups bread flour – The backbone of your bread, helping it achieve that beautiful chewy texture.
• 1 cup warm water – Activates the yeast, creating a bubbly, light dough.
• 2 tablespoons sugar – Sweetens the dough and enhances browning.
• 2 tablespoons olive oil – Adds moisture and richness to the flavor.
• 1 teaspoon salt – Balances the sweetness and strengthens gluten.
• 1 packet (2 ¼ teaspoons) active dry yeast – The magic ingredient that makes your Vampire Bread rise and fluffy!
For the Color
• Red food coloring – Provides the captivating hue that sets this bread apart.
• Black food coloring – Complements the red, giving your loaf an enchanting, eerie look!
Embrace the magic of baking this Vampire Bread and enjoy the creativity that unfolds at your kitchen counter.
Step‑by‑Step Instructions for Vampire Bread
Step 1: Activate the Yeast
In a medium bowl, combine 1 cup of warm water, 2 tablespoons of sugar, and 1 packet of active dry yeast. Allow this mixture to sit for about 5 minutes until it becomes bubbly and frothy, indicating the yeast is activated. This delightful starter is essential for achieving light and fluffy Vampire Bread.
Step 2: Mix the Dry Ingredients
In a large mixing bowl, combine 3 cups of bread flour and 1 teaspoon of salt. Stir these dry ingredients together until they are well blended, ensuring that the salt is evenly distributed. Making a well in the center, prepare to add the yeast mixture and olive oil for the next step in creating your wonderful Vampire Bread dough.
Step 3: Form the Dough
Pour the activated yeast mixture and 2 tablespoons of olive oil into the well of the dry ingredients. Using a wooden spoon, mix everything until the dough begins to come together. Once incorporated, knead the dough in the bowl for about 8-10 minutes until it is smooth and elastic, showcasing the transformative magic of bread-making.
Step 4: Color the Dough
Divide the dough into two equal parts, placing each half in separate bowls. Add red food coloring to one half and black food coloring to the other, mixing well until the colors are vibrant and evenly distributed. This whimsical coloring process is what makes your Vampire Bread a spooky standout at any table.
Step 5: Shape the Loaf
On a lightly floured surface, roll each colored dough into long strips, aiming for an even thickness. Once both strips are ready, gently twist them together, creating a spiraled loaf. This colorful twist creates the striking design that will make your Vampire Bread a visual delight once baked.
Step 6: Prepare for Rising
Carefully place the twisted dough into a greased loaf pan, ensuring it fits snugly without being cramped. Cover the pan with a clean kitchen towel or plastic wrap and let it rise in a warm spot for about 2 hours. During this time, the dough will double in size, filling your kitchen with the enchanting aroma of fresh bread.
Step 7: Preheat the Oven
As the dough rises, preheat your oven to 375°F (190°C). This ensures that your oven is hot enough to give your Vampire Bread that perfect golden crust as it bakes. Once your bread has risen beautifully, you’ll be ready to pop it in the oven for baking.
Step 8: Bake the Bread
Once the oven is properly preheated, bake your Vampire Bread for approximately 30 minutes. It’s done when the top is a rich golden brown and sounds hollow when tapped gently. The scent will be irresistible, drawing everyone to the kitchen for a taste of this enchanting creation.
Step 9: Cool and Slice
After baking, remove the loaf from the oven and let it cool in the pan for a few minutes. Then, transfer it to a wire rack to cool completely. This cooling phase is crucial for easy slicing, so you can enjoy the stunning reveal of your beautifully swirled Vampire Bread when you cut into it.
Expert Tips for Vampire Bread
• Yeast Activation: Make sure your water is warm, not too hot, as high temperatures can kill the yeast. A bubbly yeast mixture means your Vampire Bread will rise perfectly!
• Kneading Technique: Kneading is crucial for developing gluten. Ensure your dough is smooth and elastic; this helps achieve that chewy texture we all love.
• Color Mixing: When adding food coloring, start with a small amount and gradually increase for the desired vibrancy. You can always add more, but it’s difficult to lighten!
• Rising Time: Avoid rushing the rise; it’s essential for a light loaf. Make sure your dough has doubled in size before baking for the best results.
• Hollow Sound: When your Vampire Bread is ready, it should sound hollow when tapped. This indicates it’s perfectly baked and ready for slicing!
Embrace these tips to create a showstopping loaf that not only looks great but tastes even better!
Make Ahead Options
Preparing Vampire Bread in advance is a fantastic way to save time during busy weeks. You can make the dough up to 24 hours ahead of time; simply follow the mixing and coloring steps, then wrap the dough tightly in plastic wrap and refrigerate it. When you're ready to bake, take the dough out, let it sit at room temperature for about 30 minutes before shaping and letting it rise. Alternatively, you can shape and twist the loaf and refrigerate it after placing it in the loaf pan for up to 3 days. Just cover it with plastic wrap to maintain moisture. Freshly baked, your Vampire Bread will be just as delightful, ensuring your meal prep is both convenient and delicious!
How to Store and Freeze Vampire Bread
Room Temperature: Store Vampire Bread in an airtight container or wrapped in plastic wrap for up to 3 days to maintain freshness.
Fridge: If you prefer to keep it longer, place the wrapped bread in the fridge for up to a week. However, this may slightly alter the texture.
Freezer: Freeze slices of Vampire Bread in a single layer on a baking sheet, then transfer to a zip-top bag for up to 3 months. Thaw at room temperature or toast directly from frozen.
Reheating: For the best taste, reheat slices in the oven at 350°F (175°C) for about 10 minutes, or toast them for a delightful crispy finish.
Vampire Bread Variations & Substitutions
Feel free to add your personal touch to this delightful recipe and make it truly yours!
- Gluten-Free Flour: Substitute bread flour with a 1:1 gluten-free blend, ensuring everyone can enjoy this spooky loaf.
- Colorful Swirls: Experiment with different shades or even flavors by using natural food colorings like beet juice or activated charcoal.
- Herb Infusion: Add minced garlic or dried herbs to the dough for an aromatic twist that complements the visual flair.
- Sweet Treat: Incorporate a sprinkle of cinnamon and sugar into the dough for a subtly sweet version perfect for breakfast.
- Nutty Texture: Mix in some chopped nuts or seeds for added crunch and a nutritious boost, making the bread even more delightful.
- Savory Add-ins: Toss in some grated cheese or olives for a savory variation that pairs wonderfully with soups and salads.
- Heat It Up: Add a pinch of cayenne or crushed red pepper flakes for a surprising kick, transforming your Vampire Bread into a savory masterpiece.
- Mini Versions: Create individual rolls by shaping small pieces of dough instead of a large loaf; perfect for parties or lunches!
With these variations, the possibilities are endless! Let your imagination run wild and embrace the rich tradition of bread-making in your kitchen.
What to Serve with Vampire Bread?
Create a festive meal that brings everyone together and showcases the unique appeal of this vibrant loaf.
- Creamy Tomato Soup: The tangy and warm flavors of this classic pairing complement the bread's unique taste and vibrant colors perfectly. Serve it in deep bowls for a cozy presentation.
- Savory Pumpkin Risotto: Creamy, rich, and slightly sweet, this hearty dish melds beautifully with the chewy texture of Vampire Bread, making each bite a delight.
- Fresh Garden Salad: Crisp lettuce, cherry tomatoes, and a zesty vinaigrette create a refreshing contrast, cutting through the bread's richness and adding a colorful touch to your plate.
- Garlic Butter Spread: Whip up a simple garlic butter to slather on warm slices of Vampire Bread, enhancing its flavor and bringing an irresistible aroma to the table.
- Cheese Platter: An assortment of mild cheeses will provide creamy textures and mild flavors that harmonize with the visual and taste experience of the bread. Pair it with fruits for a pop of sweetness!
- Red Wine: A smooth red wine, like a Pinot Noir, pairs wonderfully with Vampire Bread, enhancing its savory aspects while adding a touch of elegance to your gathering.
- Dessert Option: Finish the meal with spooky-themed cookies or cupcakes; the playful presentation will keep the festive spirit alive long after the bread is gone.
Enjoy the art of pairing as you elevate your dining experience with these delightful accompaniments!
Vampire Bread Recipe FAQs
What type of bread flour should I use for Vampire Bread?
Absolutely! I recommend using high-protein bread flour, as it helps to create that lovely chewy texture and ideal rise in your Vampire Bread. Look for bread flour that has at least 12-14% protein content for the best results.
How should I store Vampire Bread?
To keep your Vampire Bread fresh, store it in an airtight container at room temperature for up to 3 days. If you need it to last longer, wrap it tightly in plastic wrap and place it in the fridge for up to a week. Just remember, refrigeration may slightly change the bread's texture, but it's still delicious!
Can I freeze Vampire Bread?
Absolutely! To freeze, slice your Vampire Bread and lay the pieces in a single layer on a baking sheet. Once frozen solid, transfer the slices into a zip-top bag. This way, you can enjoy them for up to 3 months! Thaw them at room temperature or toast directly from the freezer for a quick treat.
What should I do if my dough doesn’t rise?
Very! If your dough hasn't risen after the 2-hour wait, check a few things. First, ensure your yeast is fresh and properly activated in warm water and sugar. The water must be warm but not too hot—around 110°F (43°C) is perfect. Additionally, if it's cold in your kitchen, try placing the dough in a warmer spot or a slightly turned-off oven with the light on.
Is Vampire Bread safe for pets or allergenic individuals?
If you're considering sharing your Vampire Bread with furry friends or have any allergies in the family, note that bread is not recommended for pets, particularly due to the yeast and potential for gastrointestinal issues. For allergies, always check the ingredient labels, especially for gluten or specific food coloring sensitivities. For a safe bread experience, enjoy this enchanting recipe yourself!
Vampire Bread: A Spooky Twist on Homemade Loaf Magic
Ingredients
Equipment
Method
- In a medium bowl, combine 1 cup of warm water, 2 tablespoons of sugar, and 1 packet of active dry yeast. Allow this mixture to sit for about 5 minutes until it becomes bubbly and frothy, indicating the yeast is activated.
- In a large mixing bowl, combine 3 cups of bread flour and 1 teaspoon of salt. Stir these dry ingredients together until they are well blended.
- Pour the activated yeast mixture and 2 tablespoons of olive oil into the well of the dry ingredients. Mix everything until the dough begins to come together, then knead for about 8-10 minutes until smooth and elastic.
- Divide the dough into two equal parts, adding red food coloring to one half and black food coloring to the other, mixing well.
- On a lightly floured surface, roll each colored dough into long strips, then gently twist them together to create a spiraled loaf.
- Place the twisted dough into a greased loaf pan, cover it, and let it rise in a warm spot for about 2 hours.
- Preheat your oven to 375°F (190°C) as the dough rises.
- Bake the Vampire Bread for approximately 30 minutes, until the top is golden brown and sounds hollow when tapped.
- Let it cool in the pan for a few minutes, then transfer to a wire rack to cool completely.


Leave a Reply