
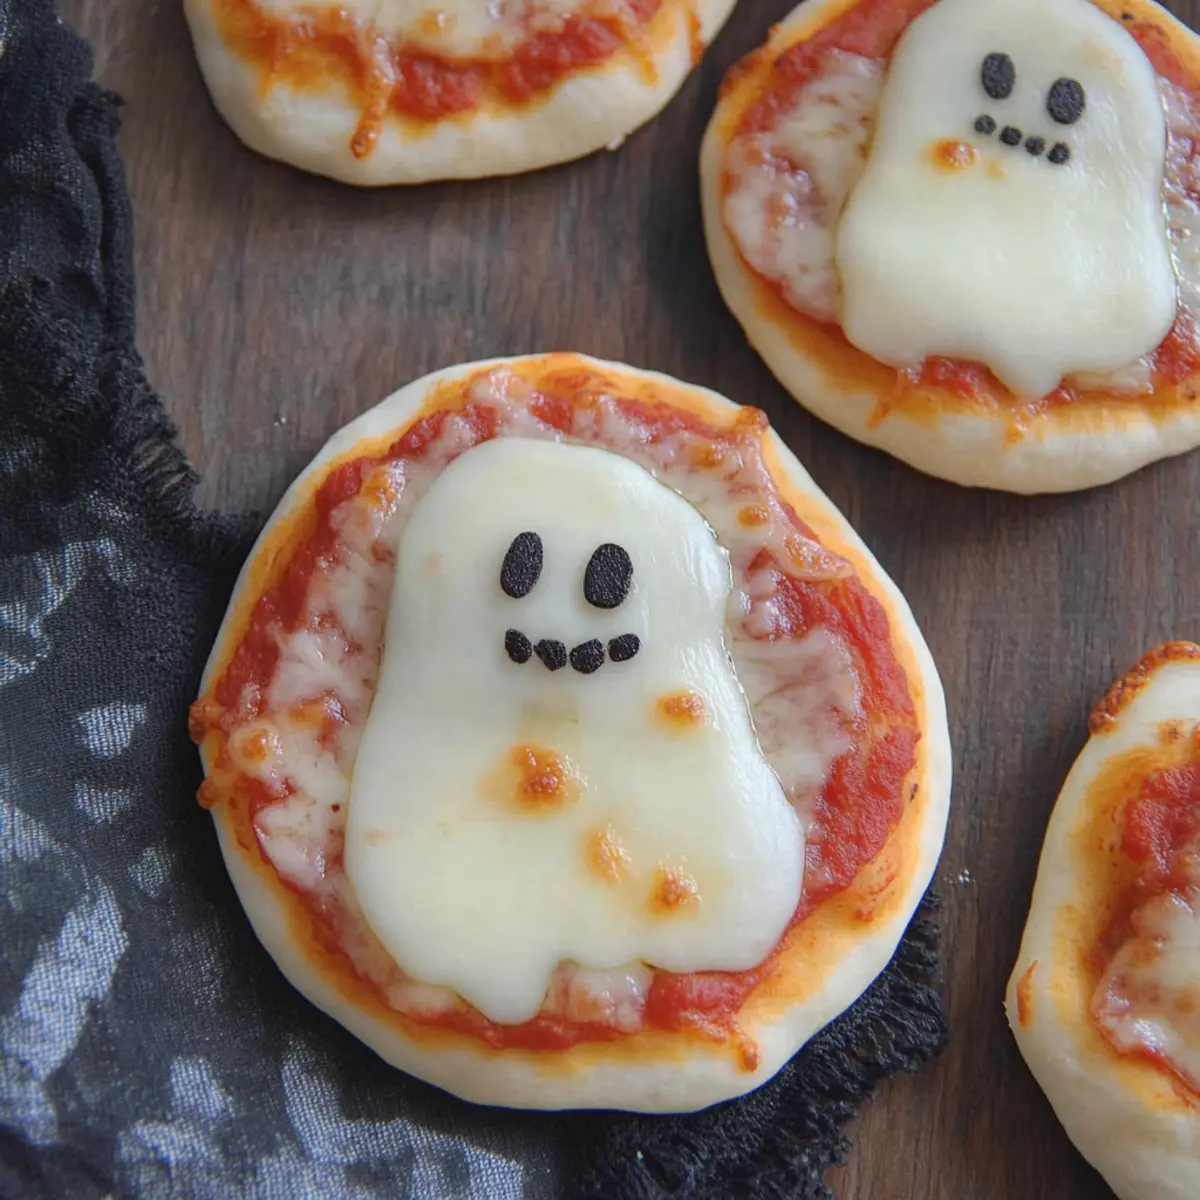
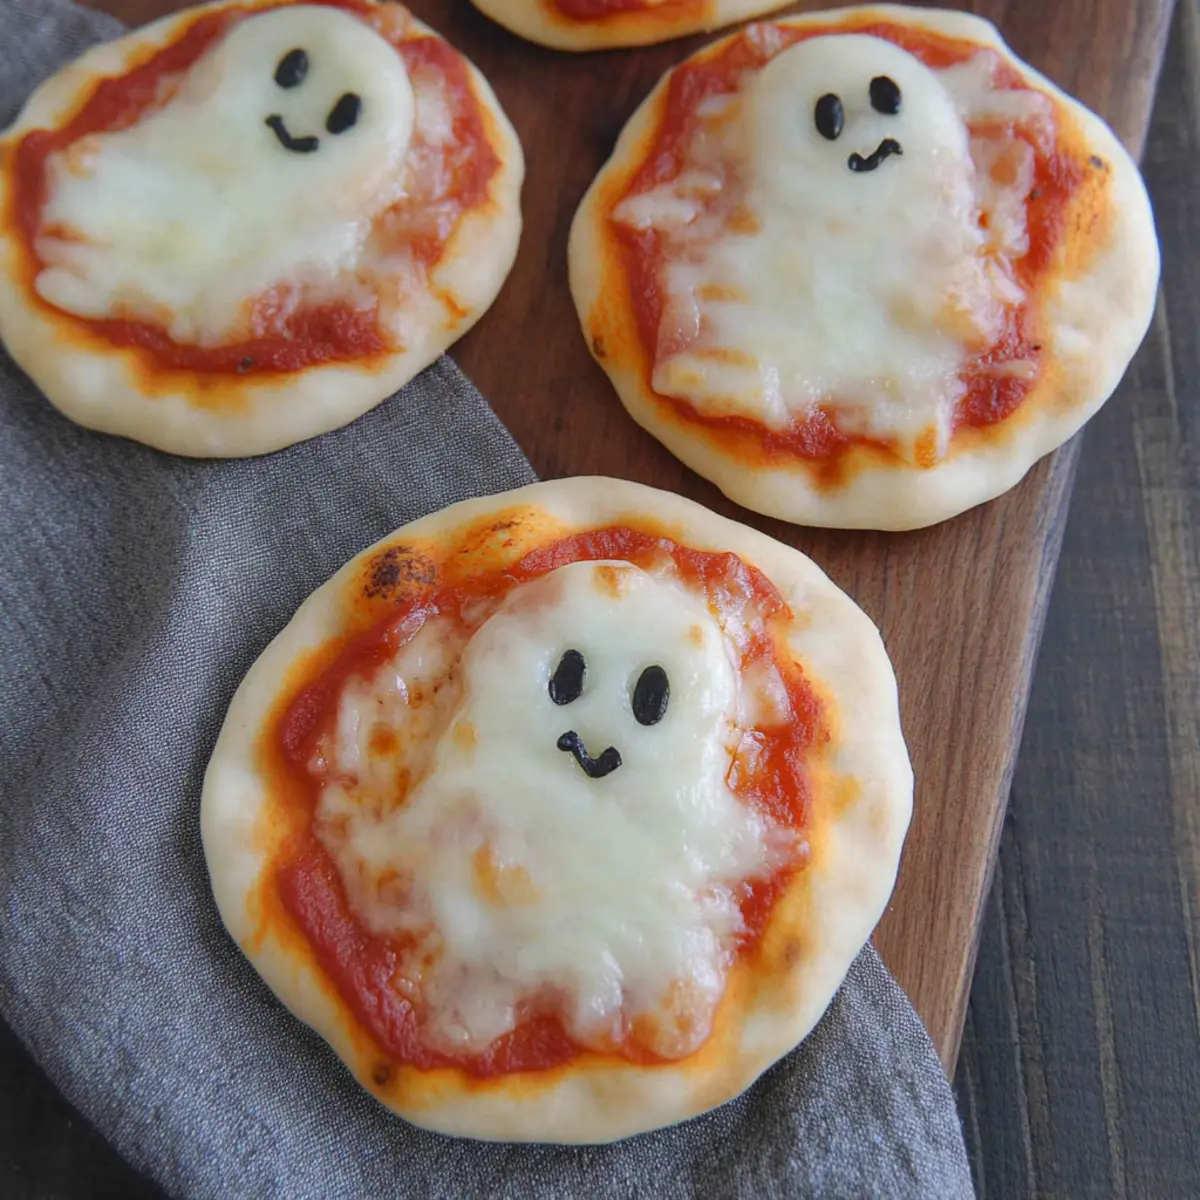
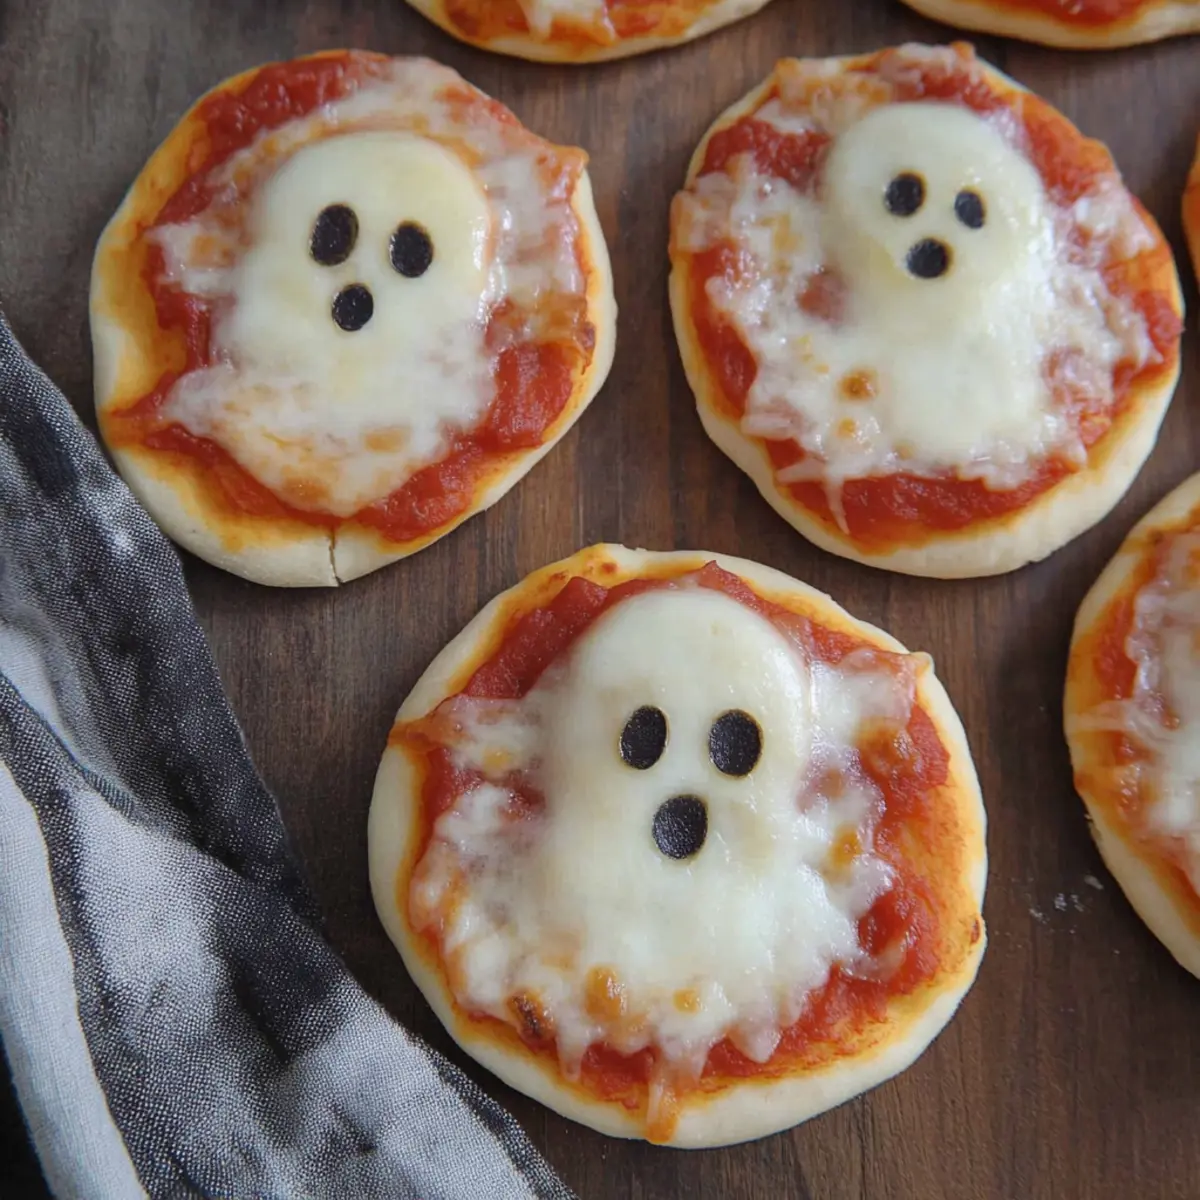
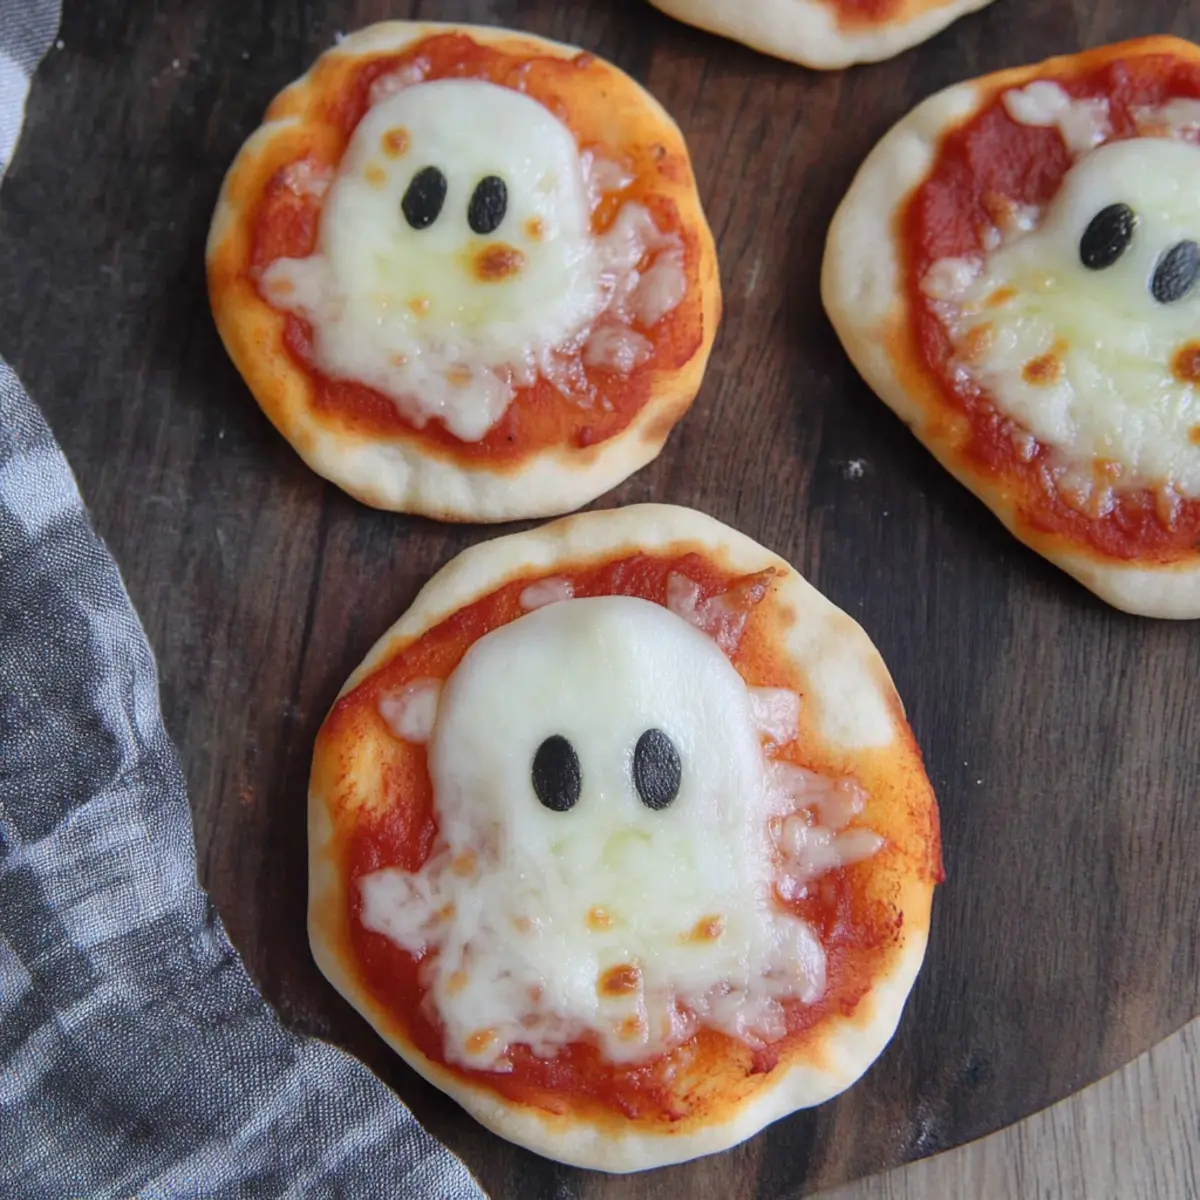
As the leaves start to crinkle and whispers of Halloween float through the air, I can’t help but think of the delightful surprises that come from the kitchen. This season, there’s something uniquely enchanting about food that doubles as festive fun, and that’s precisely what inspired my Mini Ghost Pizzas. Simple yet adorable, these 3-ingredient treats offer a delicious way to join in the spooky spirit.
Not only is this recipe quick to whip up, but it's also a perfect opportunity to engage the whole family in some quality cooking time. Imagine the joy on your children’s faces as they help create spooky ghosts, transforming ordinary pizza into something magical! Easy and so inviting, these mini pizzas are destined to be a hit at your Halloween gatherings or cozy family dinners.
What are you waiting for? Grab your ingredients, and let’s conjure up some ghostly fun in the kitchen. I promise you, these cuties will vanish faster than a ghost at dawn!
Why love Mini Ghost Pizzas this Halloween?
Simple, making these Mini Ghost Pizzas is a breeze, requiring just three ingredients you probably have at home. Fun for all ages, get the kids involved in crafting these spooky delights for a memorable family activity. Flavor-packed, each bite is a delicious homage to traditional pizza, blended with a clever Halloween twist. Quick cooking time means you'll have a festive treat ready in under 30 minutes! Perfect for gatherings, these adorable mini pizzas will impress both kids and adults alike at your Halloween festivities.
Mini Ghost Pizzas Ingredients
For the Crust
• Prepared Pizza Dough – Essential for a sturdy base and delightful texture.
For the Sauce
• Pizza Sauce – Adds moisture and tangy flavor, ensuring each ghostly bite is delicious.
For the Topping
• Mozzarella Cheese Slices – Perfect for creating the spooky ghost shape and creamy goodness.
Note: Use vegan cheese for a dairy-free option while still enjoying these Mini Ghost Pizzas.
Get ready to gather your ingredients and bring some Halloween magic to your kitchen with these spooktacular bites!
Step-by-Step Instructions for Mini Ghost Pizzas
Step 1
Preheat your oven to 400°F (200°C) and line a large baking sheet with parchment paper. This will create a non-stick surface for your Mini Ghost Pizzas, ensuring they bake evenly and come off easily once they’re done. Take a moment to gather all your ingredients so that everything is at your fingertips, ready to transform into adorable, spooky treats.
Step 2
Roll out the prepared pizza dough on a lightly floured surface until you achieve a large rectangle, about ¼-inch thick. Using a round cutter, cut out approximately 8 mini pizzas. These round shapes will serve as the perfect canvas for your mini ghostly creations. Make sure to press firmly so that the edges are well-defined, allowing for a fun presentation later on.
Step 3
Place your cut-out mini pizza rounds onto the lined baking sheet, leaving space between each one to ensure they bake evenly. Using a spoon, generously spread pizza sauce onto the top of each mini pizza, allowing the sauce to highlight the delightful flavors underneath. This layer of sauce will keep the pizzas moist and flavorful as they bake, so don’t be shy!
Step 4
While the mini pizzas are baking for about 8-10 minutes, take your mozzarella cheese slices and cut small ghost shapes out of them. Use a straw or a knife to carefully create little eyes and a mouth on each ghost. This step not only adds a spooky touch but also gets the kids involved in creating festive decorations for the pizzas, enhancing the fun factor of this Halloween-themed meal!
Step 5
Once the mini pizzas have a lightly golden crust and are sizzling with flavor, carefully remove them from the oven. Place your ghost cheese shapes on top of each mini pizza then return them to the oven for an additional 4-5 minutes. This brief baking time will melt the cheese just enough to hold its shape while enhancing the overall appearance of your enchanting Mini Ghost Pizzas.
Step 6
When the cheese is slightly melted and the pizzas are golden brown, remove them from the oven and let them cool for a minute. This short resting time allows the toppings to set slightly while ensuring the pizzas aren't too hot for little hands. Serve your delightful Mini Ghost Pizzas warm and watch the delight on your guests' faces as they indulge in this fun, festive treat!
What to Serve with Mini Ghost Pizzas?
As you conjure up these adorable ghostly treats, consider adding a little variety to your Halloween spread with these delicious accompaniments.
- Spooky Salad: A colorful mix of fresh greens with Halloween-themed toppings like pumpkin seeds or shredded carrots adds a crisp contrast to the warm pizzas.
- Bone-Chilling Veggie Platter: Offer a selection of crunchy veggies with dips like hummus or ranch. The freshness balances the savory flavors of the Mini Ghost Pizzas beautifully.
- Witch’s Brew Punch: A fruity punch with Halloween-inspired garnishes like floating orange slices and gummy worms creates a festive drink option, delighting guests of all ages.
- Hauntingly Good Garlic Bread: Soft, buttery garlic bread sticks are perfect for sharing and complement the cheesy goodness of the pizzas wonderfully.
- Eerie Fruit Skewers: Assemble colorful fruit skewers with seasonal favorites like apples and grapes. Their sweet flavors provide a refreshing palate cleanser against the savory pizzas.
- Chilling Chocolate Mousse: This rich and creamy dessert can be topped with ghostly whipped cream or chocolate shavings. It makes for a delightful ending to your spooktacular feast!
Make Ahead Options
These Mini Ghost Pizzas are perfect for meal prep enthusiasts! You can prepare the dough rounds and store them in the refrigerator for up to 24 hours. Just roll and cut the pizza dough into circles, then place them on a lined baking sheet and cover with plastic wrap to keep them fresh. You can also make the cheese ghost shapes in advance; simply cut them out and refrigerate them in a sealed container, ensuring they remain moist. When ready to serve, spread pizza sauce on the mini rounds and bake according to the recipe. This way, you’ll save time on busy Halloween nights while still treating your family to delicious, festive mini pizzas!
Expert Tips for Mini Ghost Pizzas
- Dough Consistency: Make sure your prepared pizza dough is at room temperature; it makes rolling and cutting much easier.
- Cheese Technique: For best results, cut the mozzarella ghosts with clean, sharp tools to maintain their spooky shapes when baking.
- Watch the Melting: Keep an eye on the pizzas in the oven; you want just the right amount of melt for the ghost cheese, preventing it from disappearing completely.
- Fun Variations: Feel free to experiment with additional toppings like veggies or meats to customize your Mini Ghost Pizzas to your family's preferences.
- Family Involvement: Get everyone in the kitchen! Involving kids in decorating makes for a memorable experience and brings excitement to meal prep.
Storage Tips for Mini Ghost Pizzas
- Fridge: Store leftover Mini Ghost Pizzas in an airtight container for up to 2 days to keep them fresh and delicious.
- Freezer: If you need to save them for later, freeze the mini pizzas for up to 2 months. Place them in a single layer in a freezer-safe bag or container.
- Reheating: To reheat, pop them in a preheated oven at 350°F (175°C) for about 10 minutes, or until heated through. This will help retain their crispy texture.
- Room Temperature: If you plan to serve them soon after baking, keep them on a cooling rack at room temperature for up to 1 hour to avoid sogginess.
Mini Ghost Pizzas Variations & Substitutions
Feel free to let your imagination run wild and customize these adorable Mini Ghost Pizzas to suit your family's tastes!
- Veggie Toppings: Add sliced olives for eyes or peppers for vibrant pops of color to make your ghosts even more lively.
- Whole Wheat Dough: Use whole wheat pizza dough for a healthier twist, adding more fiber without sacrificing flavor.
- Gluten-Free Option: Substitute regular pizza dough with a gluten-free version, ensuring everyone can enjoy these spooky delights.
- Spicy Kick: Sprinkle some red pepper flakes on the sauce before baking for a delightful heat that will keep adults coming back for more.
- Herbed Flavor: Add Italian herbs like oregano or basil to the sauce for an aromatic boost that elevates the overall taste.
- Cheesy Twist: Layer some additional cheese, like cheddar or pepper jack, underneath the ghost cheese for a deliciously gooey surprise.
- Creative Shapes: Don’t limit yourself to ghosts! Use holiday-themed cookie cutters to create bats or pumpkins for a fun variation.
- Sauce Swaps: Instead of pizza sauce, try pesto or barbecue sauce for a fresh and unexpected flavor profile that’s still kid-friendly.
Mini Ghost Pizzas Recipe FAQs
How do I choose the best pizza dough for Mini Ghost Pizzas?
Absolutely! For the best results, look for pizza dough that is fresh and pliable. If using store-bought dough, check the expiration date for optimal taste. If you’re feeling adventurous, homemade dough lets you control the ingredients entirely; just aim for a soft and stretchy consistency that rolls out easily.
How do I store leftover Mini Ghost Pizzas?
After enjoying your festive treat, store any leftovers in an airtight container in the fridge for up to 2 days. If you prefer to save some for a later date, you can freeze them for up to 2 months. Just be sure to place them in a freezer-safe bag in a single layer to avoid sticking.
Can I freeze Mini Ghost Pizzas, and how?
Certainly! To freeze, let the Mini Ghost Pizzas cool completely first. Then, place them in a single layer on a baking sheet and freeze until solid, usually about 1-2 hours. Once frozen, transfer them to a freezer-safe bag or container, removing as much air as possible. When you're ready to enjoy them again, simply bake directly from frozen at 400°F (200°C) for about 10-15 minutes.
What should I do if my cheese melts too much while baking?
Very good question! If the cheese melts too much and loses its ghost shape, try lowering the oven temperature slightly and reducing the baking time. Keep a close eye on the pizzas, especially after you've added the cheese. For an even better presentation, cut the cheese shapes a bit thicker, so they maintain their ghostly forms during baking.
Can dogs eat Mini Ghost Pizzas? Are there allergy concerns with this recipe?
While Mini Ghost Pizzas are not suitable for dogs due to the cheese and sauce content, you can modify the recipe for pets by using dog-safe dough and toppings. Always check for allergies; if you’re serving these to guests, make sure to ask about dietary restrictions. For dairy-free needs, using vegan cheese is a great alternative!
How long should Mini Ghost Pizzas take in the oven?
Typically, Mini Ghost Pizzas will take about 12-15 minutes total in the oven, with an initial baking time of 8-10 minutes followed by an additional 4-5 minutes after adding the cheese. Always keep an eye on them to ensure they reach that perfect golden-brown color without overbaking!
Spooktacular Mini Ghost Pizzas That Are Eerily Easy to Make
Ingredients
Equipment
Method
- Preheat your oven to 400°F (200°C) and line a baking sheet with parchment paper.
- Roll out the pizza dough on a lightly floured surface until you achieve a rectangle, about ¼-inch thick. Cut out approximately 8 mini pizzas.
- Place the mini pizza rounds onto the lined baking sheet and spread pizza sauce on each one.
- While the pizzas are baking for 8-10 minutes, cut ghost shapes out of the mozzarella cheese slices.
- Once the pizzas are light golden and sizzling, add the ghost cheese shapes on top and return to the oven for 4-5 minutes.
- Remove the pizzas when the cheese is just melted, let cool for a minute, and serve warm.
Leave a Reply