
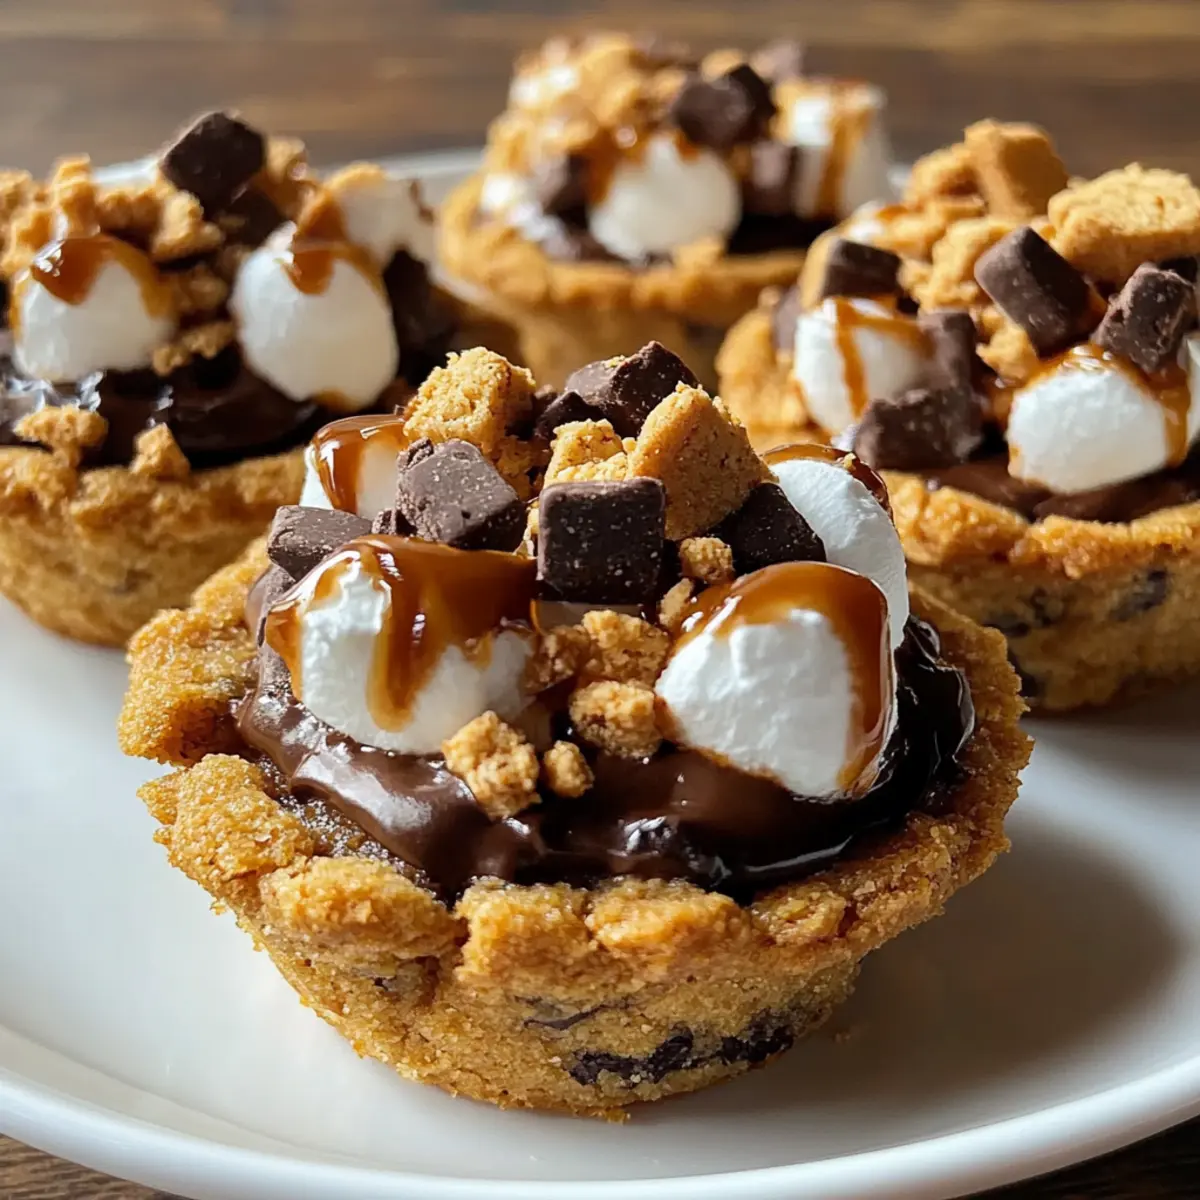
As I stood in my kitchen, the tantalizing aroma of melting chocolate was wafting through the air, transporting me back to summer camp nights around the fire. Today, I’m sharing a delightful twist on a classic favorite—S’mores Cookie Cups. These treats not only capture that nostalgic taste of gooey marshmallow and rich chocolate, but they also come together quickly, making them perfect for any occasion. With just a few simple ingredients, you can whip up a batch in no time. Plus, they’re mini-sized, making them a fun, shareable treat that’s sure to please both kids and adults alike. Are you ready to create a cozy campfire vibe right in your home with these scrumptious cookie cups? Let’s dive in!
Why are S’mores Cookie Cups irresistible?
Indulgent and fun: These S’mores Cookie Cups offer the perfect blend of familiar flavors, bringing together chocolate, marshmallow, and graham cracker in every bite.
Quick and easy: With a total prep and cooking time of just 37 minutes, they're perfect for when you're craving something sweet, yet don't want to spend hours in the kitchen.
Crowd-pleaser: Mini-sized and shareable, they are a hit at parties, family gatherings, or even a cozy movie night. Pair them with some delicious Christmas Sugar Cookie bars for the ultimate dessert platter!
Versatile: Feel free to modify the fillings to your liking—swap the chocolate chips for butterscotch or peanut butter chips for a unique twist.
Nostalgic flavors: Each bite takes you back to summer campfires, creating a warm, comforting feeling that everyone will love.
S’mores Cookie Cups Ingredients
For the Cookie Dough
• Unsalted butter – 1 cup, softened so it blends seamlessly with the sugars for that fluffy texture.
• Granulated sugar – 1 cup, adds sweetness and helps create that delightful golden crust.
• Brown sugar – 1 cup, packed for rich moisture and a hint of caramel flavor.
• Large eggs – 2, provide structure and moisture to the cookie cups.
• Vanilla extract – 1 teaspoon, brings warmth and enhances the overall flavor profile.
• All-purpose flour – 2 ½ cups, forms the base for your dough, giving it that classic cookie texture.
• Baking soda – 1 teaspoon, a leavening agent that helps the cookie cups rise beautifully.
• Salt – ½ teaspoon, balances the sweetness and amplifies the flavors.
For the Mix-ins
• Milk chocolate chips – 1 cup, for that classic s’mores flavor and gooey goodness with every bite.
• Graham cracker squares – 12, broken into pieces to simulate the iconic s’mores crust.
• Large marshmallows – 6, halved, to top off your cookie cups with a glorious, toasty finish.
With these ingredients, you’re well on your way to creating the most delightful S’mores Cookie Cups that everyone will rave about!
Step‑by‑Step Instructions for S’mores Cookie Cups
Step 1: Preheat and Prepare
Begin by preheating your oven to 350°F (175°C) and lightly grease a mini muffin pan with non-stick spray. This will ensure your S’mores Cookie Cups release easily after baking. While the oven warms up, gather your ingredients and get ready for some delightful mixing!
Step 2: Cream the Butters and Sugars
In a large mixing bowl, cream together 1 cup of softened unsalted butter, 1 cup of granulated sugar, and 1 cup of packed brown sugar. Use an electric mixer on medium speed for about 2-3 minutes until the mixture becomes light and fluffy. The fluffiness here is key for achieving soft, tender cookie cups that melt in your mouth.
Step 3: Incorporate Eggs and Vanilla
Beat in 2 large eggs, one at a time, ensuring each egg is fully incorporated before adding the next. Then, add 1 teaspoon of vanilla extract and mix until combined. This fragrant addition enhances the flavor of your S’mores Cookie Cups, setting a warm and inviting tone for your baking session.
Step 4: Mix the Dry Ingredients
In a separate bowl, whisk together 2 ½ cups of all-purpose flour, 1 teaspoon of baking soda, and ½ teaspoon of salt. This step ensures the leavening agent is evenly distributed throughout the flour, leading to beautifully risen cookie cups. Gradually add this dry mixture to your wet ingredients, stirring gently until just combined to avoid overmixing.
Step 5: Fold in Chocolate Chips
Gently fold in 1 cup of milk chocolate chips into the cookie dough using a spatula. This step adds that gooey, melty chocolate goodness you love in S’mores. Keep your mixtures light and airy; you want the chocolate chips evenly distributed to enhance each bite of your cookie cups.
Step 6: Prepare the Muffin Wells
Press a few pieces of graham crackers into the bottom of each muffin well in your greased mini muffin pan, creating a rustic crust. This layer not only resembles the traditional s’mores base but also adds a delightful crunch to every cookie cup. Make sure the pieces are evenly distributed to cover the base.
Step 7: Scoop Cookie Dough
Scoop the cookie dough into each muffin well, filling them about two-thirds full. Press the dough down slightly to form little cups. This creates the perfect shape for holding all the delicious toppings that will come later. Your mini muffin pan should smell sweet and inviting by now!
Step 8: Bake to Perfection
Place the muffin pan in your preheated oven and bake for approximately 10 minutes. Keep an eye on them, as you want their edges to turn a lovely golden brown while the centers remain soft. You’ll know they’re done when they smell heavenly and have a slight puff to them.
Step 9: Add Marshmallow Topping
Remove the pan from the oven and immediately top each cookie cup with a halved marshmallow. Make sure the marshmallows face up for optimal toasting. Their gooey, sweet nature will complement the rich chocolate and crunch of the graham cracker beautifully.
Step 10: Broil for Toastiness
Return the cookie cups to the oven and broil on high for 1-2 minutes, watching closely to avoid burning. The goal is to achieve that iconic toasted marshmallow top, giving your S’mores Cookie Cups a glorious finish. The marshmallows should puff up and develop a lovely golden brown hue.
Step 11: Cool Before Serving
Let the cookie cups cool in the pan for 5 minutes. This brief cooling period allows them to set and makes it easier to transfer them without breaking. Afterward, gently remove each cup and place them on a wire rack to cool completely.
Creating these S’mores Cookie Cups is a delightful journey from prep to taste, filling your home with cozy, sweet aromas!
Expert Tips for S’mores Cookie Cups
• Butter Temperature: Use softened butter for a creamy texture. If it's too cold, your cookie cups may turn out dense instead of fluffy.
• Avoid Overmixing: Blend the wet and dry ingredients until just combined. Overmixing can lead to tough cookie cups instead of the soft texture we crave.
• Watch the Oven: Keep an eye on them while baking and broiling. Ovens vary, and a minute can be the difference between golden brown and burnt.
• Graham Cracker Layer: Don't skimp on the graham cracker base; it adds crunch and authentic s’mores flavor to your S’mores Cookie Cups.
• Toast Marshmallows Carefully: Broil marshmallows on high and stay close, as they can burn quickly. Perfectly toasted marshmallows elevate the treat!
S’mores Cookie Cups Variations & Substitutions
Feel free to get creative with these S’mores Cookie Cups by trying out delicious variations that will elevate your treats!
-
Dairy-Free: Substitute unsalted butter with coconut oil and use dairy-free chocolate chips for the same rich flavor without dairy.
-
Nutty Delight: Add ½ cup of chopped nuts, like walnuts or pecans, into the dough for a delightful crunch that complements the softer textures.
-
Spicy Kick: Sprinkle a pinch of cayenne pepper or ground cinnamon into the cookie dough for a surprising kick that enhances the s'mores flavors beautifully.
-
Whole Wheat: Switch out half of the all-purpose flour for whole wheat flour to give your cookie cups a wholesome twist while maintaining their deliciousness.
-
Different Chocolates: Swap milk chocolate chips for dark chocolate or even white chocolate for a unique flavor profile that brings new dimensions to these cookie cups.
-
Chewy Instead of Crunchy: Substitute the graham crackers with crushed pretzels for a salty-sweet combo that tantalizes every taste bud.
-
Mini Marshmallow Mix: Instead of halving large marshmallows, use mini marshmallows for a fun texture, ensuring every cookie cup has those gooey pockets of sweetness.
-
Flavor-Filled Center: Before baking, stuff each cup with a teaspoon of your favorite flavored jam or nut butter to create an oozy surprise in the middle!
These fun variations and substitutions let you put your own stamp on the classic S'mores Cookie Cups. Whether you try them for a cozy movie night or a festive gathering, each twist can spark some deliciously wonderful memories! Enjoy the journey of making these, and consider serving them alongside Edible Cookie Dough for even more sweet indulgence!
How to Store and Freeze S’mores Cookie Cups
Room Temperature: Store your S’mores Cookie Cups in an airtight container at room temperature for up to 3 days to maintain their delicious softness.
Fridge: For longer freshness, place them in the fridge for up to a week. Just be sure to seal them well to prevent drying out.
Freezer: Freeze the cookie cups in a freezer-safe container with parchment paper in between layers. They can be stored for up to 3 months; thaw before enjoying!
Reheating: To reheat, pop them in the microwave for about 10-15 seconds or in an oven at 350°F for a few minutes until warm, restoring that gooey texture you love.
Make Ahead Options
These S’mores Cookie Cups are perfect for busy home cooks looking to save time! You can prepare the cookie dough up to 24 hours in advance and refrigerate it in an airtight container. Additionally, you can also break the graham crackers and portion out the chocolate chips ahead of time—just store them in separate bags to maintain freshness. When you’re ready to bake, simply scoop the chilled dough into the muffin pan, press the graham crackers into the bottom, and bake as directed. The cookie cups will be just as delicious, providing you with a delightful treat with minimal effort on your busy weeknights!
What to Serve with S’mores Cookie Cups?
Create the perfect accompaniment to elevate your delightful cookie experience!
-
Vanilla Ice Cream: The creamy sweetness of vanilla ice cream melts beautifully alongside the warm cookie cups, creating a dreamy dessert combination. Enjoy each bite as the cold ice cream contrasts with the gooey marshmallow and chocolate.
-
Fresh Berries: Juicy strawberries or blueberries add a vibrant, tart contrast to the rich flavors of the cookie cups, balancing the sweetness and providing a refreshing pop.
-
Chocolate Milkshake: Indulge in a rich chocolate milkshake to echo the flavors of the cookie cups, enhancing the overall chocolatey delight of your dessert spread.
-
Coffee or Espresso: The robust flavors of coffee or a bold espresso create an adult touch, enhancing the sweetness and making for an indulgent pairing.
-
Whipped Cream Topping: A dollop of fluffy whipped cream on top of your cookie cups adds an extra layer of creaminess, complementing the toasted marshmallow topping perfectly.
-
Salted Caramel Sauce: Drizzling warm salted caramel over the cookie cups introduces a luxurious flavor that perfectly balances sweetness and brings a gourmet flair to your treats.
-
S’mores Charcuterie Board: Create a fun s’mores-themed board with graham crackers, marshmallows, and assorted chocolates, inviting everyone to indulge in interactive sweetness alongside the cookie cups.
S’mores Cookie Cups Recipe FAQs
How do I select the right ingredients for S’mores Cookie Cups?
Absolutely! For the best S’mores Cookie Cups, choose fresh, high-quality ingredients. Use unsalted butter that's softened to room temperature—this ensures a light, fluffy texture when creamed. For the sugars, granulated sugar provides sweetness while brown sugar contributes moisture and a delightful caramel flavor. Always check that your chocolate chips and marshmallows are fresh; chocolate should be shiny, and marshmallows should be soft and not over-sticky.
How should I store S’mores Cookie Cups?
Very! To keep your S’mores Cookie Cups fresh, place them in an airtight container at room temperature for up to 3 days. If you want to keep them longer, refrigerate them for up to a week. Just make sure to seal them well to prevent them from drying out!
Can I freeze my S’mores Cookie Cups?
Absolutely! To freeze your S’mores Cookie Cups, allow them to cool completely. Layer them in a freezer-safe container with parchment paper between each layer to avoid sticking. They can be stored for up to 3 months. When you’re ready to enjoy them, simply thaw them in the refrigerator overnight, or pop them into the microwave for about 10-15 seconds for a quick warm-up!
What if my cookie cups are too dry or crumbly?
If your cookie cups turn out dry or crumbly, it can be due to overmixing or not measuring the flour correctly. For future batches, I recommend spooning and leveling flour with a measuring cup instead of scooping directly from the bag. Additionally, aim for a light hand when mixing the wet and dry ingredients. If they do come out dry, serve them warm with a scoop of ice cream to add moisture and decadence.
Are S’mores Cookie Cups suitable for my pets or anyone with allergies?
S’mores Cookie Cups contain ingredients like butter, sugar, and chocolate that aren't safe for pets, specifically dogs and cats, so keep them away from your furry friends. If you have allergies to gluten or dairy, consider swapping the all-purpose flour for a gluten-free blend and using dairy-free chocolate chips and margarine. These substitutions can create a deliciously inclusive treat for your dietary needs!
Delicious S’mores Cookie Cups to Satisfy Your Sweet Cravings
Ingredients
Equipment
Method
- Preheat your oven to 350°F (175°C) and lightly grease a mini muffin pan with non-stick spray.
- Cream together unsalted butter, granulated sugar, and brown sugar for 2-3 minutes until light and fluffy.
- Beat in eggs, one at a time, then add vanilla extract and mix until combined.
- Whisk together flour, baking soda, and salt in a separate bowl, then gradually add to wet ingredients.
- Fold in milk chocolate chips into the cookie dough using a spatula.
- Press graham crackers into the bottom of each muffin well.
- Scoop cookie dough into muffin wells, filling two-thirds full, and press down slightly.
- Bake for approximately 10 minutes until edges are golden brown.
- Top each cookie cup with a halved marshmallow, facing up.
- Broil for 1-2 minutes until marshmallows are toasted.
- Let cool in the pan for 5 minutes before transferring to a wire rack.
Leave a Reply