
The aroma of freshly baked bread always brings back memories of cozy family dinners and laughter shared over a table. Today, I'm excited to share my recipe for Gluten Free Garlic Pizza Breadsticks, a guilt-free indulgence that combines the satisfying chewiness of pizza dough with a delightful garlic punch. Not only are these breadsticks incredibly easy to whip up in just 45 minutes, but they’re also a fantastic crowd-pleaser—perfect for game nights or as a tasty appetizer at your next gathering. With simple gluten-free ingredients and a rich garlic flavor, you'll find yourself reaching for these homemade delights time and time again. Are you ready to turn your kitchen into the ultimate comfort food hub? Let’s dive in!
Why are these breadsticks irresistible?
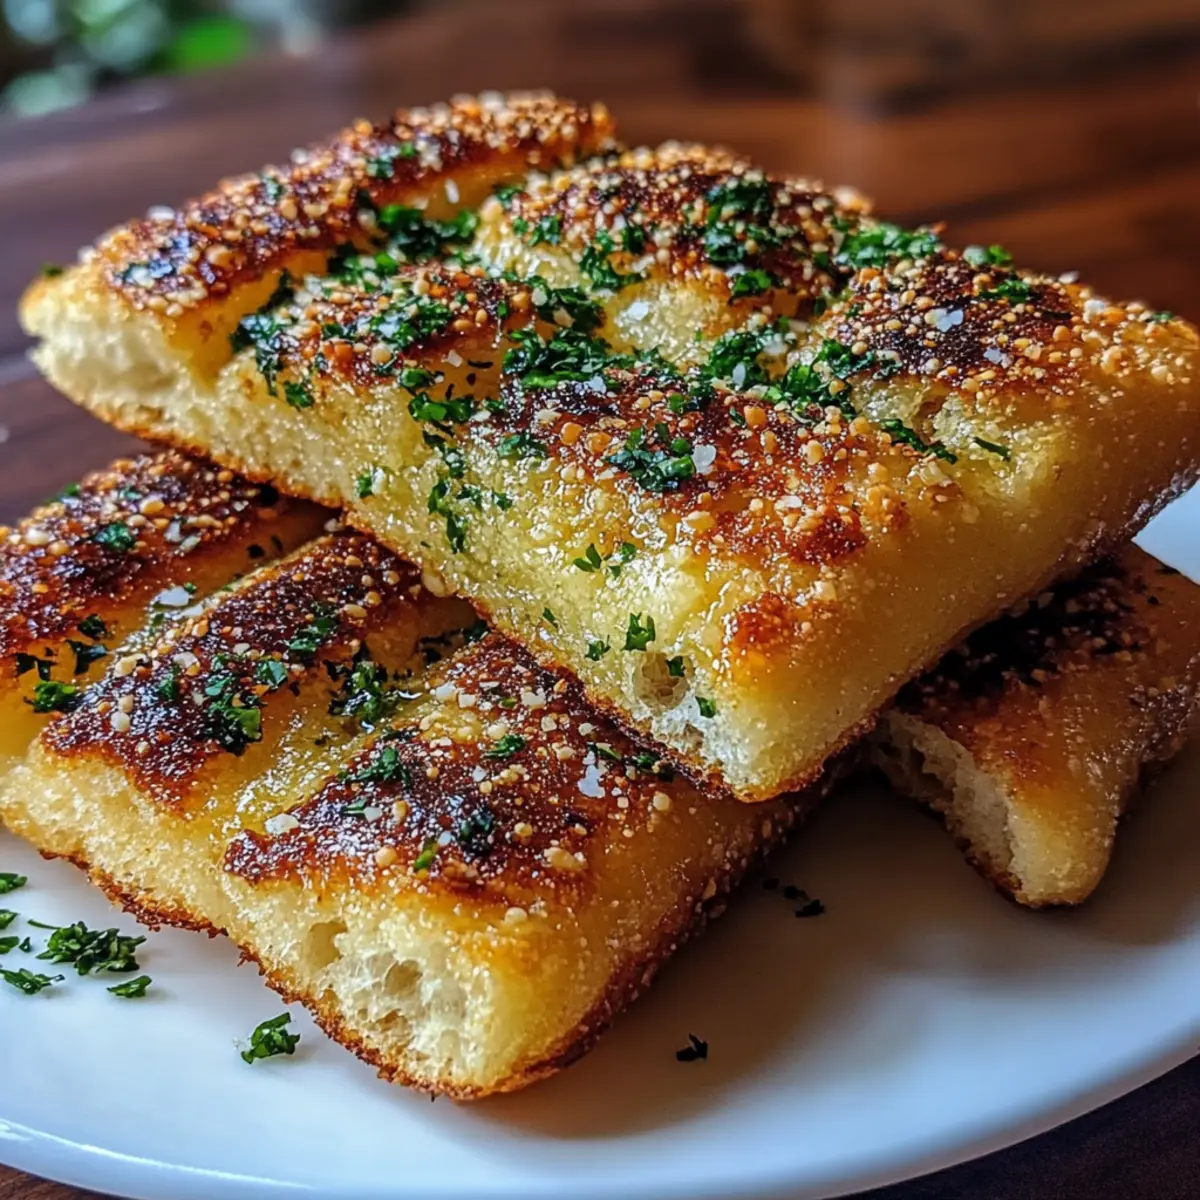
Savor the flavor: These Gluten Free Garlic Pizza Breadsticks pack a punch with aromatic garlic, complemented by a sprinkle of fresh parsley and savory Parmesan.
Easy & Quick: With just 45 minutes from start to finish, they’re the perfect solution for a last-minute snack or a crowd-pleasing appetizer.
Gluten-Free Goodness: Made with gluten-free all-purpose flour, everyone can enjoy this delicious treat without sacrificing taste or texture.
Customizable Delight: Feel free to add your favorite toppings—whether it’s extra cheese or a dash of Italian seasoning, the possibilities are endless!
Perfect for Sharing: Great for game nights or cozy family dinners, they invite laughter and fun around the table. Get ready to impress your guests or just treat yourself to a warm, indulgent experience!
Gluten Free Garlic Pizza Breadsticks Ingredients
• Get ready to create something delicious!
For the Dough
- 1 cup warm water – Activates the yeast for that perfect rise.
- 2 ¼ teaspoons active dry yeast – Essential for creating a fluffy texture.
- 1 teaspoon sugar – Helps the yeast thrive and adds a hint of sweetness.
- 2 cups gluten free all-purpose flour – The base for your tasty gluten free garlic pizza breadsticks.
- 1 teaspoon xanthan gum – Provides the necessary elasticity for gluten-free dough.
- 1 teaspoon salt – Enhances flavor and balances the ingredients.
- 2 tablespoons olive oil – Adds moisture and a rich depth of flavor.
For the Topping
- 2 tablespoons melted butter – Adds a luscious coating and helps toppings stick.
- 3 cloves minced garlic – Infuses a bold garlic punch into every bite.
- ½ teaspoon garlic powder – Intensifies the garlic flavor for those who can’t get enough!
- 1 tablespoon chopped fresh parsley – Brightens up the flavor and adds a pop of color.
- ¼ cup grated Parmesan cheese – Offers a savory, cheesy finish that's oh-so-addictive.
Feel free to gather these ingredients and get ready for a delightful cooking experience!
Step‑by‑Step Instructions for Gluten Free Garlic Pizza Breadsticks
Step 1: Preheat the Oven
Begin by preheating your oven to 425°F (220°C) to create the perfect baking environment for your Gluten Free Garlic Pizza Breadsticks. While the oven heats up, line a baking sheet with parchment paper, ensuring a non-stick surface for your delicious breadsticks once they’re baked.
Step 2: Activate the Yeast
In a small bowl, combine 1 cup of warm water, 2 ¼ teaspoons of active dry yeast, and 1 teaspoon of sugar. Let this mixture sit undisturbed for approximately 5 minutes, or until it becomes foamy. This step is crucial as it activates the yeast, which will give your breadsticks a lovely rise and airy texture.
Step 3: Mix the Dry Ingredients
In a large mixing bowl, whisk together 2 cups of gluten free all-purpose flour, 1 teaspoon of xanthan gum, and 1 teaspoon of salt. This dry mixture lays the foundation for your dough, ensuring the right proportions for flavor and structure. Make sure to break up any lumps for an even texture throughout.
Step 4: Combine and Form the Dough
Once the yeast is foamy, pour the yeast mixture and 2 tablespoons of olive oil into the bowl with the dry ingredients. Stir everything together until a soft, cohesive dough forms. The dough should be slightly sticky but manageable; if it feels too wet, add a sprinkle of gluten free flour to achieve the perfect consistency.
Step 5: Knead the Dough
Dump the dough onto a lightly floured surface, using more gluten free flour as needed. Gently knead the dough for 2-3 minutes until it becomes smooth and elastic. This process helps develop the structure of your Gluten Free Garlic Pizza Breadsticks, contributing to their delightful chewiness.
Step 6: Roll the Dough
Transfer the kneaded dough onto the prepared baking sheet and use a rolling pin to roll it into a rectangle about ¼ inch thick. Ensure the dough is evenly spread across the sheet to achieve uniform baking. This step shapes your breadsticks and allows for easy scoring later.
Step 7: Add the Toppings
Now, brush the dough generously with 2 tablespoons of melted butter. Evenly sprinkle the minced garlic, ½ teaspoon of garlic powder, chopped fresh parsley, and ¼ cup of grated Parmesan cheese on top. Make sure the toppings are well-distributed to enjoy a burst of flavor in every bite of your Gluten Free Garlic Pizza Breadsticks.
Step 8: Score the Dough
Using a sharp knife or pizza cutter, gently score the dough into equal-sized breadsticks without cutting all the way through. This will help your breadsticks separate easily after baking while ensuring they keep their shape. The scored lines are a visual cue for portioning later!
Step 9: Bake the Breadsticks
Carefully place the baking sheet in your preheated oven and bake for 12 to 15 minutes. Keep an eye on the edges; they should turn golden brown when the breadsticks are perfectly finished. The aroma will fill your kitchen, making it hard to resist a taste test.
Step 10: Cool and Serve
Once baked, remove the breadsticks from the oven and let them cool slightly for a few minutes. To serve, gently twist along the scored lines to separate your Gluten Free Garlic Pizza Breadsticks. This step adds a touch of flair while ensuring everyone gets their share of deliciousness!
Tips for the Best Gluten Free Garlic Pizza Breadsticks
-
Careful Yeast Activation: Make sure your water is warm but not hot; if it's too hot, it can kill the yeast, preventing a good rise.
-
Flour Measurement Matters: Spoon and level your gluten free all-purpose flour into the measuring cup. Too much flour can lead to dense breadsticks!
-
Don’t Skip Kneading: Gently knead the dough for a few minutes to develop its elasticity. Neglecting this step can result in tough breadsticks.
-
Scoring Technique: When scoring the dough, use a sharp knife or pizza cutter to make clean cuts. This ensures easy portioning after baking without tearing.
-
Watch the Bake Time: Ovens vary, so start checking your breadsticks at around 12 minutes. You want them golden brown, not overbaked!
-
Flavor Variations: Experiment with different herbs or cheeses on top. Adding oregano or mozzarella can add a delightful twist to your Gluten Free Garlic Pizza Breadsticks!
Gluten Free Garlic Pizza Breadsticks Variations
Feel free to get creative with these delicious breadsticks and cater them to your taste preferences!
-
Herb-Infused: Add a blend of dried Italian herbs to the dough for an aromatic boost. Basil, oregano, and thyme elevate the flavor profile beautifully.
-
Cheesy Twist: Mix in shredded mozzarella cheese to the dough for extra gooeyness. This variation adds a delightful cheesy stretch that kids absolutely adore!
-
Spicy Kick: Sprinkle some red pepper flakes over the top before baking to add a nice heat. If you love a bit of warmth, this will certainly fire up your taste buds.
-
Nutty Flavor: Substitute half of the gluten-free flour with almond flour for a nutty twist. The result is a richer tasting breadstick that's sure to surprise.
-
Garlic Lovers' Delight: Increase the minced garlic to 5 cloves if you're a garlic fanatic. The more garlic, the better, right? This variation is perfect for those who want that strong garlic flavor.
-
Dairy-Free Option: Replace the melted butter and Parmesan cheese with olive oil and a dairy-free cheese alternative. You won't miss the dairy but will love the flavor!
-
Sweet Surprise: Add a touch of honey to the dough for a hint of sweetness. Just 1 tablespoon can transform your breadsticks from savory to subtly sweet for an unexpected treat.
-
Stuffed Style: Roll small pieces of dough around your favorite filling, like pepperoni or spinach, before baking. Get creative—stuffing can make your breadsticks even more satisfying!
Don't hesitate to explore these fun variations and make your Gluten Free Garlic Pizza Breadsticks uniquely yours. Each twist adds something special, so why not try a few today? Happy cooking!
What to Serve with Gluten Free Garlic Pizza Breadsticks
Enhance your mealtime with delightful accompaniments that create a warm and inviting atmosphere.
-
Marinara Sauce: A classic pairing, its rich tomato flavor balances the savory garlic and cheese perfectly. Dip each breadstick for a burst of flavor!
-
Caesar Salad: Crisp romaine, creamy dressing, and crunchy croutons lend a fresh, tangy contrast to the buttery warmth of the breadsticks, making your meal satisfying and vibrant.
-
Stuffed Peppers: Colorful and hearty, these peppers filled with seasoned rice and ground meat will elevate your dinner experience with their vibrant flavors and textures.
-
Cheesy Spinach Dip: Creamy and indulgent, this dip is ideal for sharing, inviting everyone to gather around and indulge. The warmth complements the garlic flavor beautifully.
-
Roasted Veggies: Caramelized and tender, roasted vegetables add a healthy crunch that offsets the softness of the breadsticks. Their earthy flavors bring balance to your plate.
-
Homemade Pesto: Fresh basil and nuts create a vibrant dipping option with an aromatic kick that pairs wonderfully with the garlic undertones of your breadsticks.
-
Craft Beer: A refreshing, hoppy brew can cut through the richness of the breadsticks while enhancing the overall flavor experience. A perfect pairing for your cozy gathering!
-
Chocolate Lava Cake: Finish your meal on a sweet note with a warm, gooey chocolate treat. The decadence offers a wonderful contrast to the savory elements of your feast.
Make Ahead Options
These Gluten Free Garlic Pizza Breadsticks are perfect for meal prep enthusiasts! You can prepare the dough up to 24 hours in advance by mixing and kneading it as instructed, then cover it and refrigerate. This allows the flavors to meld beautifully, enhancing the overall taste. Additionally, you can roll out the dough and add the toppings (but don’t bake it) up to 3 days ahead—simply cover it tightly with plastic wrap and refrigerate. When you’re ready to enjoy, just bake them directly from the fridge for 12-15 minutes until golden brown. They will be just as delicious, allowing you to spend more quality time with family and friends!
How to Store and Freeze Gluten Free Garlic Pizza Breadsticks
Room Temperature: Store leftover breadsticks in an airtight container at room temperature for up to 2 days to maintain their softness and flavor.
Fridge: If you need them to last longer, keep them in the fridge for up to 5 days. Reheat them in the oven for a few minutes to restore their texture.
Freezer: For longer storage, freeze the breadsticks in a zip-top freezer bag for up to 3 months. Ensure they’re well-wrapped to prevent freezer burn.
Reheating: When ready to enjoy your frozen Gluten Free Garlic Pizza Breadsticks, thaw overnight in the fridge and reheat in a preheated oven at 350°F (175°C) for about 10 minutes.
Gluten Free Garlic Pizza Breadsticks Recipe FAQs
What kind of gluten free flour should I use?
For these Gluten Free Garlic Pizza Breadsticks, it’s best to use a high-quality gluten free all-purpose flour blend that includes xanthan gum, as this helps mimic the elasticity of traditional wheat flour. Brands like Bob's Red Mill or King Arthur Flour work wonderfully. Just be sure to double-check that it's truly gluten-free if you or your guests have dietary restrictions.
How should I store leftover breadsticks?
Store any leftover Gluten Free Garlic Pizza Breadsticks in an airtight container at room temperature for up to 2 days to keep them deliciously soft. If you want them to last longer, keep them in the fridge for up to 5 days. Reheat them gently in the oven to bring back their delightful texture!
Can I freeze these breadsticks?
Absolutely! For longer storage, you can freeze the breadsticks. First, let them cool completely, then individually wrap them in plastic wrap and place them in a zip-top freezer bag. They’ll keep well for up to 3 months. When you're ready to indulge, thaw them in the fridge overnight and reheat in a preheated oven at 350°F (175°C) for about 10 minutes.
What can I do if my dough is too sticky or too dry?
If your dough turns out too sticky, sprinkle in a bit more gluten free flour, a tablespoon at a time, until it’s manageable. On the other hand, if it’s too dry, add a teaspoon of warm water gradually until you reach the desired consistency. This adjustment can help achieve the perfect texture for your Gluten Free Garlic Pizza Breadsticks!
Are these breadsticks safe for individuals with allergies?
These Gluten Free Garlic Pizza Breadsticks are safe for those with gluten allergies but do check all ingredient labels for allergens, like dairy in the Parmesan cheese or possible cross-contamination. If you have a nut allergy, ensure your gluten free flour blend is processed in a nut-free facility. Always consult with your doctor if you have severe allergies.
Delicious Gluten Free Garlic Pizza Breadsticks You’ll Love
Ingredients
Equipment
Method
- Preheat your oven to 425°F (220°C) and line a baking sheet with parchment paper.
- In a small bowl, combine warm water, active dry yeast, and sugar. Let it sit for about 5 minutes until foamy.
- In a large mixing bowl, whisk together gluten free flour, xanthan gum, and salt.
- Pour the yeast mixture and olive oil into the dry ingredients and stir until a soft dough forms.
- Dump the dough onto a lightly floured surface and knead for 2-3 minutes until smooth.
- Roll the dough into a rectangle about ¼ inch thick on the prepared baking sheet.
- Brush the dough with melted butter and sprinkle with minced garlic, garlic powder, parsley, and Parmesan cheese.
- Score the dough into equal-sized breadsticks without cutting all the way through.
- Bake the breadsticks for 12-15 minutes until golden brown.
- Let them cool slightly before twisting along the scored lines to separate.

Leave a Reply