
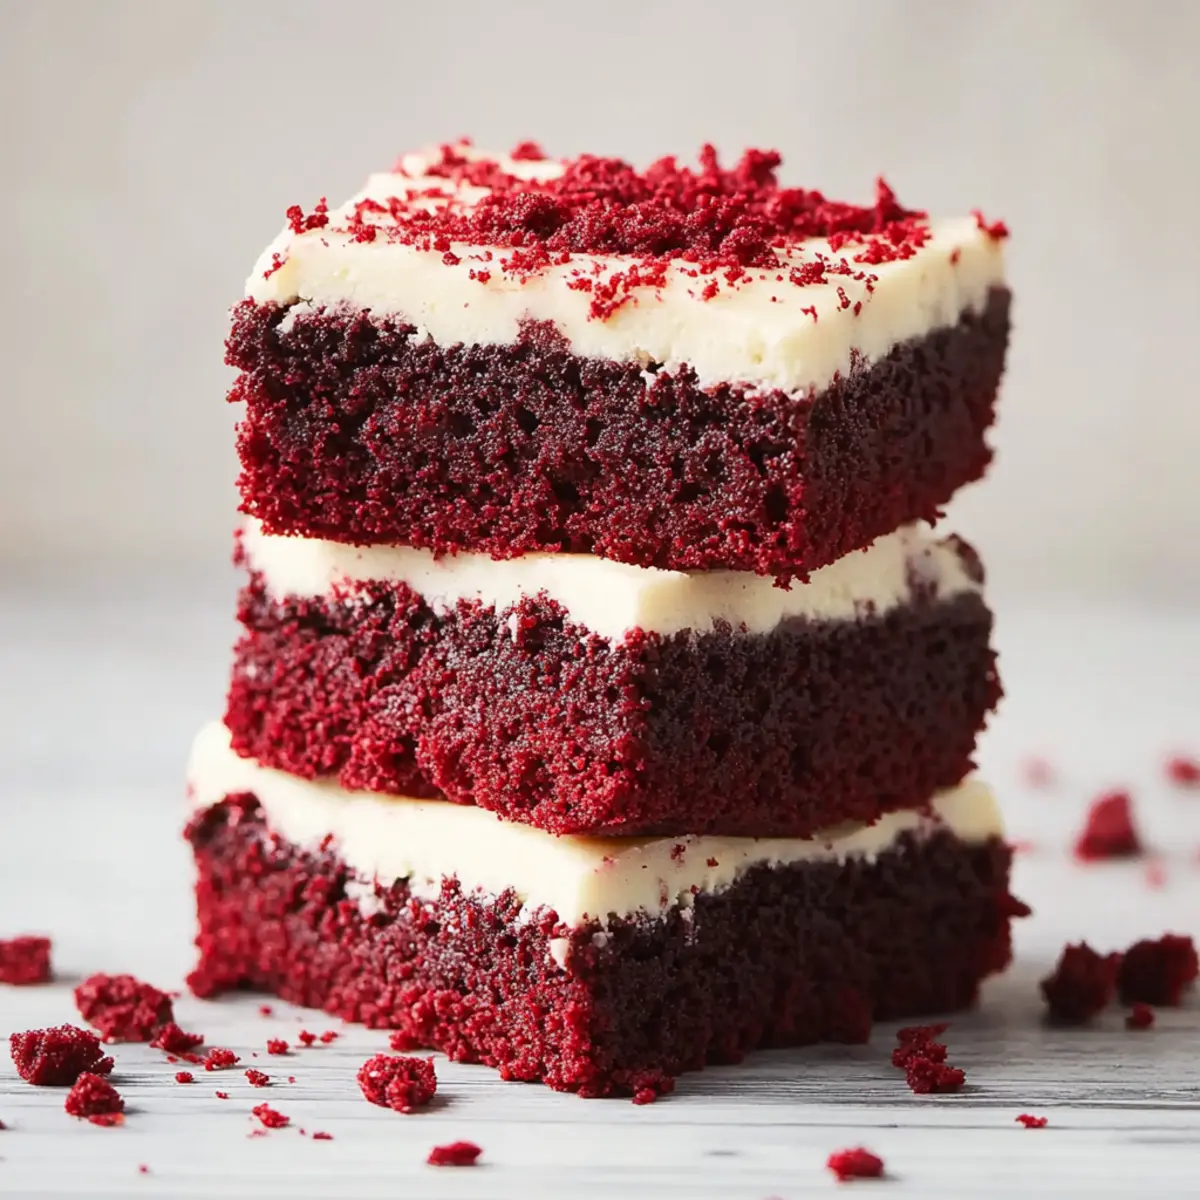
Ever walked into a bakery and felt that delightful tingle of anticipation? That’s precisely how I felt when I first tried red velvet brownies; they encapsulate the essence of indulgence. Crafted with the same vibrance and charm as traditional red velvet cake, these fudgy red velvet brownies are taken to the next level with a luxurious cream cheese frosting. Trust me; the combination is nothing short of magical!
But here’s the secret: they’re remarkably easy to whip up. Whether you're prepping for a gathering or simply in need of a sweet pick-me-up, these brownies are quick to prepare and guaranteed to impress, making them a true crowd-pleaser. Plus, they have that ideal balance of fudgy and chewy textures that will satisfy any chocolate lover’s cravings.
Picture this: the first bite reveals a rich and flavorful brownie, topped with a velvety cream cheese frosting that tantalizes your taste buds. Are you ready to learn how to make this delightful dessert? Scroll down, and let’s get baking together!
Why are Red Velvet Brownies so special?
Irresistible, rich flavor: The fusion of cocoa and vibrant red food coloring creates a unique taste that delights the senses.
Perfect for any occasion: Whether it’s a festive party or a cozy night in, these brownies impress everyone.
Easy to make: With simple ingredients and straightforward steps, baking becomes a joyful experience.
Versatile options: Feel free to experiment with optional white chocolate chips for an extra hint of sweetness.
For a similar indulgent treat, check out these glazed blueberry brownies that offer another unique flavor profile!
Texture perfection: With a fudgy base and creamy topping, each bite is a heavenly combination of textures.
Red Velvet Brownie Ingredients
• Experience the delight of baking these Red Velvet Brownies with easily accessible ingredients!
For the Brownies
• Unsalted Butter – Adds richness and structure; ensure it's melted for a smooth batter.
• Granulated Sugar – Sweetens the brownies and aids in achieving a lovely golden color when baked.
• Light Brown Sugar – Contributes moisture and a hint of caramel flavor for depth.
• Eggs – Bind all the ingredients together; use large eggs for the best result.
• Egg Yolk – Adds extra richness and helps create that delightful chewy texture.
• Vanilla Extract – Enhances the entire flavor profile, bringing warmth to the brownies.
• Vegetable Oil – Keeps the brownies moist and prevents them from drying out.
• Cocoa Powder – Provides the chocolatey base and deep flavor we crave in brownies.
• All-purpose Flour – Essential for structure; measure accurately for the perfect texture.
• Vinegar – Activates the red food coloring and gives a slight tang that complements sweetness.
• Cornstarch – Contributes to a soft and tender crumb, enhancing the overall texture.
• Salt – Elevates the flavors and balances sweetness in the brownies.
• Red Food Coloring – Gives the brownies their signature vibrant hue; gel is recommended for richer color.
• White Chocolate Chips (optional) – Offers a lovely, sweet contrast to the cocoa flavor.
For Cream Cheese Frosting
• Cream Cheese – The base for a tangy and creamy frosting; ensure it’s at room temperature for easy blending.
• Powdered Sugar – Sweetens and thickens the frosting, creating that delightful velvety texture.
• Vanilla Extract – Adds an aromatic touch that complements the creaminess of the frosting beautifully.
Step-by-Step Instructions for Fudgy Red Velvet Brownies with Creamy Cream Cheese Frosting
Step 1
Begin by preparing your baking environment. Preheat your oven to 350°F (180°C) to get it nice and hot for your fudgy red velvet brownies. Then, line a 9-inch square cake pan with parchment paper, allowing some overhang for easy removal later. This step ensures your brownies won’t stick and will come out beautifully when you’re ready to slice them.
Step 2
Next, melt the unsalted butter in the microwave, which should take about 30 seconds to 1 minute. Once melted, transfer it to a large mixing bowl and whisk in both granulated and light brown sugars until the mixture is well combined and slightly glossy. This process takes about 2-3 minutes and sets a flavorful foundation for your fudgy red velvet brownies.
Step 3
Incorporate the wet ingredients by adding the eggs, egg yolk, and vanilla extract to the sugar mixture. Mix gently until everything is just combined; it’s crucial not to overmix at this stage, as that can lead to cakey brownies. Aim for a smooth consistency and feel the joy of the batter beginning to come together—this should take roughly 1-2 minutes.
Step 4
Now it’s time to bring in the dry ingredients. Add the vegetable oil, red food coloring, and cocoa powder, mixing well until incorporated. Gradually fold in the all-purpose flour, cornstarch, salt, and vinegar, stirring until just combined. As you do this, admire the stunning red hue forming in your batter—it’s all part of making luscious red velvet brownies!
Step 5
If you want to explore texture, feel free to fold in optional white chocolate chips at this point. This extra step adds a delightful sweetness and creaminess alongside the rich cocoa flavor. Stir gently, just until the chips are evenly distributed, ensuring they don’t get lost in the batter without overmixing.
Step 6
Pour the rich brownie batter into your prepared pan, spreading it out evenly with a spatula for a smooth top. Bake in the preheated oven for 20-25 minutes. You’ll know they’re ready when a skewer inserted in the center comes out with moist crumbs attached; this means your fudgy red velvet brownies are perfectly baked.
Step 7
Once baked, remove the pan from the oven and let it cool completely on a wire rack. This cooling process is essential, as it allows the fudgy texture to set up nicely. Just try to be patient; it usually takes about an hour for them to cool enough for frosting to be applied.
Step 8
As the brownies cool, prepare the cream cheese frosting. Begin by beating room temperature cream cheese and unsalted butter together in a mixing bowl until smooth and fully combined, which should take about 3-4 minutes. This will create a creamy base that complements the richness of the brownies beautifully.
Step 9
Gradually add the powdered sugar to the bowl, mixing slowly at first to avoid a sugar cloud. Once combined, turn up the speed and beat until the frosting is light and fluffy—this should take another 3 minutes. Finally, add the vanilla extract and mix just until blended for that extra touch of flavor.
Step 10
Now comes the fun part! Once your fudgy red velvet brownies have cooled completely, generously frost them with your creamy cream cheese frosting using a spatula. Slice them into squares, and get ready to share (or keep all to yourself)! The vibrant red and the creamy topping make this dessert irresistibly inviting. Enjoy every delightful bite!
What to Serve with Red Velvet Brownies?
Indulging in fudgy red velvet brownies is a treat around which you can build an entire meal. Here are some delightful pairings to elevate your dessert experience.
- Vanilla Ice Cream: The classic choice! A scoop of creamy vanilla ice cream balances the richness of the brownies beautifully, creating a delightful contrast in temperatures.
- Fresh Berries: Serve with raspberries or strawberries to enhance the brownies' flavor. The tartness provides a refreshing palate cleanser that brightens each bite.
- Chocolate Sauce: Drizzling rich chocolate sauce on top brings an indulgent twist. It accentuates the buttery cocoa notes and offers an extra dose of chocolatey goodness.
- Coffee or Espresso: A nice cup of coffee takes the sweetness down a notch and complements the chocolate flavors effortlessly. The warmth of the drink enhances the cozy feel of enjoying brownies.
- Whipped Cream: A fluffy dollop of whipped cream adds a light and airy element. Consider flavoring it with a touch of vanilla or cocoa for a delightful addition.
- Mint Chocolate Chip Ice Cream: If you’re feeling adventurous, mint ice cream adds a refreshing twist. The minty notes create a fun and unexpected pairing with the rich red velvet flavor.
- Milkshakes: A luscious milkshake, whether chocolate, vanilla, or strawberry, makes for a nostalgic drink that pairs wonderfully with the fudgy texture of the brownies.
Enjoy pairing these delicious options alongside your freshly baked red velvet brownies for a sensory feast that promises to satisfy every sweet tooth!
How to Store and Freeze Red Velvet Brownies
Fridge: Store your frosted red velvet brownies in an airtight container in the fridge for up to 5 days. This keeps them fresh and creamy.
Room Temperature: If you prefer unfrosted brownies, they can be kept at room temperature in an airtight container for up to 3 days. Wrap them tightly in plastic wrap for best results.
Freezer: For longer storage, freeze unfrosted brownies in an airtight container for up to 3 months. Thaw overnight in the fridge before frosting or serving.
Reheating: To enjoy a warm brownie, microwave individual pieces for about 10-15 seconds. Make sure to frost them after reheating for that delightful creaminess!
Red Velvet Brownies Variations
Feel free to get creative with these delicious red velvet brownies and tailor them to your taste preferences!
- Nutty Delight: Add chopped walnuts or pecans for added crunch and a lovely nutty flavor.
- Spicy Kick: Stir in a pinch of cinnamon or cayenne pepper for a surprising warmth that complements the chocolate.
- Fruity Twist: Incorporate dried cherries or raspberries; this gives a sweet-tart balance against the richness of the brownies.
- Minty Freshness: Infuse a few drops of peppermint extract for a refreshing minty flavor that's perfect for special occasions.
- Caramel Swirl: Drizzle caramel sauce into the batter before baking to create a decadent, gooey texture.
- Coconut Bliss: Mix shredded coconut into the batter for a tropical flavor that pairs beautifully with the cream cheese frosting.
- Different Frosting Flavor: Swap the cream cheese frosting for a rich chocolate or vanilla buttercream to change the profile entirely.
- Gluten-Free Option: Use a gluten-free flour blend to make these brownies suitable for gluten-sensitive friends without sacrificing taste.
Make Ahead Options
These Red Velvet Brownies are perfect for meal prep enthusiasts! You can prepare the brownie batter up to 24 hours in advance by mixing all the dry and wet ingredients, then store it tightly covered in the refrigerator. Additionally, you can bake the brownies and let them cool completely, then refrigerate them in an airtight container for up to 3 days without frosting. To maintain their fudgy texture, just be sure to cover them well. When you’re ready to enjoy, simply frost the brownies with the cream cheese frosting right before serving, and you’ll have an indulgent sweet treat ready to impress with minimal effort!
Expert Tips for Red Velvet Brownies
Use a kitchen scale: Precise ingredient measurements, especially for flour, ensure your brownies achieve the perfect fudgy texture without any guesswork.
Avoid overmixing: Mix wet ingredients just until combined to prevent cakey brownies; the goal is that rich, fudgy dessert.
Choose the right pan: Opt for an aluminum pan to maintain even baking and avoid altering bake times, resulting in consistent, delicious brownies.
Go for gel coloring: For that stunning rich red color, use gel food coloring; it gives you vibrant results that will impress everyone.
Cool before frosting: Allow the brownies to cool completely before adding the creamy frosting. This step prevents the frosting from melting and ensures a lovely presentation.
Red Velvet Brownies Recipe FAQs
What’s the difference between red velvet brownies and regular brownies?
Red velvet brownies have a unique twist compared to regular brownies due to the addition of red food coloring and a hint of cocoa, which gives them a vibrant color and a distinct flavor profile. They’re often complemented by a tangy cream cheese frosting, enhancing their deliciousness and making them perfect for special occasions or celebrations.
Can I mix red velvet cake mix with brownie mix?
Absolutely! If you're looking for a shortcut, you can combine red velvet cake mix with brownie mix to create a quick and delightful treat. Just follow the package instructions, adding any extra ingredients like eggs or oil as needed. This will give you a cake-like texture with that iconic red velvet flavor, perfect when you're short on time.
Why add vinegar to red velvet brownies?
The addition of vinegar in red velvet brownies serves a dual purpose. Firstly, it activates the red food coloring, enhancing the iconic red hue. Secondly, the slight acidity of vinegar balances out the sweetness of the chocolate, creating a more complex and delicious flavor that elevates the overall taste of the brownies.
How should I store my red velvet brownies?
For optimal freshness, store your frosted red velvet brownies in an airtight container in the fridge for up to 5 days. If they're unfrosted, they can stay at room temperature for up to 3 days. Just be sure to wrap them tightly in plastic wrap to maintain their moist and fudgy texture!
Can I freeze red velvet brownies?
Certainly! To freeze red velvet brownies, wrap them individually in plastic wrap or place them in an airtight container. They can be stored in the freezer for up to 3 months. When you’re ready to enjoy them, thaw them in the fridge overnight, and then add frosting if desired. They’ll taste just as delicious as the day you baked them!
What makes brownies cakey instead of fudgy?
Brownies become cakey when there is an imbalance in the ingredients, particularly with too much flour or too many eggs. To achieve that irresistibly fudgy texture, ensure you accurately measure your flour and avoid overmixing your batter. Keep that rich, soft crumb in mind and you’ll bake perfect fudgy red velvet brownies every time!
Irresistibly Fudgy Red Velvet Brownies with Creamy Frosting
Ingredients
Method
- Preheat your oven to 350°F (180°C) and line a 9-inch square cake pan with parchment paper.
- Melt the unsalted butter and whisk it with granulated and light brown sugars for 2-3 minutes.
- Add the eggs, egg yolk, and vanilla extract, mixing gently until just combined.
- Incorporate the vegetable oil, red food coloring, and cocoa powder, then fold in the all-purpose flour, cornstarch, salt, and vinegar.
- If desired, fold in white chocolate chips until evenly distributed.
- Pour the brownie batter into the prepared pan and bake for 20-25 minutes.
- Cool completely on a wire rack before frosting.
- Beat cream cheese and unsalted butter until smooth, then add powdered sugar and blend until fluffy; add vanilla extract and mix until combined.
- Frost the cooled brownies generously and cut into squares.
- Enjoy your delightful red velvet brownies!
Nutrition
Notes
- Use a kitchen scale for precise measurements.
- Avoid overmixing to maintain a fudgy texture.
- Choose an aluminum pan for even baking.
- Consider using gel food coloring for a vibrant red hue.
- Allow brownies to cool completely before frosting.
Leave a Reply