
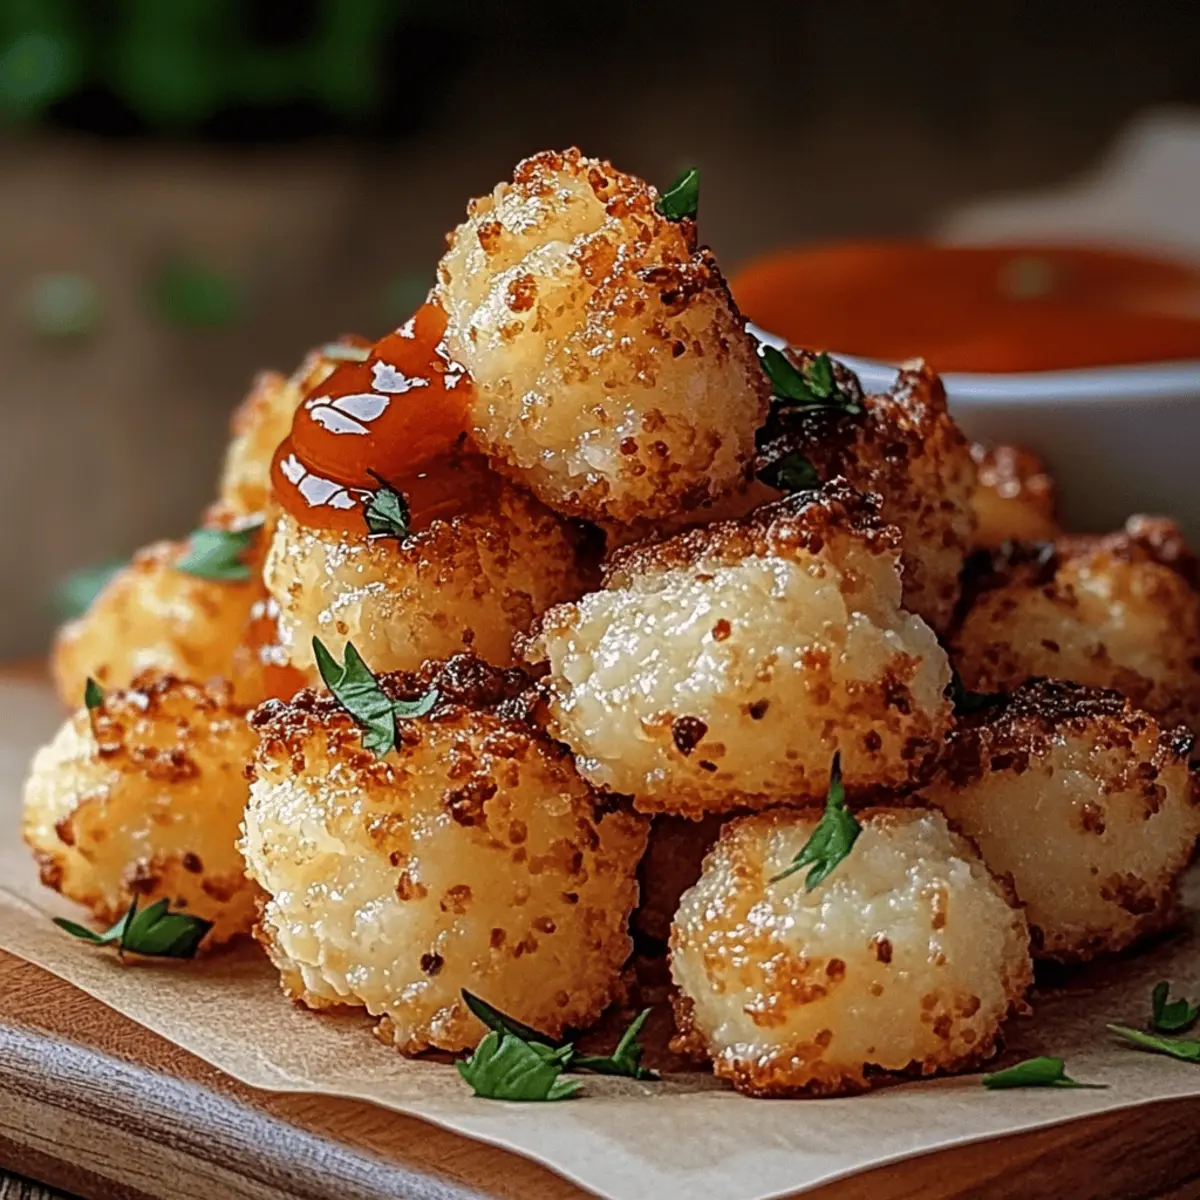
There’s something magical about the golden crunch of a perfectly roasted vegetable that can turn any mealtime into a celebration. Recently, I found myself craving something both satisfying and simple, leading me to create this Crispy Roasted Cauliflower recipe. It’s incredibly quick to prepare—the whole dish is ready in just 40 minutes—and it's always a crowd-pleaser, making it an excellent side for family dinners or casual get-togethers. What I love most is how versatile baked cauliflower can be; you can enjoy it as is, or elevate it with a sprinkle of Parmesan for that extra layer of deliciousness. So, are you ready to transform your dinner with this delightful recipe? Let's dive in!

Why is Baked Cauliflower so Irresistible?
Flavorful Crunch: Get ready for a delightful explosion of textures as the edges turn crisp while the insides stay tender.
Quick and Easy: In just 40 minutes, you can whip up this dish, making it perfect for busy weeknights or last-minute gatherings.
Versatile Side: Serve it alongside grilled chicken or toss it into a salad for an extra punch of flavor.
Healthy Indulgence: At only 120 calories per serving, this baked cauliflower satisfies while keeping your health goals on track.
Crowd-Pleasing: Whether family or friends, everyone will love this tasty twist on vegetables, proving that even picky eaters can enjoy healthy foods. If you love simple and delicious sides, consider also trying roasted Brussels sprouts or a hearty vegetable stir-fry for more easy options!
Baked Cauliflower Ingredients
For the Cauliflower
- Cauliflower – use a fresh head for the best flavor and texture.
- Olive oil – this helps to achieve that perfect golden crispiness.
- Salt – enhances the natural flavors of the baked cauliflower.
- Black pepper – adds a touch of warmth and subtle spice.
- Garlic powder – a delicious way to infuse savory depth into your dish.
- Paprika – brings a lovely subtle smokiness and vibrant color.
For Serving (Optional)
- Grated Parmesan cheese – sprinkle on top for an indulgent, savory finish that truly elevates the baked cauliflower.
Get ready to savor the scrumptiousness of this baked cauliflower recipe, perfect for those who are tired of fast food and crave homemade goodness!
Step‑by‑Step Instructions for Baked Cauliflower
Step 1: Preheat the Oven
Start by preheating your oven to 425°F (220°C). This high temperature is key to achieving that irresistible golden, crispy exterior on your baked cauliflower. While the oven is heating, you’ll be preparing the cauliflower and seasonings.
Step 2: Prepare the Cauliflower
In a large mixing bowl, add your chopped cauliflower florets, ensuring they’re bite-sized for even cooking. Drizzle in 2–3 tablespoons of olive oil, then sprinkle with salt, black pepper, garlic powder, and paprika. Toss everything together thoroughly, ensuring each floret is beautifully coated with the seasoning mixture.
Step 3: Arrange on Baking Sheet
Take a rimmed baking sheet and line it with parchment paper to make cleanup easy. Spread the seasoned cauliflower in a single layer across the baking sheet. Be careful not to overcrowd them; this allows for better roasting and crispiness.
Step 4: Roast the Cauliflower
Place the baking sheet in the preheated oven and roast the cauliflower for 25–30 minutes. Halfway through, give the florets a gentle flip to ensure they cook evenly. You'll know they’re done when they’re golden brown with crispy edges—a mouthwatering sight!
Step 5: Add Parmesan Cheese
If you’re bringing your baked cauliflower to the next level, sprinkle grated Parmesan cheese on top during the last 5 minutes of roasting. This added touch will melt into deliciousness and create an extra layer of flavor that you won’t want to miss.
Step 6: Serve and Enjoy
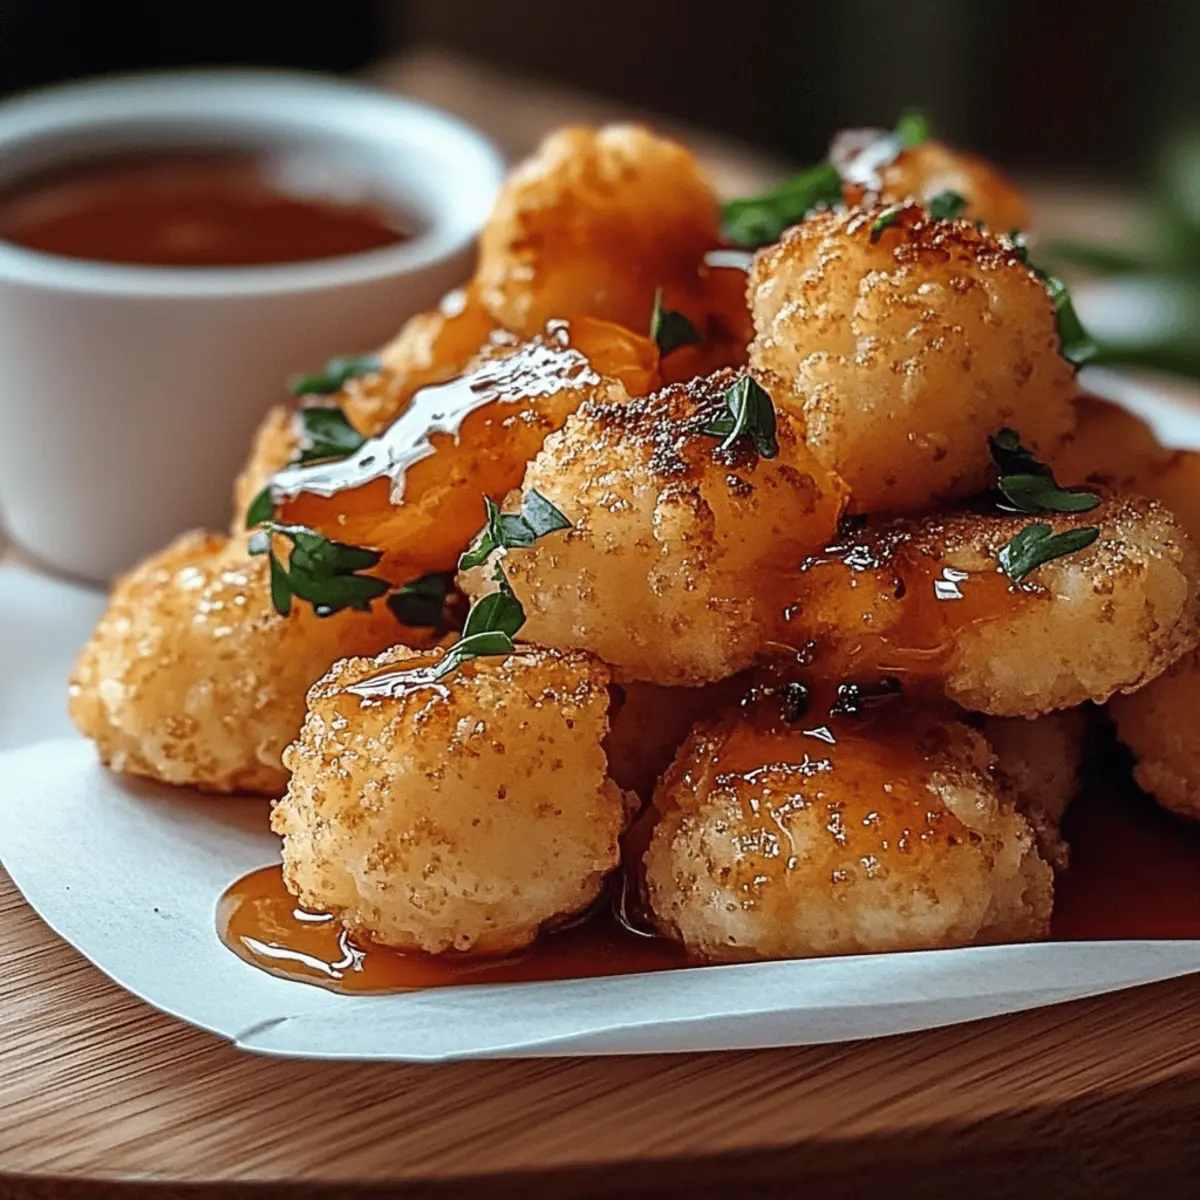
Once roasted to perfection, remove the baked cauliflower from the oven. Serve it hot, allowing everyone to relish in its crispy goodness. You can enjoy it as is or pair it with your favorite dip, like ranch or garlic aioli, for an extra kick of flavor.
Storage Tips for Baked Cauliflower
Room Temperature: Allow the baked cauliflower to cool completely before storing it at room temperature for up to 2 hours.
Fridge: Store your baked cauliflower in an airtight container in the refrigerator for up to 4 days to keep it fresh and flavorful.
Freezer: For longer storage, freeze the baked cauliflower in a vacuum-sealed bag or airtight container for up to 2 months.
Reheating: When ready to enjoy, reheat in the oven at 350°F (175°C) for about 10–15 minutes, or in an air fryer for a few minutes to regain its crispiness.
Baked Cauliflower Variations & Substitutions
Feel free to get creative and customize your baked cauliflower with these fun ideas!
-
Dairy-Free: Omit Parmesan and use nutritional yeast for a cheesy flavor without dairy.
For a dairy-free alternative, nutritional yeast works wonders, bringing a savory kick. Your dish will still be satisfying and delicious! -
Spicy Kick: Add cayenne pepper or red pepper flakes to spice things up.
A pinch of cayenne can transform your baked cauliflower into a fiery delight. Perfect for those who love a little heat in their meals! -
Herb Infusion: Toss in fresh herbs like rosemary or thyme for extra aroma.
Adding herbs elevates the flavor profile beautifully, and the delightful scent will waft through your kitchen as it bakes! -
Balsamic Glaze: Drizzle balsamic glaze before roasting for a tangy sweetness.
This twist offers a lovely contrast to the savory spices, creating a fresh flavor burst that will tantalize your taste buds. -
Crunchy Toppings: Try topping with crushed nuts or seeds for added texture.
Sprinkle some toasted almond slices or sesame seeds just before serving to introduce a delightful crunch and an extra layer of nutrition! -
Experiment with Veggies: Mix in other veggies like bell peppers or zucchini for variety.
You can make this dish even more colorful by adding other vegetables alongside the cauliflower, providing vibrant hues and diverse flavors. -
Garlic Lovers: Toss in freshly minced garlic for an extra savory punch.
If you're a garlic aficionado, adding minced garlic will intensify the dish's rich flavors and make your home smell irresistibly delicious. -
Curry Flavor: Use curry powder for a unique and aromatic twist on the original recipe.
Curry powder will introduce an exotic taste, transforming your baked cauliflower into a flavorful adventure!
With these variations, you can keep your baked cauliflower exciting and tailored to your tastes. If you’re looking for even more inspiration, consider adding a side of creamy hummus for dipping or serving alongside a zesty quinoa salad for a complete meal!
Make Ahead Options
These Crispy Roasted Cauliflower florets are perfect for meal prep! You can chop and season the cauliflower up to 24 hours in advance, storing it in an airtight container in the refrigerator to keep it fresh. This not only saves you precious time during busy weeknights but also allows the flavors to meld beautifully. When you're ready to enjoy your baked cauliflower, simply arrange the prepped florets on a baking sheet and roast as directed—no need to adjust the cooking time. Just watch for that perfect golden crispiness, and you'll have a delicious side dish with minimal effort!
Expert Tips for Baked Cauliflower
- Even Coating: Ensure each floret is coated evenly with oil and spices; this prevents some pieces from drying out while others remain bland.
- Single Layer: Spread the cauliflower in a single layer on the baking sheet, as overcrowding can lead to steaming instead of that desired crispy effect.
- Know Your Oven: Ovens can vary; check for doneness around the 25-minute mark to avoid overcooking. Look for golden brown edges!
- Parmesan Timing: Add Parmesan cheese in the last 5 minutes of baking for a melty, flavorful topping without burning it.
- Fresh Ingredients: Use a fresh head of cauliflower for the best flavor and texture; wilted florets can lead to a soggy outcome.
What to Serve with Crispy Roasted Cauliflower
Transform your simple side into a stunning meal with these delightful pairings that perfectly complement the crispy, savory notes of this dish.
-
Creamy Mashed Potatoes: Rich and buttery, these mashed potatoes provide a smooth contrast to the crispy texture, creating a heartwarming duo.
-
Grilled Lemon Chicken: The bright citrus flavors of grilled chicken enhance the baked cauliflower, making each bite a celebration of freshness.
-
Quinoa Salad: A light and nutty quinoa salad with fresh veggies adds a refreshing crunch, enhancing the overall experience with every forkful.
-
Hummus Platter: Serve with a trio of hummus flavors for dipping; the creamy elements work beautifully against the roasted flavors of the cauliflower.
-
Garlic Aioli: A dollop of garlic aioli elevates the flavor profile, introducing a savory richness that is simply irresistible alongside this dish.
-
Steamed Asparagus: Crisp-tender asparagus offers a vibrant green contrast and a delightful snap, rounding out your table with color and taste.
-
Crisp White Wine: Pair with a chilled Sauvignon Blanc for a light, zesty complement that enhances the cauliflower’s natural flavors while adding a touch of sophistication.
-
Chocolate Mousse: Consider ending on a sweet note with a rich chocolate mousse, delivering a delightful finale that contrasts nicely with the savory cauliflower.
Crispy Roasted Cauliflower Recipe FAQs
How do I choose the best cauliflower?
Absolutely! Look for a head of cauliflower that is firm, with tightly packed florets and a vibrant white color. Avoid any heads with dark spots or browning, as this indicates they may be past their prime. Fresh cauliflower should feel heavy for its size and have bright green leaves.
What’s the best way to store leftover baked cauliflower?
Very! Allow the baked cauliflower to cool completely before placing it in an airtight container. You can store it in the fridge for up to 4 days. If reheating, use the oven or air fryer to maintain that beautiful crispiness.
Can I freeze baked cauliflower?
Yes, you can! To freeze, let the baked cauliflower cool completely. Then, place it in a vacuum-sealed bag or an airtight container to prevent freezer burn. It can be stored for up to 2 months. When you’re ready to enjoy it again, reheat in the oven at 350°F (175°C) for about 10–15 minutes.
What should I do if my cauliflower isn’t getting crispy?
If your baked cauliflower isn’t crispy, it could be due to overcrowding on the baking sheet. Make sure the florets are in a single layer without overlapping for optimal roasting. Additionally, ensuring they are evenly coated in oil can help achieve that desired crunch.
Is this recipe suitable for people with dietary restrictions?
Absolutely! This baked cauliflower is vegan and gluten-free, making it a great addition to many diets. However, if you are serving it to guests, be aware of any allergies to common seasonings like garlic or paprika. You can easily adjust the spices to suit different tastes.
How long can I keep the baked cauliflower in the fridge?
You can keep your leftover baked cauliflower in the fridge for up to 4 days. Just make sure it’s in an airtight container to lock in its delicious flavors and keep it fresh!

Deliciously Crispy Baked Cauliflower You’ll Crave Daily
Ingredients
Equipment
Method
- Preheat your oven to 425°F (220°C).
- In a large mixing bowl, add your chopped cauliflower florets and drizzle in olive oil, then sprinkle with salt, black pepper, garlic powder, and paprika. Toss until the florets are evenly coated.
- Take a rimmed baking sheet lined with parchment paper and spread the seasoned cauliflower in a single layer.
- Place the baking sheet in the preheated oven and roast the cauliflower for 25-30 minutes, flipping halfway through.
- During the last 5 minutes of roasting, sprinkle grated Parmesan cheese on top.
- Once roasted to perfection, remove from the oven and serve hot.


Leave a Reply