
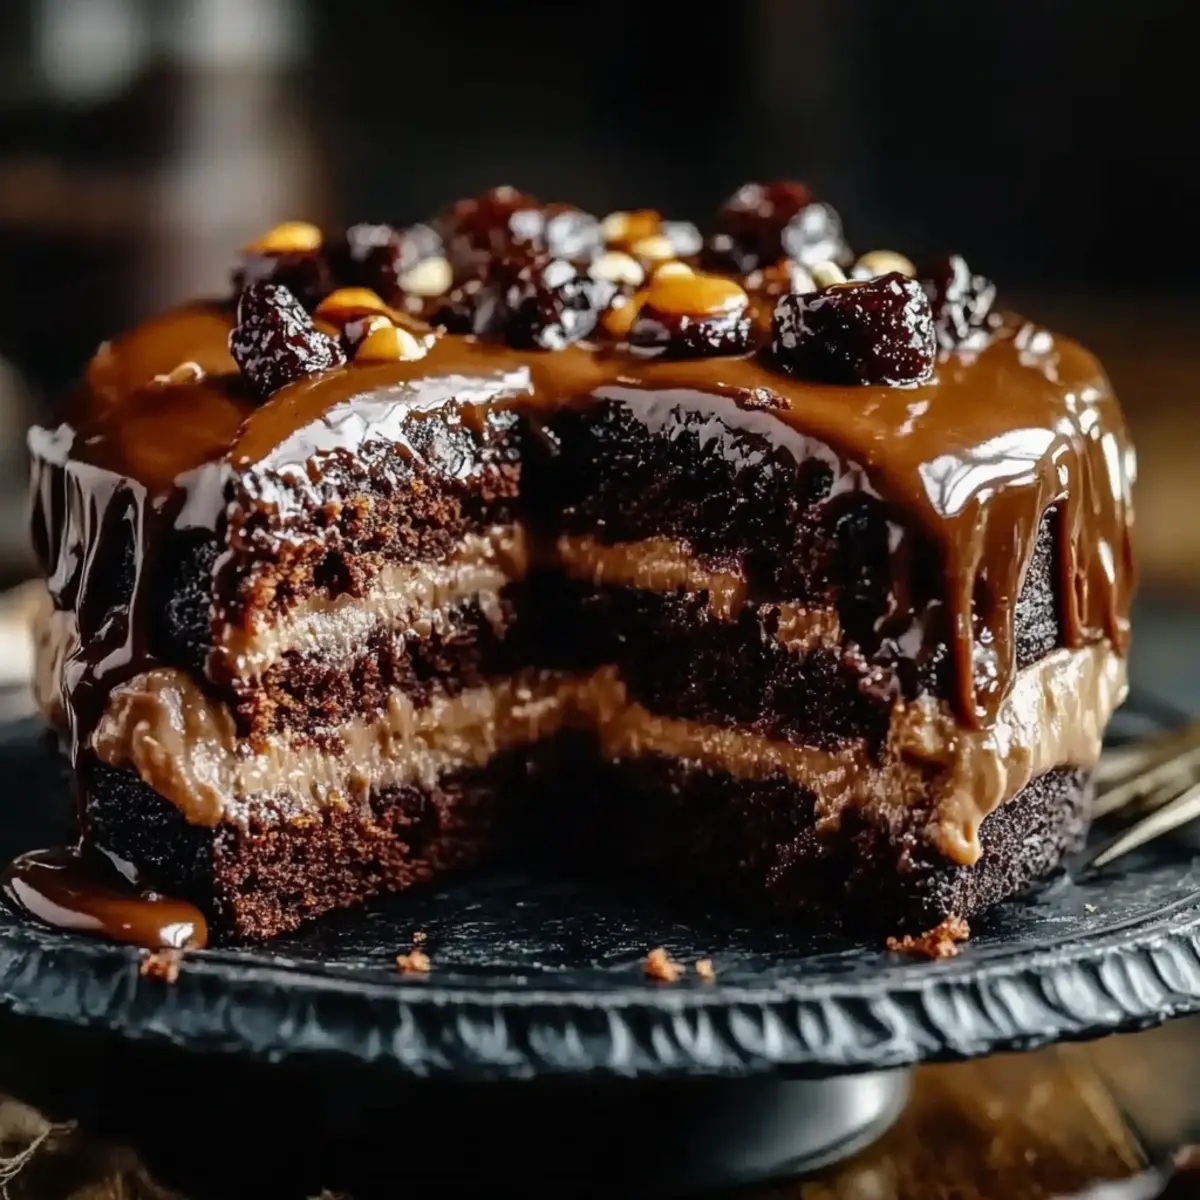
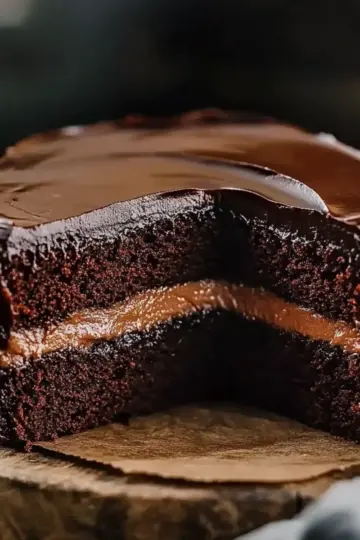
As I rummaged through my pantry one afternoon, a familiar sense of nostalgia washed over me—a craving for something rich and satisfying that would wrap me in warm, cozy memories. That’s when I decided to whip up my beloved Chocolate Turtle Cake. This delightful dessert is not just a feast for the eyes; it’s a glorious blend of layers drizzled with caramel, scattered with crunchy pecans, and topped off with luscious chocolate glaze. Plus, it's incredibly easy to prepare and can win over any crowd, making it the perfect showstopper for gatherings or cozy nights in. Ready to indulge in a slice of sweetness that transports you back to cherished moments? Let’s get baking!
Why is this Chocolate Turtle Cake irresistible?
Decadent flavors: This cake is a heavenly blend of rich chocolate and smooth caramel, creating a sensation that takes your taste buds on a delightful journey.
Easy to follow: With simple steps, even novice bakers can whip up this delicious dessert without stress.
Crowd-pleaser: Whether at a holiday gathering or an intimate dinner, the Chocolate Turtle Cake is sure to impress your guests and have them asking for seconds.
Versatile delight: Serve it as-is, or elevate it further with toppings like whipped cream or fresh fruit. You might also explore my Chocolate Cake Variations for added inspiration!
Perfect for celebrations: Birthdays, anniversaries, or just a sweet treat for yourself—this cake fits every occasion! You’ll definitely want to keep this recipe on hand for those moments.
Chocolate Turtle Cake Ingredients
• Get ready to create a dessert that’s as delightful to make as it is to devour!
For the Cake
- All-purpose flour – ensures a tender crumb for your Chocolate Turtle Cake.
- Granulated sugar – adds sweetness and helps to achieve that perfect rise.
- Unsweetened cocoa powder – brings deep chocolate flavor that balances the sweetness.
- Baking powder – gives the cake a lovely lift, keeping it light and fluffy.
- Baking soda – enhances the cake’s leavening, creating a perfect texture.
- Salt – elevates the flavors, making the chocolate richer.
- Large eggs – binds everything and adds moisture to the cake.
- Whole milk – enriches the batter for a creamier texture.
- Vegetable oil – keeps the cake moist for days; feel free to use melted butter as a substitute.
- Vanilla extract – adds a warm, aromatic flavor that enhances the chocolate.
- Boiling water – helps to deepen the cocoa flavor, making the chocolate even more intense.
For the Filling and Topping
- Caramel sauce – drizzles beautifully between layers, adding a sweet contrast to the chocolate.
- Toasted pecans – introduce a crunchy texture that pairs perfectly with the gooey caramel.
- Chocolate glaze – transforms your cake into a show-stopping dessert, adding an irresistible sheen.
Get excited to mix these lovely ingredients, and let this Chocolate Turtle Cake be the star of your next celebration!
Step‑by‑Step Instructions for Chocolate Turtle Cake
Step 1: Prepare the Oven and Pans
Preheat your oven to 350°F (175°C) and grab two 9-inch round cake pans. Lightly grease the pans with butter or oil, then sprinkle a little flour inside, shaking off the excess to prevent sticking. This ensures your Chocolate Turtle Cake will come out perfectly shaped after baking.
Step 2: Mix the Dry Ingredients
In a large mixing bowl, whisk together 1 ¾ cups of all-purpose flour, 1 ½ cups of granulated sugar, ¾ cup of unsweetened cocoa powder, 1 ½ teaspoons of baking powder, 1 ½ teaspoons of baking soda, and ½ teaspoon of salt. Mix until well combined, and take a moment to soak in that irresistible chocolate aroma.
Step 3: Combine Wet Ingredients
Add 2 large eggs, 1 cup of whole milk, ½ cup of vegetable oil, and 2 teaspoons of vanilla extract to your dry mixture. Using an electric mixer, beat the batter on medium speed for about 2 minutes, until it's smooth and well-blended. Don’t worry if it looks a bit thick at this stage; that’s just right!
Step 4: Incorporate Boiling Water
Carefully stir in 1 cup of boiling water into the cake batter; this will loosen it up considerably and enhance the chocolate flavor. Take your time to mix until the batter is completely smooth, showcasing a lovely rich color—that’s the magic of your Chocolate Turtle Cake really starting to shine!
Step 5: Pour into Cake Pans
Divide the batter evenly between the prepared cake pans, ensuring they’re filled about halfway. This allows for even rising. Gently tap the pans on the counter to remove any air bubbles, which helps your cakes bake evenly and rise perfectly.
Step 6: Bake the Cakes
Place the cake pans in your preheated oven and bake for 30-35 minutes. To check for doneness, insert a toothpick into the center of the cakes; it should come out clean or with a few moist crumbs. Enjoy the delightful chocolate fragrance that fills your kitchen!
Step 7: Cool the Cakes
After baking, allow the cakes to cool in the pans for about 10 minutes. Run a knife around the edges to loosen them if needed, then gently turn the cakes out onto a wire rack to cool completely. This step is crucial to prevent a soggy bottom for your Chocolate Turtle Cake.
Step 8: Assemble the Layers
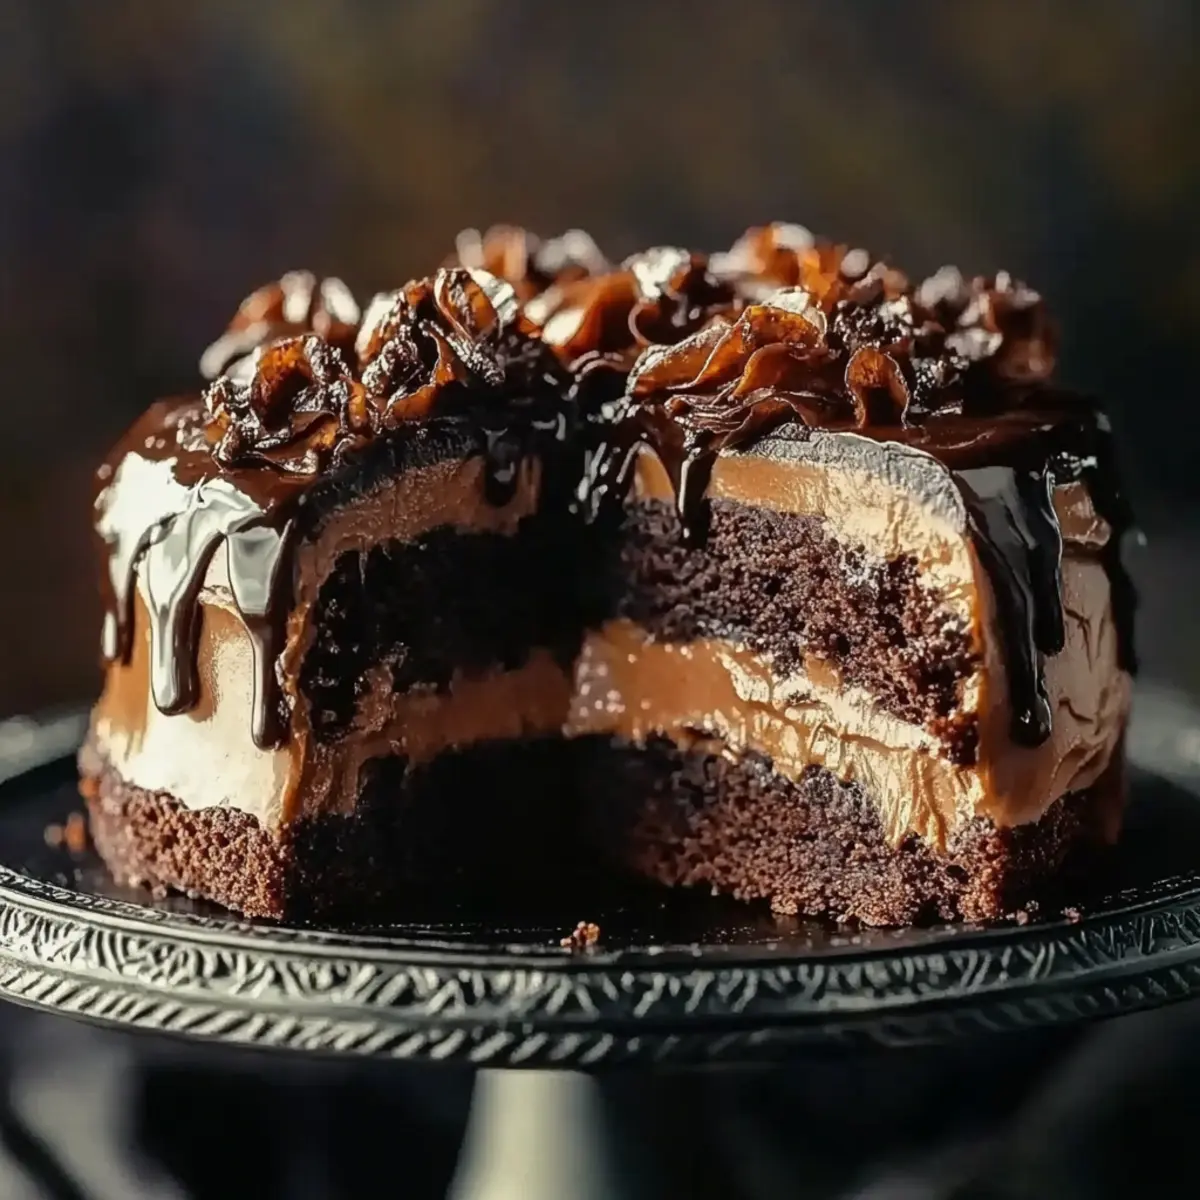
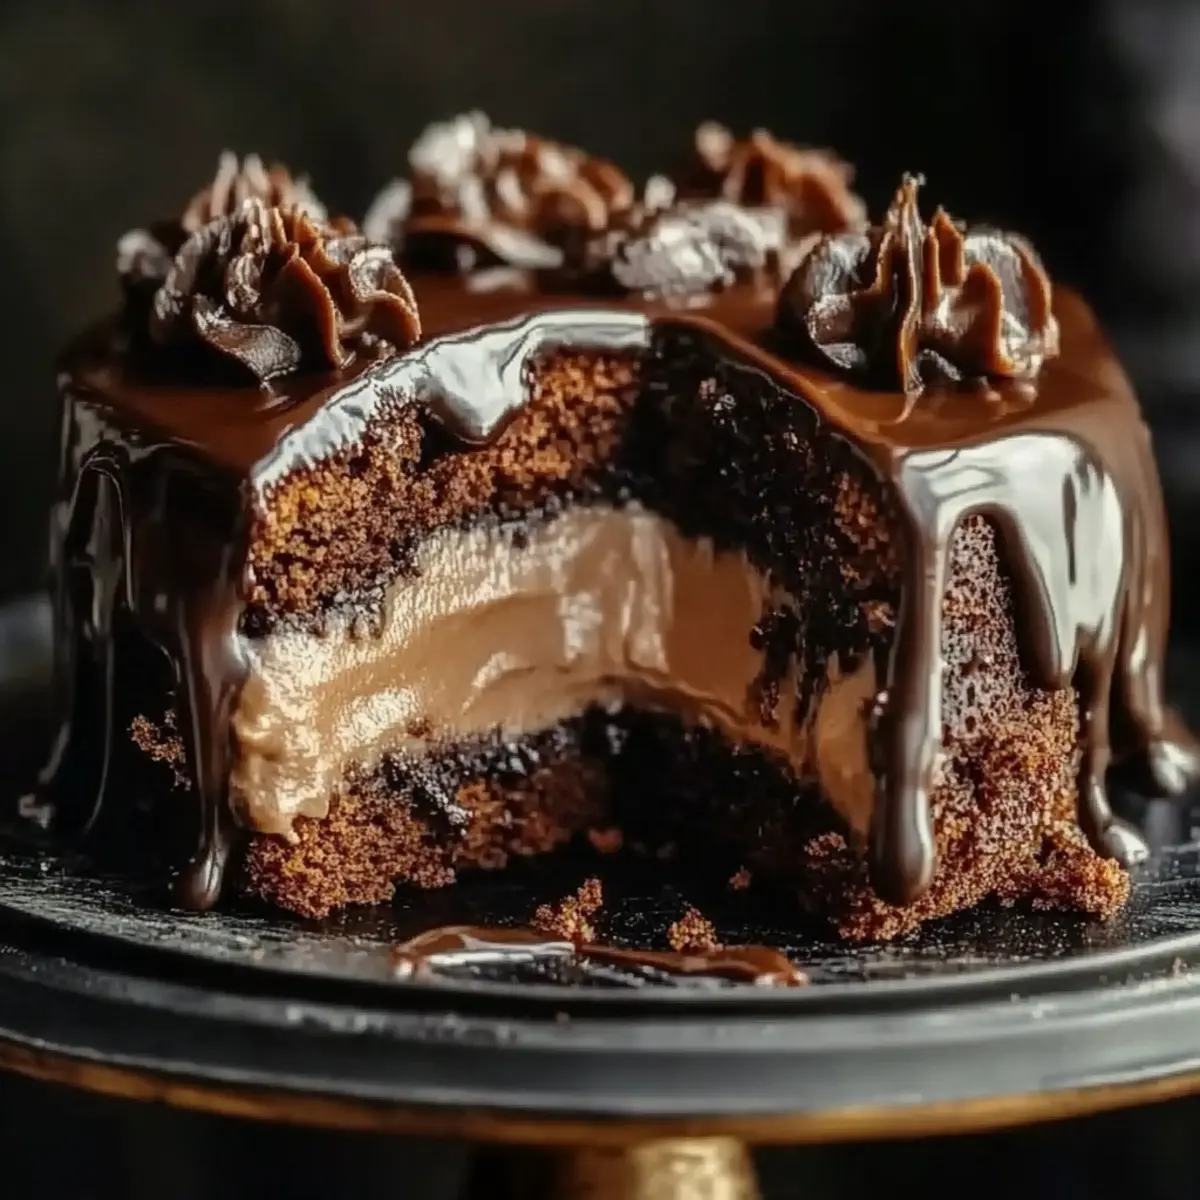
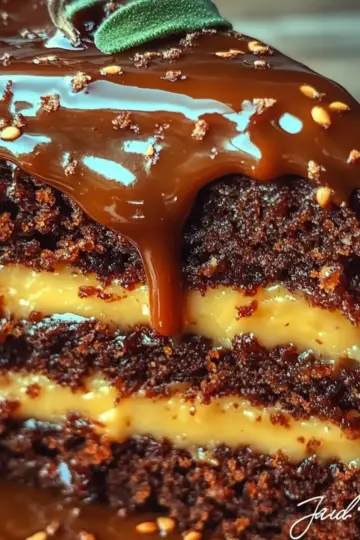
Once the cakes are completely cooled, place one layer on a serving plate. Drizzle a generous amount of caramel sauce over the top, letting it ooze down the sides a bit for that beautiful effect. Sprinkle with 1 cup of toasted pecans, adding delightful crunch to each bite.
Step 9: Frost the Cake
Carefully position the second cake layer on top. Using a spatula, spread the luscious chocolate glaze evenly over the entire cake, allowing it to coat the sides. This rich topping not only enhances the flavor but also makes your Chocolate Turtle Cake visually stunning!
Step 10: Add Final Touches
To elevate your cake’s presentation, drizzle additional caramel sauce over the top, allowing it to pool a little. Finish with a sprinkle of the remaining toasted pecans, creating a tempting display that beckons everyone to indulge in your delightful homemade Chocolate Turtle Cake.
Expert Tips for the Best Chocolate Turtle Cake
-
Precise Measurements: Use a kitchen scale for accuracy when measuring your ingredients. This ensures your Chocolate Turtle Cake bakes evenly and comes out perfectly every time.
-
Don't Rush Cooling: After baking, allow the cakes to cool completely. Cutting into warm cakes can result in a messy presentation, so patience pays off!
-
Layer with Love: Spread caramel sauce evenly between cake layers to prevent it from oozing out. This creates a lovely surprise when you slice into your Chocolate Turtle Cake.
-
Enhance the Flavor: Consider toasting pecans before garnishing for an extra depth of flavor. Just a few minutes in the oven can elevate your cake significantly!
-
Smooth Glaze: For a flawless chocolate glaze, ensure your cake is completely cool before frosting. This prevents the glaze from melting and maintains that beautiful finish.
Make Ahead Options
These Chocolate Turtle Cake layers are perfect for busy home cooks looking to save time! You can prepare the cake layers up to 24 hours in advance. Simply bake the cakes, allow them to cool completely, and wrap them tightly in plastic wrap to prevent dryness. The caramel sauce and toasted pecans can also be prepared ahead of time and stored in the refrigerator for up to 3 days. When you're ready to serve, assemble the cake by spreading the caramel and pecans between layers, then frost with the chocolate glaze for stunning, homemade results. This way, you’ll have a show-stopping dessert with minimum stress on the big day!
How to Store and Freeze Chocolate Turtle Cake
Room Temperature: If storing for short-term enjoyment, keep the cake covered at room temperature for up to 3 days to maintain its delicious freshness.
Fridge: For longer storage, place the Chocolate Turtle Cake in an airtight container in the fridge, where it will stay fresh for about a week.
Freezer: To freeze, wrap slices or the whole cake tightly in plastic wrap, then in foil, for up to 3 months. Thaw overnight in the refrigerator before serving.
Reheating: For a warm chocolatey experience, you can reheat individual slices in the microwave for 10-15 seconds, just enough to enjoy the gooey caramel and rich chocolate glaze!
What to Serve with Chocolate Turtle Cake?
Indulging in the rich experience of a Chocolate Turtle Cake is a delight on its own, but pairing it with complementary sides elevates it to new heights of culinary bliss.
-
Vanilla Ice Cream: The creamy, cool texture of vanilla ice cream contrasts beautifully with the dense chocolate, balancing the sweetness perfectly.
-
Fresh Berries: A burst of tartness from strawberries or raspberries provides a refreshing counterpoint, enhancing the cake’s deep flavors while adding a pop of color.
-
Whipped Cream: Fluffy whipped cream adds an airy touch and complements the richness of the ganache and caramel, making every bite delightful.
-
Coffee: A warm cup of freshly brewed coffee enhances the cake's sweetness and deep chocolate notes, creating a comforting experience perfect for any gathering.
-
Chocolate Sauce: Drizzling extra chocolate sauce over the plate garnishes aesthetically, while deepening the already rich chocolate flavor with a luscious finish.
-
Pecan Pie Bars: These bars mirror the nutty elements in the cake, delivering another layer of texture with a buttery sweetness that pairs seamlessly.
-
Caramel Drizzle: For extra decadence, a simple drizzle of caramel sauce on the plate draws the eye, inviting you to savor each bite in its gooey glory.
-
Mint Tea: A crisp cup of mint tea cleanses the palate, refreshing your senses between scrumptious bites of delicious cake.
Chocolate Turtle Cake Variations
Feel free to get creative and make this Chocolate Turtle Cake your own with these fun and delightful variations!
-
Gluten-Free: Substitute all-purpose flour with a gluten-free blend to cater to gluten sensitivities without sacrificing taste.
-
Nut-Free: Skip the toasted pecans and use crushed cookies or graham crackers instead. This will maintain that wonderful crunch without the nuts.
-
Dairy-Free: Swap whole milk for almond or coconut milk, and replace the chocolate glaze with a dairy-free chocolate option. Your cake will still be luscious!
-
Caramel Lovers: Boost the caramel flavor by adding a swirl of caramel ice cream on top of each slice. An indulgent treat that will leave taste buds dancing!
-
Mint Chocolate Twist: Add a few drops of peppermint extract to the chocolate glaze for a refreshing minty kick that beautifully complements the rich chocolate.
-
Spicy Kick: Mix in a sprinkle of cayenne pepper or cinnamon into the dry ingredients. This unexpected spice will surprise and delight those seeking a bit of heat!
-
Fruit Filling: Layer in fresh raspberries or strawberries between the cake layers. Their tartness contrasts so wonderfully with the richness of chocolate and caramel.
-
Extra Chocolate: For the ultimate chocoholics, fold in mini chocolate chips into the batter before baking. These melty morsels create little pockets of chocolate bliss!

Chocolate Turtle Cake Recipe FAQs
How do I choose the right pecans for my Chocolate Turtle Cake?
Absolutely! Look for fresh pecans that are plump and fragrant. Avoid nuts with dark spots or a rancid smell, as these may ruin the flavor of your cake. If you prefer a different nut, feel free to substitute with walnuts or almonds for a delightful twist!
How long will my Chocolate Turtle Cake stay fresh after baking?
Very! If stored at room temperature, the cake can last for up to 3 days when covered. For longer freshness, transfer it to the refrigerator in an airtight container where it can be enjoyed for about a week.
Can I freeze my Chocolate Turtle Cake?
Absolutely! To freeze, wrap the whole cake or individual slices in plastic wrap, then foil, ensuring everything is sealed tightly. This method preserves it for up to 3 months. When you're ready to enjoy, simply thaw it overnight in the fridge before savoring that decadent taste.
What should I do if my cake is too dry?
Don’t fret! If your Chocolate Turtle Cake turns out dry, this could be due to overbaking or measurement mishaps. Next time, check the cake a few minutes earlier, and use a toothpick for testing. If you find yourself with dry slices, try heating them slightly in the microwave before serving, as this can help retain moisture and enhance the flavors.
Is this Chocolate Turtle Cake okay for people with nut allergies?
Be cautious! If you’re serving someone with nut allergies, it might be best to omit the toasted pecans. You can still enjoy the rich flavor of chocolate and caramel without them! If you want a similar texture, consider using sunflower seeds as a nut-free alternative.
Can I make this cake ahead of time?
Definitely! You can prepare the cake layers a day in advance. Just cool them completely, wrap each layer in plastic wrap to keep them moist, and store them in the fridge. Assemble the cake with caramel and chocolate glaze right before your celebration for the freshest taste!
Decadent Chocolate Turtle Cake for Sweet Celebrations
Ingredients
Equipment
Method
- Preheat your oven to 350°F (175°C) and prepare two 9-inch round cake pans with grease and flour.
- In a large mixing bowl, whisk together all dry ingredients until combined.
- Add the wet ingredients to the dry mixture and beat with an electric mixer until smooth.
- Stir in boiling water until the batter is completely smooth.
- Divide the batter evenly into the prepared cake pans and tap to remove air bubbles.
- Bake in the preheated oven for 30-35 minutes, checking for doneness with a toothpick.
- Allow the cakes to cool in the pans for about 10 minutes before turning out onto a wire rack.
- Assemble the cake by drizzling caramel sauce and sprinkling toasted pecans between layers.
- Frost the cake with chocolate glaze, coating the sides evenly.
- Drizzle additional caramel on top and sprinkle remaining pecans for presentation.

Leave a Reply