
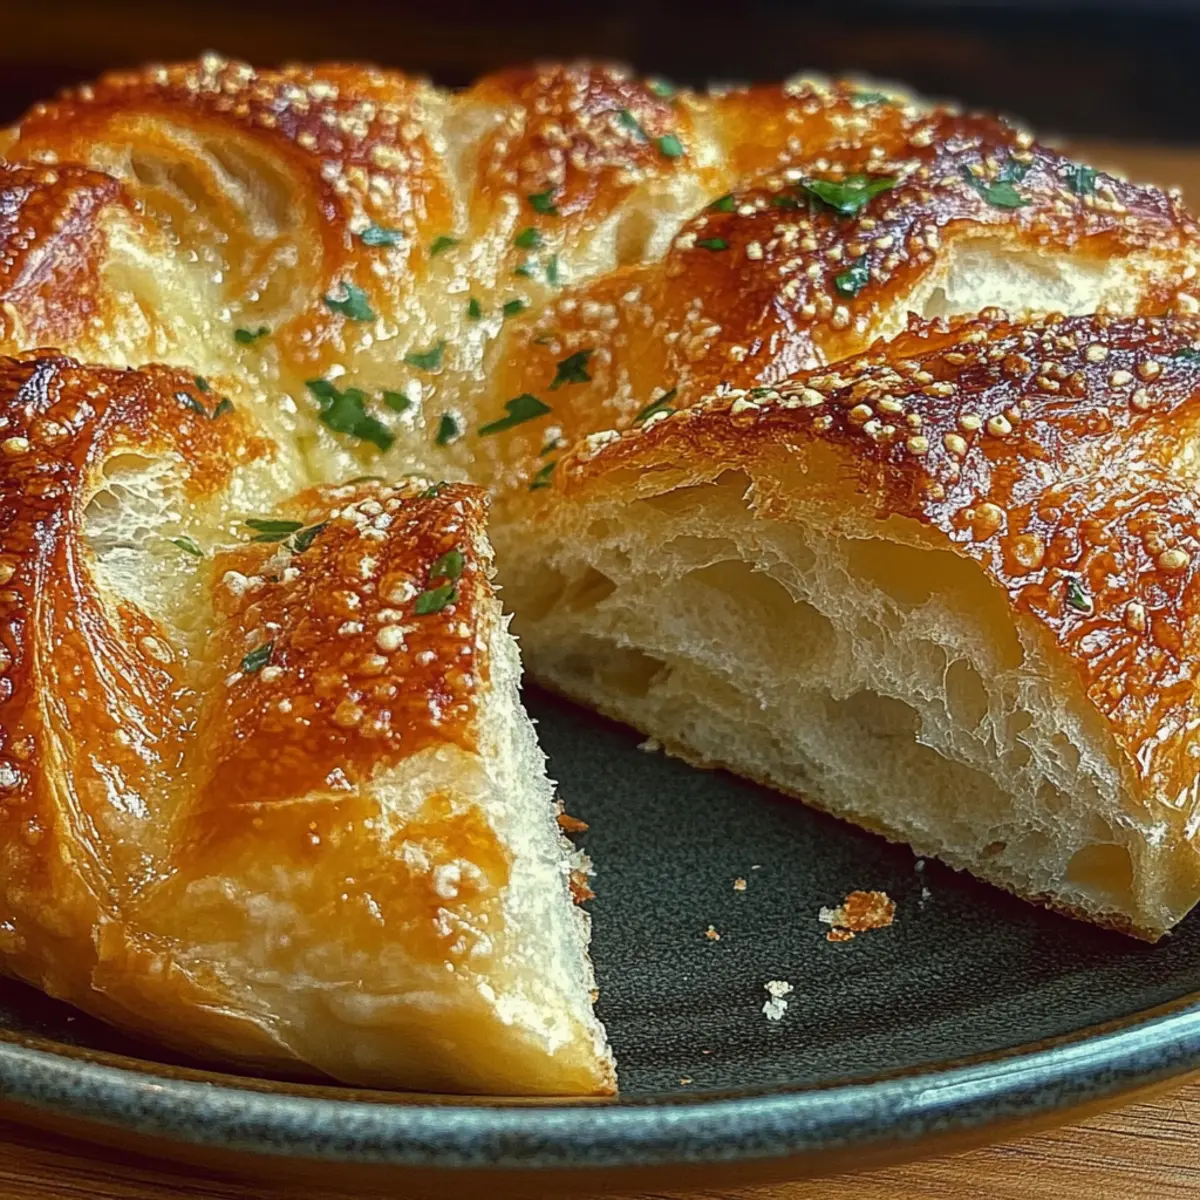
The first time I pulled a golden loaf of garlic herb Dutch oven bread from my oven, the aroma blanketed my kitchen like a warm hug. It’s astonishing to think that this masterpiece requires zero kneading and just a little patience, yet tastes as if it came from an artisan bakery. This homemade bread, infused with vibrant herbs and savory garlic, is perfect for impressing guests or simply indulging yourself. Not only does it elevate any meal, but its crispy crust and soft, airy inside make it downright irresistible. Plus, the simplicity of the preparation means you can spend less time fussing in the kitchen and more time enjoying the fruits of your labor. Ready to elevate your bread game? Let’s dive into this delightful recipe that proves you don’t need a fancy oven to bake like a pro!
Why is This Bread Recipe So Special?
Simplicity at Its Finest: This no-knead recipe requires minimal effort, yet delivers a stunning artisan loaf.
Aromatic Flavor: The blend of fresh garlic and fragrant herbs elevates your bread, making it a delicious accompaniment to any meal.
Impressive Crust: Baking in a Dutch oven creates a beautifully golden and crispy crust, just like a bakery loaf.
Time-Saving: With most of the work done during bulk fermentation, you can prepare and bake this bread around your schedule.
Crowd-Pleaser: Serve warm at gatherings, and watch your guests raving about your culinary prowess! This Garlic Herb Dutch Oven Bread is perfect for any occasion, enhancing everything from weeknight dinners to festive feasts. For more delicious tips, check out this easy artisan bread technique.
Ingredients
## Garlic Herb Dutch Oven Bread Ingredients
For the Dough
- 3 cups all-purpose flour – the foundation of this no-knead bread provides structure and texture.
- 1 ¼ teaspoons salt – enhances the flavor and balances the bread's natural sweetness.
- ½ teaspoon instant yeast – allows for a slow fermentation, creating depth in flavor.
- 1 ½ cups warm water (about 110°F) – helps activate the yeast for a perfect rise.
For the Flavor
- 3 tablespoons olive oil – adds richness and moisture, ensuring a tender crumb.
- 4 cloves garlic, minced – infuses the bread with a warm, savory aroma.
- 1 tablespoon fresh rosemary, chopped – gives a hint of earthiness that pairs beautifully with garlic.
- 1 tablespoon fresh thyme, chopped – adds a refreshing brightness to the flavor palette.
- 1 tablespoon fresh parsley, chopped – brings a touch of color and a fresh herbaceous note.
For Dusting
- Additional flour for dusting – keeps your surface manageable and prevents sticking while shaping.
Step‑by‑Step Instructions for Garlic Herb Dutch Oven Bread
Step 1: Combine Dry Ingredients
In a large mixing bowl, whisk together 3 cups of all-purpose flour, 1 ¼ teaspoons of salt, and ½ teaspoon of instant yeast. Stir until the mixture is well blended, ensuring no lumps remain. This forms the foundation for your Garlic Herb Dutch Oven Bread, setting the stage for the flavor to come.
Step 2: Prepare Wet Ingredients
In a separate bowl, mix together 1 ½ cups of warm water (about 110°F), 4 cloves of minced garlic, and 3 tablespoons of olive oil, along with your chopped herbs—1 tablespoon each of fresh rosemary, thyme, and parsley. Stir these ingredients thoroughly until they are fully combined, creating a fragrant mix that will elevate your bread.
Step 3: Combine Mixtures
Pour the wet ingredients into the bowl with the dry ingredients, using a wooden spoon or your hands to stir until a shaggy, sticky dough forms. This dough will be wet and soft, perfect for a no-knead bread. Ensure that all dry components are incorporated, creating a messy yet promising mixture.
Step 4: Allow Dough to Rise
Cover the bowl tightly with plastic wrap or a clean kitchen towel. Let your dough rest at room temperature for 12 to 18 hours, or until it has doubled in size and the surface is bubbly, indicating that the fermentation process is complete. This long rise will enhance the flavors of your Garlic Herb Dutch Oven Bread.
Step 5: Shape the Dough
Once risen, sprinkle a clean work surface generously with flour. Carefully turn the dough out onto the floured surface, using floured hands to shape it gently into a round loaf. Avoid overworking the dough; you want to retain its airy texture. Place it gently on the floured surface and dust the top with a bit more flour.
Step 6: Second Rise
Cover the shaped loaf with a kitchen towel and let it rest for an additional 1 to 2 hours. During this time, you’ll notice the loaf puffing up slightly, indicating it’s ready for baking. The second rise is crucial for ensuring your Garlic Herb Dutch Oven Bread has a beautiful, airy crumb.
Step 7: Preheat the Dutch Oven
About 30 minutes before baking, place a Dutch oven (with the lid on) into your oven and preheat to 450°F (230°C). This ensures that the pot is hot enough to create the perfect crust for your bread once it’s placed inside, mimicking the steam of a bakery oven.
Step 8: Bake the Bread
Once the Dutch oven is preheated, carefully remove it from the oven using oven mitts. Take off the lid and gently place the loaf inside. Cover it again with the lid and return it to the oven. Bake for 30 minutes, allowing the steam to create a beautiful crust.
Step 9: Finish Baking
After the initial 30 minutes, carefully remove the lid from the Dutch oven. Continue baking for an additional 15 to 20 minutes, or until the bread is golden brown and sounds hollow when tapped on the bottom. Your Garlic Herb Dutch Oven Bread is almost ready to tantalize your taste buds!
Step 10: Cool and Slice
Once baked, transfer your bread to a wire rack to cool. Allow it to rest for at least 15 minutes before slicing. This will help the steam escape and set the crumb, creating a perfect texture that’s ideal for slathering with butter or enjoying as is!
Garlic Herb Dutch Oven Bread Variations
Feel free to let your imagination run wild with these delightful twists that will make your Garlic Herb Dutch Oven Bread truly your own!
-
Whole Wheat: Substitute half of the all-purpose flour with whole wheat flour for a nutty flavor and extra fiber. This twist enhances both taste and health benefits, making your bread more heart-healthy while still maintaining its rustic charm.
-
Gluten-Free: Use a gluten-free all-purpose flour blend to make this recipe suitable for gluten-sensitive guests. Just ensure it includes a binding agent like xanthan gum for optimal texture and rise.
-
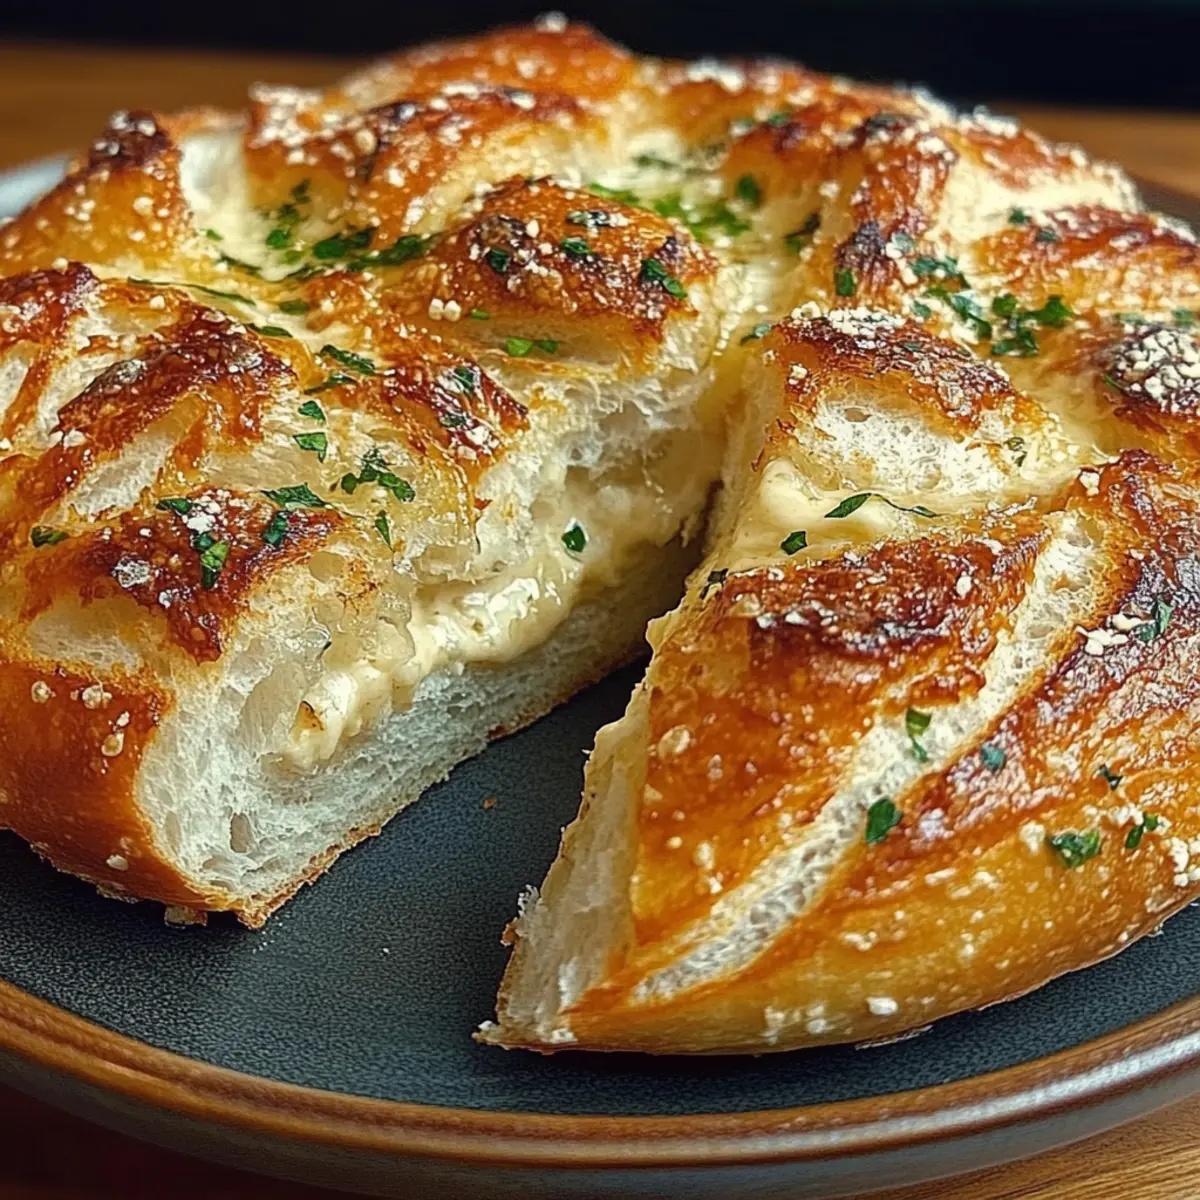
Cheesy Delight: Fold in 1 cup of shredded cheese, such as mozzarella or cheddar, into the dough for a mouthwatering cheesy version. The melted cheese will create flavorful pockets throughout the bread, making each bite a comforting experience.
-
Spicy Kick: Add 1 teaspoon of red pepper flakes to introduce some heat and excitement. This adds a delightful spiciness that can elevate your bread, making it perfect for pairing with soups or stews.
-
Nutty Crunch: Toss in ½ cup of toasted walnuts or sunflower seeds for a lovely crunch and nutty flavor. These additions not only enhance texture but also provide delightful surprises with every slice.
-
Flavor Infusion: Swap out olive oil for infused oils, such as garlic or basil oil, to enhance the aromatic flavor profile further. This subtle change can bring new dimensions to your bread with captivating aromas.
-
Herb Variation: Experiment with different herbs like oregano, basil, or dill instead of rosemary and thyme for unique flavor experiences. Each herb brings its own signature taste, allowing for endless combinations and leaving your guests guessing.
-
Sweet Twist: Add 2 tablespoons of honey or brown sugar for a hint of sweetness that complements the garlic beautifully. This slight contrast can create a fantastic balance, especially when served with rich cheeses or cured meats.
Embrace creativity in the kitchen and let your personality shine through with these variations, ensuring each batch is unique yet equally delicious! Looking for more adventurous baking ideas? Check out this helpful guide on creating the perfect no-knead bread and elevate your bread-making journey!
Make Ahead Options
Making Garlic Herb Dutch Oven Bread ahead of time is a delightful way to save precious minutes on busy days! You can prepare the dough and let it rise for up to 24 hours before baking, making it perfect for meal prep. Just mix the dry ingredients and wet ingredients, then cover and let it sit at room temperature. If you need to pause the process longer, you can refrigerate the formed dough after the first rise for up to 3 days—this will enhance the flavor even further. When you're ready to bake, allow the dough to come to room temperature and complete the second rise for about 1 to 2 hours before baking. This way, your Garlic Herb Dutch Oven Bread will be just as delicious and fresh, even when prepped in advance!
Expert Tips for the Best Garlic Herb Dutch Oven Bread
-
Use Fresh Herbs: Fresh rosemary, thyme, and parsley provide vibrant flavors. Don’t use dried herbs, as they lack the freshness and potency of their fresh counterparts.
-
Water Temperature Matters: Make sure your warm water is around 110°F. Too hot, and it may kill the yeast; too cold, and the dough won't rise properly.
-
Avoid Over-Shaping: When turning out the dough, handle it gently to preserve air pockets. Over-kneading can lead to dense bread instead of the light, airy Garlic Herb Dutch Oven Bread you desire.
-
Long Fermentation Is Key: Allow the dough to rise for at least 12 hours. This slow fermentation develops the rich flavors characteristic of artisan bread.
-
Check Crust Color: Bake with the lid on for the first 30 minutes to trap steam, then remove it to achieve a crusty finish. Trust your eyes—golden brown indicates it's ready!
What to Serve with Garlic Herb Dutch Oven Bread
There's something wonderfully inviting about crafting a complete meal around this aromatic bread that fills your kitchen with warmth and delicious scents.
-
Creamy Tomato Soup: The rich, velvety texture and tangy flavor of tomato soup perfectly complement the garlic and herb notes of the bread, making every bite a delight.
-
Zesty Salad with Feta: A refreshing salad dressed with lemon vinaigrette and sprinkled with feta cheese adds a bright and tangy contrast, enhancing the bread’s savory profile.
-
Savory Herb Butter: Spread a dollop of whipped herb butter on warm slices for an exquisite touch. The herbs in the butter echo the flavors of the bread, creating harmony on the palate.
-
Roasted Vegetables: A tray of caramelized seasonal vegetables brings natural sweetness and earthy tones that beautifully balance the bread's flavors, making for a wholesome, comforting meal.
-
Red Wine: A glass of bold red wine brings out the deep savory notes of the bread and pairs perfectly with any meal, enhancing the entire dining experience.
-
Cheese Platter: A selection of cheeses with varying textures—from creamy Brie to sharp Cheddar—makes for an elegant pairing, and you can spread your bread for a delightful tasting experience.
Indulging in these pairings will turn your Garlic Herb Dutch Oven Bread into a centerpiece of a memorable meal that everyone will savor!
How to Store and Freeze Garlic Herb Dutch Oven Bread
Room Temperature: Store the bread in a bread box or loosely wrapped in a kitchen towel for up to 3 days to keep its crust crispy and interior soft.
Fridge: Avoid refrigerating the bread, as it can dry out quickly. Instead, opt for the room temperature storage for the best texture.
Freezer: For longer storage, wrap the cooled bread tightly in plastic wrap followed by aluminum foil. It can be frozen for up to 3 months; simply thaw overnight on the counter before enjoying.
Reheating: To restore its crustiness, preheat your oven to 350°F (175°C) and warm the bread for about 10 minutes. Enjoy your flavorful Garlic Herb Dutch Oven Bread!
Garlic Herb Dutch Oven Bread Recipe FAQs
How do I select the best garlic for this recipe?
When choosing garlic, look for firm bulbs with a smooth, unblemished skin. Avoid any that have sprouts or soft spots, as these indicate aging. For the best flavor, use fresh, plump cloves, as they’ll impart a robust aroma to your Garlic Herb Dutch Oven Bread.
What’s the best way to store leftover Garlic Herb Dutch Oven Bread?
To keep your garlic herb bread fresh, store it at room temperature in a bread box or wrapped in a kitchen towel for up to 3 days. This helps maintain its crispy crust and soft interior. Avoid refrigerating, as it can lead to dryness. If you find it getting stale, toasting slices can breathe new life into them!
Can I freeze Garlic Herb Dutch Oven Bread?
Absolutely! Once cooled, wrap your bread tightly in plastic wrap followed by aluminum foil. It can be frozen for up to 3 months. When you’re ready to enjoy it, simply thaw it overnight on the counter. To revive its crustiness, preheat your oven to 350°F (175°C) and warm the bread for about 10 minutes.
What should I do if my bread doesn't rise properly?
If your dough doesn't rise, the yeast may not have been activated properly. Ensure your water is around 110°F—not too hot—when mixing, as higher temperatures can kill the yeast. Also, check the yeast's expiration date before starting. If your dough is not bubbly after the fermentation time, it’s best not to bake it and instead try again with fresh ingredients.
Can this bread be made without the garlic or herbs?
Of course! While the garlic and herbs add wonderful flavor, you can skip them or substitute with your favorite seasonings. Perhaps try some cheese or spices for a different twist. Enjoy experimenting and making this garlic herb Dutch oven bread your own!
Are there any allergy concerns with this recipe?
Be mindful of allergies; this recipe contains gluten from the all-purpose flour and may pose a risk for those with celiac disease. If you have any specific dietary restrictions or allergies, consider using gluten-free flour blends. Always check ingredient labels for potential allergens!
Mouthwatering Garlic Herb Dutch Oven Bread Made Easy
Ingredients
Equipment
Method
- In a large mixing bowl, whisk together 3 cups of all-purpose flour, 1 ¼ teaspoons of salt, and ½ teaspoon of instant yeast. Stir until well blended.
- In a separate bowl, mix 1 ½ cups of warm water, 4 cloves of minced garlic, and 3 tablespoons of olive oil with chopped herbs. Stir until fully combined.
- Pour the wet ingredients into the dry ingredients and stir until a shaggy, sticky dough forms.
- Cover the bowl tightly with plastic wrap and let the dough rest at room temperature for 12 to 18 hours.
- Sprinkle a clean surface with flour and gently turn the dough out, shaping it into a round loaf. Dust the top with flour.
- Cover the shaped loaf with a towel and let it rest for an additional 1 to 2 hours.
- Preheat your oven to 450°F and place a Dutch oven inside to heat up.
- Once preheated, carefully place the loaf in the Dutch oven, cover with the lid, and bake for 30 minutes.
- After 30 minutes, remove the lid and bake for an additional 15 to 20 minutes until golden brown.
- Transfer the bread to a wire rack to cool for at least 15 minutes before slicing.


Leave a Reply