
The rich aroma of freshly brewed coffee wafts through the kitchen, instantly transforming a simple afternoon into a moment of indulgence. I was inspired to create these Coffee Protein Tiramisu Cups when I craved a nutritious yet delicious dessert that would satisfy my sweet tooth without the guilt of traditional sweets. These cups not only offer a delightful twist on the classic tiramisu but also pack in a protein punch, making them a perfect post-workout treat or an elegant dessert for entertaining guests. With quick prep and a chilled finish, these cups are a go-to for anyone seeking that perfect blend of comfort and health. Curious about how to whip up this delightful treat? Let’s dive into the delicious details!
Why are Coffee Protein Tiramisu Cups irresistible?
Indulgent yet Healthy: These cups provide a satisfying blend of rich coffee flavor and creamy mascarpone while being a nutritious option, thanks to the added protein powder.
Quick Prep: In just 30 minutes, you can prepare these delicious treats and pop them in the fridge, making them perfect for last-minute guests or meal prep.
Versatility: Enjoy them as a post-workout snack or a sweet dessert—the possibilities are endless!
Crowd-Pleasing Dessert: Impress your friends at gatherings with this unique twist on a classic; they won't believe it's guilt-free!
Easy to Make: Layering is a breeze—just dip, assemble, and chill. If you love simple yet impressive desserts, be sure to check out my recipe for Halloween Dirt Cups for another fun treat!
Coffee Protein Tiramisu Cups Ingredients
• Perfectly designed for a guilt-free treat.
For the Base
- Brewed coffee – Use strong coffee for a robust flavor in your Coffee Protein Tiramisu Cups.
- Ladyfingers – These sponge cookies create a delightful texture and absorb the coffee beautifully.
For the Filling
- Mascarpone cheese – This rich cheese adds creaminess and an authentic Italian flavor to the dessert.
- Protein powder – Boosts the nutritional value, transforming the traditional tiramisu into a protein-packed delight.
- Sugar – Sweetens the mixture; feel free to adjust depending on your taste.
- Cocoa powder – Adds depth and a beautiful dusting on top; choose unsweetened for a healthier option.
- Vanilla extract – Enhances the overall flavor with a hint of warmth and sweetness.
For Serving
- Cups for serving – Choose attractive cups to showcase your delicious creations; transparency showcases the lovely layers!
Step‑by‑Step Instructions for Coffee Protein Tiramisu Cups
Step 1: Brew the Coffee
Begin by brewing a strong cup of coffee, using your preferred brewing method. Allow the coffee to cool to room temperature; this usually takes about 15–20 minutes. The aroma of the freshly brewed coffee will fill your kitchen, setting the perfect mood for making your Coffee Protein Tiramisu Cups.
Step 2: Prepare the Filling
In a mixing bowl, combine 1 cup of mascarpone cheese, 1 cup of protein powder, ¼ cup of sugar, ¼ cup of cocoa powder, and 2 teaspoons of vanilla extract. Using a hand mixer, blend this mixture on medium speed until smooth and creamy, ensuring there are no lumps. This filling will provide a delightful contrast to the dipped ladyfingers.
Step 3: Dip the Ladyfingers
Once the coffee has cooled, take your ladyfingers and quickly dip each one into the coffee, ensuring they are moistened but not soaked. Place the dipped ladyfingers on a plate, allowing any excess coffee to drain off. This brief dipping is critical for achieving the perfect texture in your Coffee Protein Tiramisu Cups without making them soggy.
Step 4: Assemble the Cups
Grab your serving cups and begin assembling the first layer by placing the dipped ladyfingers at the bottom of each cup. Ensure they are arranged neatly to create a beautiful base for your dessert. The coffee-soaked ladyfingers will absorb the flavors and begin the layering process of your delicious Coffee Protein Tiramisu Cups.
Step 5: Add the Filling
Now, scoop a generous layer of the mascarpone mixture over the ladyfingers in each cup. Use a spatula to spread it evenly, covering the ladyfingers completely. The creamy filling will beautifully contrast with the coffee flavor, bringing a rich texture to your Coffee Protein Tiramisu Cups that everyone will love.
Step 6: Repeat the Layers
Continue layering by adding another round of dipped ladyfingers over the mascarpone layer, followed by another scoop of the creamy filling. Repeat this process until the cups are filled to the top, finishing with a layer of the mascarpone mixture. This layered approach is what makes your Coffee Protein Tiramisu Cups visually appealing.
Step 7: Chill to Set
Cover each filled cup with plastic wrap and place them in the refrigerator to chill for at least 30 minutes. This step allows the flavors to meld beautifully and the filling to firm up, creating a delightful treat that can be enjoyed cold. The anticipation of chilling will make your Coffee Protein Tiramisu Cups even more satisfying.
Step 8: Serve and Garnish
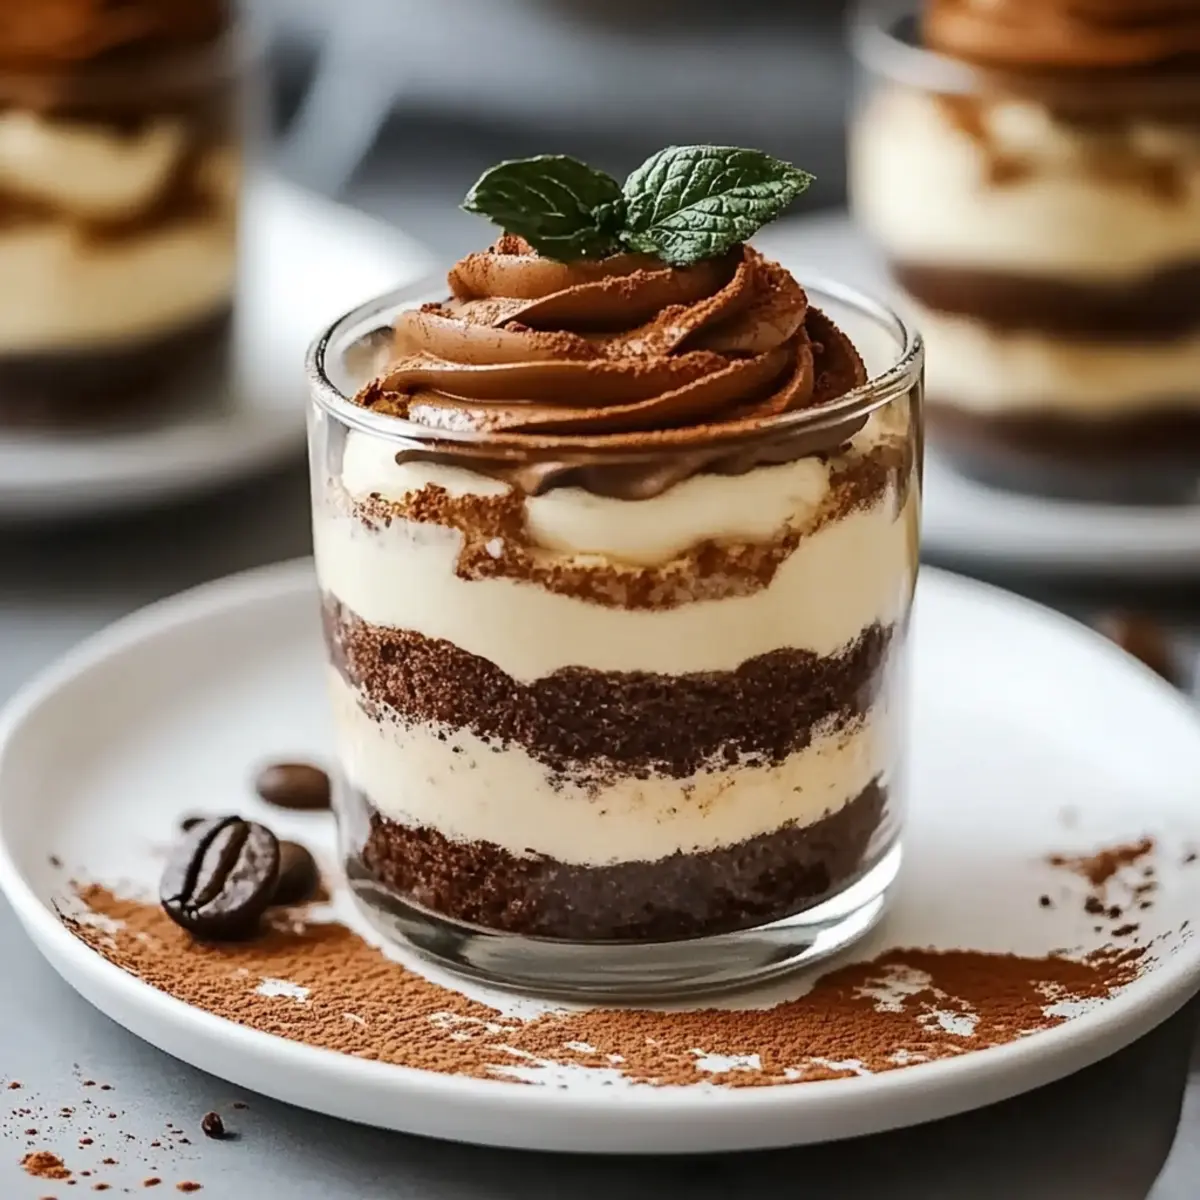
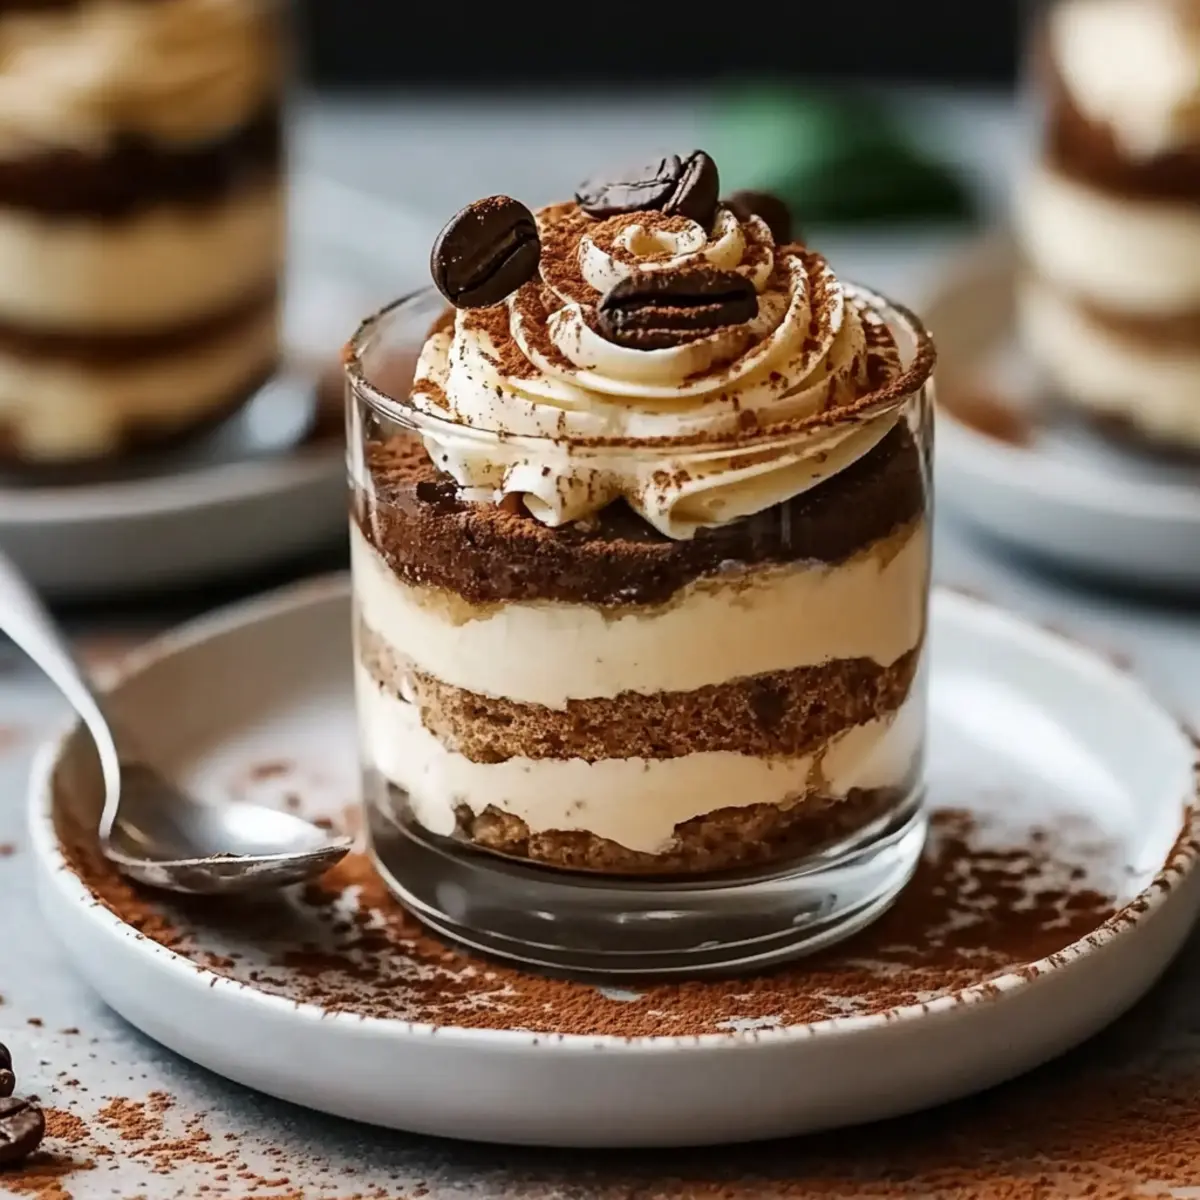
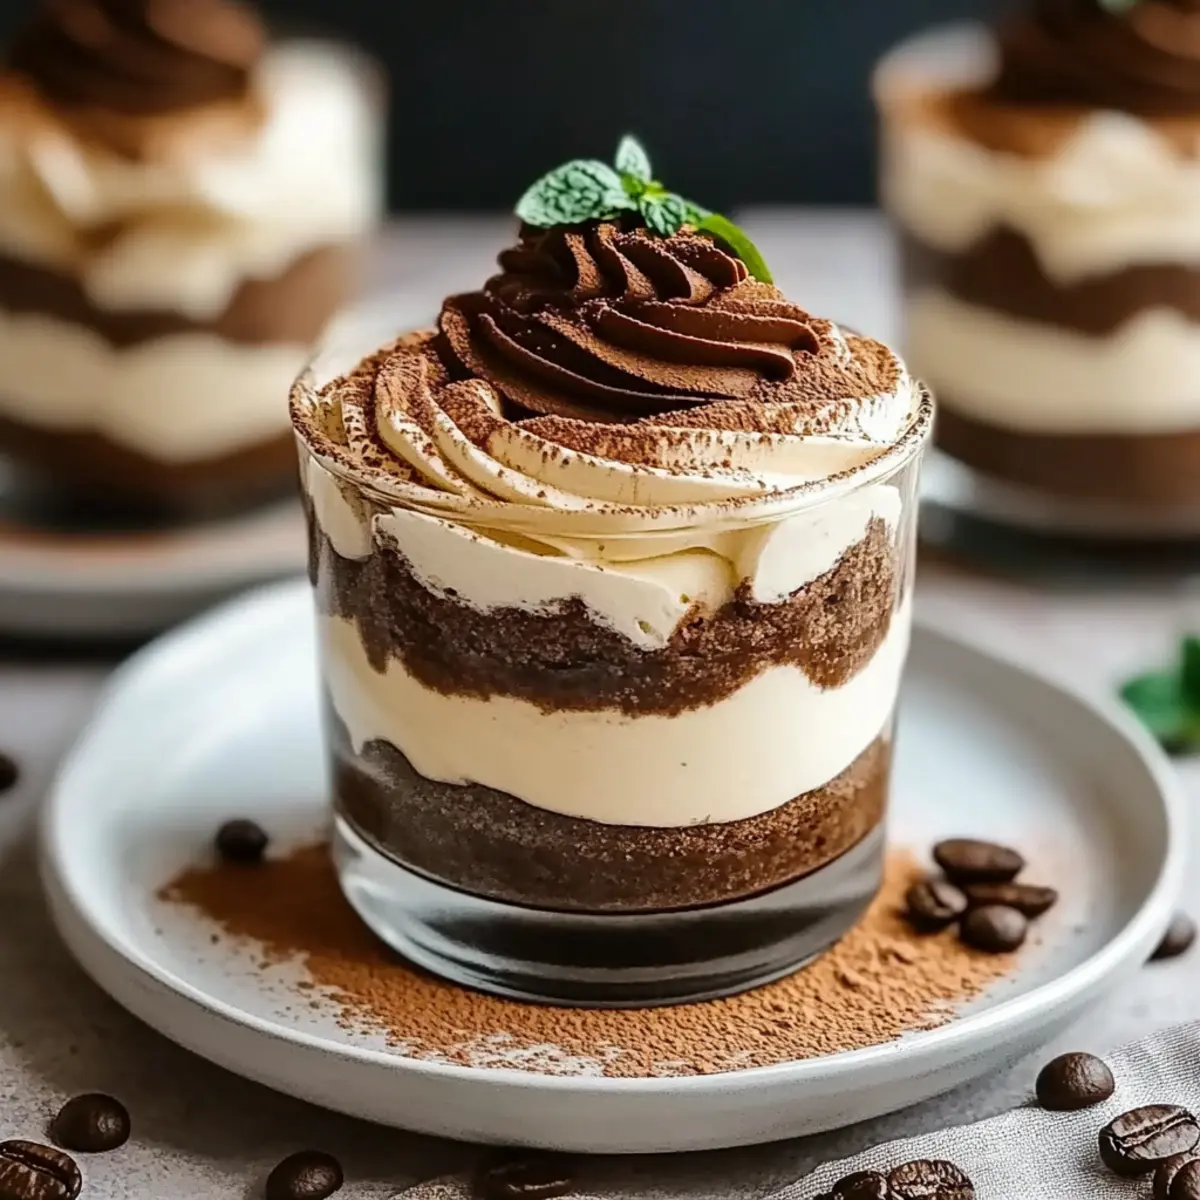
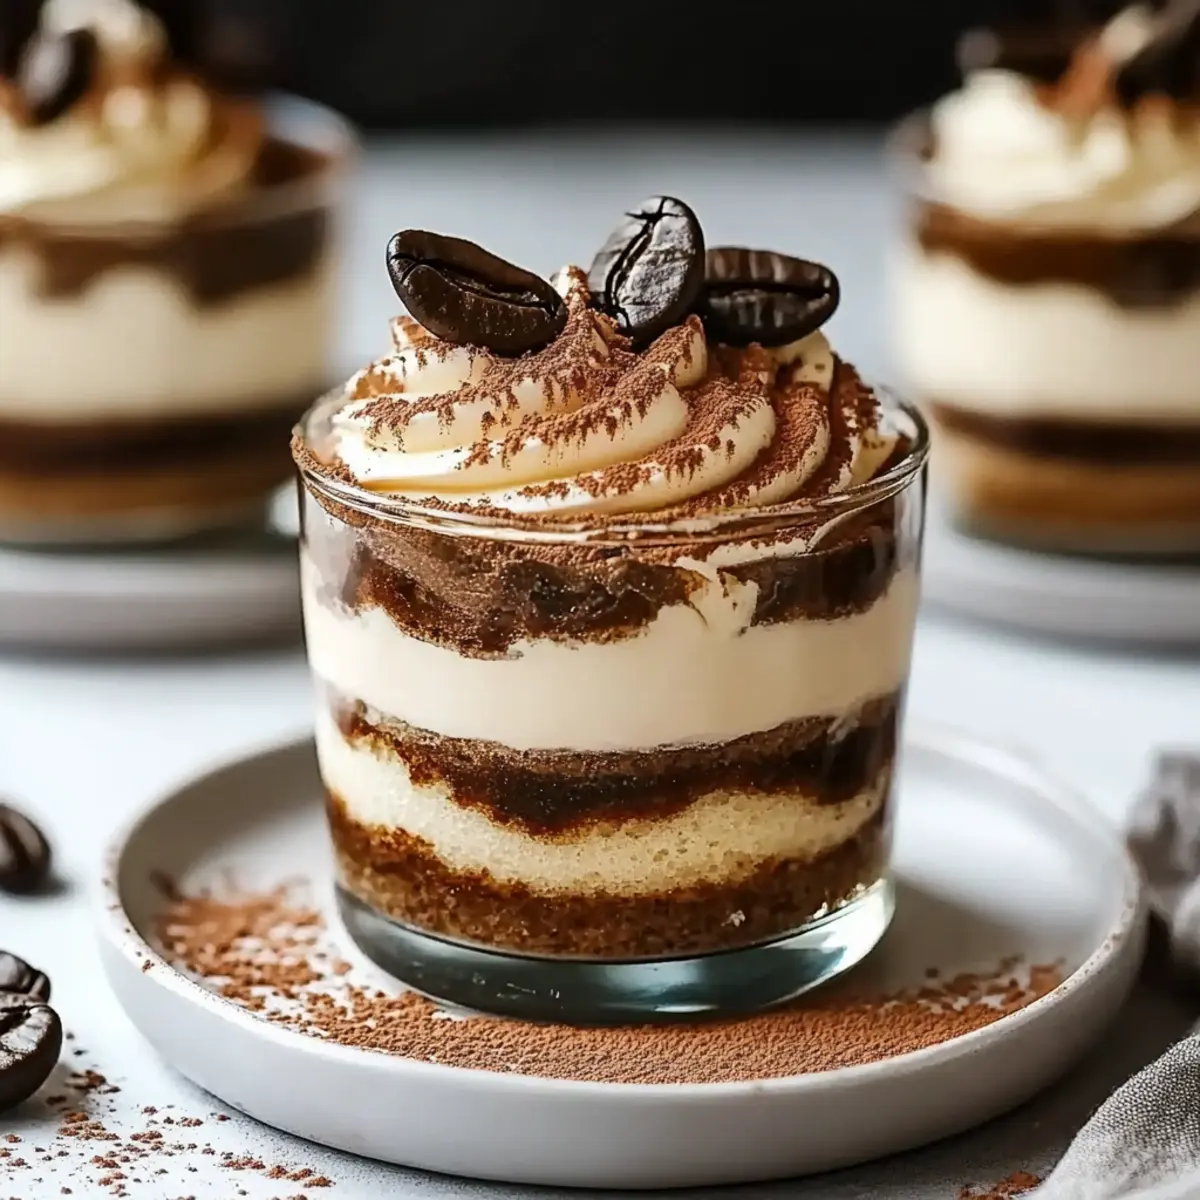
Once chilled, remove the cups from the refrigerator. If desired, dust the tops with additional cocoa powder for an elegant finishing touch. The contrast of the cocoa against the creamy mascarpone perfectly complements the flavors in your Coffee Protein Tiramisu Cups, making them a visual and culinary delight for any occasion.
What to Serve with Coffee Protein Tiramisu Cups
Elevate your indulgence with delightful sides and drinks that complement the rich and creamy layers of your dessert.
-
Fresh Berries: Juicy strawberries or raspberries add a bright, tart contrast and enhance the overall flavor experience.
-
Whipped Cream: A dollop of lightly sweetened whipped cream brings a fluffy texture, perfectly balancing the richness of the tiramisu cups.
-
Chocolate Espresso Cookies: These rich, chewy cookies are a fantastic match, echoing the coffee notes while adding a satisfying crunch.
-
Italian Biscotti: Serve alongside for a delightful dipping experience; their crunchy texture pairs wonderfully with the creamy dessert.
-
Coconut Milk Latte: A smooth latte made with coconut milk offers a twist that complements the flavors in your Coffee Protein Tiramisu Cups, making every sip divine.
-
Mint Infused Iced Tea: Refreshing and lightly sweetened, this herbal tea cleanses the palate after each delicious bite, enhancing your dessert experience.
Tips for the Best Coffee Protein Tiramisu Cups
Choose Strong Coffee: The flavor of your Coffee Protein Tiramisu Cups hinges on robust coffee. Use high-quality, freshly brewed coffee for the best taste.
Quick Dipping Technique: Dip ladyfingers swiftly in coffee to avoid sogginess. Aim for just a second or two—this keeps them sturdy for layering.
Smooth Filling: Ensure your mascarpone mixture is lump-free for a creamy texture. Mix well and consider sifting cocoa powder for a silky finish.
Layer with Care: Don’t rush the layering; take your time to create even layers. This not only enhances presentation but also flavor balance in your Coffee Protein Tiramisu Cups.
Chill Longer for Flavor: While 30 minutes will suffice, chilling your cups longer (up to 2 hours) allows flavors to meld, making each bite irresistible.
Coffee Protein Tiramisu Cups Variations
Feel free to let your creativity soar as you customize these delightful cups to suit your taste buds!
- Dairy-Free: Substitute mascarpone with a dairy-free cream cheese or blended silken tofu for a luscious vegan filling.
- Low Sugar: Replace the sugar with your preferred sweetener like stevia or erythritol for a guilt-free treat that still satisfies.
- Chocolate Lovers: Add chocolate chips or a swirl of melted dark chocolate in the layers for an irresistible chocolate boost.
- Nutty Twist: Fold in crushed nuts like walnuts or hazelnuts into the filling to introduce a delightful crunch and richer flavor.
- Spiced Delight: Sprinkle in a dash of cinnamon or nutmeg to the filling for a warm, aromatic touch that enhances the coffee flavor.
- Fruit Fusion: Layer in some fresh berries or a dollop of fruit puree between layers for a refreshing tang that cuts through the richness.
For an exquisitely unique treat, why not try a couple of different layers? Mixing raspberry puree with your filling can elevate every bite into a whirlwind of flavor. And if you're craving something more decadent, check out my recipe for Chocolate Mousse Cups—it’s another fabulous dessert that’s sure to impress!
Make Ahead Options
These Coffee Protein Tiramisu Cups are perfect for meal prep enthusiasts looking to save time during busy weeks! You can prepare the filling and layer the cups up to 24 hours in advance, storing them in the refrigerator to maintain freshness. Simply dip the ladyfingers in coffee and assemble the layers as usual, but avoid garnishing with cocoa powder until just before serving to keep it looking pristine. When you're ready to indulge, just pull the cups from the fridge, give them a quick dusting of cocoa powder, and enjoy a delightful dessert that’s just as delicious and satisfying as when freshly made. Your future self will thank you for this effortless treat!
How to Store and Freeze Coffee Protein Tiramisu Cups
Fridge: Keep your Coffee Protein Tiramisu Cups in an airtight container in the refrigerator for up to 3 days, ensuring they stay fresh and ready to impress.
Freezer: For longer storage, you can freeze the assembled cups (without garnishing) for up to 2 months. Just wrap them tightly in plastic wrap to prevent freezer burn.
Thawing: To enjoy frozen cups, transfer them to the fridge for about 4 hours or overnight. This gentle thawing method helps maintain their creamy texture.
Reheating: These cups are best enjoyed chilled. Avoid reheating, as it may alter their delightful consistency and flavor, keeping the coffee goodness intact!
Coffee Protein Tiramisu Cups Recipe FAQs
How do I choose the right coffee for my Coffee Protein Tiramisu Cups?
Absolutely! For your Coffee Protein Tiramisu Cups, opt for a strong blend such as espresso or a dark roast. This will provide a robust flavor that beautifully contrasts the creamy mascarpone. Freshly brewed coffee always elevates the taste, so grind your beans just before brewing for the best aroma and richness.
What’s the best way to store leftover Coffee Protein Tiramisu Cups?
Keep your Coffee Protein Tiramisu Cups in an airtight container in the fridge for up to 3 days. This way, you can enjoy their delightful flavors without losing any freshness. If you need to store them longer, consider freezing them (details below)!
Can I freeze Coffee Protein Tiramisu Cups?
Yes, you can freeze the assembled cups for up to 2 months! Wrap each cup tightly in plastic wrap to protect it from freezer burn. Just remember to leave off any garnishes until you're ready to serve them, as this keeps them looking beautiful on the plate.
What should I do if my ladyfingers become too soggy?
Very important! Quickly dipping your ladyfingers in coffee for only a second or two prevents them from soaking too much. If they do become too soggy, you might try using less coffee next time or skipping the dip altogether. Instead, you can drizzle coffee over the layers once assembled for that desired flavor without the added moisture.
Are Coffee Protein Tiramisu Cups suitable for my gluten-free friends?
If you have gluten-free guests, absolutely! You can find gluten-free ladyfingers made with alternative flours. Just make sure to check the packaging for any allergens, and feel free to adjust the recipe to suit any dietary restrictions your friends may have.
Is it safe for pets?
It's best not to share these cups with pets, especially dogs, as chocolate (found in cocoa powder) can be harmful to them. Enjoy these indulgent treats yourself, and keep them away from your furry friends!
Indulge Guilt-Free with Coffee Protein Tiramisu Cups
Ingredients
Equipment
Method
- Brew a strong cup of coffee and allow it to cool to room temperature.
- In a mixing bowl, combine the mascarpone, protein powder, sugar, cocoa powder, and vanilla extract. Blend until smooth.
- Dip the ladyfingers quickly into the coffee and place them on a plate.
- Assemble the cups by placing the dipped ladyfingers at the bottom.
- Scoop the mascarpone mixture over the ladyfingers in each cup.
- Repeat layering with more dipped ladyfingers and filling until cups are full.
- Cover with plastic wrap and refrigerate for at least 30 minutes.
- Serve chilled, dust with cocoa powder if desired.


Leave a Reply