
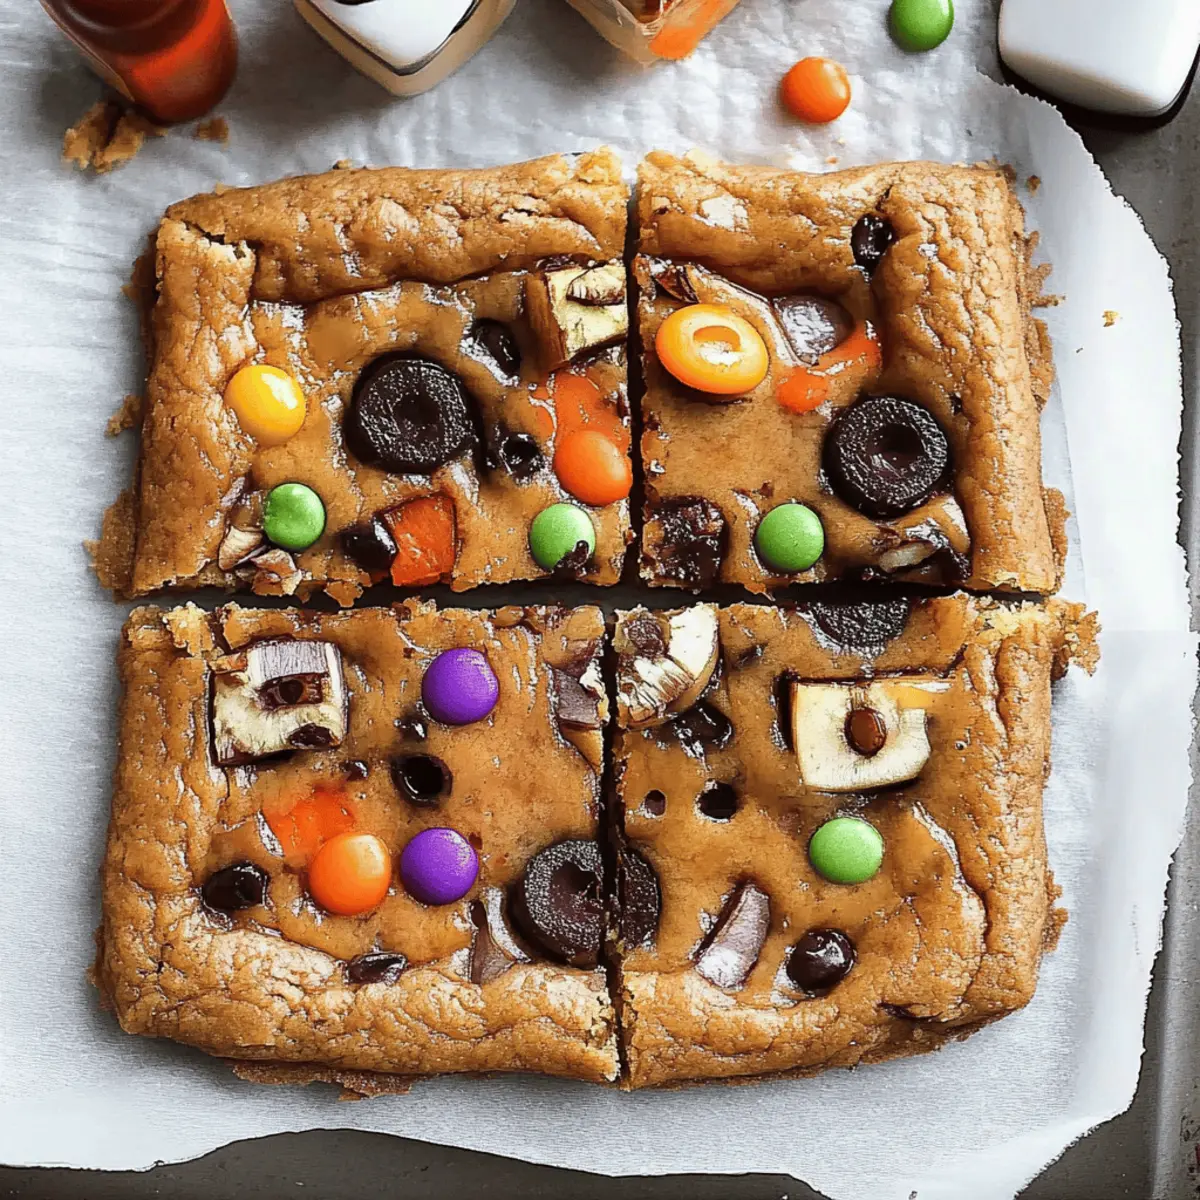
The sweet aroma of melted chocolate and caramelized butter wafting through my kitchen always brings back fond memories of Halloween nights spent unwrapping candy treasures. These Halloween Candy Cookie Bars are my secret weapon for transforming leftover treats into a crowd-pleasing dessert that everyone loves. With just a quick prep time and a baking process that takes under 20 minutes, you'll have a delightful twist on classic cookie bars ready to share, or perhaps keep just for yourself! The combination of Reese's Pieces, M&M's, and your favorite Halloween leftovers creates a chewy, gooey indulgence that’s not just a great way to use up candy, but also a festive way to celebrate the season. Curious about how to whip up this delicious bar in no time? Let’s dive in!
Why are these cookie bars irresistible?
Incredible fusion of flavors: The mix of Reese's Pieces and M&M's delivers a delightful punch.
Quick preparation time: With only 15 minutes of hands-on work, you’ll have them baking in no time!
Perfect for sharing: Cut into squares, these bars are great for parties, or served warm with ice cream.
Endless creativity: Use any leftover Halloween candy—think Snickers or Butterfingers—to customize each batch!
Get ready for a festive treat that everyone will adore—these Halloween Candy Cookie Bars are about to become your new favorite!
Halloween Candy Cookie Bars Ingredients
• Dive into these delicious bars with a mix of sweet treats!
For the Cookie Dough
- 2¼ cups unbleached all-purpose flour – This is the foundation for your chewy cookie bars.
- 1 teaspoon baking soda – This will help your bars rise perfectly.
- ¾ teaspoon kosher salt – Just the right amount to enhance all the sweet flavors.
- ¾ cup unsalted butter – Softened to room temperature for easy mixing.
- ¾ cup dark brown sugar – Adds a rich, molasses-like flavor.
- ¾ cup granulated sugar – Sweetens the bars to perfection.
- 2 large eggs – These bind everything together beautifully.
- 1½ teaspoons real vanilla extract – A must-have for that comforting vanilla aroma.
For the Candy Mix-Ins
- ½ cup Reese's Pieces – You can’t go wrong with the perfect chocolate-peanut butter combo!
- ½ cup chocolate M&M's – Adds a pop of color and extra chocolatey goodness.
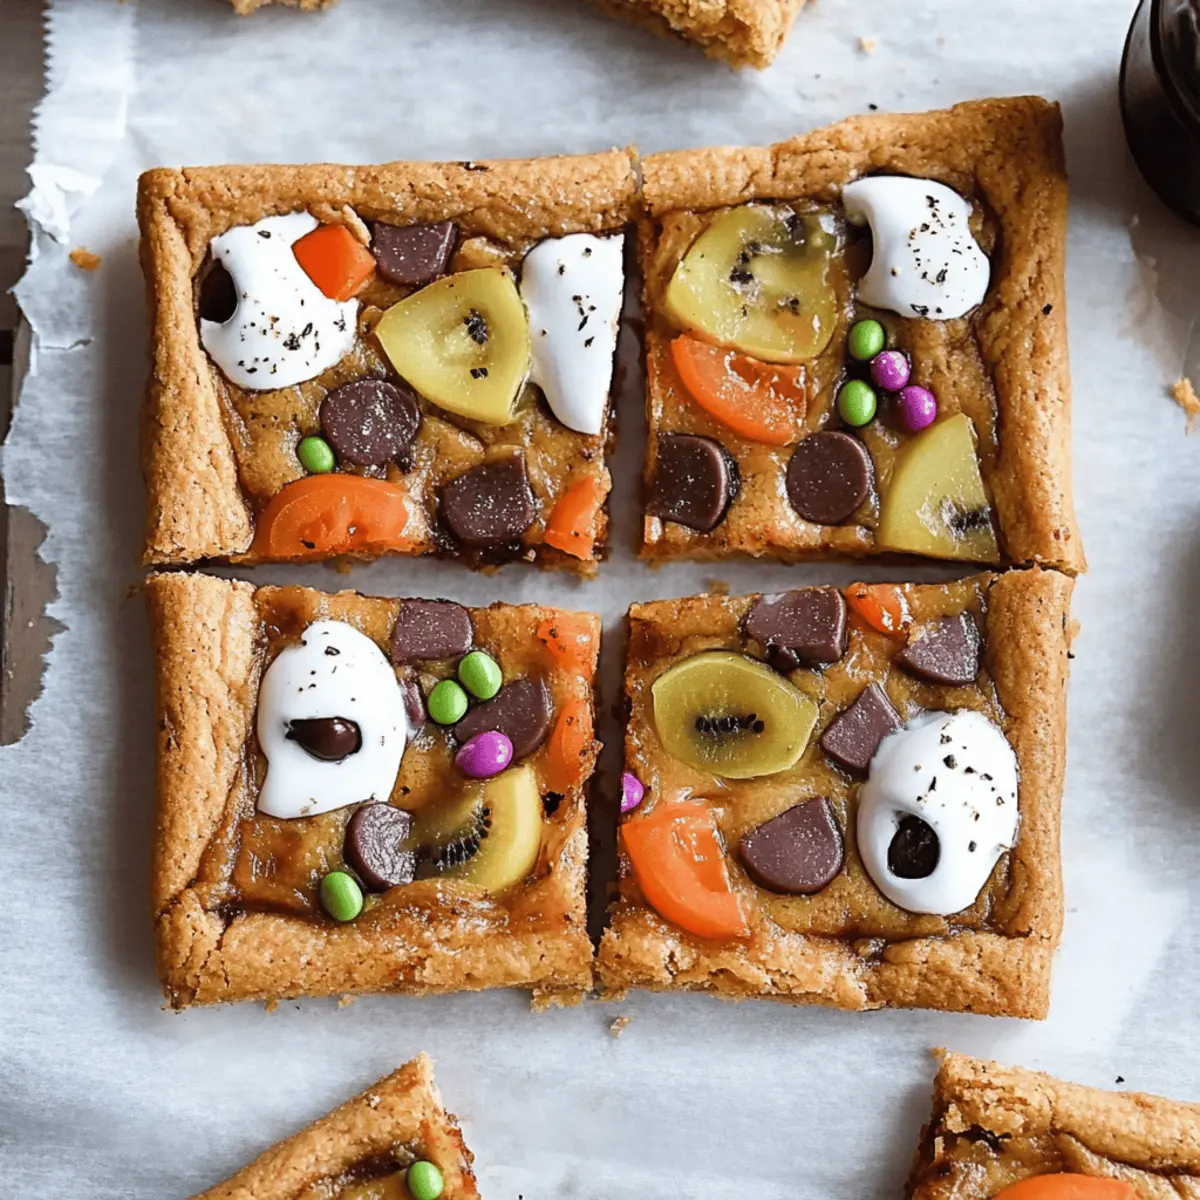
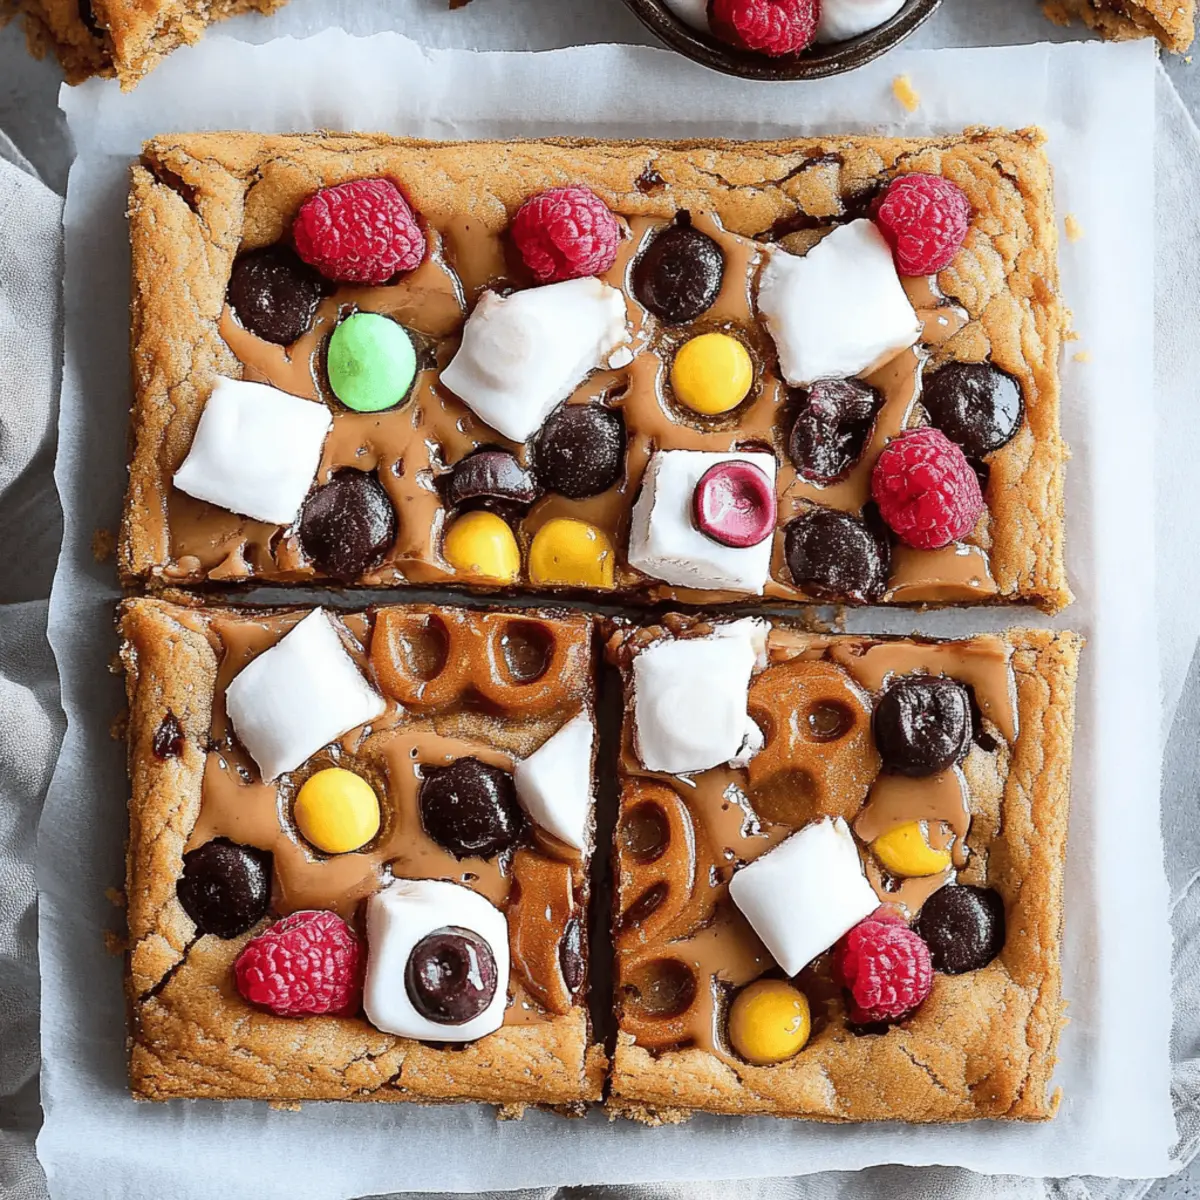
- Leftover Halloween candy – Use any favorites like Reese's peanut butter cups, KitKat bars, or Snickers to add surprises in every bite.
- Candy eyes – For a fun and festive finishing touch, especially for your Halloween-themed dessert!
Now that you're all set with the ingredients, let’s get baking these delightful Halloween Candy Cookie Bars!
Step‑by‑Step Instructions for Halloween Candy Cookie Bars
Step 1: Preheat the Oven
Begin by preheating your oven to 350℉ (or 180℃). This ensures the Halloween Candy Cookie Bars will bake evenly and achieve that perfect golden-brown color. While the oven warms up, you can prepare your baking pan and cookie dough, keeping everything efficient and organized.
Step 2: Prepare the Baking Pan
Line a 9x13x2 inch baking pan with parchment paper, allowing some overhang for easy removal later. Lightly spray the parchment with nonstick spray to keep your cookie bars from sticking. Setting the pan aside while you mix the dough will keep your process smooth and streamlined.
Step 3: Mix Dry Ingredients
In a medium bowl, combine 2¼ cups of unbleached all-purpose flour, 1 teaspoon of baking soda, and ¾ teaspoon of kosher salt. Stir these dry ingredients together until well mixed, then set them aside. This step prepares the foundation for your chewy Halloween Candy Cookie Bars, ensuring the right balance of flavors and texture.
Step 4: Cream Butter and Sugars
In the bowl of a stand mixer, add ¾ cup of room-temperature unsalted butter along with ¾ cup of dark brown sugar and ¾ cup of granulated sugar. Mix on medium speed until the mixture is creamy and light in color, about 2-3 minutes. This process allows the sugars to dissolve and the mixture to aerate, creating a delightful texture in your cookie bars.
Step 5: Incorporate Eggs and Vanilla
Add the eggs one at a time, mixing well after each addition to ensure full incorporation. With the last egg, pour in 1½ teaspoons of real vanilla extract, mixing until everything is blended together smoothly. Scrape down the sides and bottom of the bowl with a spatula to ensure no ingredients are left unmixed, resulting in perfectly flavored Halloween Candy Cookie Bars.
Step 6: Add Dry Ingredients Gradually
With the mixer on low, add half of the reserved flour mixture to the batter, mixing just until incorporated. Then, add the remaining flour mixture, continuing to mix on low until no streaks of flour remain. Scraping the sides and bottom of the bowl again ensures an even, well-combined dough for those delightful bars.
Step 7: Fold in Candies
Using a rubber spatula, gently fold in ½ cup of Reese's Pieces and ½ cup of chocolate M&M's by hand. This step allows you to effectively incorporate the candies without breaking them, while giving your Halloween Candy Cookie Bars that fun burst of color and flavor with every bite.
Step 8: Transfer Dough to Pan
Carefully transfer the dough into your prepared baking pan. Use lightly greased fingers or a sheet of wax paper to press the dough evenly into the pan, making sure to create a smooth surface. This ensures that your cookie bars bake evenly and gives them a professional finish for sharing.
Step 9: Bake the Cookie Bars
Place the pan on the middle rack of your preheated oven and bake for 18 to 20 minutes. Rotate the pan halfway through baking to ensure even cooking. When the edges are lightly golden and the center is set but still slightly soft, your Halloween Candy Cookie Bars are ready to come out of the oven.
Step 10: Prepare Extra Candy
While the cookie bars are baking, unwrap and chop any leftover Halloween candy you want to use. Ensure they're broken into bite-sized pieces so they can be pressed easily into the top of the bars right after baking. This adds a delicious assortment of flavors and textures, making your bars uniquely festive.
Step 11: Add Candy Toppings
As soon as your cookie bars are out of the oven, immediately press the chopped candy pieces into the top of the warm bars. This step not only adds visual appeal but also keeps the candies perfectly melted on top, creating an irresistible look that will draw everyone in when serving your Halloween Candy Cookie Bars.
Step 12: Cool and Serve
Allow the cookie bars to cool completely in the pan before slicing them into squares. Once cooled, use the parchment overhang to lift the bars out of the pan for easy cutting. These delightful Halloween Candy Cookie Bars are now ready to be enjoyed, offering a sweet treat that is perfect for sharing!
Halloween Candy Cookie Bars Variations
There's so much fun to be had when you customize your cookie bars—let your creativity and taste buds lead the way!
-
Gluten-Free: Swap out the all-purpose flour for a gluten-free blend to cater to those with gluten sensitivities. You can still enjoy the same great taste and chewy texture!
-
Nutty Delight: Add ½ cup of chopped nuts like pecans or walnuts for an added crunch. This twist introduces a delightful texture that contrasts beautifully with the candy-filled sweetness.
-
Oatmeal Boost: Mix in 1 cup of rolled oats into the cookie dough for a heartier version. The oats create a rustic feel and enhance the chewiness of each bite.
-
Spicy Kick: Add a teaspoon of cinnamon or a pinch of cayenne pepper to the batter for a warm, spicy kick. This will elevate your bar's flavor, making it a unique treat for adventurous taste buds!
-
Dairy-Free: Replace the unsalted butter with coconut oil and use egg substitute to make the bars dairy-free. The coconut oil adds a subtle tropical sweetness that's simply divine!
-
Chocolate Lovers Upgrade: Incorporate dark chocolate chips along with the candies for an extra chocolatey experience. These bars will be a true indulgence for chocolate enthusiasts.
-
Peanut Butter Swirl: Fold in ½ cup of peanut butter into the cookie dough before baking for an extra creamy, nutty twist. This enhances both flavor and richness, making every bite a little heavenly!
-
Caramel Drizzle: Once the bars have cooled, drizzle melted caramel over the top before serving for a decadent finishing touch. This sweet addition will take your cookie bars to a whole new level!
Feel free to mix and match these variations to create a treat that’s uniquely yours! For more delicious baking ideas, check out these expert tips or explore our guide on how to store and freeze your treats for maximum freshness.
Expert Tips for Halloween Candy Cookie Bars
- Use Room Temperature Ingredients: Ensure your butter and eggs are at room temperature. This creates a smooth batter and promotes even baking for your cookie bars.
- Don't Overmix: Mix just until incorporated when adding flour and candy. Overmixing can make the bars tough; you want that soft, chewy texture in your Halloween Candy Cookie Bars!
- Rotate the Pan: Rotate your baking pan halfway through to ensure that your bars bake evenly. This prevents overcooked edges and undercooked centers.
- Cool Completely: Let the bars cool in the pan before slicing. This helps them set perfectly and avoids any crumbling when you cut them.
- Customize with Candies: Feel free to get creative! Use any leftover Halloween candy you love for a unique twist on the classic recipe, enhancing flavor and fun.
How to Store and Freeze Halloween Candy Cookie Bars
Room Temperature: Store your cookie bars in an airtight container at room temperature for up to 3 days to maintain their freshness and chewy texture.
Fridge: For longer storage, keep them in the refrigerator in an airtight container for up to a week. Just make sure to let them come to room temperature before serving for that perfect softness.
Freezer: Freeze the cookie bars for up to 3 months. Wrap them tightly in plastic wrap, followed by aluminum foil. Thaw in the fridge overnight before enjoying or warming up in the microwave for a few seconds.
Reheating: If desired, reheat individual bars in the microwave for about 10-15 seconds for a warm, gooey treat that reawakens the delightful flavors of your Halloween Candy Cookie Bars!
Make Ahead Options
These Halloween Candy Cookie Bars are perfect for busy home cooks looking to save time! You can prepare the dough up to 24 hours in advance by following the initial steps through adding the egg and vanilla, then refrigerate the dough in an airtight container. This helps maintain quality while preventing browning. Additionally, you can chop and store your leftover Halloween candy in a sealed bag to use later. When you're ready to bake, simply transfer the dough to your prepared baking pan, add the candy toppings, and bake as directed. You'll have festive, gooey bars that are just as delicious with minimal effort, perfect for last-minute entertaining!
What to Serve with Halloween Candy Cookie Bars
Treat your friends and family to an unforgettable dessert experience that perfectly complements these scrumptious cookie bars, making any gathering extra special.
- Vanilla Ice Cream: A scoop of creamy vanilla ice cream will melt beautifully over warm bars, enhancing the chocolate flavors. The contrast of temperature is delightful!
- Pumpkin Spice Latte: Add a seasonal touch with this warm beverage. The cozy spices pair wonderfully with the sweetness of the cookie bars, creating a comforting duo.
- Fresh Fruit Salad: A zesty mix of fresh fruits like strawberries, oranges, and kiwi provides a refreshing contrast to the rich, gooey bars. It adds a vibrant splash of color to your spread.
- Chocolate Ganache Drizzle: For an indulgent twist, drizzle warm chocolate ganache over the bars. This extra layer of chocolate decadence will surely satisfy any sweet tooth.
- Marshmallow Fluff: Serve with a side of warm marshmallow fluff for dipping. The gooey texture and sweet flavor make every bite feel like a celebration.
- Caramel Sauce: A drizzle of caramel sauce adds a rich, buttery sweetness that complements the candy pieces beautifully. Pairing these bars with a warm sauce is pure bliss!
- Hot Apple Cider: This classic fall drink infuses your dessert table with cozy aromas. The spiced apple flavors highlight the festive vibes, making it a perfect pairing for Halloween treats.
- Nutty Trail Mix: Balance the sweetness with a crunchy, nutty trail mix, providing an assorted texture that complements the chewy cookie bars. It's a fun, snackable addition to your table!
Halloween Candy Cookie Bars Recipe FAQs
What kind of leftover Halloween candy can I use for these cookie bars?
Absolutely! You can use any leftover Halloween candy that you love. Think Reese’s peanut butter cups, Snickers, Butterfinger, or KitKat bars. Just make sure to cut them into bite-sized pieces so they can easily be pressed into the cookie bars!
How should I store the Halloween Candy Cookie Bars?
To keep your cookie bars fresh, store them in an airtight container at room temperature for up to 3 days. If you want them to last longer, you can refrigerate them for up to a week. Just remember to let them come back to room temperature before serving for that delightful soft texture!
Can I freeze Halloween Candy Cookie Bars?
Yes, you can freeze them! Wrap the cookie bars tightly in plastic wrap, then cover them with aluminum foil to prevent freezer burn. They can be stored in the freezer for up to 3 months. When you're ready to enjoy, simply thaw them in the fridge overnight, and for a warm treat, pop them in the microwave for about 10-15 seconds.
How can I fix cookie bars that came out too dry?
If your Halloween Candy Cookie Bars are dry, there are a few tricks! Make sure not to overmix your dough, as this can lead to a tough texture. Also, ensure you’re measuring your flour correctly—too much can make them dry. If your bars are overbaked, you can try serving them with a scoop of ice cream or a drizzle of chocolate sauce to add moisture and flavor!
Are these cookie bars suitable for people with nut allergies?
It depends on the candies you choose! While the base of the cookie bars is nut-free, candies like Reese's do contain peanuts. To make them nut-free, simply swap in candies that are certified nut-free, like plain M&M's, Skittles, or any other favorite treats without nuts. Always read the labels just to be safe!
What’s the best way to tell if the cookie bars are done baking?
The best way to check is to look for a lightly golden edge while the center still looks soft. Insert a toothpick into the center; if it comes out clean or with just a few moist crumbs, your Halloween Candy Cookie Bars are ready! They will continue to cook slightly as they cool in the pan.

Indulge in Festive Halloween Candy Cookie Bars Delight
Ingredients
Equipment
Method
- Preheat your oven to 350℉ (or 180℃).
- Line a 9x13 inch baking pan with parchment paper and lightly spray with nonstick spray.
- In a medium bowl, mix 2¼ cups of unbleached all-purpose flour, 1 teaspoon of baking soda, and ¾ teaspoon of kosher salt.
- In a stand mixer, cream ¾ cup unsalted butter, ¾ cup dark brown sugar, and ¾ cup granulated sugar until creamy.
- Add the eggs one at a time and then mix in 1½ teaspoons real vanilla extract.
- Gradually incorporate the dry ingredients into the wet mixture until no streaks remain.
- Gently fold in ½ cup Reese's Pieces and ½ cup chocolate M&M's.
- Transfer the dough into the prepared baking pan and press evenly.
- Bake for 18 to 20 minutes, until lightly golden.
- While baking, chop leftover Halloween candy.
- Immediately press the chopped candy into the top of warm bars after baking.
- Allow to cool completely before slicing into squares.


Leave a Reply