
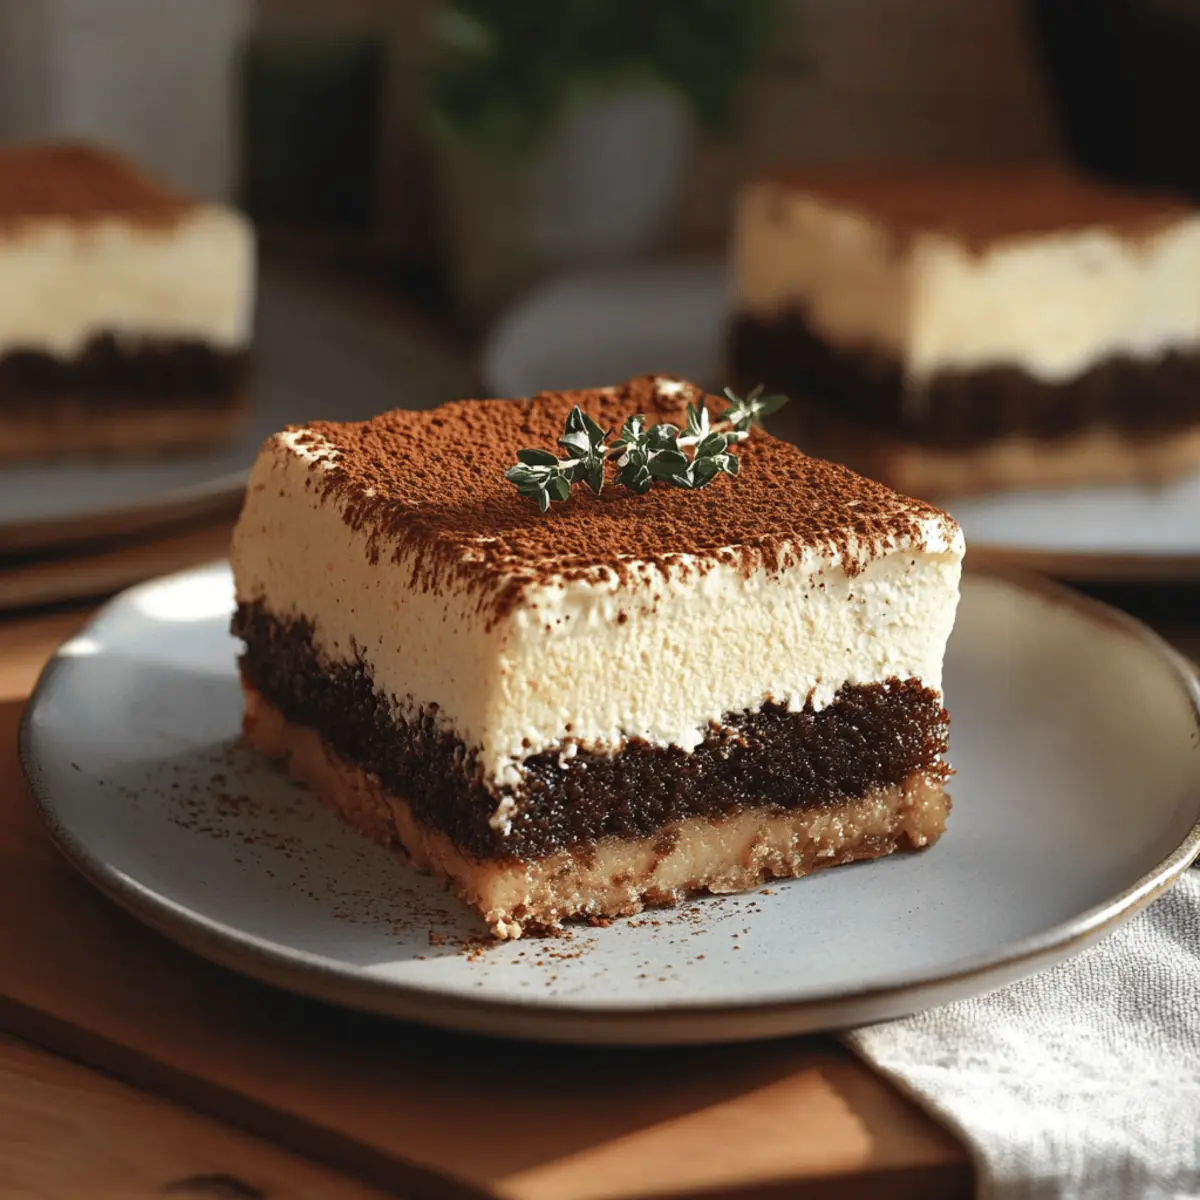
As I stirred the luscious chocolate and espresso mixture, I couldn’t help but feel like a pastry magician crafting something extraordinary. Today, I’m excited to share my Tiramisu Brownies with you, an enticing fusion of rich chocolate brownie and creamy tiramisu that will transport your taste buds straight to dessert heaven. Not only are these brownies a showstopper for any gathering, but they’re also surprisingly easy to whip up, making them a perfect weekend baking project. The best part? They’re freezer-friendly, so you can indulge on your terms! Ready to embark on this delightful culinary adventure? Let’s get those brownies baking!
Why Will You Crave Tiramisu Brownies?
Decadent Flavor Fusion: The magic happens when rich chocolate brownies meet the creamy layers of tiramisu, creating a dessert that dazzles the palate.
Effortlessly Impressive: Perfect for gatherings, these elegantly layered brownies elevate your dessert game without a hefty time commitment.
Adaptable to Taste: Feel free to swap in your favorite liqueurs or alternate flavors to customize this treat for any occasion.
Crowd-Pleasing Delight: With a balance of sweetness and bold coffee undertones, they are sure to please chocolate lovers and coffee connoisseurs alike!
Make Ahead Marvel: These Tiramisu Brownies can be prepared in advance, making them an ideal choice for last-minute entertaining. Discover more about chilling desserts for the ultimate serving experience!
Tiramisu Brownies Ingredients
For the Brownie Base
- 100 g dark or semi-sweet chocolate – Finely chopped for a rich, melty texture.
- 50 g natural cocoa powder – Adds depth and enhances the chocolate flavor.
- 230 g unsalted butter – Browned to bring a nutty aroma that elevates the brownies.
- 4 large eggs – Make sure they’re at room temperature for a smooth batter.
- 150 g granulated sugar – Sweetens the brownies while keeping them moist.
- 100 g brown sugar – Provides a lovely caramel flavor and chewiness.
- 100 g all-purpose flour – Helps bind the ingredients for those fudgy bites.
For the Tiramisu Layer
- 250 g mascarpone cheese – Cold for the creamiest, dreamiest texture.
- 200 g whipping cream – Whipped to airy perfection for a light topping.
- 50 g powdered sugar – Sweetens the cream without grittiness.
- ½ teaspoon vanilla extract – Enhances the overall flavor with a touch of warmth.
- 2 teaspoons espresso powder – Infuses that coffee kick that complements the brownies.
- 150 g hot water – Helps dissolve and activate the espresso powder.
- 1 tablespoon coffee liqueur or dark rum (optional) – Adds a sophisticated layer of flavor, perfect for adults.
- 12 ladyfingers – These will soak up the coffee mixture, forming a delightful layer.
- 1 tablespoon cocoa powder – For dusting on top, adding a lovely finish to your brownies.
These Tiramisu Brownies are not just a dessert; they are an experience you won’t soon forget!
Step‑by‑Step Instructions for Tiramisu Brownies
Step 1: Preheat the Oven
Begin by preheating your oven to 350°F (175°C). While the oven warms up, grab a 9x9-inch square baking pan and line it with parchment paper, ensuring the paper hangs slightly over the edges to help with easy removal later. The comforting aroma of melting chocolate and coffee will soon fill your kitchen!
Step 2: Combine Chocolate and Cocoa
In a medium bowl, mix together the finely chopped dark or semi-sweet chocolate and cocoa powder until well combined. This blend will be set aside for later but will play a crucial role in achieving the rich flavor of your Tiramisu Brownies. Prepare for a luscious chocolatey experience ahead!
Step 3: Brown the Butter
Next, take a small saucepan and melt the roughly cubed unsalted butter over medium heat. Stir occasionally, allowing it to cook until the milk solids brown and the mixture smells nutty—about 5 minutes. Once it's achieved this delightful aroma, remove it from heat and pour it over the chocolate mixture. Let it sit for 3 minutes to melt the chocolate completely.
Step 4: Whisk the Egg and Sugars
In a large mixing bowl, whisk together the room-temperature eggs, granulated sugar, and brown sugar for about 3 minutes. You want the mixture to become pale and fluffy, creating the perfect base for your brownies. Once well combined, slowly stream in the chocolate and butter mixture while continuously whisking until everything is smoothly incorporated.
Step 5: Fold in the Flour
Gently fold in the all-purpose flour into the chocolate batter, being careful not to overmix. The batter should be just combined and slightly thick; it should have an inviting, fudgy consistency that promises rich flavor. Preparing your tantalizing Tiramisu Brownies is almost complete!
Step 6: Bake the Brownies
Spread the brownie batter evenly into the prepared baking pan, smoothing out the top if necessary. Pop it into your preheated oven and bake for 28-30 minutes. You'll know they are done when a toothpick inserted into the center comes out mostly clean with just a bit of moisture clinging—this ensures you keep that fudgy texture.
Step 7: Cool the Brownies
Once baked, remove the pan from the oven and let the brownies cool in the pan on a wire rack. This cooling process allows the brownies to firm up, making it easier to slice them later. Revel in the wonderful aroma as they cool—your Tiramisu Brownies are already a step closer to perfection!
Step 8: Prepare the Mascarpone Cream
In a mixing bowl, beat the cold mascarpone cheese until creamy, which should take just a few moments. Gradually add in the cold whipping cream, powdered sugar, and vanilla extract, beating until the mixture thickens and forms a beautiful, airy cream—this will be the dreamy topping on your brownies.
Step 9: Create the Coffee Mixture
In a shallow bowl, combine the espresso powder, hot water, and optional coffee liqueur, stirring until evenly mixed. This mixture will infuse the ladyfingers with delightful coffee flavoring, perfectly balancing the richness of the Tiramisu Brownies. Prepare to transform your brownies into a decadent layered dessert!
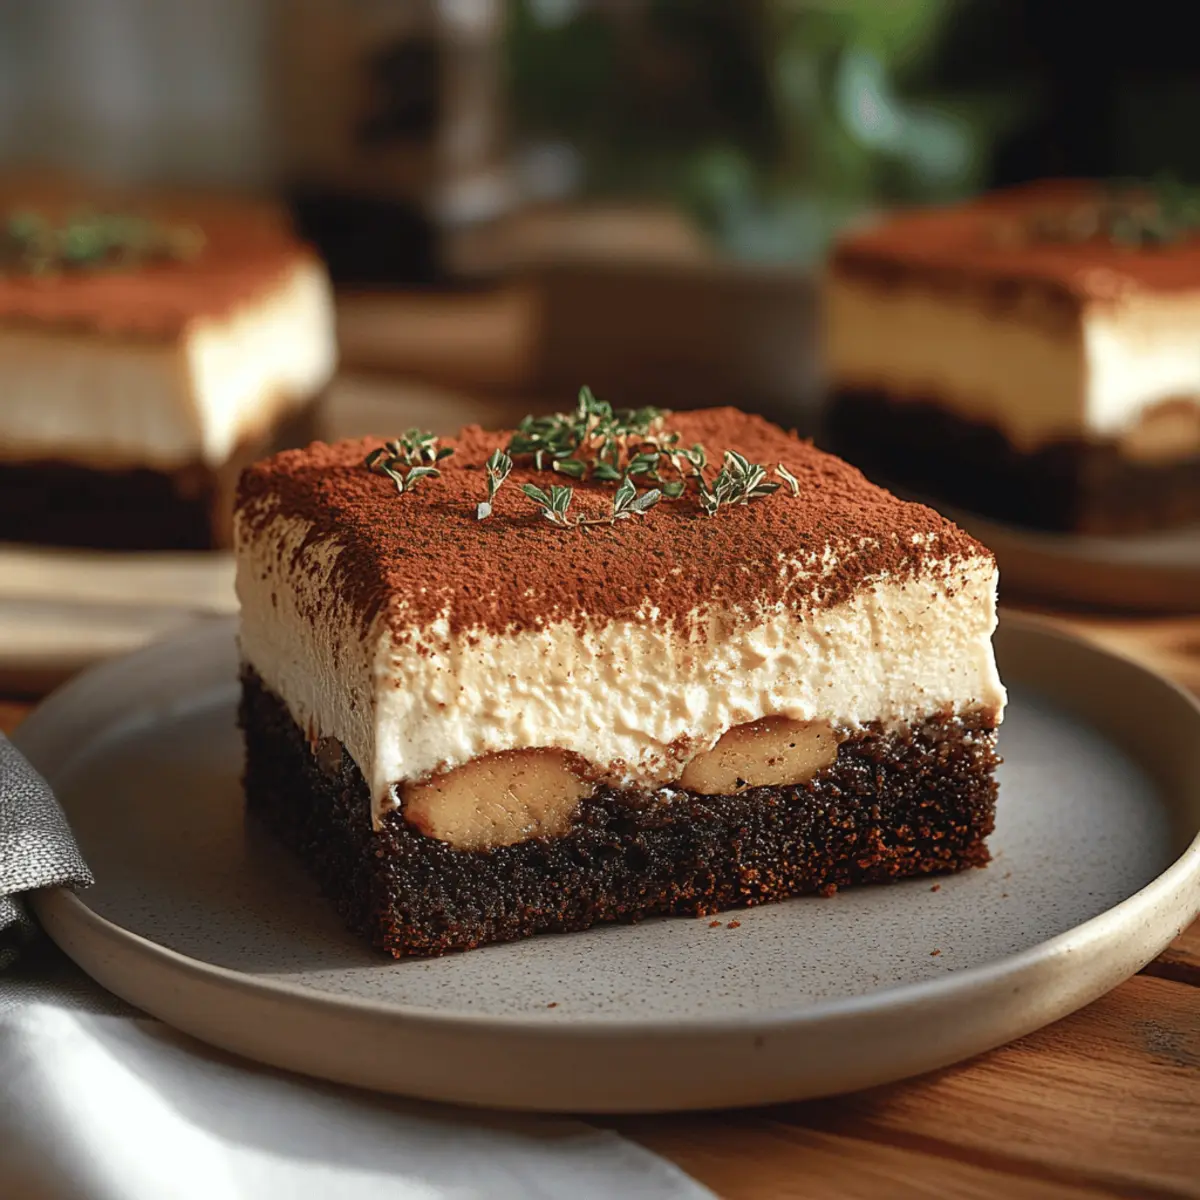
Step 10: Assemble with Ladyfingers
Quickly dip each ladyfinger into the coffee mixture, one at a time, ensuring they are just moistened but not soggy. Arrange the dipped ladyfingers in rows on top of the cooled brownie layer. This step creates a luscious coffee-infused layer that brings the essence of tiramisu to your brownies.
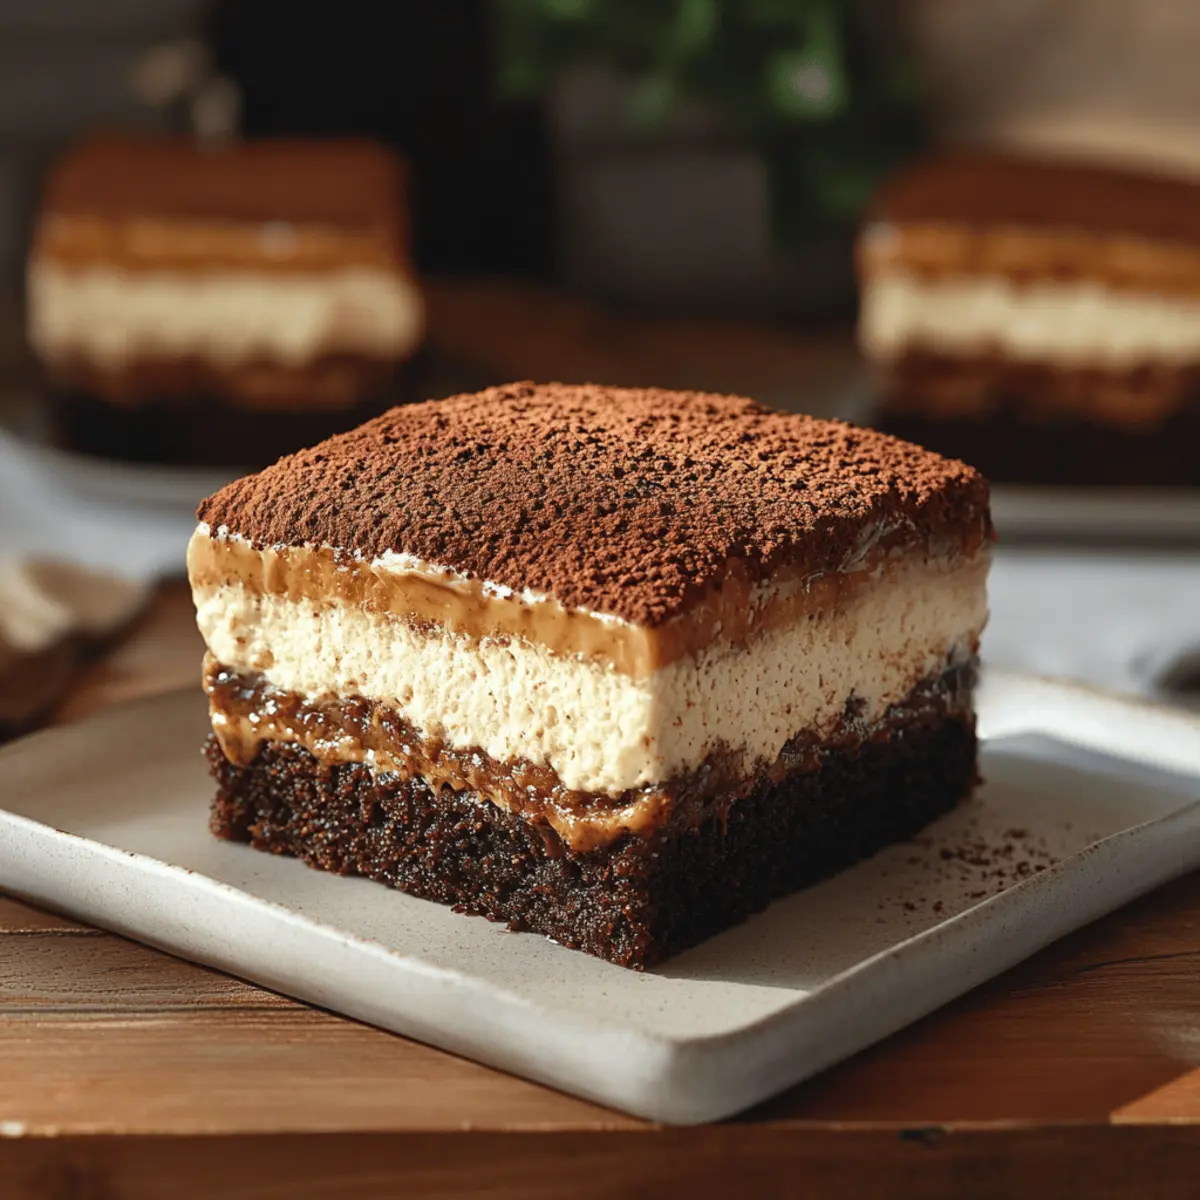
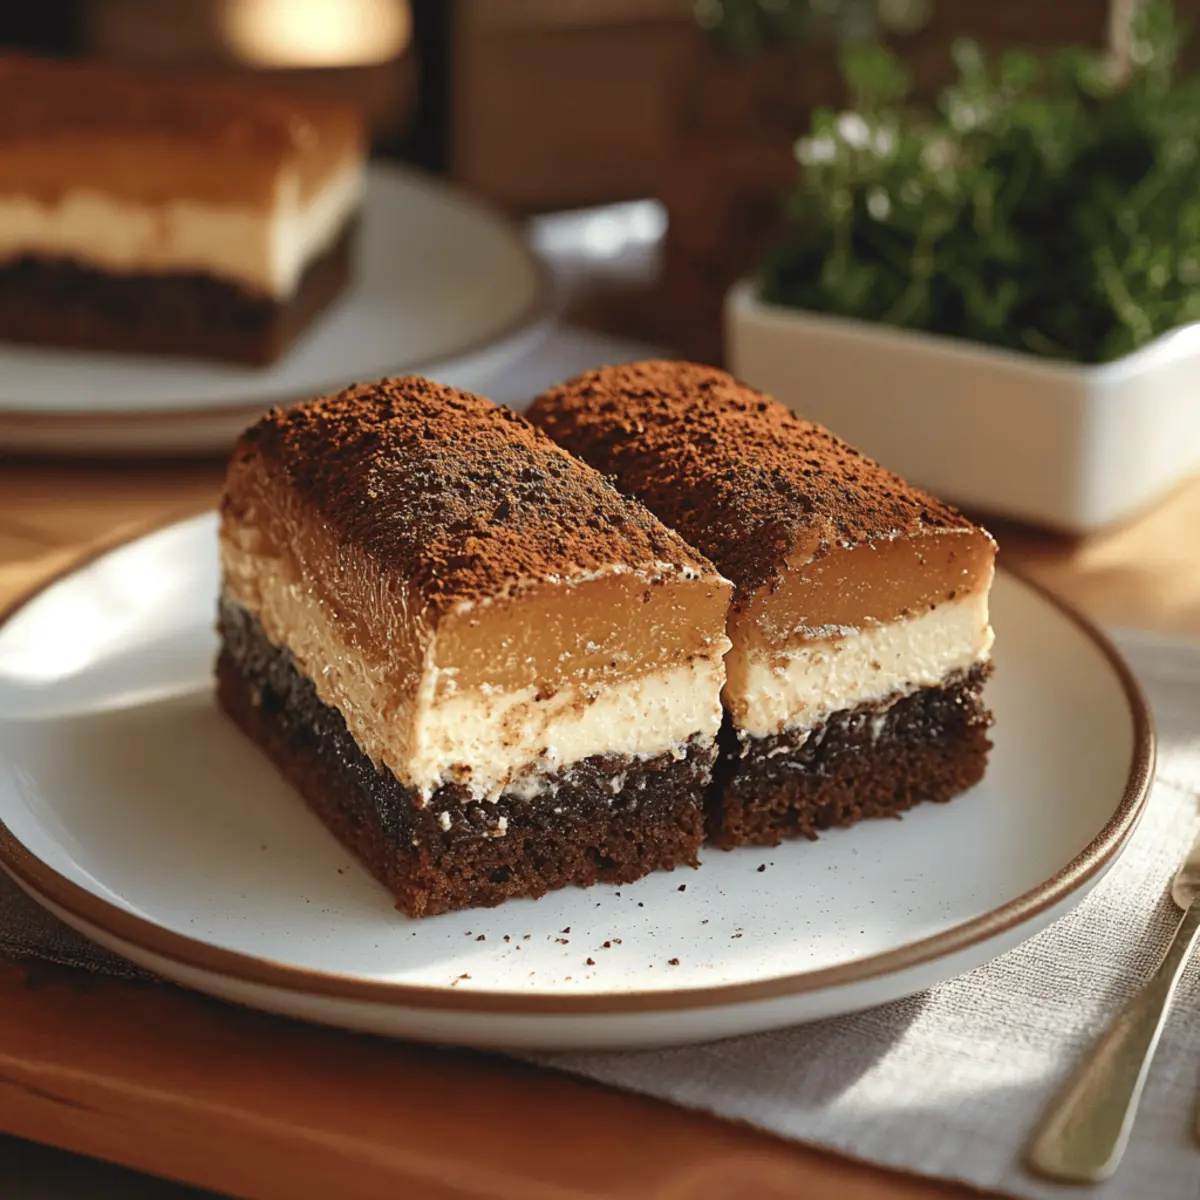
Step 11: Top with Mascarpone Cream
Spread the prepared mascarpone cream evenly over the layer of ladyfingers, smoothing it out to create a cohesive layer. Feel free to take your time here, ensuring it's nice and even. Your Tiramisu Brownies are nearly complete, and they’ll look divine with this creamy topping!
Step 12: Chill and Dust
Chill the assembled Tiramisu Brownies in the fridge for about 1 hour, allowing the flavors to meld beautifully. Once chilled, dust the top with cocoa powder to create a charming finishing touch. Now, slice into squares and enjoy the rich and velvety delights of your homemade Tiramisu Brownies!
Make Ahead Options
These Tiramisu Brownies are a fantastic choice for meal prep! You can prepare the brownie base up to 24 hours in advance; simply bake and let them cool before covering tightly and refrigerating. Additionally, the mascarpone cream can be made up to 3 days ahead—just store it in an airtight container in the refrigerator to keep it fresh and creamy. When you're ready to serve, assemble the brownies with the ladyfingers and coffee mixture, and top with the mascarpone cream. If you wish to enhance quality, dust with cocoa powder just before slicing to keep the presentation perfect. Enjoy delicious, homemade dessert with less last-minute fuss!
How to Store and Freeze Tiramisu Brownies
Room Temperature: Keep Tiramisu Brownies at room temperature for up to 2 days, covered with plastic wrap or in an airtight container to maintain freshness.
Fridge: For longer storage, place the brownies in the refrigerator, where they will last up to a week. Ensure they’re covered to prevent them from absorbing other odors.
Freezer: Tiramisu Brownies can be frozen for up to 3 months. Slice them into squares, wrap each piece tightly in plastic wrap, and place them in an airtight container or freezer bag.
Reheating: When ready to enjoy, let them thaw in the fridge overnight or at room temperature for a few hours. If desired, warm them lightly in the microwave for a few seconds before serving for a gooey treat!
Tiramisu Brownies Variations & Substitutions
Feel free to make these delightful Tiramisu Brownies your own with these creative twists and substitutions!
-
Gluten-Free: Substitute all-purpose flour with a 1:1 gluten-free flour blend for a similar texture, ensuring everyone can enjoy them!
-
Dairy-Free: Use coconut cream instead of mascarpone and a dairy-free butter alternative to accommodate lactose sensitivities without sacrificing flavor.
-
Nutty Addition: Add chopped walnuts or almonds into the brownie batter for extra texture and a delightful crunchy contrast against the creamy layers.
-
Fruit Flavors: Incorporate a layer of fresh raspberries or strawberries between the brownies and ladyfingers to add a burst of fruity freshness.
-
Liqueur Swap: Experiment with different liqueurs like Amaretto or Irish cream for unique flavor profiles that still evoke that classic tiramisu vibe.
-
Caramel Drizzle: Drizzle homemade caramel sauce over the top after dusting with cocoa for an indulgent sweet finish that enhances the overall richness.
-
Spicy Kick: Elevate the flavor by adding a pinch of cayenne pepper to the chocolate batter for a subtle heat that enhances the chocolate's depth.
-
Decadent Chocolate Chips: Stir in some dark chocolate chips into the brownie batter for an even more fudgy, chocolatey experience that chocolate lovers will adore!
These variations will allow you to explore an exciting world of flavors while keeping the essence of Tiramisu Brownies intact. Don't forget to share your delicious creations!
Expert Tips for Tiramisu Brownies
-
Use Room Temperature Eggs: Make sure your eggs are at room temperature before whisking; they incorporate better for a smooth batter, leading to airy brownies.
-
Perfectly Browned Butter: Achieve that nutty flavor by browning the butter just until the milk solids are golden. This extra step adds depth that you don’t want to skip!
-
Don’t Overmix: When folding in the flour, mix just until combined. Overmixing can lead to tough brownies, so be gentle to ensure a fudgy texture.
-
Chill Thoroughly: Allow your Tiramisu Brownies to chill in the refrigerator for at least one hour after assembling. This enhances flavors and makes slicing easier—definitely worth the wait!
-
Dust with Cocoa Just Before Serving: For a beautiful presentation, dust with cocoa powder right before serving. This prevents the cocoa from becoming soggy and keeps it looking fresh.
What to Serve with Tiramisu Brownies
Indulging in Tiramisu Brownies opens the door to creative meal pairings that complement their rich, luscious flavors.
-
Vanilla Ice Cream: A scoop of creamy vanilla perfectly balances the coffee-infused richness of the brownies, adding a cool contrast.
-
Espresso or Coffee: Serve with a hot cup of espresso to enhance the coffee notes in the brownies, creating a cozy after-dinner experience.
-
Whipped Cream: Lightly sweetened whipped cream adds an airy texture that contrasts beautifully with the dense brownie and creamy layers.
-
Fresh Berries: Juicy strawberries or raspberries provide a refreshing burst of tartness, brightening up the dessert and enhancing visual appeal.
Pair your brownies with a zesty citrus drink to cleanse the palate. A lemon spritz complements the sweetness without overpowering it.
- Chocolate Sauce: Drizzling warm chocolate sauce over each square elevates the indulgence factor, making each bite even more decadent.
With a variety of textures and flavors, these pairings will take your Tiramisu Brownies from delightful to unforgettable!
Tiramisu Brownies Recipe FAQs
How do I choose the best chocolate for Tiramisu Brownies?
Absolutely! When selecting chocolate, go for high-quality dark or semi-sweet chocolate with a cocoa content of 60% or higher. This choice provides a rich and deep flavor that complements the creamy tiramisu layer beautifully. Always ensure it's finely chopped, as this helps it melt evenly when combined with the browned butter.
What is the best way to store Tiramisu Brownies?
I recommend keeping them at room temperature for up to 2 days in an airtight container. For longer storage, you can refrigerate them for up to a week—just make sure they’re covered. This prevents them from picking up any unwanted flavors from the fridge and keeping them deliciously fresh!
Can I freeze Tiramisu Brownies, and if so, how?
Of course! Freezing is a fantastic way to save your Tiramisu Brownies for later. First, slice them into squares, then wrap each piece tightly in plastic wrap. Place the wrapped brownies in an airtight container or a freezer bag. They should stay fresh for up to 3 months. When you’re ready to indulge, simply let them thaw overnight in the refrigerator or at room temperature for a couple of hours.
What should I do if my brownies are too dense or cake-like?
Great question! If your Tiramisu Brownies end up too dense, it could be due to overmixing the batter—this can incorporate too much air. To avoid this, gently fold in the flour and stop as soon as you see no dry flour. Also, ensure your oven temperature is calibrated correctly, as baking at too high a temperature can lead to overcooking.
Can pets eat Tiramisu Brownies?
No, it's best to keep Tiramisu Brownies away from pets. Chocolate and coffee can be toxic to dogs and cats. If you’re looking for a dog-friendly treat, try making a simple brownie alternative using carob instead of chocolate. This way, your furry friends can enjoy a safe and tasty treat!
Can I substitute ingredients for dietary needs?
Very good thought! You can substitute the all-purpose flour with gluten-free flour for a gluten-free option. If you need a dairy-free variant, use vegan butter and a dairy-free cream cheese in place of mascarpone. For sweetness without sugar, consider using organic coconut sugar or a sugar substitute, adjusting the quantities to taste. Enjoy the flexibility!
Indulge in Flavorful Tiramisu Brownies for a Sweet Escape
Ingredients
Equipment
Method
- Preheat your oven to 350°F (175°C) and line a 9x9-inch baking pan with parchment paper.
- Mix together the finely chopped chocolate and cocoa powder in a medium bowl.
- Melt the cubed unsalted butter in a small saucepan until browned and pour over chocolate mixture.
- Whisk room-temperature eggs, granulated sugar, and brown sugar in a large bowl until pale and fluffy.
- Slowly mix in chocolate and butter mixture while whisking continuously.
- Gently fold in the all-purpose flour until just combined.
- Spread the brownie batter evenly in the prepared baking pan and bake for 28-30 minutes.
- Cool the brownies in the pan on a wire rack.
- Beat the cold mascarpone cheese until creamy, then add whipping cream, powdered sugar, and vanilla extract.
- Combine espresso powder, hot water, and optional liqueur in a shallow bowl.
- Dip ladyfingers in the coffee mixture and arrange them over the cooled brownie layer.
- Spread mascarpone cream over the ladyfingers, smoothing out evenly.
- Chill the assembled brownies in the fridge for about 1 hour, then dust with cocoa powder before serving.


Leave a Reply