
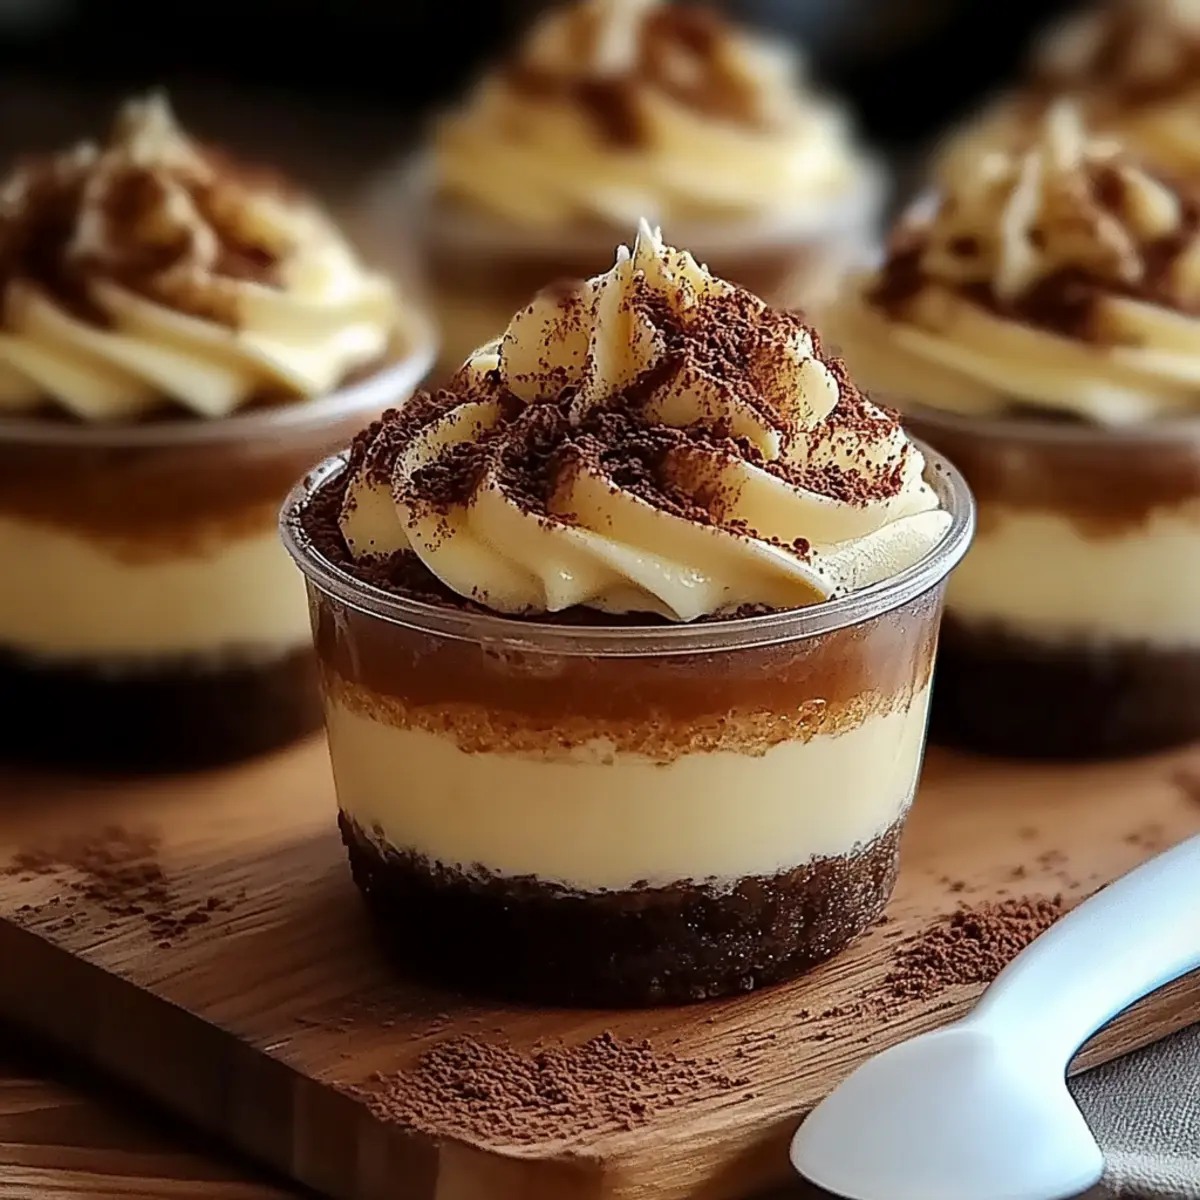
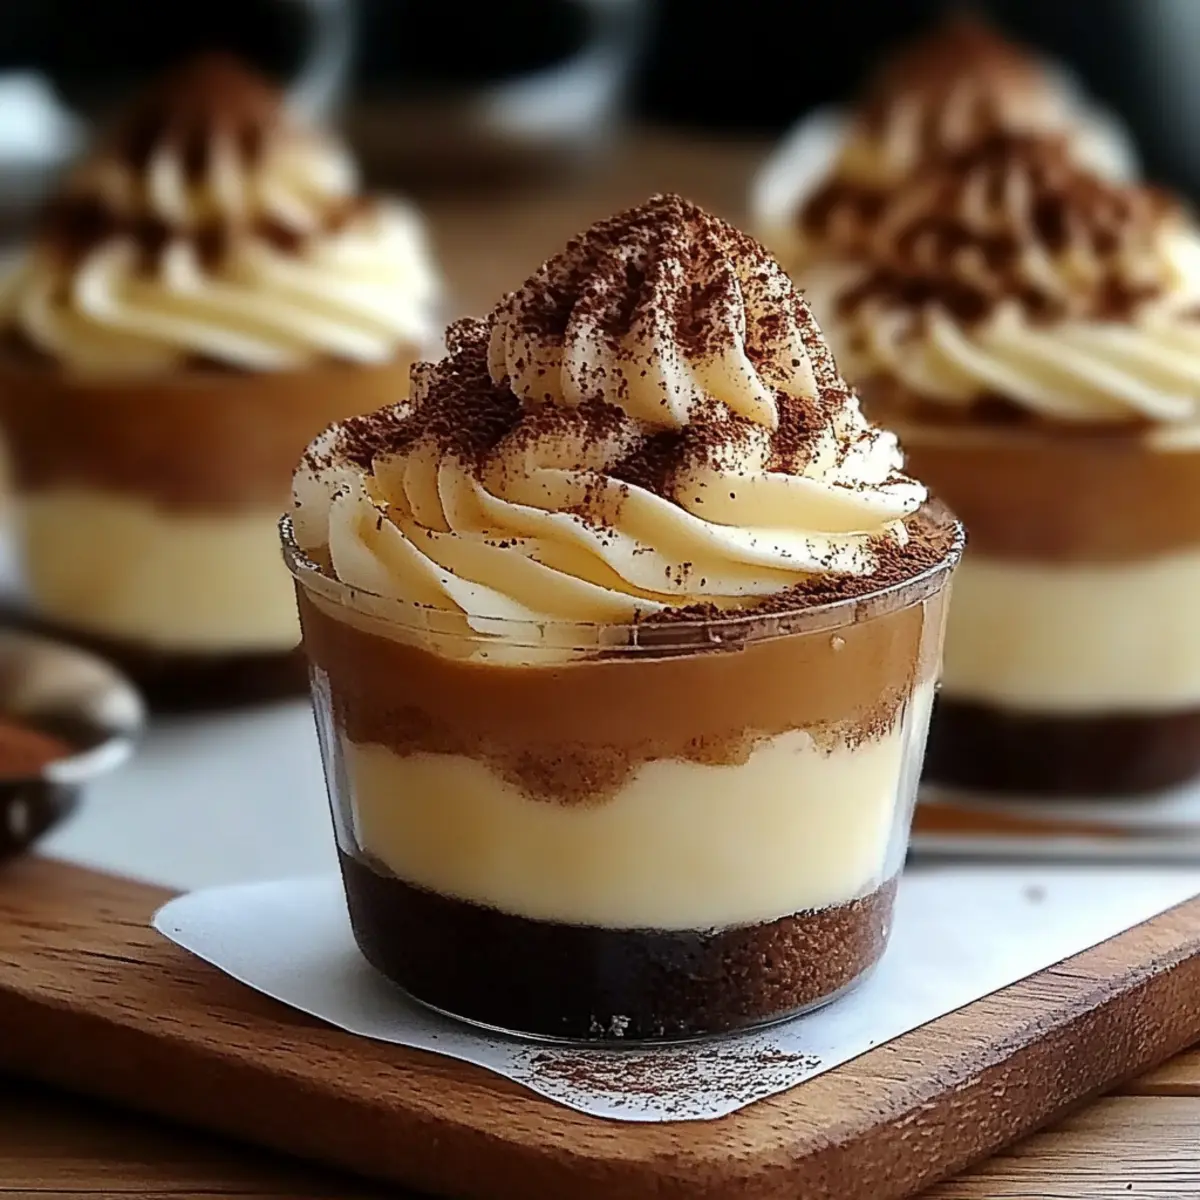
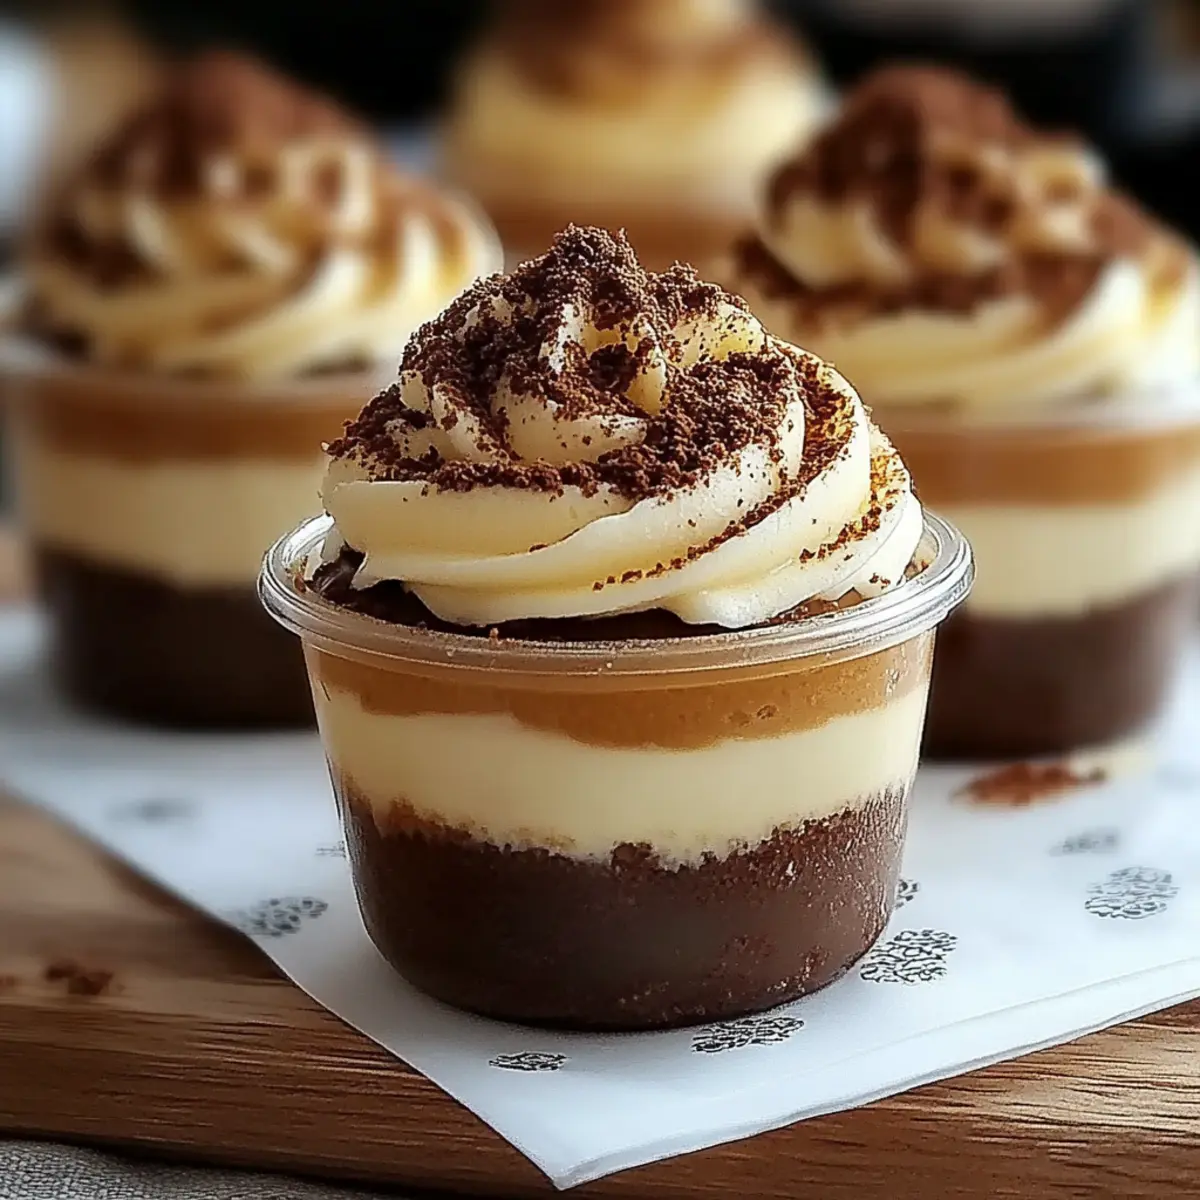
As I stood in my kitchen, the aroma of freshly brewed coffee mingled with the sweet scent of vanilla, transporting me to a cozy café in Rome. I was about to whip up the delightful Mini Tiramisu Cups, a dessert that’s not just a treat for the taste buds but a visual feast, too. In just 30 minutes, you can create these individual cups of joy, perfect for impressing guests or simply indulging yourself. With layers of creamy mascarpone and luscious ladyfingers soaked in rich coffee, these easy-to-make delights are sure to become your new favorite sweet fix. Plus, they chill beautifully in the fridge, allowing you to prepare them ahead of time—who doesn't love a make-ahead dessert? Ready to dive into the world of coffee and cream? Your taste buds are in for a real treat!
Why are Mini Tiramisu Cups irresistible?
Irresistible Flavors: The combination of rich mascarpone and strong coffee creates a heavenly balance of sweetness and depth that is hard to resist.
Easy and Quick: Whip them up in just 30 minutes! Perfect for busy weekdays or unexpected guests.
Make-Ahead Magic: Chill them in the fridge for a few hours—or even overnight—allowing the flavors to meld beautifully.
Visual Delight: Their individual cups provide a charming presentation, perfect for gatherings or potlucks. They'll impress your friends just like the Halloween Dirt Cups you love!
Versatile Treat: Swap ingredients according to your mood; try adding a layer of chocolate or using different flavored coffee for a unique twist. Every bite of these Mini Tiramisu Cups is a mini-vacation to Italy!
Mini Tiramisu Cups Ingredients
Get ready to create something truly delightful!
For the Cream Layer
- Mascarpone cheese – provides a rich and creamy base for your cups.
- Heavy cream – adds volume and lightness; for a lighter option, use half-and-half.
- Powdered sugar – sweetens the mix; you can substitute with granulated sugar if needed.
- Vanilla extract – enhances the flavor; pure vanilla gives the best taste.
For the Ladyfingers
- Ladyfingers – these sponge-like biscuits soak up the coffee perfectly; if unavailable, try sponge cake cut into strips.
For the Coffee
- Brewed strong coffee – use espresso or an Arabica blend for that authentic tiramisu flavor; decaf works too if you prefer.
For the Topping
- Cocoa powder – a dusting for that classic touch; you can also use chocolate shavings for a special twist.
Let’s get those Mini Tiramisu Cups made and delight your taste buds!
Step‑by‑Step Instructions for Mini Tiramisu Cups
Step 1: Prepare the Cream Mixture
In a mixing bowl, blend together 1 cup of mascarpone cheese, 1 cup of heavy cream, ½ cup of powdered sugar, and 1 teaspoon of vanilla extract. Use an electric mixer on medium speed to whip the ingredients until the mixture is smooth and creamy, which typically takes about 3-5 minutes. Look for a texture that is thick enough to hold its shape when dolloped.
Step 2: Soak the Ladyfingers
Grab your ladyfingers and pour 1 cup of brewed strong coffee into a shallow dish. Dip each ladyfinger briefly into the coffee, ensuring they soak just long enough—about 1-2 seconds—without getting soggy. The goal is to have them absorb the rich coffee flavor while still retaining their structure for the Mini Tiramisu Cups.
Step 3: Layer the Cups
Take small cups or glasses and start layering! Begin by placing a single layer of the soaked ladyfingers at the bottom of each cup. Arrange them so they create a solid base, slightly overlapping if necessary. This first layer will set the stage for the delightful contrast between the cream and coffee flavors in your Mini Tiramisu Cups.
Step 4: Add the Cream Layer
Once the ladyfingers are in place, spoon a generous layer of the mascarpone cream mixture over the ladyfingers, smoothing it out with the back of a spoon. Aim for about ¼ to ½ inch thickness, ensuring an even spread. This layer will add a rich creaminess, which pairs beautifully with the coffee-soaked ladyfingers.
Step 5: Repeat the Layering Process
Continue your construction by repeating the layering process: add another round of soaked ladyfingers, followed by another layer of the mascarpone cream. Fill each cup to the desired height, maintaining balance between the layers. This repetition is what makes the Mini Tiramisu Cups truly indulgent and pleasing to the eye.
Step 6: Dust with Cocoa Powder
After the final layer of cream is added, take some cocoa powder and dust it generously over the top of each cup. A fine sieve works great for this, allowing for an even distribution. This finishing touch not only adds a classic touch but also enhances the visual appeal of your Mini Tiramisu Cups.
Step 7: Chill and Set
Cover the cups with plastic wrap and place them in the refrigerator to chill for at least 4 hours, or ideally overnight. This chilling time allows the flavors to meld beautifully together, creating a wonderfully creamy dessert. Be sure to keep them covered so they stay fresh and ready to impress when you're ready to serve!

Make Ahead Options
These Mini Tiramisu Cups are perfect for meal prep enthusiasts, allowing you to prepare ahead and save time during busy weeknights! You can assemble the cups up to 24 hours in advance by layering the soaked ladyfingers and mascarpone cream mixture. To maintain the quality, cover each cup tightly with plastic wrap to prevent drying out. Simply dust with cocoa powder just before serving for that fresh, classic touch. When ready to enjoy, just pull them from the refrigerator—after chilling, the flavors meld beautifully, delivering a delightful dessert with minimal effort. Trust me, your guests will think you poured your heart and soul into these treats!
Mini Tiramisu Cups Variations
Feel free to get creative with your Mini Tiramisu Cups by trying these delightful variations!
-
Coffee-Free: Replace coffee with brewed herbal tea for a unique, caffeine-free twist. The subtle flavors will still create a delightful dessert experience.
-
Chocolate Lovers: Add a layer of melted dark chocolate between the ladyfingers and mascarpone cream. The richness of chocolate elevates this treat to a whole new level!
-
Nutty Crunch: Incorporate crushed hazelnuts or almonds into the cream mixture. This adds a wonderful crunch and extra flavor that will surprise your taste buds.
-
Flavor Twist: Experiment with flavored coffee syrup—like hazelnut or caramel—in place of brewed coffee. Each sip will bring a deliciously aromatic experience, making dessert a little bit more special.
-
Skinny Version: Substitute heavy cream with Greek yogurt for a lighter option. You’ll still achieve creaminess while cutting down on calories—perfect for those seeking a guilt-free indulgence.
-
Seasonal Approaches: For fall, swap the cocoa dusting for pumpkin spice to create a seasonal treat that embraces cozy autumn vibes!
-
Berry Bliss: Incorporate a layer of fresh berries in between creamy layers. Strawberries or raspberries provide a fresh contrast and a pop of color that’s visually stunning.
-
Mini Ghost Pizzas: Like the flavor of Halloween? Twist up the presentation by adapting these cups around Halloween with some spooky ghost decorations. Pair them with some Mini Ghost Pizzas for a fun theme!
Explore these variations to tailor your Mini Tiramisu Cups to your tastes and make every serving uniquely yours! Every delightful bite will leave you craving more.
How to Store and Freeze Mini Tiramisu Cups
Fridge: Store Mini Tiramisu Cups covered with plastic wrap in the refrigerator for up to 3 days to keep them fresh and flavorful.
Freezer: For longer storage, freeze the Mini Tiramisu Cups for up to 1 month. Place them in an airtight container, ensuring they are well-covered.
Thawing: When ready to enjoy, move them to the fridge to defrost overnight. Avoid microwaving, as it might alter the texture of the creamy layers.
Serving: After thawing, you can dust with additional cocoa powder just before serving for that fresh, delightful presentation!
What to Serve with Mini Tiramisu Cups?
Elevate your dessert experience with delightful pairings that complement the rich sweetness of these Mini Tiramisu Cups.
-
Espresso: A shot of rich espresso enhances the coffee notes in the dessert and offers a delightful pick-me-up.
-
Chocolate Biscotti: Crunchy chocolate biscotti adds texture and a hint of bitterness that balances the sweetness of the tiramisu.
-
Whipped Cream: A dollop of lightly sweetened whipped cream adds silkiness and provides a lovely contrast to the layered cups.
-
Fresh Berries: Juicy raspberries or sliced strawberries bring a pop of freshness and color, cutting through the richness of the cups.
-
Gelato: Creamy vanilla or coffee gelato makes for a harmonious addition, as its smooth texture complements every spoonful.
-
Mint Tea: A soothing cup of mint tea can cleanse the palate, making each bite of the Mini Tiramisu Cups feel like a fresh start.
-
Hazelnut Liqueur: A splash of hazelnut liqueur served alongside the cups creates a luxurious pairing, enhancing the coffee flavor.
-
Chocolate-Covered Almonds: Crunchy and sweet, these provide an irresistible bite that pairs perfectly with the coffee and cream flavors.
With these delightful pairings, you’ll create a memorable dessert experience that will leave your guests begging for more!
Expert Tips for Mini Tiramisu Cups
Perfect Cream Texture: Use room temperature mascarpone cheese for an easier mix; it will whip into a smoother consistency.
Ladyfinger Soaking: Dip the ladyfingers quickly—1-2 seconds max—to prevent them from becoming too soggy. You need that perfect balance for your Mini Tiramisu Cups!
Layered Aesthetics: For a stunning presentation, try arranging ladyfingers in a circular pattern at the bottom of the cups, creating visual interest.
Chill Time: Don’t rush the chilling process; let your Mini Tiramisu Cups set overnight in the fridge for the best flavor and texture.
Cocoa Alternatives: For a chocolatey twist, consider using a blend of cocoa powder and chocolate shavings for the topping. It enhances indulgence without complicating the recipe!
Mini Tiramisu Cups Recipe FAQs
What type of coffee should I use for the Mini Tiramisu Cups?
Absolutely! For the best flavor, I recommend using a strong brewed coffee like espresso or a rich Arabica blend. If you're a decaf lover, feel free to use decaffeinated coffee! This ensures the essence of Italy infuses beautifully into your dessert.
How long can I store Mini Tiramisu Cups in the fridge?
You can keep your Mini Tiramisu Cups fresh for up to 3 days when stored in the fridge. Just cover them tightly with plastic wrap to preserve their creaminess and prevent any fridge odors from sneaking in.
Can I freeze Mini Tiramisu Cups, and how do I do it?
Very! To freeze, place your Mini Tiramisu Cups in an airtight container, ensuring they're well-covered. They can be frozen for up to 1 month. When you're ready to enjoy, simply move them to the fridge and let them thaw overnight. This way, you maintain that heavenly texture!
What should I do if my cream mixture doesn't whip up?
If your mascarpone cream isn't whipping properly, try these steps: Make sure your mascarpone cheese is at room temperature; cold cream often won't whip well. Also, check if your heavy cream is fresh; expired cream may lack the ability to whip up effectively. If all else fails, I'd recommend whipping the heavy cream separately until soft peaks form, then gently folding it into the mascarpone mixture.
Are there any dietary considerations for Mini Tiramisu Cups?
When it comes to allergies, keep in mind that this recipe contains dairy from mascarpone and cream, as well as gluten from ladyfingers, which may not be suitable for everyone. For gluten-free alternatives, I often suggest using gluten-free ladyfingers or sponge cake. If you're looking for a lighter option, you can substitute a dairy-free cream alternative. Just be sure to check the labels for any specific allergens!
Can I customize the flavors in my Mini Tiramisu Cups?
Absolutely! The more the merrier when it comes to flavors. Feel free to swap the vanilla extract for almond or hazelnut extract for a delightful twist. You can also try adding a layer of chocolate pudding or fruit puree between the cream and ladyfingers for a fun twist on this classic dessert!
Mini Tiramisu Cups: A Delightful Twist on Classic Flavor
Ingredients
Equipment
Method
- In a mixing bowl, blend together the mascarpone cheese, heavy cream, powdered sugar, and vanilla extract until smooth and creamy.
- Dip the ladyfingers briefly into the brewed coffee, ensuring they soak just enough without getting soggy.
- Layer the soaked ladyfingers at the bottom of each cup to form a solid base.
- Spoon a layer of the mascarpone cream mixture over the ladyfingers.
- Repeat the layering process with remaining ladyfingers and cream.
- Dust cocoa powder over the top of each cup using a fine sieve.
- Cover the cups and place them in the refrigerator to chill for at least 4 hours or overnight.


Leave a Reply