
As I stood in my kitchen, the rich, chocolaty aroma surrounded me like a warm hug, instantly transporting me to cozy autumn evenings filled with laughter and festivities. Today, I’m excited to share my delightful Mummy Brownies, a spooky delight that’s perfect for Halloween or any occasion that calls for a bit of fun in the kitchen. Not only are these brownies quick to whip up—with just a 15-minute prep time—but they also promise to be a hit with both kids and adults alike. With their fudgy texture and playful icing decorations, these treats are a healthier alternative to store-bought sweets, ensuring everyone can indulge guilt-free. Are you ready to bring a little magic to your baking? Let’s dive into the deliciously sweet world of Mummy Brownies!
What makes Mummy Brownies so special?
Unmatched simplicity: This recipe is straightforward, requiring just a few ingredients and minimal effort, making it perfect for both novice bakers and seasoned pros.
Decadent texture: With a fudgy base that melts in your mouth, these brownies are sure to impress. Each bite offers a rich chocolate experience that’s hard to resist.
Fun and festive: The playful mummy decoration is great for Halloween or any gathering, making it a favorite among kids and adults alike! Consider pairing them with chocolate chip muffins for a sweet dessert spread.
Time-efficient: Ready in just 45 minutes, you can whip up these delightful treats even on a busy day.
Healthier indulgence: Made with simple, wholesome ingredients, these brownies provide a guilt-free way to satisfy your sweet tooth compared to typical store-bought options.
Mummy Brownies Ingredients
Get ready to bake up some magic with these Mummy Brownies!
For the Brownie Base
- Unsweetened cocoa powder – adds rich chocolate flavor and depth to the brownies.
- Granulated sugar – balances the cocoa’s bitterness, creating sweetness.
- All-purpose flour – provides structure and helps achieve a fudgy texture.
- Large eggs – bind the ingredients together and enrich the brownies.
- Unsalted butter (melted) – creates a moist base; use coconut oil for a dairy-free option.
For the Decoration
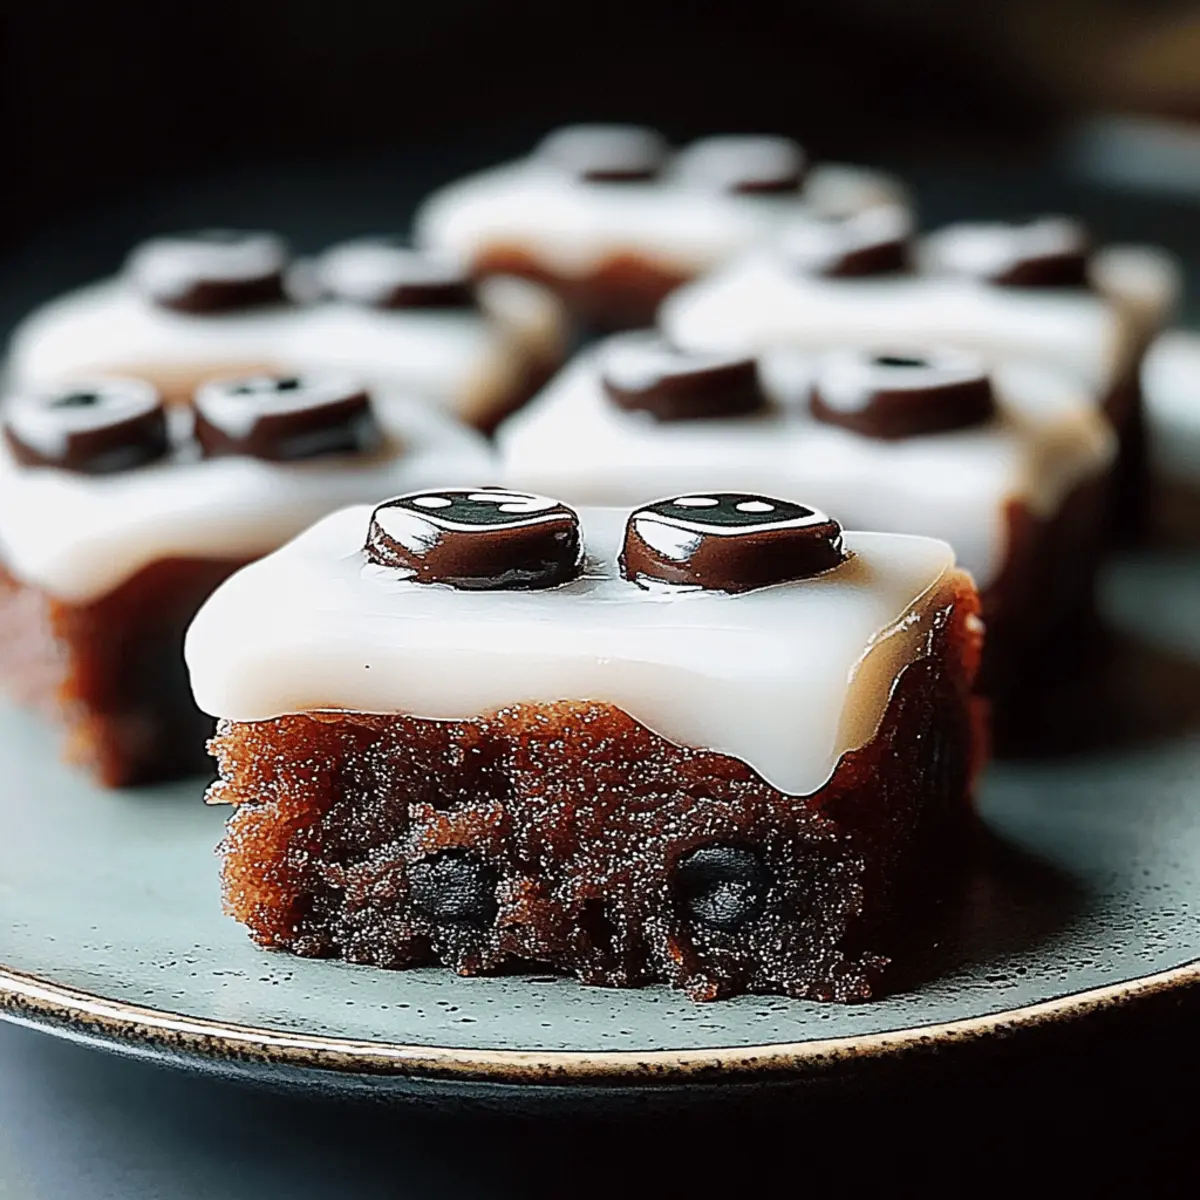
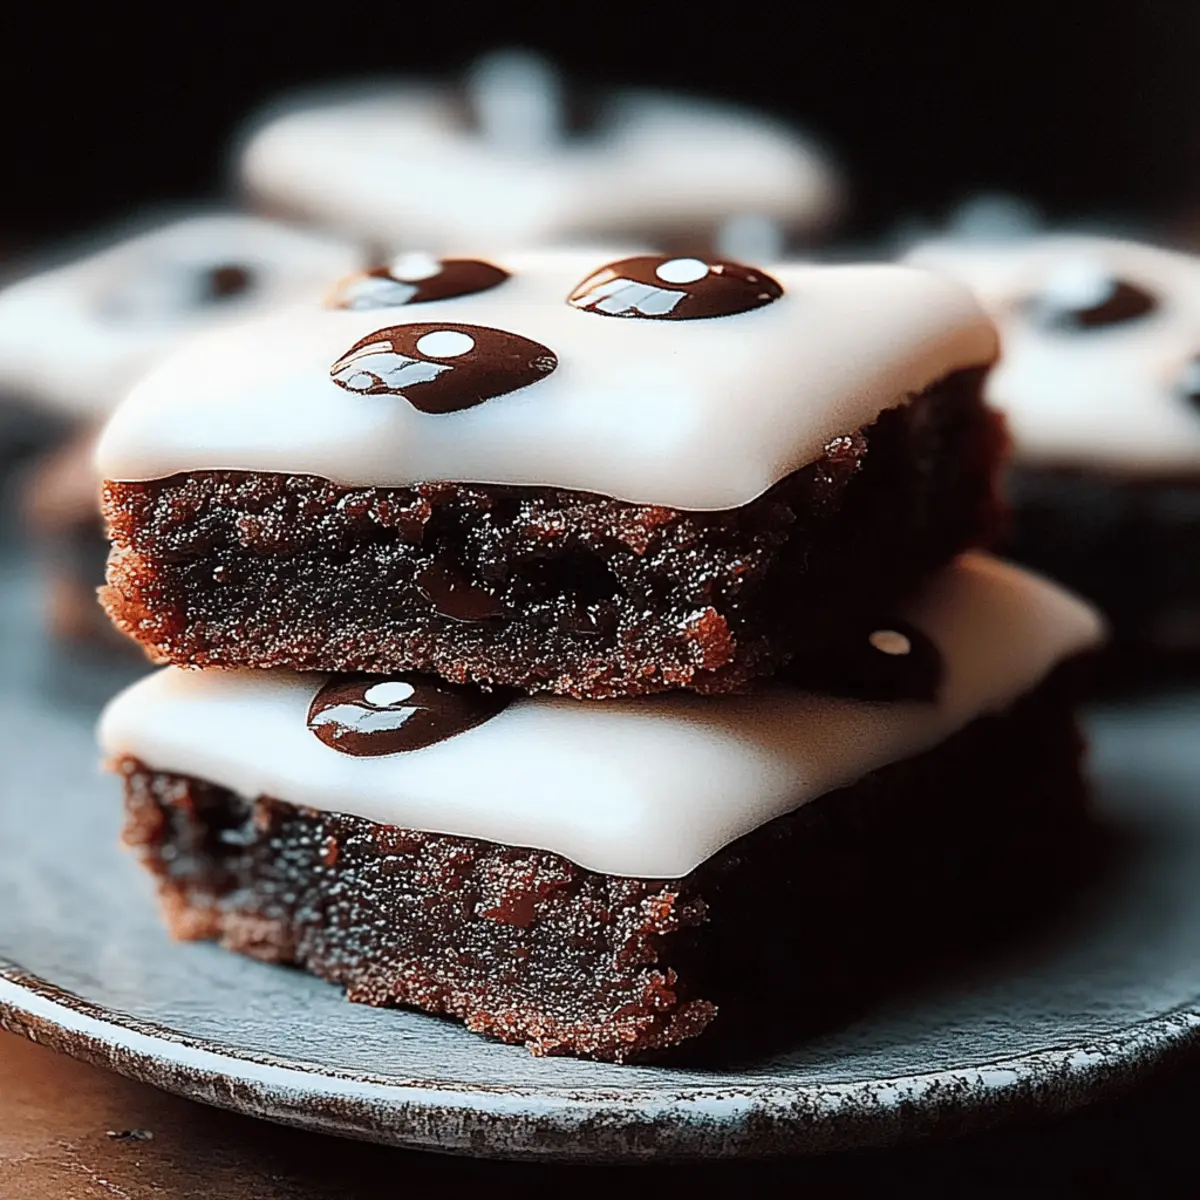
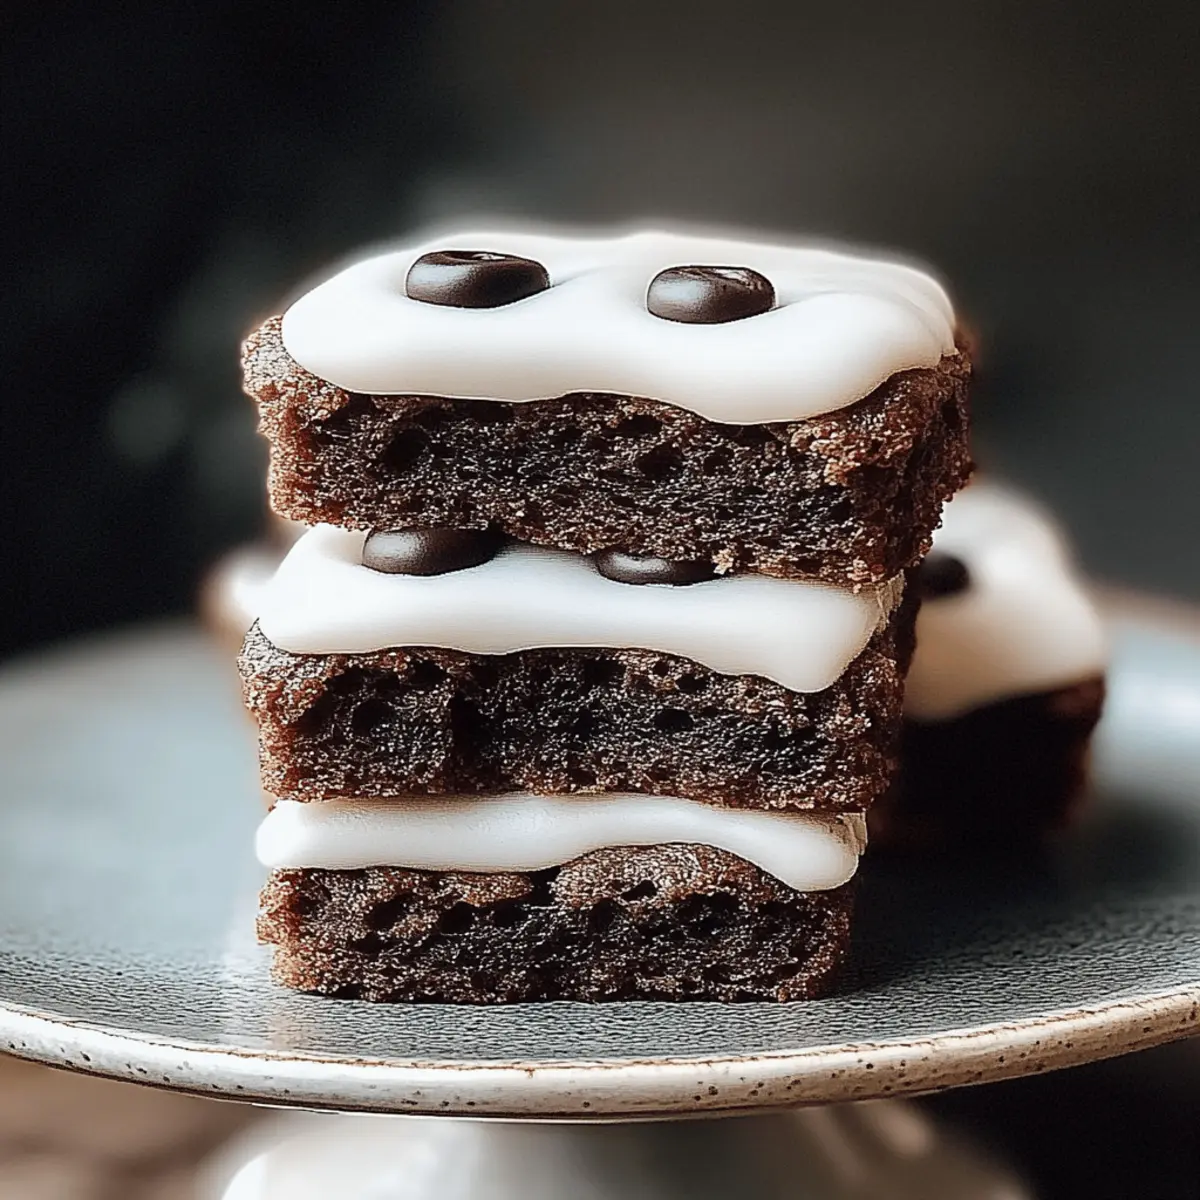
- White icing – perfect for creating the mummy wrapping effect; can use cream cheese frosting for an extra kick.
- Candy eyes – these fun little treats add character and charm, making them irresistible!
Whip together these Mummy Brownies ingredients, and soon, you'll have a plateful of spooky delights that are not only delicious but also bring a smile to every face!
Step‑by‑Step Instructions for Mummy Brownies
Step 1: Preheat the Oven
Begin by preheating your oven to 350°F (175°C). While the oven is warming up, grab a baking pan, and either grease it with butter or line it with parchment paper for easy removal. This preparation will ensure that your Mummy Brownies bake evenly and come out perfectly fudgy.
Step 2: Mix the Dry Ingredients
In a large mixing bowl, whisk together 1 cup of unsweetened cocoa powder, 1 cup of granulated sugar, 1 cup of all-purpose flour, and a pinch of salt. Keep whisking until the mixture is smooth and well-blended, allowing the cocoa and sugar to infuse throughout the flour. The rich chocolate aroma will begin to fill your kitchen.
Step 3: Prepare the Wet Mixture
Next, melt ½ cup of unsalted butter in a microwave-safe bowl or on the stovetop until it’s completely liquid. Allow it to cool slightly, then add in 2 large eggs. Whisk the eggs and butter together until the mixture is smooth and creamy. This step ensures your Mummy Brownies will be rich and moist.
Step 4: Combine Wet and Dry Ingredients
Carefully pour the wet mixture into the bowl of dry ingredients. Use a spatula or wooden spoon to gently fold the mixtures together until just combined. Be cautious not to over-mix; you want to maintain that fudgy texture that makes Mummy Brownies so delightful.
Step 5: Bake the Brownies
Spread the brownie batter evenly into the prepared baking pan, smoothing out the top with a spatula. Place the pan in the preheated oven and bake for 25–30 minutes. Check for doneness by inserting a toothpick; it should come out with a few moist crumbs attached, indicating you've achieved that perfect fudginess.
Step 6: Cool and Decorate
Once baked, remove the Mummy Brownies from the oven and allow them to cool in the pan for about 10 minutes. After cooling, transfer them to a wire rack to cool completely. Once cooled, cut them into squares and get creative with the white icing—drizzle it in zigzag patterns to mimic mummy wrappings, then add candy eyes to make them extra fun.

Mummy Brownies Variations & Substitutions
Feel free to get creative and personalize your Mummy Brownies to suit your taste and dietary needs!
-
Nutty Twist: Add ½ cup of chopped nuts like walnuts or pecans to the batter for added crunch and flavor.
Mixing in nuts brings a delightful texture that plays with the fudginess, making each bite even more interesting! -
Dairy-Free: Substitute the unsalted butter with coconut oil or vegan butter for a dairy-free version.
This swap maintains that rich flavor while ensuring everyone can join in the fun! -
Gluten-Free: Use a 1-to-1 gluten-free flour blend in place of all-purpose flour.
You’ll still enjoy the same fudgy texture, making these brownies accessible for gluten-sensitive friends! -
Spicy Kick: Add a teaspoon of cayenne pepper to the batter for a surprising heat that contrasts beautifully with the chocolate.
A subtle warmth can elevate the flavors, making these brownies a unique treat at your next gathering! -
Minty Fresh: Incorporate 1 teaspoon of peppermint extract into the batter for a refreshing twist.
Pairing chocolate with mint will have everyone wondering what your secret ingredient is! -
Caramel Delight: Swirl in some caramel sauce before baking for a gooey surprise.
This mouthwatering addition brings a sweet and salty flavor profile that is utterly enchanting! -
Cake-Like Texture: For a cake-like brownie, add an extra egg to the recipe.
This alters the consistency, offering a lighter, airy texture while still keeping the chocolatey goodness intact. -
Fruity Flavor: Fold in ½ cup of mashed bananas or applesauce for natural sweetness.
These fruits will add moisture and a bit of extra nutrition, creating a more wholesome treat.
Add these variations and substitutions to your Mummy Brownies for a delightful twist that keeps them exciting and tailored to your preferences! For some fun, consider serving them alongside chocolate chip muffins for a delightful dessert spread that all ages can enjoy!
How to Store and Freeze Mummy Brownies
Room Temperature: Store the brownies in an airtight container at room temperature for up to 5 days to maintain their fudgy texture and flavor.
Fridge: If you prefer a longer shelf life, place the brownies in the fridge for up to 7 days. Make sure they are sealed tightly to prevent them from drying out.
Freezer: Freeze Mummy Brownies by wrapping them individually in plastic wrap, then placing them in a freezer-safe bag. They can be stored for up to 3 months.
Reheating: To enjoy the brownies after freezing, let them thaw in the fridge overnight, then warm them in the microwave for about 10 seconds for that fresh-baked taste.
Make Ahead Options
These Mummy Brownies are a fantastic make-ahead treat for busy nights! You can prepare the brownie batter up to 24 hours in advance by mixing the dry ingredients and wet ingredients separately, then refrigerating them. Just be sure to cover the bowls tightly to maintain freshness. When you're ready to bake, simply combine the mixtures and spread them into the baking pan. The finished brownies can also be made a day ahead and stored at room temperature in an airtight container. To serve, cool and decorate them with icing just before enjoying, ensuring they remain delightfully moist and fudgy, making your Halloween festivities easier and more delicious!
Expert Tips for Mummy Brownies
-
Don’t Overmix: Stir the wet and dry ingredients just until combined to keep your brownies rich and fudgy. Overmixing can lead to a cakier texture, which we want to avoid in our Mummy Brownies.
-
Check Doneness: Insert a toothpick into the center; it should come out with a few moist crumbs. If it comes out clean, they may be overbaked, compromising the delicious fudgy consistency.
-
Cool Completely: Allow your brownies to cool fully before cutting them. This helps the brownies set properly, making it easier to achieve clean cuts when decorating.
-
Icing Alternatives: If you want an extra flavor boost, try using cream cheese frosting instead of white icing for a rich twist in your Mummy Brownies decoration.
-
Storage Tips: Store your brownies in an airtight container at room temperature for up to five days. This will keep them fresh and fudgy, making them a delightful treat for days to come!
What to Serve with Mummy Brownies
Indulging in these whimsical desserts opens up a world of perfect pairings that will elevate your gathering.
-
Vanilla Ice Cream: A scoop of creamy vanilla ice cream provides a comforting contrast to the rich chocolate brownies, creating a delightful harmony of flavors.
-
Fresh Berries: Juicy strawberries or raspberries add a bright, tart freshness that cuts through the fudginess, refreshing your palate with each bite.
-
Chocolate Milkshake: A thick chocolate milkshake is a nostalgic treat that complements the brownies' cocoa flavor without overshadowing their unique charm.
-
Caramel Sauce: Drizzling warm caramel sauce over the brownies enhances their decadence and adds a buttery sweetness, making each bite absolutely heavenly.
-
Pumpkin Spice Latte: This cozy drink brings warm spices that wonderfully pair with the chocolate, creating an autumnal experience everyone will love.
-
Peanut Butter Cups: For a playful twist, serve these brownies alongside mini peanut butter cups to capture that classic chocolate and peanut butter combo that’s hard to resist.
-
Hot Cocoa: A warm mug of rich hot cocoa wrapped in your hands creates a snug atmosphere, inviting everyone to dive into holiday celebrations together.
Mummy Brownies Recipe FAQs
What type of cocoa powder should I use for Mummy Brownies?
You should use unsweetened cocoa powder for Mummy Brownies. This brings a rich chocolate flavor without additional sweetness. For a deeper taste, consider using Dutch-processed cocoa powder, which can enhance both the color and flavor.
How should I store leftover Mummy Brownies?
Absolutely! Store your Mummy Brownies in an airtight container at room temperature for up to 5 days. This keeps their fudgy texture intact. If you want them to last longer, you can refrigerate them for up to 7 days, but be sure to seal them tightly to avoid drying out.
Can I freeze Mummy Brownies?
Yes, you can freeze Mummy Brownies! Wrap each brownie individually in plastic wrap, then place them in a freezer-safe bag. They can be stored for up to 3 months. When you’re ready to enjoy, just let them thaw in the fridge overnight and warm them in the microwave for about 10 seconds for that fresh-baked experience.
What if my brownies come out too cakey?
Very! If your Mummy Brownies turn out cakey, it’s likely due to overmixing the batter or baking them too long. Be sure to mix the wet and dry ingredients just until combined to keep that fudgy texture. Also, check for doneness a few minutes before the timer goes off; a toothpick should come out with a few moist crumbs, not clean.
Are Mummy Brownies safe for kids with allergies?
It's essential to consider potential allergies. Mummy Brownies contain gluten and dairy, so they’re not suitable for individuals with gluten intolerance or dairy allergies. You can easily make them dairy-free by substituting the butter with coconut oil or a dairy-free butter alternative. Always check ingredient labels for potential allergens if you’re serving them to guests with dietary restrictions.
How can I make my mummy decoration more fun?
Get creative! Besides using white icing, consider adding colored icing for a spooky twist. You can even sprinkle edible glitter or swap in various candy eyes to create unique mummy characters. The more, the merrier in this haunted culinary adventure!
Mummy Brownies: Spooktacular Treats for Your Halloween Bash
Ingredients
Equipment
Method
- Preheat your oven to 350°F (175°C) and grease or line a baking pan.
- In a mixing bowl, whisk together cocoa powder, sugar, flour, and a pinch of salt.
- Melt butter and cool slightly, then whisk in eggs until smooth.
- Pour the wet mixture into the dry ingredients and fold until just combined.
- Spread the batter into the prepared pan and bake for 25-30 minutes.
- Cool in the pan for 10 minutes, then transfer to a wire rack.
- Cut into squares, drizzle with icing, and add candy eyes for decoration.


Leave a Reply