
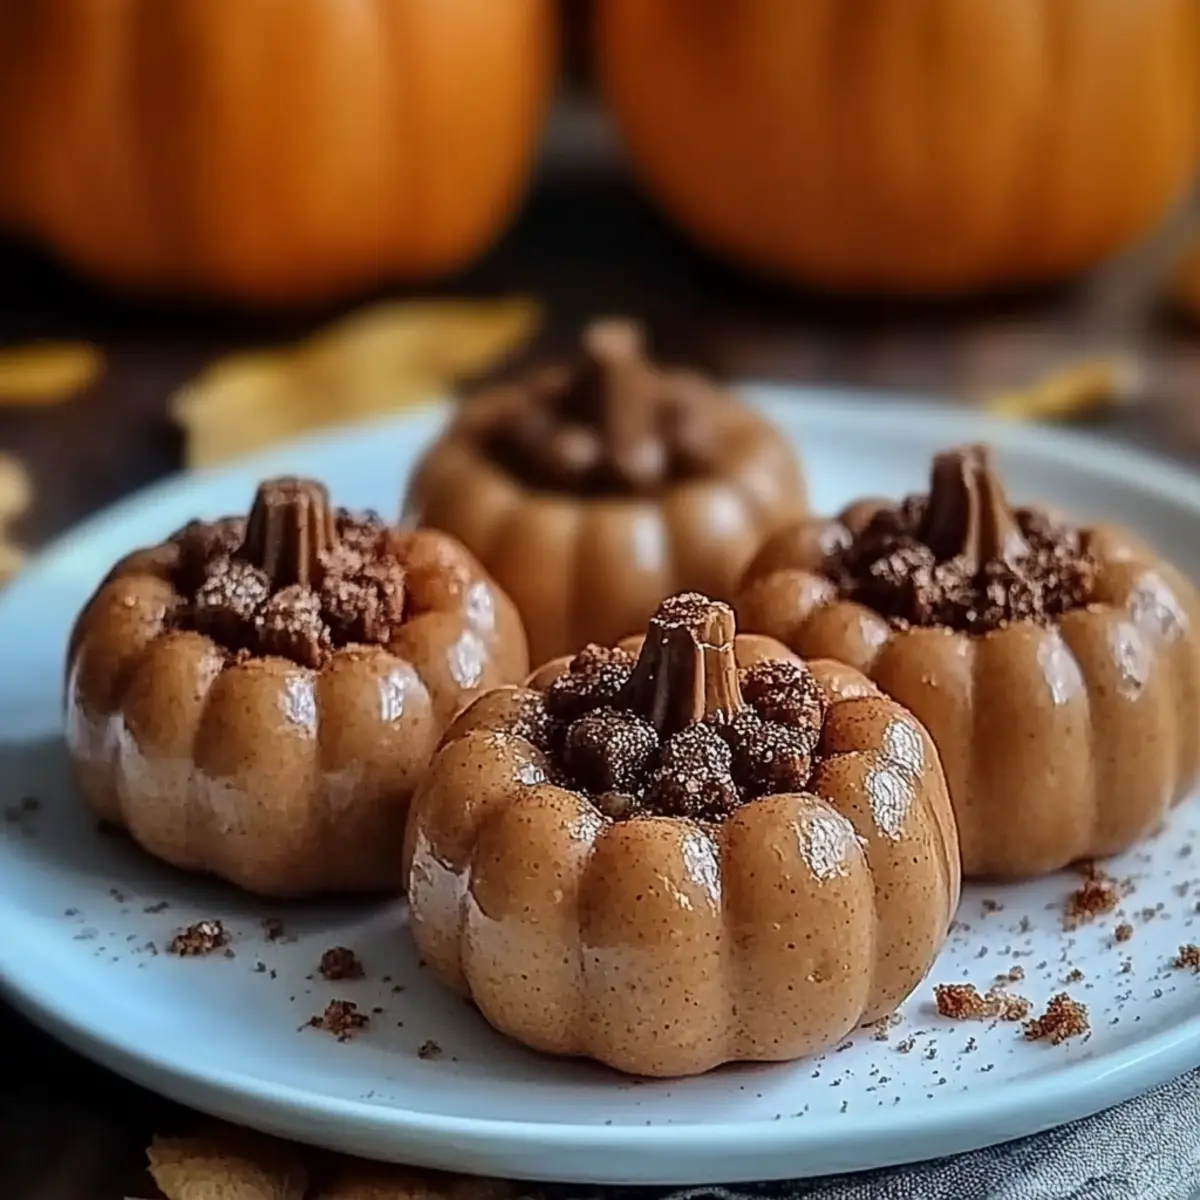
As the crisp autumn air rolls in, I find myself daydreaming about delightful treats that bring a touch of the season into our homes. Enter these adorable Peanut Butter Pumpkins—a fun and festive recipe that effortlessly captures the essence of fall. Not only are they a quick and easy no-bake treat, but they also make for a crowd-pleasing addition to any gathering. With creamy peanut butter at the heart and a vibrant candy coating, these little pumpkins will bring smiles to both kids and adults alike. Plus, they’re perfect for those moments when you need a sweetness fix without all the fuss! Ready to make some adorable treats that are as fun to create as they are to eat? Let’s dive into this delicious recipe!
Why You'll Love These Peanut Butter Pumpkins
Ultimate Festive Fun: These cute Peanut Butter Pumpkins are not only delightful to look at, but they also bring a playful spirit to your fall gatherings.
Simple Steps: With just a few ingredients and no baking required, you’ll whip these up in a snap.
Flavor Explosion: The creamy peanut butter paired with the sweetness of candy melts creates an irresistible flavor combo that’s hard to resist.
Perfect for Sharing: Ideal for parties or as lunchbox treats, everyone will love these tasty little pumpkins—just like our Christmas Gooey Butter cookies!
Customizable Delight: Feel free to add your favorite sprinkles or color variations to make them your own, just like the decadent Salted Caramel Butter bars!
Get ready to brighten up your fall days with these charming treats that everyone is sure to adore!
Peanut Butter Pumpkins Ingredients
Dive into the deliciousness by gathering these simple ingredients!
For the Pumpkin Mixture
• Creamy peanut butter – a smooth base that gives these treats their signature flavor.
• Powdered sugar – sweetens the mix and helps create that perfect consistency.
• Vanilla extract – adds a warm and inviting aroma to the Peanut Butter Pumpkins.
• Crispy rice cereal – provides a delightful crunch that balances the creamy filling.
For the Coating
• Orange candy melts – transform your pumpkins into festive bites with vibrant color.
• Vegetable oil – ensures the candy melts are smooth and easy to coat.
For the Finishing Touches
• Green candy melts – perfect for creating those adorable pumpkin leaves!
• Mini chocolate chips – use for cute eyes, giving your pumpkins personality.
Gather these ingredients, and you're all set to create a charming and delicious fall treat that everyone will love!
Step‑by‑Step Instructions for Peanut Butter Pumpkins
Step 1: Prepare Your Workspace
Begin by clearing and cleaning your kitchen counter to create an organized cooking space. Gather all your ingredients for the Peanut Butter Pumpkins, including a large mixing bowl and a parchment-lined baking sheet. Having everything within reach will help streamline the process and keep it enjoyable.
Step 2: Make the Peanut Butter Mixture
In a large mixing bowl, combine 1 cup of creamy peanut butter, 1 cup of powdered sugar, and 1 teaspoon of vanilla extract. Use a spatula to stir the ingredients together until the mixture becomes smooth and creamy, with no lumps remaining. This should take about 2-3 minutes of steady mixing to achieve the perfect texture.
Step 3: Fold in the Crispy Rice Cereal
Once your peanut butter mixture is smooth, gently fold in 2 cups of crispy rice cereal. Use a spatula to carefully mix until the cereal is completely coated and evenly distributed throughout the peanut butter mixture. This step infuses delightful crunchiness and takes about 1-2 minutes to mix well without crushing the cereal.
Step 4: Shape the Pumpkins
Take small portions of the mixture—aim for about 1-2 inches in diameter—and roll them into round pumpkin shapes with your hands. Place each shaped pumpkin onto the parchment-lined baking sheet as you go. You should yield about a dozen pumpkins, depending on the size, so give yourself about 10-15 minutes for this step.
Step 5: Chill the Pumpkin Shapes
Cover the baking sheet with plastic wrap and place it in the refrigerator. Let the peanut butter pumpkins chill for about 30 minutes, or until they are firm to the touch. This chilling time helps the candies hold their shape during coating, ensuring your adorable treats stay perfectly round.
Step 6: Melt the Orange Candy Coating
While the pumpkins chill, prepare the orange candy coating. In a microwave-safe bowl, combine 1 cup of orange candy melts and 1 tablespoon of vegetable oil. Microwave the mixture in 30-second intervals, stirring in between until it is fully melted and smooth—this should take about 1-2 minutes in total.
Step 7: Coat the Pumpkins
Once your candy melts are ready, take each chilled peanut butter ball and dip it into the melted orange coating. Ensure each pumpkin is fully covered, then gently shake off any excess coating before placing them back on the parchment-lined baking sheet. Repeat this process until all your Peanut Butter Pumpkins are coated in their vibrant orange layer.
Step 8: Add the Finishing Touches
While the orange coating is still wet, add charm to your pumpkins by placing two mini chocolate chips for eyes on each one. For the leaves, melt a bit of green candy melts and use a toothpick to shape tiny leaves atop the pumpkins. This final touch will bring them to life and add that festive spirit.
Step 9: Allow to Set
Once your Peanut Butter Pumpkins are decorated, let them sit at room temperature until the candy coating hardens completely. This usually takes about 15-20 minutes. Be patient, as this ensures your treats will be ready to share and enjoy with friends and family.
Peanut Butter Pumpkins Variations
Feel free to embrace your creativity and customize these treats to suit your taste buds!
-
Nut-Free: Substitute the peanut butter with sunbutter for a delicious nut-free treat that's still creamy and satisfying.
-
Chocolate Twist: Drizzle melted chocolate over the finished pumpkins for an extra layer of indulgence—perfect for chocolate lovers!
-
Spicy Kick: Add a pinch of cayenne pepper or chili powder to the peanut butter mixture for a surprising and delightful heat that balances the sweetness.
-
Vegan Alternative: Use vegan butter and dairy-free candy melts to create a completely plant-based version without sacrificing flavor.
-
Crunchy Texture: Substitute crispy rice cereal with crushed graham crackers or chopped nuts for added crunch and a different flavor profile.
-
Fall Spice: Mix in pumpkin pie spice or cinnamon to the peanut butter mixture for a warm, cozy flavor that will remind you of the holidays.
-
Decorative Sprinkles: Use festive fall-themed sprinkles to coat the pumpkins, adding vibrancy and texture—just like our lovely Chocolate Peanut Butter treats!
-
Mini Pumpkin Versions: Create mini-sized pumpkins by rolling smaller balls for bite-sized snacks that are perfect for party platters, just like our Browned Butter Chai delights!
What to Serve with Peanut Butter Pumpkins
As you delight in these charming Peanut Butter Pumpkins, consider surrounding them with a full array of delicious complements that enhance the flavors and create a festive atmosphere.
-
Creamy Mashed Potatoes: Rich and buttery, they provide a comforting contrast to the sweetness of the pumpkins. Perfect for balancing flavors in a hearty fall meal.
-
Apple Cider: A warm glass of spiced apple cider captures the essence of autumn, making it a cozy drink pairing that everyone will enjoy.
-
Caramel Popcorn: The sweet crunch of caramel popcorn adds a delightful texture contrast, elevating your treat experience with every bite.
-
Harvest Salad: Fresh greens with cranberries and candied pecans offer a refreshing, crisp complement, balancing the rich flavors of your sweets.
-
Pumpkin Spice Latte: Embrace the season with this beloved drink, featuring warm spices that harmonize beautifully with the flavors of your Peanut Butter Pumpkins.
-
Chocolate Chip Cookies: A timeless classic, their chewy texture and sweetness pair wonderfully with the creamy peanut butter, offering nostalgic satisfaction.
Feel free to mix and match these delectable pairings to create your perfect fall gathering!
Storage Tips for Peanut Butter Pumpkins
Fridge: Store your Peanut Butter Pumpkins in an airtight container in the fridge for up to 1 week to keep them fresh and delicious.
Freezer: If you want to prepare them in advance, these treats can be frozen for up to 3 months. Just place them in a freezer-safe container with parchment paper between layers to prevent sticking.
Reheating: There's no need to reheat—but if you'd like to enjoy them with a little warmth, let them sit at room temperature for 10-15 minutes before serving.
Room Temperature: If serving immediately, Peanut Butter Pumpkins can sit out for up to 2 hours, making them perfect for parties and gatherings!
Make Ahead Options
These delightful Peanut Butter Pumpkins are perfect for meal prep enthusiasts! You can prepare the peanut butter mixture and shape the pumpkins up to 24 hours in advance; simply store them covered in the refrigerator. The crispy rice cereal will maintain its crunch, and the flavors will meld beautifully. When you're ready to serve, melt the orange candy coating and dip the chilled pumpkins as instructed. By having this step completed ahead of time, you’ll save yourself precious minutes during busy fall gatherings, ensuring every bite is just as delicious and festive as if they were made fresh!
Expert Tips for Peanut Butter Pumpkins
-
Chill Thoroughly: Ensure your pumpkin shapes chill for the full 30 minutes. This helps the coating adhere better and keeps their shape.
-
Microwave Steps: When melting candy melts, always microwave in short intervals and stir in between to avoid burning.
-
Shape Uniformly: Aim for similar-sized pumpkin balls for even coating and consistent results. A scoop can help with measurement.
-
Add Personal Touches: Feel free to customize your Peanut Butter Pumpkins with different colors or decorations. Use your creativity!
-
Storage Tips: Store any leftovers in an airtight container in the fridge for up to a week, keeping them fresh and delicious.
Peanut Butter Pumpkins Recipe FAQs
What type of peanut butter is best for Peanut Butter Pumpkins?
Absolutely! For this recipe, I recommend using creamy peanut butter for a smooth and consistent texture. Crunchy peanut butter can also work, but it may alter the shape and make the pumpkins difficult to coat.
How long can I store my Peanut Butter Pumpkins in the fridge?
You can store your Peanut Butter Pumpkins in an airtight container in the fridge for up to 1 week. Just make sure they stay cool to maintain their delightful texture and flavor!
Can I freeze Peanut Butter Pumpkins?
Very! You can freeze these adorable treats for up to 3 months. To do this, place them in a freezer-safe container, ensuring you add parchment paper between layers to prevent sticking. When you're ready to enjoy them, let them thaw in the fridge for a few hours or at room temperature for about 30 minutes.
What if my candy melts aren't smooth?
In case your candy melts turn out lumpy or clumpy, don’t panic! Simply return them to the microwave in 10-second intervals, stirring in between until smooth again. Adding a teaspoon of vegetable oil can also help achieve a smoother consistency.
Are these Peanut Butter Pumpkins safe for kids with allergies?
It's essential to check allergy information! While these treats are nut-based and may not be suitable for those with peanut allergies, you can use sun butter or almond butter as alternatives for a nut-free version. Just remember to avoid any additional allergenic garnishes when decorating.
Do Peanut Butter Pumpkins need to be refrigerated after coating?
Yes, it’s best to let the coated Peanut Butter Pumpkins set at room temperature until firm, which takes about 15-20 minutes. However, if you're not serving them immediately, store them in the fridge to keep that candy coating fresh and delicious.
Delicious Peanut Butter Pumpkins for Fall Sweet Treats
Ingredients
Equipment
Method
- Prepare your workspace by cleaning the counter and gathering all ingredients.
- In a bowl, combine the peanut butter, powdered sugar, and vanilla extract until smooth.
- Fold in the crispy rice cereal until evenly coated.
- Roll the mixture into 1-2 inch balls and place on the baking sheet.
- Chill in the refrigerator for 30 minutes.
- Melt the orange candy melts with vegetable oil in the microwave.
- Dip each pumpkin into the melted orange coating, shaking off excess.
- Add mini chocolate chips for eyes and melted green candy melts for leaves.
- Allow to set at room temperature for 15-20 minutes.


Leave a Reply