
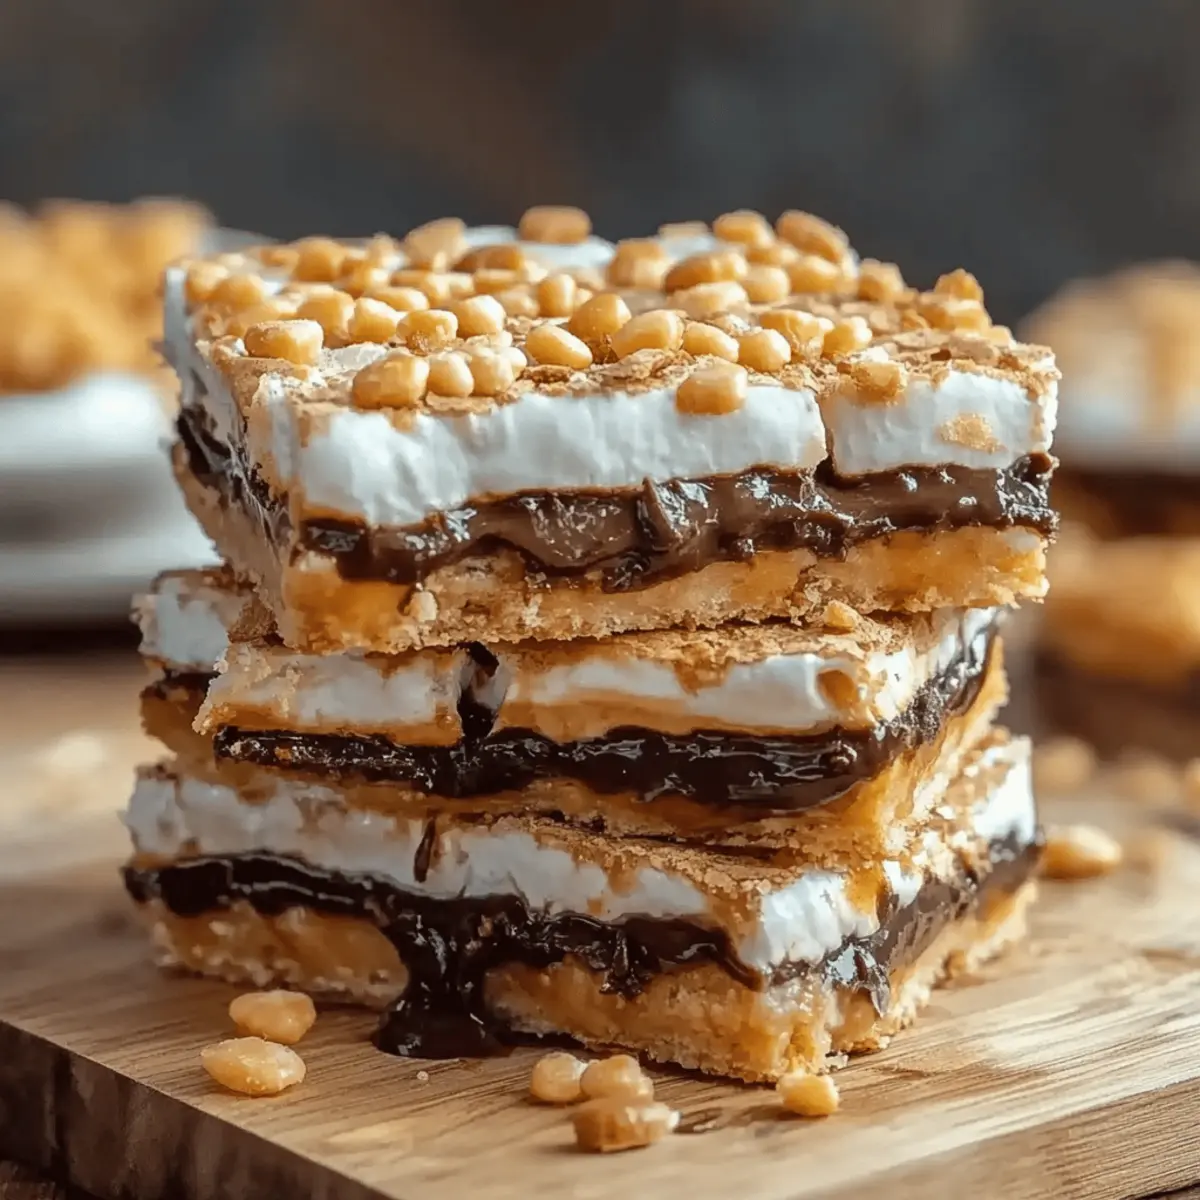
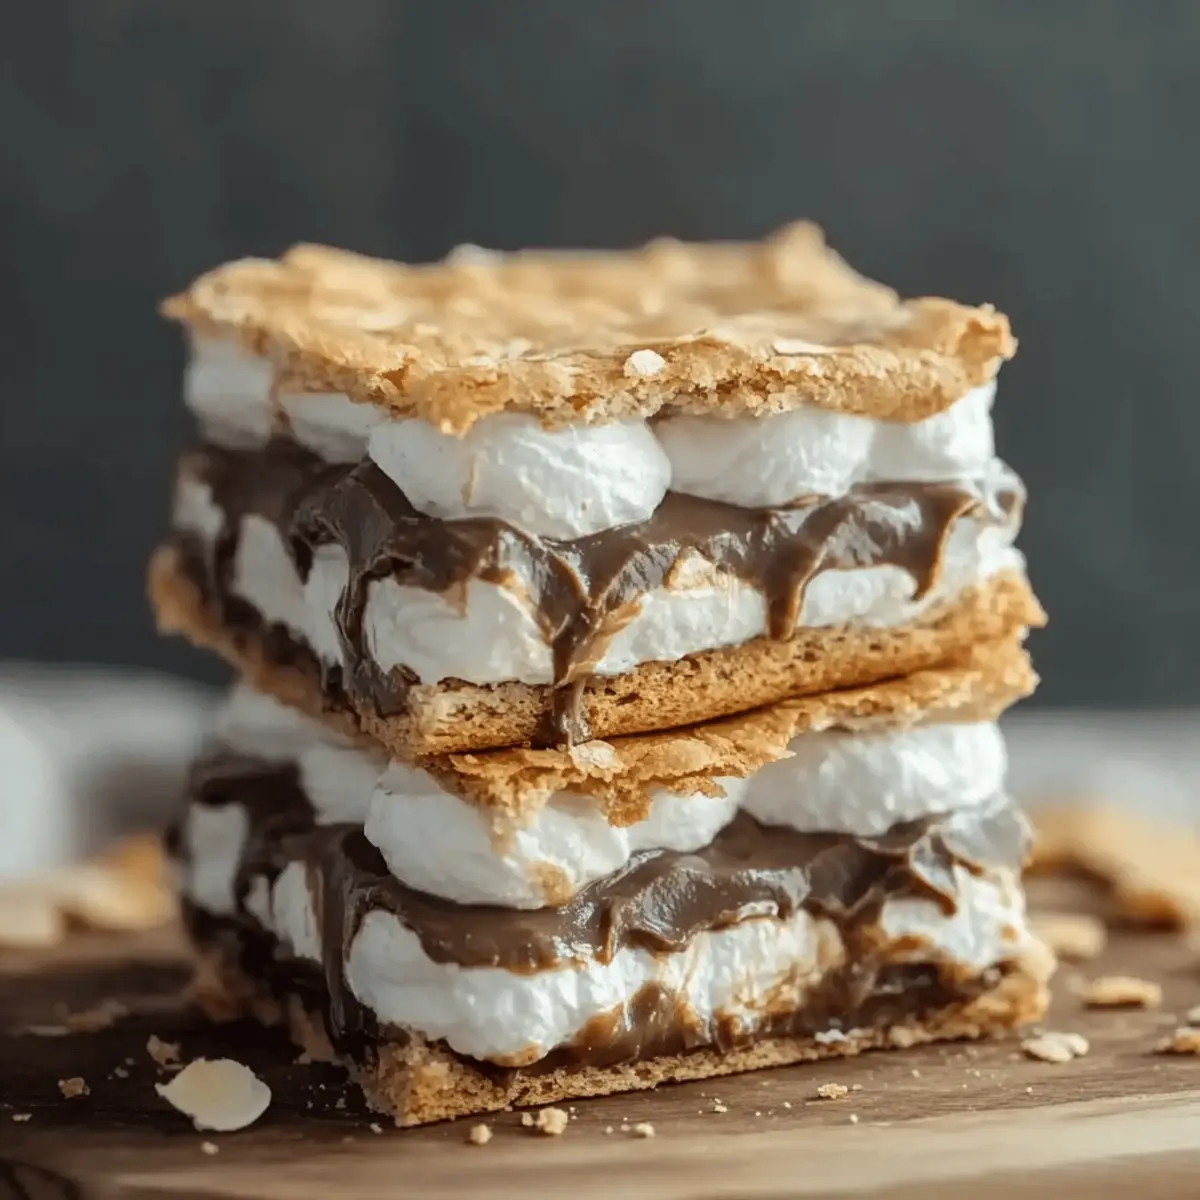
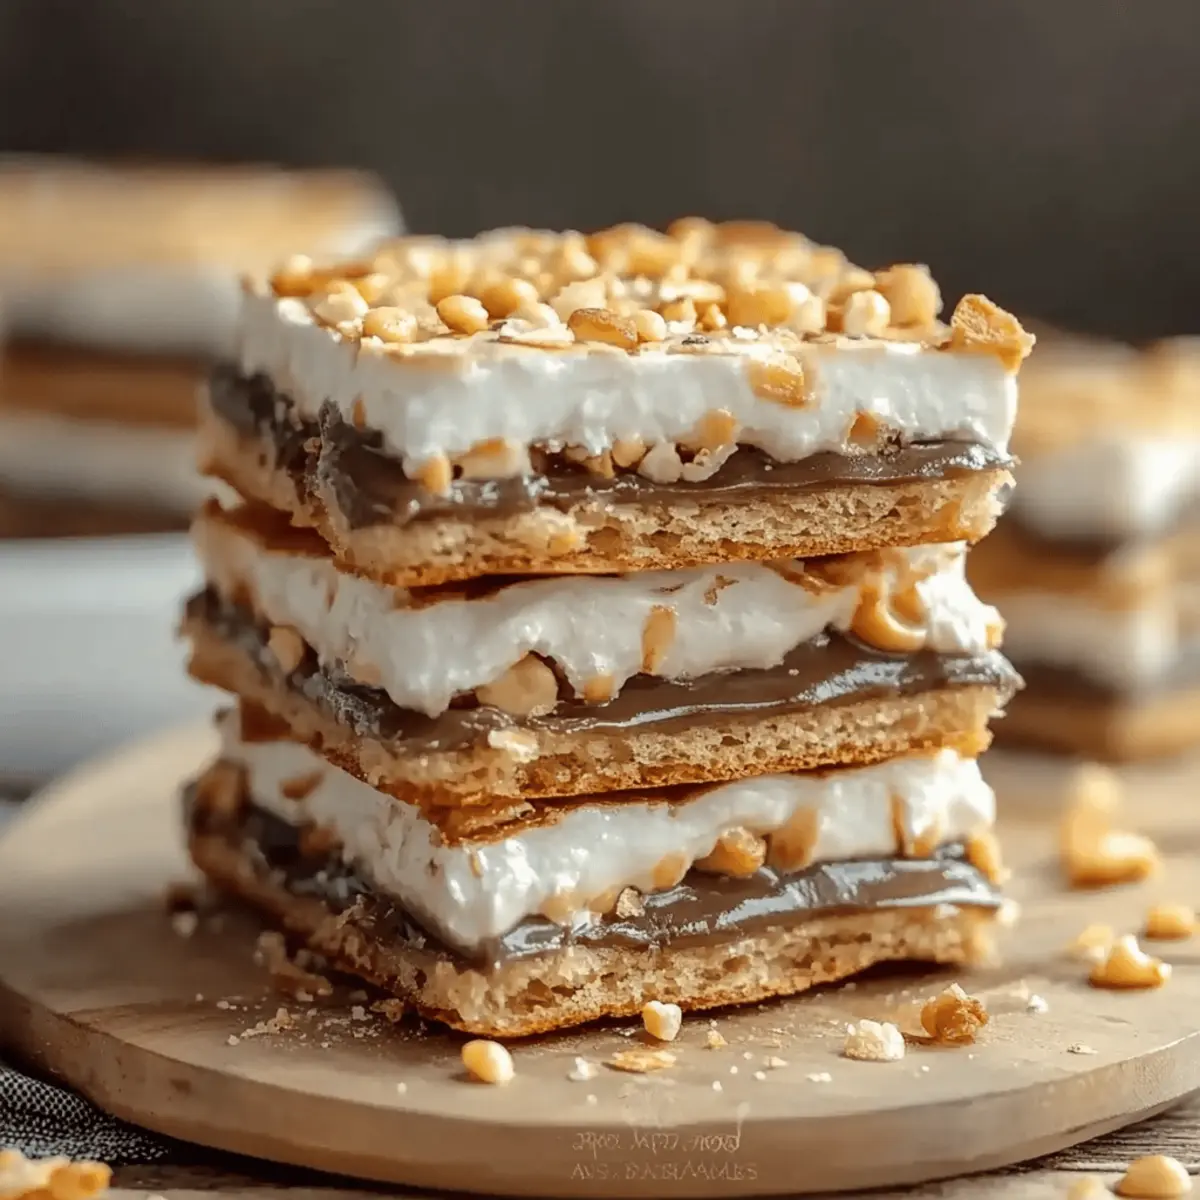
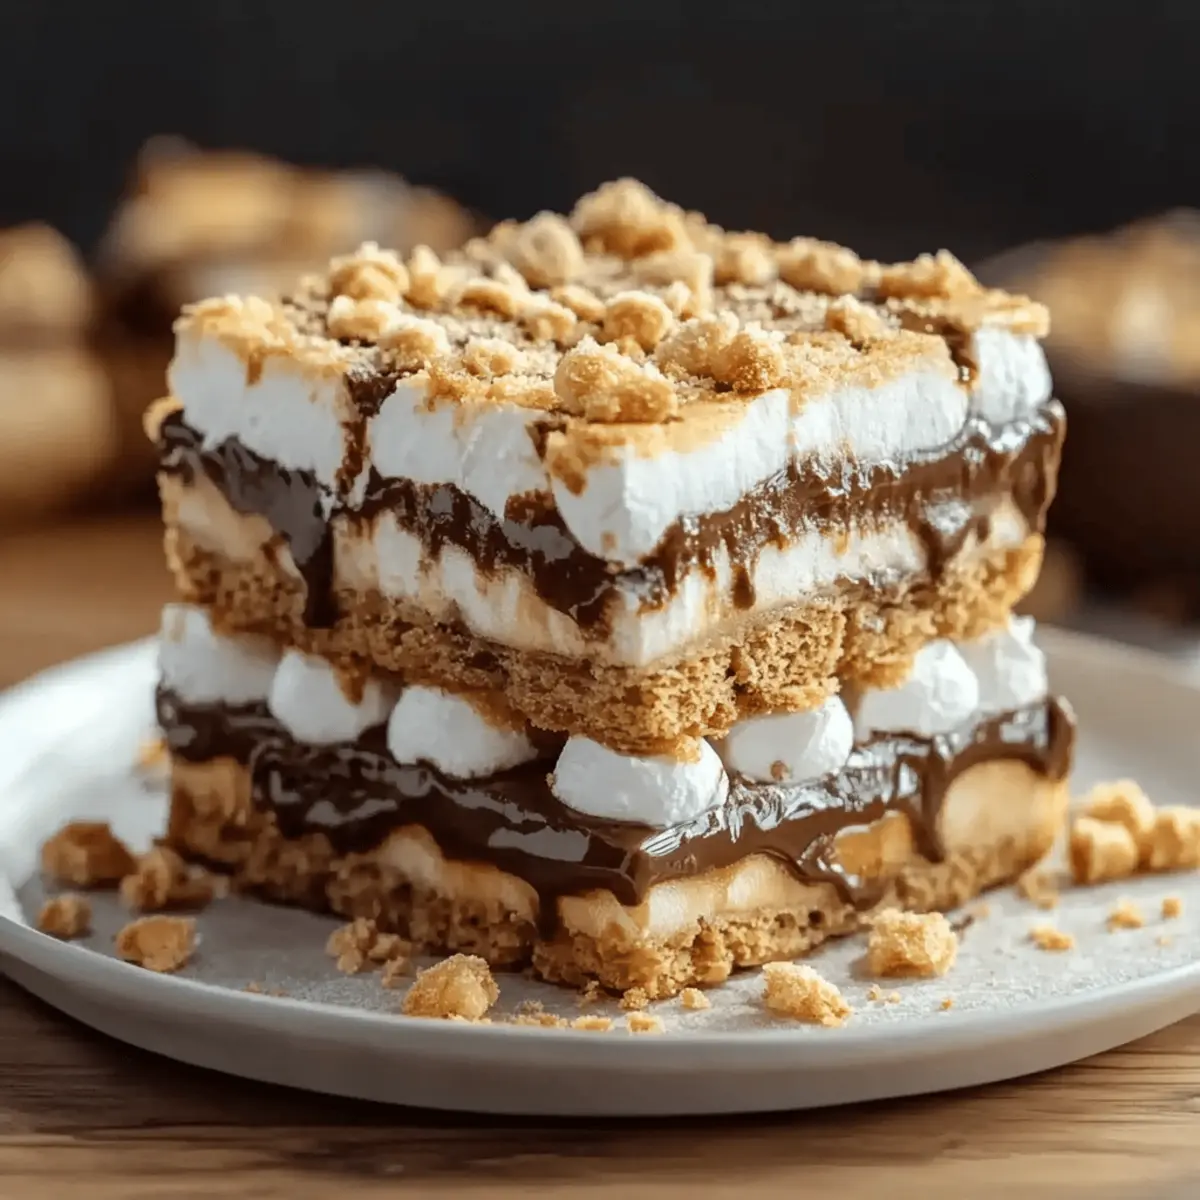
As I shuffled through my pantry, a bag of graham cracker crumbs caught my eye, and instantly, a wave of nostalgia hit me—it was time to recreate those magical summer nights spent around the campfire. Today, I’m excited to share my take on S’mores Bars, a delight that brings that iconic flavor into a quick, satisfying treat. These bars are not only easy to whip up—perfect for bustling weeknights—but they also deliver a chewy, gooey goodness that everyone loves. Imagine biting into layers of buttery graham crust, melted chocolate, and toasted marshmallows, all neatly packed into your favorite baking pan. Do you have your apron ready? Let’s dive into this sweet adventure together!
Why Are S’mores Bars So Irresistible?
Gooey Perfection: Each bite offers a heavenly blend of melting chocolate and toasted marshmallows, reminiscent of classic campfire treats.
Quick and Easy: With just a few simple ingredients and minimal prep, you'll have these delicious bars ready in no time—perfect for busy evenings.
Crowd-Pleasing Treat: Whether you're hosting a party or craving something sweet, these S’mores Bars are sure to be a hit with family and friends.
Versatile Indulgence: Feel free to experiment by adding nuts, caramel, or even peanut butter for a unique twist that caters to your taste.
Make Ahead Convenience: Bake a batch, refrigerate, and enjoy them throughout the week—just slice and serve for an easy dessert anytime!
S’mores Bars Ingredients
For the Crust
- Graham cracker crumbs – a classic base that provides that iconic flavor and texture.
- Powdered sugar – adds sweetness and helps bind the crust together without grittiness.
- Butter, melted – provides richness and moisture; be sure to mix in gradually to avoid sogginess.
For the Filling
- Hershey bars – the rich chocolate layer that creates that mouthwatering S’mores experience.
- Mini marshmallows – these create the gooey, melty topping that’s essential for your S’mores Bars.
With these delightful ingredients ready, you're just a few steps away from a heavenly treat that will transport you to those cherished summer nights!
Step‑by‑Step Instructions for S’mores Bars
Step 1: Preheat the Oven
Begin by preheating your oven to 350°F (175°C). This step ensures that your S’mores Bars will bake evenly. As the oven warms up, gather your baking tools: a 9×13-inch pan, mixing bowl, and spatula to prepare for mixing your delightful ingredients.
Step 2: Prepare the Crust Mixture
In a spacious mixing bowl, combine the graham cracker crumbs with the powdered sugar. Gradually drizzle in the melted butter while stirring the mixture to coat evenly. The goal is a crumbly yet cohesive texture that holds together when pressed. This delightful crust is the foundation of your S’mores Bars.
Step 3: Press the Crust into the Pan
Once the crust mixture is well combined, transfer it to your greased baking pan. Using your fingers or the back of a spatula, firmly press the mixture into the bottom of the pan, ensuring an even layer. This step shouldn't take long—press until compacted, forming a solid base for your delicious bars.
Step 4: Bake the Crust
Place the pan in the preheated oven and bake the crust for 5–8 minutes. You’re looking for the edges to turn golden brown, which signals that the crust is ready. The warm oven will bring out the buttery aroma of the graham cracker base—so inviting!
Step 5: Layer the Chocolate
After baking, remove the crust and immediately lay the Hershey bars on top, covering the surface completely. Return the pan to the oven for about 3 minutes, allowing the chocolate to soften. You’ll know it’s ready when the bars start to glisten—just perfect for the next layer!
Step 6: Add Marshmallows
Once the chocolate has softened, let it sit for 1–2 minutes to make it easier to work with. Evenly disperse the mini marshmallows across the chocolate layer, gently pressing them down. This will create that gooey topping that makes S’mores Bars irresistibly delicious.
Step 7: Broil the Marshmallows
Switch your oven to broil and return the pan to the oven for 1–2 minutes. Keep a close watch during this time, as the marshmallows will quickly turn golden brown—creating a beautifully toasted top. Remove the pan as soon as you achieve that perfect color!
Step 8: Cool and Slice
Allow the S’mores Bars to cool completely at room temperature. For the cleanest cuts, refrigerate them for a bit before slicing. When ready to serve, use a sharp knife warmed under hot water to slice through the layers smoothly, ensuring each piece is beautifully arranged for your guests.
Make Ahead Options
These S’mores Bars are perfect for busy home cooks looking to simplify meal planning! You can prepare the crust up to 24 hours in advance by mixing the graham cracker crumbs, powdered sugar, and melted butter, then pressing it into the pan. Simply cover the pan with plastic wrap and refrigerate it to maintain freshness. Additionally, you can layer in the chocolate and marshmallows up to 3 days ahead; just broil them right before serving for that golden brown finish. When you're ready to enjoy, allow the bars to cool, slice them, and serve for that gooey, delicious treat everyone will love!
S’mores Bars: Delicious Twists and Swaps
Feel free to make this S’mores Bars recipe your own with delightful twists that excite your taste buds!
- Gluten-Free: Substitute graham cracker crumbs with gluten-free alternatives made from almond or rice flour to maintain the delicious flavor.
- Nutty Crunch: Add 1 cup of chopped walnuts or pecans into the crust for an extra layer of texture and flavor that everyone will love!
- Caramel Drizzle: Drizzle warmed caramel sauce over the melted chocolate before adding marshmallows for a decadent twist that elevates the sweetness.
- Peanut Butter Love: Swirl in a few spoonfuls of creamy peanut butter into the chocolate layer for a delightful salty-sweet combination that will have you coming back for seconds.
- Spicy Kick: Sprinkle a pinch of cayenne pepper into the crust for a subtle heat that complements the sweetness beautifully. Just a little will do the trick!
- Chocolate Variety: Experiment with different chocolate varieties—like dark or milk chocolate—or even flavored chocolate bars for an exciting new flavor experience.
- Vegan Version: Swap out butter for coconut oil and use dairy-free chocolate and marshmallows to create a vegan-friendly treat everyone can enjoy.
- Frozen Delight: Transform your S’mores Bars into a frozen treat by layering the ingredients in a freezer-safe dish and freezing them for a cool, summer indulgence.
These variations not only offer a personalized touch but also enhance the joy of sharing sweet moments with loved ones. Consider matching your S’mores Bars with a scoop of creamy vanilla ice cream or serving them alongside a cup of rich hot cocoa for the ultimate cozy experience! Check out our delicious Warm Chocolate Lava Cake for another decadent dessert option that pairs beautifully with these bars!
How to Store and Freeze S’mores Bars
Fridge: Store your S’mores Bars in an airtight container in the refrigerator for up to 5 days to maintain freshness and texture.
Freezer: For longer storage, freeze the bars in a single layer, wrapped tightly in plastic wrap and then aluminum foil, for up to 3 months.
Thawing: To enjoy, thaw them in the fridge overnight before serving, or let them sit at room temperature for about 30 minutes for a softer treat.
Reheating: If you prefer them warm, briefly microwave individual pieces for 10-15 seconds to melt the chocolate and marshmallows slightly.
Tips for the Best S’mores Bars
-
Perfect Crust: Gradually mix melted butter into the graham cracker crumbs and powdered sugar. Adding too much too quickly can lead to a soggy base.
-
Watch the Broil: Stay close while broiling the marshmallows, as they can burn in seconds. Look for that golden brown hue that signifies perfection!
-
Chill Before Slicing: Let the bars cool completely, then refrigerate. This makes cutting into perfect squares easy and keeps the layers intact.
-
Custom Flavor: Want to change it up? Consider adding chopped nuts or a drizzle of caramel for added flavor and texture to your S’mores Bars.
-
Store Properly: Keep any leftovers in an airtight container in the fridge. This way, you’ll have a sweet treat ready whenever cravings hit!
What to Serve with S’mores Bars?
Indulging in sweet, gooey S’mores Bars is an experience best enjoyed with the perfect accompaniments that elevate your dessert game!
-
Creamy Vanilla Ice Cream: The cool creaminess perfectly balances the warm, gooey textures of the bars, creating a delightful contrast. A scoop alongside each piece will amplify your dessert experience.
-
Fresh Fruit Salad: Bright, juicy fruits add a refreshing burst and a healthful touch that balances the sweetness of the bars. Citrus fruits like oranges and berries give that perfect zing!
-
Chocolate Dipped Strawberries: Decadent and romantic, these add an elegant flair to your dessert table, while enhancing the rich chocolate flavor of the S’mores Bars.
-
Rich Hot Chocolate: For the ultimate comfort food pairing, serve a cup of hot chocolate topped with whipped cream; it’s like a cozy hug in a mug on a chilly evening.
-
Caramel Sauce Drizzle: Adding a drizzle of warm caramel sauce elevates the sweetness while offering a luscious texture that complements the chewy bars. Perfect for drizzling on top!
-
Sparkling Water with Lime: A refreshing drink that cleanses the palate between sweet bites, sparkling water enhances flavors without overpowering them. A zesty twist brightens every taste!
-
Nutty Trail Mix: This snack adds a crunchy texture and earthy flavor that contrasts beautifully with the soft and sweet S’mores Bars. Don’t be surprised when folks keep reaching for more!
-
Mini Cheesecakes: Rich and creamy, these little delights offer a different flavor profile to the dessert table, creating a sophisticated blend of flavors that pairs well with S’mores.
These mouthwatering ideas will create a delightful spread, ensuring that every bite of S’mores Bars is paired with the perfect complement!
S’mores Bars Recipe FAQs
What type of graham crackers should I use for S’mores Bars?
Absolutely! Use classic graham crackers for an authentic taste. They should be fresh and crisp; avoid any that have dark spots or are crushed, which can affect the texture of your crust.
How can I store leftover S’mores Bars?
Very easily! Place your S’mores Bars in an airtight container and store them in the refrigerator for up to 5 days. This helps to maintain their freshness and gooey texture. Always let them cool completely before sealing to avoid condensation!
Can I freeze S’mores Bars?
Yes, you can! To freeze, first slice the bars and wrap each piece tightly in plastic wrap. Then, place them in a zip-top freezer bag or an airtight container. They can be frozen for up to 3 months. When you're ready to enjoy, simply thaw them in the refrigerator overnight or at room temperature for about 30 minutes.
What if my marshmallows burn while broiling?
If you notice that your marshmallows are burning, it could be due to having the pan too close to the heating element. To prevent this, keep a close eye during broiling and rotate the pan for even browning. If you find they’re too charred, a next time try lowering the oven rack a notch.
Are S’mores Bars safe for children and pets?
Great question! S’mores Bars are not suitable for pets, particularly dogs, due to chocolate being toxic to them. For children, just ensure that they’re old enough to enjoy the treat safely, as the marshmallows can be sticky and pose a choking hazard. If allergies are a concern, always check for any ingredients that may cause reactions, like chocolate or gluten in the graham crackers.
Can I make S’mores Bars gluten-free?
Absolutely! Simply opt for gluten-free graham cracker crumbs and ensure that all other ingredients are certified gluten-free. This way, you can enjoy the same delightful S’mores Bars while accommodating gluten sensitivities.
Irresistible S’mores Bars: Simple Sweet Treats You’ll Love
Ingredients
Equipment
Method
- Preheat your oven to 350°F (175°C).
- In a spacious mixing bowl, combine graham cracker crumbs with powdered sugar. Gradually drizzle in melted butter while stirring.
- Transfer the crust mixture to your greased baking pan. Press mixture into the bottom to form a solid base.
- Bake the crust for 5–8 minutes until edges are golden brown.
- Remove the crust and immediately lay the Hershey bars on top, covering the surface completely.
- Return the pan to the oven for about 3 minutes to soften the chocolate.
- Disperse mini marshmallows across the chocolate layer and gently press down.
- Switch your oven to broil and broil for 1–2 minutes until marshmallows are golden brown.
- Allow the S’mores Bars to cool completely at room temperature.
- For clean cuts, refrigerate them before slicing.


Leave a Reply