
Last Halloween, I found myself in a delightful dilemma—what could be more fun than a side dish that not only pleases the palate but also sparks joy and creativity at the dinner table? Enter Spooky Skull Potatoes, a playful twist on a classic favorite that will wow both kids and adults alike. This easy-to-make recipe is perfect for those who love homemade comfort food but are looking to add a little seasonal flair. With just a mere 30 minutes of your time, you’ll whip up creamy mashed potatoes shaped into delightful skulls, making it a fantastic crowd-pleaser for any Halloween gathering. Plus, they’re fun to decorate, and you can get the whole family involved! Ready to transform your mealtime with a touch of whimsy? Let’s get cooking!

Why Make Spooky Skull Potatoes?
Creativity in Cooking: This recipe is a fantastic way to unleash your culinary imagination! Shaping mashed potatoes into skulls brings an exciting and festive touch to your meals.
Family Fun: Involve the kids in decorating these spooky delights. They’ll love creating fun faces with black olives!
Quick and Easy: With only 30 minutes required, it’s perfect for busy weeknights or last-minute Halloween gatherings.
Deliciously Creamy: The combination of heavy cream and butter makes for irresistibly smooth and flavorful mashed potatoes.
Versatile Sides: These skulls can be paired with various main dishes, making them an easy addition to any meal. Serve them alongside your favorite protein for a playful, thematic dinner!
Spooky Skull Potatoes Ingredients
• Prepare for a fun kitchen adventure with these delightful ingredients!
For the Mashed Potatoes
- Russet potatoes – A starchy variety that creates the creamiest texture for your skulls.
- Heavy cream – Adds rich creaminess for a luxurious mouthfeel.
- Butter – Provides a silky finish; for a lighter option, use olive oil as a substitution.
- Salt – Enhances the flavors; adjust to your taste for the Spooky Skull Potatoes.
- Pepper – A dash brings in a touch of warmth and depth.
For the Decoration
- Black olives – Great for creating spooky eyes and expressions on your skulls!
- Fresh chives or green onions (optional) – Adds a pop of color and freshness to your Halloween dish.
Now, let’s get those spooky potatoes into your kitchen!
Step‑by‑Step Instructions for Spooky Skull Potatoes
Step 1: Prepare the Potatoes
Start by peeling and chopping the 4 large russet potatoes into even chunks, which will help them cook uniformly. Place them in a pot of salted water, ensuring they are fully submerged. Bring the pot to a rolling boil over medium-high heat and cook the potatoes until they are tender, about 15-20 minutes. You’ll know they’re done when a fork easily pierces them.
Step 2: Mash the Potatoes
Once the potatoes are cooked, drain them well and return them to the pot. Add ½ cup of heavy cream and ¼ cup of melted butter, along with salt and pepper to taste. Using a potato masher, mash the mixture until it reaches a silky smooth consistency. The creamy texture is key to achieving those delightful Spooky Skull Potatoes, so keep mashing until no lumps remain.
Step 3: Shape the Skulls
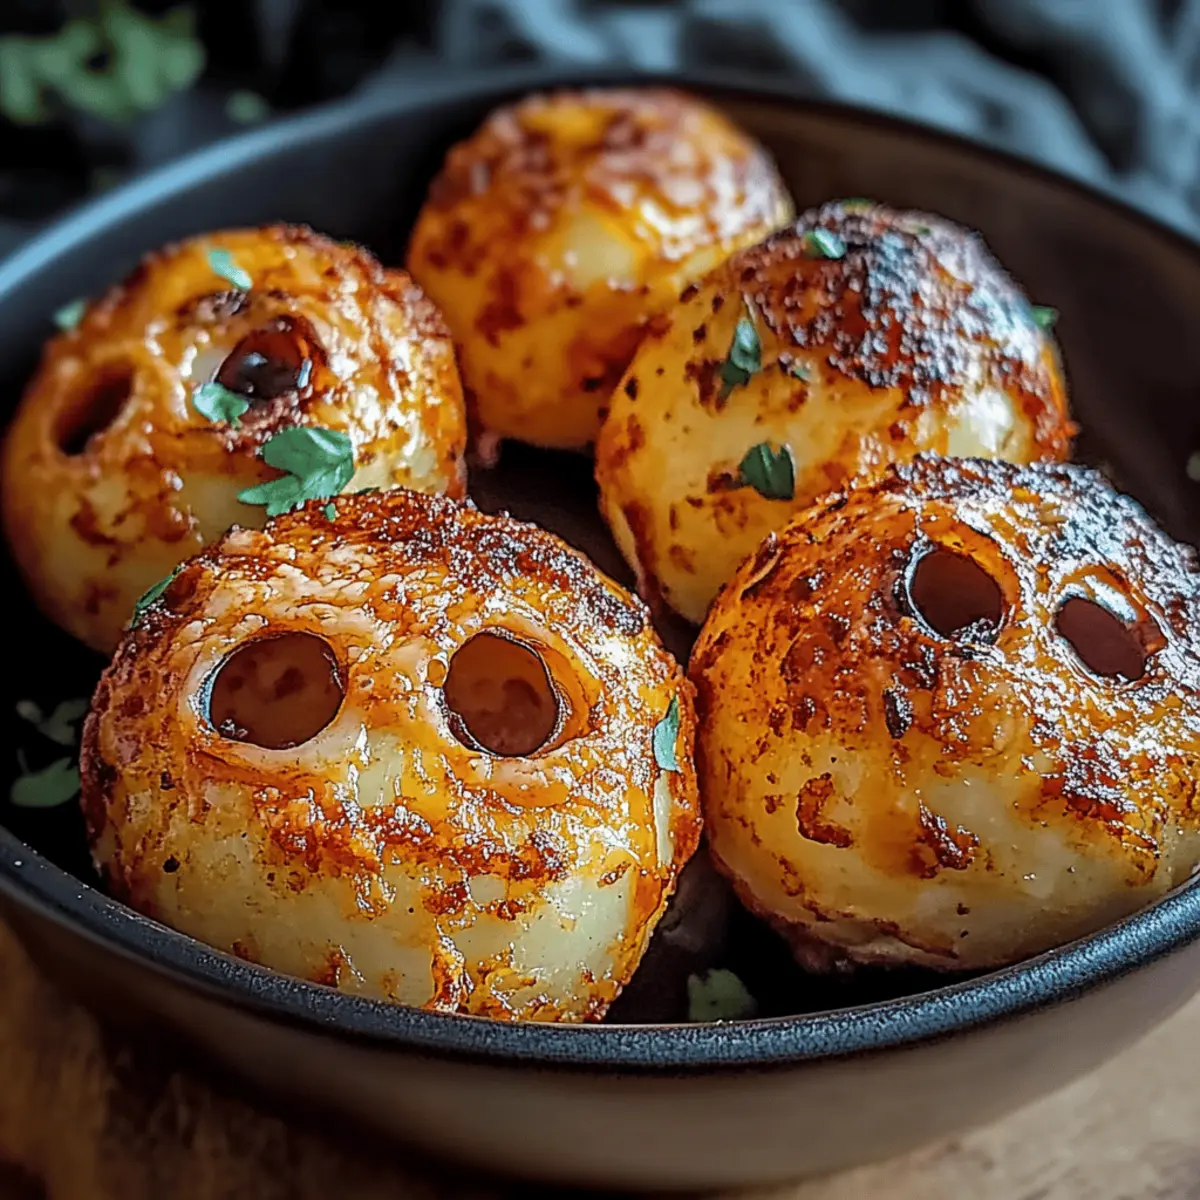
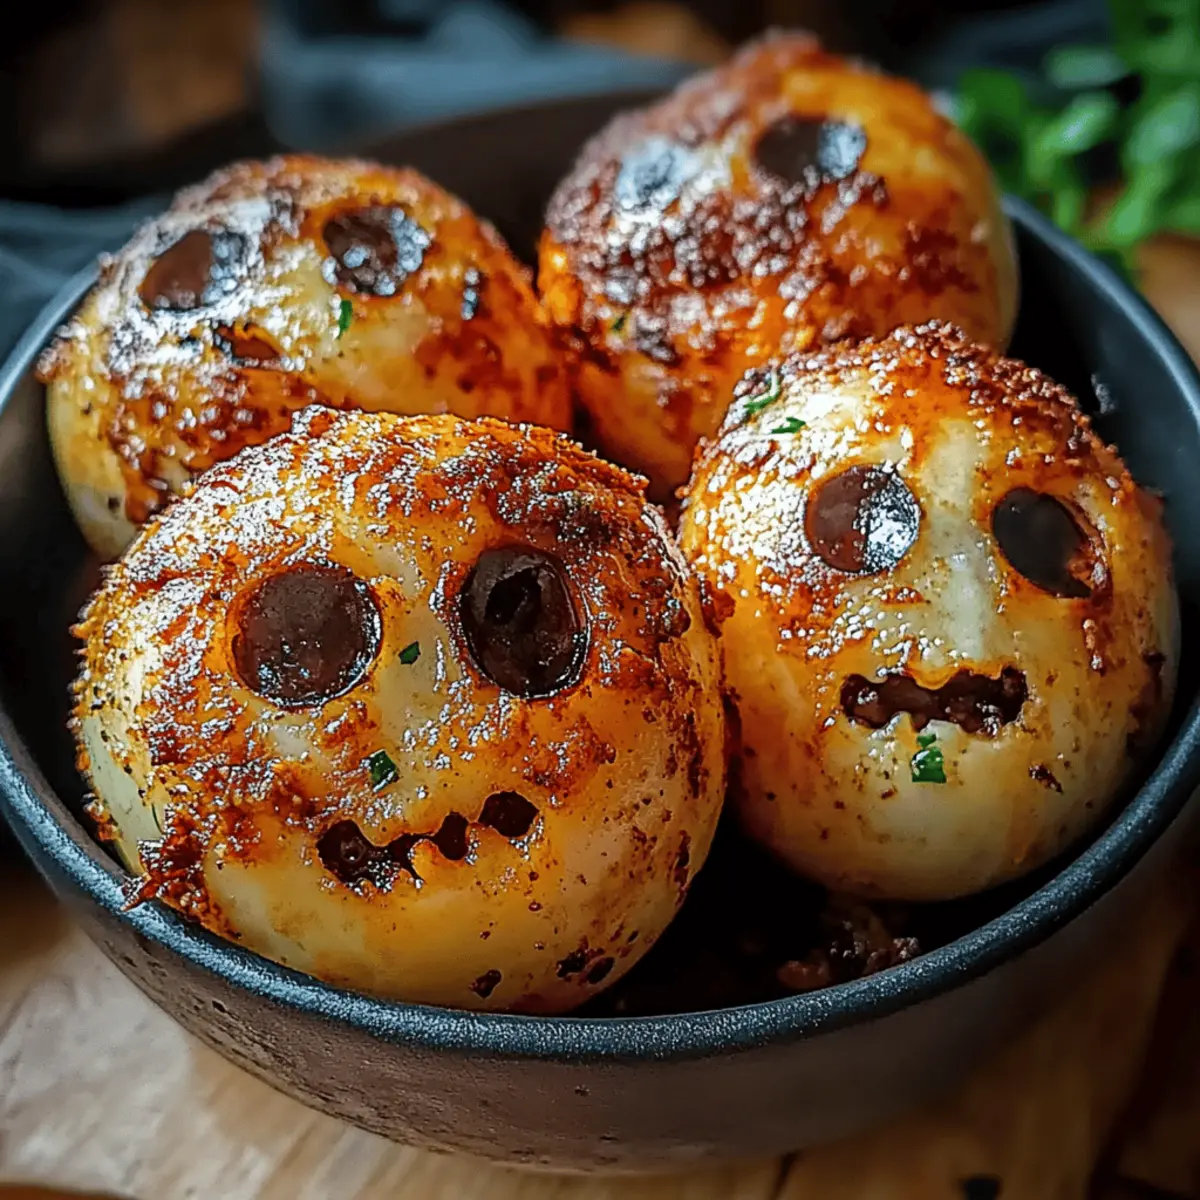
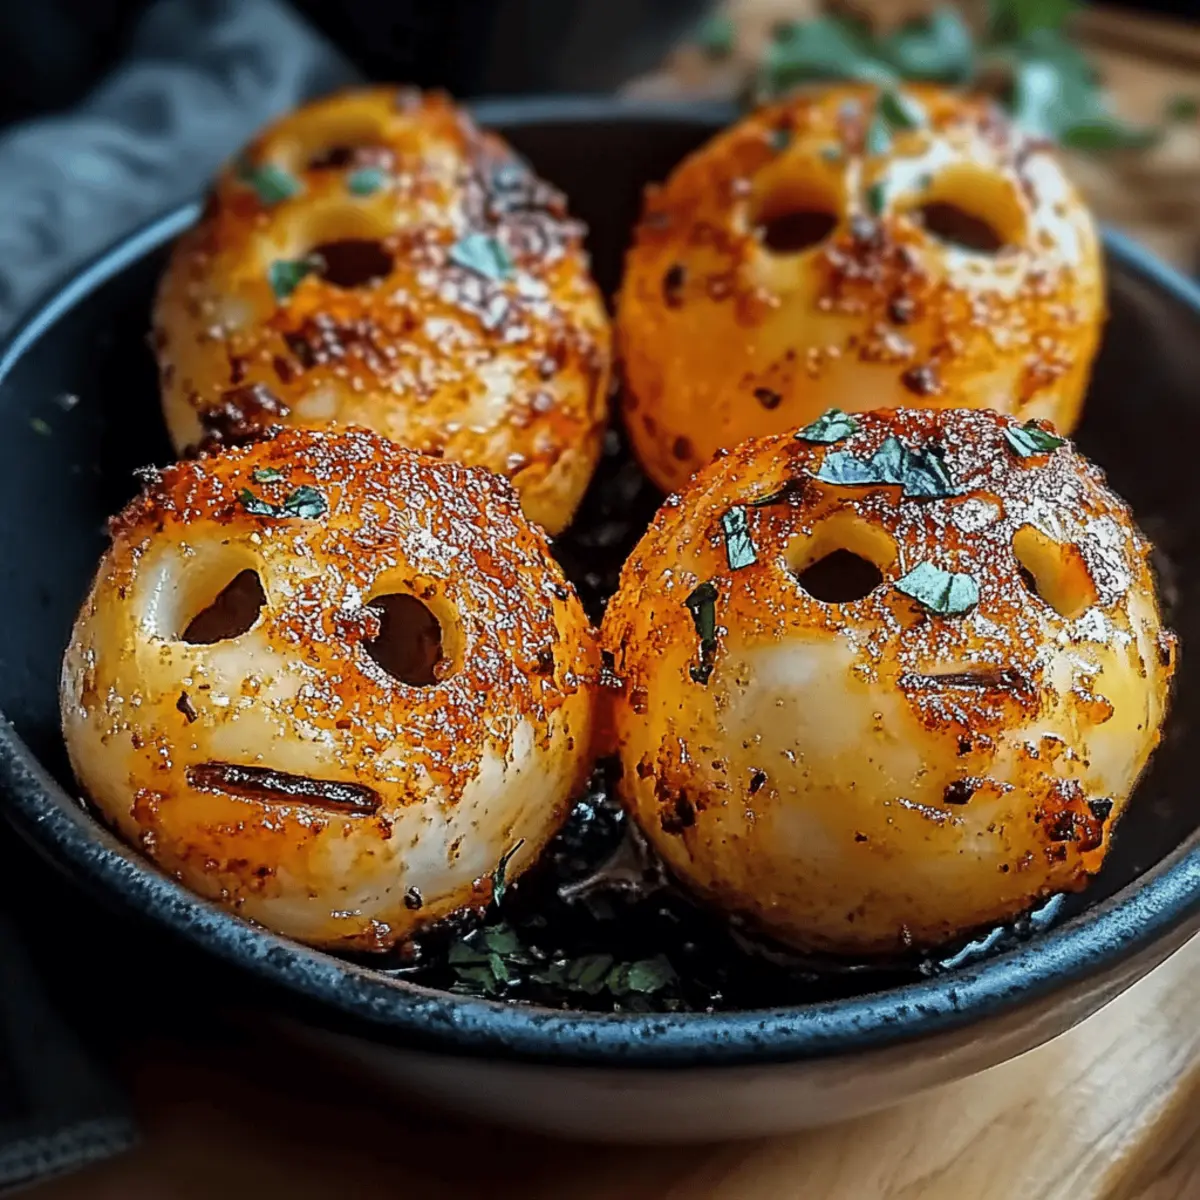
To create the spooky shapes, take a skull mold or use your hands to form the mashed potatoes into skull forms. If using a mold, pack the mixture tightly to ensure they hold their shape once removed. Carefully invert the mold onto a plate and gently tap to release the mashed potato skulls. If molding by hand, aim for even shapes to give your spooky potatoes personality!
Step 4: Decorate Your Skulls
Transform your spookily shaped potatoes by slicing black olives into small circles for the eyes. Place them strategically on your skulls for a haunting look, using additional olives to craft mouths or other fun facial features. Get creative with the design to ensure each Skulled Potato stands out and brings a festive flair to your dish.
Step 5: Garnish and Serve
For an extra touch of freshness, finely chop fresh chives or green onions and sprinkle them over your Spooky Skull Potatoes. This adds a vibrant color contrast that enhances presentation. Serve these delightfully spooky treats warm, perfect as a side dish for your Halloween feast, and watch as they captivate both kids and adults alike.
What to Serve with Spooky Skull Potatoes?
Looking to create a festive feast that delights both the eyes and taste buds?
- Grilled Chicken: Juicy, tender chicken brings a savory balance to the creamy potatoes, creating a satisfying plate that everyone will adore.
- Roasted Brussels Sprouts: Their crispy exterior and earthiness contrast beautifully with the smoothness of your Spooky Skull Potatoes, adding a delightful crunch.
- Pumpkin Soup: Serve this velvety, comforting bowl as an appetizer for a cozy touch; it pairs perfectly and sets the seasonal mood!
- Beef Stew: Warm, hearty beef stew is a wonderful match. The rich, savory flavors complement the creamy skulls for a homey, satisfying meal.
- Fall Salad: A fresh salad with apples, nuts, and a light vinaigrette adds brightness and crunch, enhancing the overall dining experience.
- Cranberry Sauce: Its sweet-tart profile provides a contrasting zing that cuts through the richness of the potatoes, reviving every bite.
- Apple Cider: A glass of spiced apple cider beautifully rounds off the meal with a warm, nostalgic flavor, perfect for autumn gatherings.
- Halloween-themed Cupcakes: Continue the festive vibe with fun, spooky cupcakes that add a sweet touch to your dining table.
- Pumpkin Spice Cheesecake: A slice of this creamy dessert will satisfy your sweet tooth while enhancing the seasonal flair of your meal!
Make Ahead Options
Spooky Skull Potatoes are fantastic for meal prepping, making them a perfect choice for busy weeknights. You can prepare the mashed potatoes up to 24 hours in advance; just follow the first two steps, mash the potatoes, and then let them cool before refrigerating them in an airtight container. To maintain their creamy texture, be sure to cover them with plastic wrap pressed directly against the surface to prevent browning. When you’re ready to serve, simply reheat the mashed potatoes gently on the stovetop or in the microwave before shaping them into skulls. Add the decorations and serve warm for a deliciously festive touch at your next gathering!
Spooky Skull Potatoes: Variations & Substitutions
Get ready to let your creativity flourish by customizing this fun recipe to suit your taste!
-
Dairy-Free: Substitute heavy cream with coconut milk and use vegan butter for a luscious, non-dairy option.
-
Herbed Delight: Mix in fresh herbs like dill or parsley for an aromatic twist that elevates flavor and presentation.
-
Cheesy Twist: Stir in shredded cheddar or Parmesan cheese for an extra layer of flavor—cheese always tops off potatoes splendidly!
-
Spicy Skull Potatoes: Add a pinch of cayenne pepper or crushed red pepper flakes to the mashed potatoes for a delightful kick.
-
Sweet Potato Skulls: Replace russet potatoes with sweet potatoes for a naturally sweet flavor and vibrant color.
-
Garlic Infusion: Roast a few cloves of garlic and mash them with the potatoes for a deliciously savory profile; it’s a hit in any kitchen!
-
Nutty Crunch: Sprinkle some toasted pumpkin seeds on top before serving for a delightful texture contrast and added nutrition.
-
Colorful Skulls: Use colorful bell peppers or cherry tomatoes instead of olives to create a rainbow of spooky faces—let your imagination run wild!
How to Store and Freeze Spooky Skull Potatoes
Room Temperature: Spooky Skull Potatoes are best enjoyed fresh, but if you have leftovers, they can sit at room temperature for up to 2 hours before they should be refrigerated.
Fridge: Store any leftover decorated skulls in an airtight container in the fridge for up to 3 days. This helps preserve their creamy texture and delightful presentation.
Freezer: For longer storage, freeze unadorned mashed potato skulls in a freezer-safe container for up to 2 months. Thaw them in the fridge before reheating.
Reheating: To enjoy your Spooky Skull Potatoes, reheat in the oven at 350°F (175°C) for about 15-20 minutes or until warmed through without losing texture.
Expert Tips for Spooky Skull Potatoes
-
Choose the Right Potatoes: Use russet potatoes for their high starch content, which results in creamier mashed potatoes perfect for shaping the Spooky Skull Potatoes.
-
Smooth & Creamy: Ensure your potatoes are well-mashed without lumps. If they’re too chunky, your skulls won't hold their spooky shape.
-
Pack Tightly: When using a mold, pack the mashed potatoes tightly to avoid breakage during unmolding. A gently tapped mold makes a world of difference!
-
Creative Faces: Don’t hesitate to get whimsical with olive placements. Extra features can add personality to your skulls—try giving them silly or spooky expressions!
-
Serve Warm: For the best experience, serve your Spooky Skull Potatoes warm. This ensures they maintain their delightful texture and flavor.
-
Garnish Creatively: Fresh chives or green onions not only add color but also a burst of flavor; sprinkle them liberally for that extra flair!
Spooky Skull Potatoes Recipe FAQs
What type of potatoes should I use for Spooky Skull Potatoes?
Absolutely, russet potatoes are the best choice! Their high starch content produces a creamy texture that's perfect for shaping into the adorable skulls. Avoid using waxy potatoes like red or Yukon gold since they may result in a chunkier mash, making it difficult to shape them.
How do I store leftover Spooky Skull Potatoes?
Very! After serving, you can let the skulls sit at room temperature for about 2 hours. Beyond that, store leftovers in an airtight container in the fridge for up to 3 days. Just make sure they’re cool before sealing to avoid condensation!
Can I freeze Spooky Skull Potatoes?
Definitely! If you want to store them for longer, freeze unadorned mashed potato skulls in a freezer-safe container for up to 2 months. When you're ready to enjoy them, thaw them overnight in the fridge. For reheating, pop them in a preheated oven at 350°F (175°C) for about 15-20 minutes until they're nice and warm.
What are some common issues I might face when making these?
No worries! If your skulls are too soft, it usually means they weren't mashed enough or waterlogged from boiling. Always drain well after cooking! If they break when unmolding, try packing the mash more tightly into the mold. Additionally, using a gentle tap on the mold can help release them without damage.
Are there any dietary considerations I should keep in mind with this recipe?
Very much so! If you're cooking for someone with dairy allergies, consider using dairy-free heavy cream alternatives and a plant-based butter substitute. On the other hand, if serving children or pets, watch for any choking hazards with the olives, and leave out any decorative parts if necessary. You can also modify the recipe to cater to gluten-free diets by ensuring all ingredients are certified gluten-free.
Spooky Skull Potatoes: A Fun Halloween Side Dish to Delight
Ingredients
Equipment
Method
- Peel and chop the potatoes into chunks. Place in a pot of salted water, bring to a boil, and cook until tender, about 15-20 minutes.
- Drain potatoes and return to pot. Add heavy cream, melted butter, salt, and pepper. Mash until silky smooth.
- Form mashed potatoes into skull shapes using a mold or your hands.
- Slice black olives for eyes and place on skulls. Get creative with additional facial features.
- Garnish with chopped chives or green onions before serving warm.

Leave a Reply