
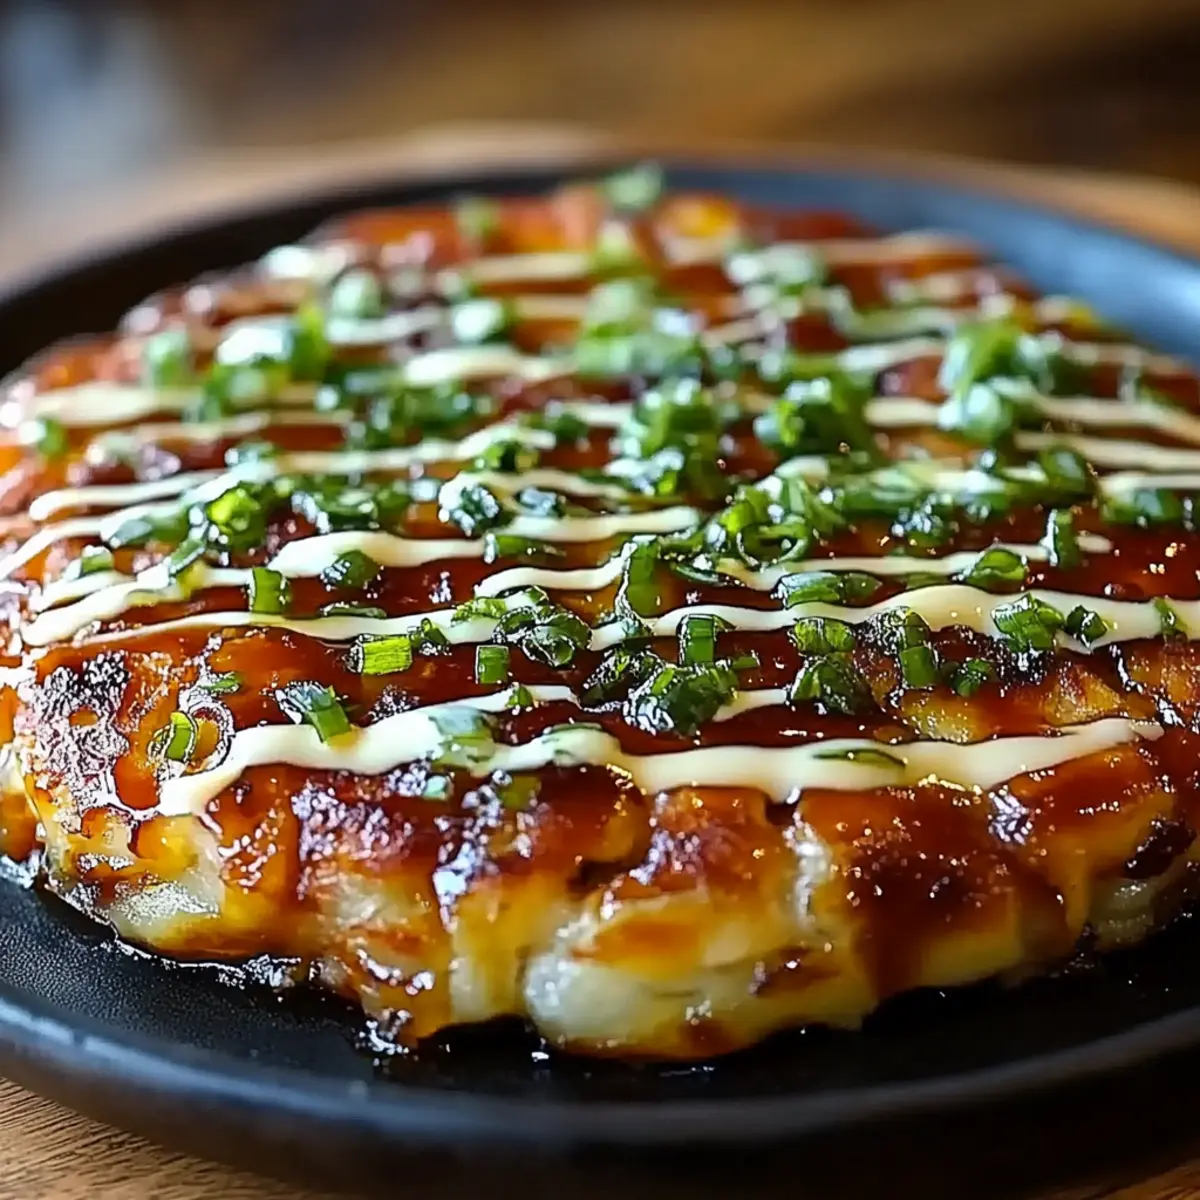
As I watched the vibrant colors of fresh vegetables dance in the skillet, an unmistakable aroma filled my kitchen—this was my first encounter with okonomiyaki, a Japanese savory pancake that feels like a warm hug on a plate. This delightful recipe not only marries convenience with creativity, allowing for endless customization, but it’s also a fantastic way to sneak in more veggies into your family’s diet. Whether you're a seafood enthusiast or prefer a meat-free version, okonomiyaki opens the door to delightful variations that everyone will love. The best part? You can whip it up in just 35 minutes, making it the perfect weeknight dinner or an impressive addition to your next gathering. Ready to turn your kitchen into a little slice of Japan? Let's dive into how to make this flavorful masterpiece!
Why is Okonomiyaki a Must-Try?
Versatile Ingredients: This dish allows you to customize your toppings, whether you prefer fresh veggies or savory seafood.
Quick Preparation: In just 35 minutes, you can create a delicious meal that feels gourmet but is straightforward enough for any home cook.
Crowd Pleaser: Impressive enough for dinner parties, yet simple enough for a cozy family dinner, it appeals to people of all ages.
Healthy & Wholesome: Packed with fresh vegetables, it’s a guilt-free choice for anyone looking to add more greens to their diet.
Culinary Adventure: Bringing a taste of Japan to your kitchen, this recipe transforms weeknight dinners into exciting culinary experiences. Don’t forget to explore even more variations by checking out our guide on creative pancake recipes!
Okonomiyaki Ingredients
• Unleash the deliciousness with essential ingredients!
For the Batter
- Flour – the foundation of your okonomiyaki, providing the perfect base for those fluffy pancakes.
- Dashi (or water/vegetable stock) – brings umami flavor; substitute with stock based on your dietary needs.
- Egg – binds the ingredients together, ensuring a moist texture.
For the Filling
- Shredded cabbage – adds crunch and volume, making your okonomiyaki hearty and satisfying.
- Chopped green onions – impart a fresh, oniony flavor that brightens every bite.
- Cooked seafood or meat (optional) – elevate your okonomiyaki’s taste; shrimp, pork, or even tofu are fantastic choices!
- Pickled ginger (optional) – a tangy kick that balances the flavors, elevating your dish to the next level.
For Frying & Serving
- Cooking oil – essential for that golden-brown crust; choose vegetable oil for a neutral flavor.
- Okonomiyaki sauce – drizzled on top, it provides a sweet and savory finish that’s simply irresistible.
- Mayonnaise – adds creaminess and richness; opt for Japanese mayonnaise for an authentic touch.
- Aonori (dried seaweed flakes) – a beautiful garnish that adds a hint of ocean flavor reminiscent of traditional okonomiyaki.
- Bonito flakes – these will dance on top of your hot okonomiyaki, bringing a delightful touch to the presentation.
With these ingredients, you’re on your way to creating mouthwatering okonomiyaki that will leave your family and friends craving more!
Step‑by‑Step Instructions for Okonomiyaki
Step 1: Prepare the Batter
In a mixing bowl, combine 2 cups of flour with 1 cup of dashi or your chosen alternative liquid. Whisk thoroughly until smooth, ensuring there are no lumps. This creates the perfect base for your okonomiyaki. Add in 1 egg and continue mixing until well integrated, achieving a creamy batter that will bind all ingredients together seamlessly.
Step 2: Incorporate the Fillings
Gently fold in 2 cups of shredded cabbage and ½ cup of chopped green onions to the batter. If you’re using cooked seafood or meat, now's the time to add 1 cup of your choice, along with ¼ cup of pickled ginger for an extra zing. Keep folding until everything is well combined, showcasing a colorful mixture that speaks of freshness and flavor.
Step 3: Heat the Skillet
Place a skillet over medium heat and add a splash of cooking oil for frying. Allow the oil to shimmer, which should take about 1-2 minutes. This is a crucial step for achieving that beautifully crispy outer layer in your okonomiyaki. Make sure to spread the oil evenly across the surface of the skillet to promote even cooking.
Step 4: Cook the Pancake
Pour a portion of the batter into the skillet, forming a round pancake measure about 6-8 inches in diameter. Cook for about 5-7 minutes, or until the bottom is a lovely golden brown and the edges begin to look set. The aroma will fill your kitchen, enticing your senses as you await the perfect flip.
Step 5: Flip and Finish Cooking
Gently flip the pancake using a spatula, taking care to keep its shape intact. Cook the other side for another 5-7 minutes until it becomes golden brown and cooked through. This is where the magic happens, as you watch your okonomiyaki transform into a fluffy, savory delight that is irresistible.
Step 6: Plate and Sauce Up
Once cooked, transfer the okonomiyaki carefully to a plate. Drizzle generously with okonomiyaki sauce and a creamy layer of mayonnaise on top, creating a beautiful contrast of flavors. This step elevates your dish, adding that signature umami burst that characterizes this Japanese pancake.
Step 7: Garnish and Serve
Finally, sprinkle aonori and bonito flakes over the top for that authentic touch. The bonito flakes will dance gently due to the heat of the pancake, offering a delightful visual presentation. Your okonomiyaki is now ready to be served, a colorful and flavorful dish that brings the essence of Japan right to your dinner table!

What to Serve with Okonomiyaki
Ready to elevate your okonomiyaki experience with delightful side dishes and beverages that harmonize beautifully with this savory pancake?
-
Ginger Salad: A crisp ginger salad complements the savory notes of okonomiyaki with its zesty dressing, adding a refreshing crunch. The tanginess beautifully balances the dish's richness and enhances its flavors.
-
Miso Soup: This warm, comforting soup loaded with umami provides the perfect contrast to the texture of your pancakes. Its light and broth-like essence helps cleanse the palate while enjoying the meal.
-
Steamed Edamame: These tender, slightly salty soybeans are the ideal snack or side. Their playful pop in your mouth adds a satisfying bite, making them an enjoyable addition to your meal.
-
Pickled Vegetables: Adding a tangy kick, pickles offer bright flavors that balance the heaviness of okonomiyaki. The crunchiness of carrots and radishes supports the dish, creating a delightful mash-up of tastes.
-
Sake or Japanese Beer: Pair your okonomiyaki with a chilled sake or a lightweight Japanese beer for a traditional touch. These drinks enhance the flavor profile of the dish, making each bite even more enjoyable.
-
Green Tea: A steaming cup of green tea acts as a refreshing antidote to the rich okonomiyaki. Its earthy tones are soothing and invigorate the palate, complementing the pancake beautifully.
-
Fried Tofu: Crispy fried tofu adds a delightful contrast in texture, allowing for a plant-based protein option that pairs well with the flavor explosion of okonomiyaki. It’s a great choice for vegetarians and enhances the meal's heartiness.
-
Coconut Sorbet: For dessert, a light coconut sorbet provides a sweet and cooling finish to your meal. Its tropical flavor harmonizes perfectly with the savory richness of the okonomiyaki while offering a refreshing palate cleanser.
Make Ahead Options
These okonomiyaki pancakes are perfect for meal prep enthusiasts looking to save time during busy weeknights! You can prepare the batter and store it in an airtight container in the refrigerator for up to 24 hours; this allows the flavors to meld beautifully. Additionally, you can chop the vegetables (cabbage, green onions) and store them separately in the fridge for up to 3 days. When you're ready to enjoy your okonomiyaki, simply combine the ingredients and cook as directed, ensuring the final product is just as delicious. By prepping ahead, you’ll have a seamless cooking experience that brings a taste of Japan to your table with minimal effort!
How to Store and Freeze Okonomiyaki
Room Temperature: Okonomiyaki is best enjoyed fresh, but if needed, it can sit out for up to 2 hours. Keep it covered with a clean kitchen towel to maintain warmth.
Fridge: Store leftovers in an airtight container for up to 3 days. Reheat gently in a skillet or microwave, adding a splash of water to maintain moisture.
Freezer: Freeze individual slices of okonomiyaki wrapped in plastic wrap and placed in a freezer bag for up to 2 months. Thaw overnight in the fridge before reheating.
Reheating: For the best texture, reheat in a skillet over medium heat, allowing a minute or two on each side to regain that crispy crust and warm interior.
Tips for the Best Okonomiyaki
-
Mix Well: Ensure the batter is lump-free to achieve a smooth texture. This is key for a perfect okonomiyaki base.
-
Don’t Rush Cooking: Cook each side for 5-7 minutes until golden brown. Rushing can lead to a soggy pancake that won't hold its shape.
-
Garnishes Matter: Don’t skip the aonori and bonito flakes! They add essential flavor and visual appeal to your okonomiyaki.
-
Customize Freely: Experiment with different fillings based on your cravings—mushrooms, kimchi, or even cheese can be delightful additions!
-
Control the Heat: Keep heat at medium to avoid burning the pancake while ensuring it cooks through. Too high, and it won't finish inside.
Enjoy your cooking adventure with this okonomiyaki recipe!
Okonomiyaki Variations & Substitutions
Feel free to get creative and tailor your okonomiyaki to suit your taste buds or dietary needs!
- Gluten-Free: Substitute all-purpose flour with a gluten-free flour blend to accommodate gluten sensitivities without sacrificing flavor.
- Vegetarian: Replace seafood or meat with hearty mushrooms or tofu for a fulfilling plant-based version that still packs a flavor punch.
- Spicy Twist: Add a sprinkle of chili flakes or a splash of sriracha to the batter for a delightful kick that livens up the traditional taste.
- Cheesy Goodness: Mix in some grated cheese for a melty, indulgent twist that kids and adults alike will rave about.
- Baked Option: For a hands-off approach, pour the batter into a baking dish and bake in the oven at 375°F until set, creating a fluffy casserole-like okonomiyaki.
- Savory Pancake: Blend in different shredded veggies like carrots or zucchini for added nutrition and a colorful presentation that excites the senses.
- Sweet Touch: For a fun dessert twist, use sweet potato in the batter and top with sweet sauce or fruit to transform your okonomiyaki into a delightful treat.
Experimenting with these variations can illuminate new flavors, making every okonomiyaki experience unique!
Okonomiyaki Recipe FAQs
What ingredients should I use for the best flavor in my okonomiyaki?
Absolutely! The key ingredients for a delicious okonomiyaki are fresh vegetables, especially shredded cabbage, and a quality dashi or stock, which adds depth to the batter. Don't forget the optional toppings like pickled ginger and your choice of seafood or meat, which can elevate the dish even more!
How should I store my leftover okonomiyaki?
After enjoying your okonomiyaki, store leftovers in an airtight container in the refrigerator for up to 3 days. For the best tasting experience, reheat them gently in a skillet to bring back that crispy texture!
Can I freeze okonomiyaki for later use?
Absolutely! To freeze, wrap individual slices of okonomiyaki tightly in plastic wrap and place them in a freezer bag. They can be kept frozen for up to 2 months. When you're ready to enjoy, simply thaw in the fridge overnight and reheat in a skillet until warm and crispy.
What if my okonomiyaki batter is too runny?
If your batter seems too runny, don’t worry! This can happen sometimes with dashi. Just add a little more flour until you achieve a thicker consistency. Mix gently to avoid overworking the batter and ensure fluffy pancakes!
Are there any dietary considerations I should keep in mind?
Yes! If you're making okonomiyaki for someone with dietary restrictions, consider using gluten-free flour and vegetable stock to accommodate those with gluten allergies. You can also omit seafood for a vegetarian option and load it up with extra vegetables for everyone to enjoy!
How can I tell when my okonomiyaki is done cooking?
Look for a golden brown color on both sides, which usually takes about 5-7 minutes per side. The edges should appear slightly set, and when you cut into it, the inside should be moist but cooked through. Trust me, there’s nothing like that beautiful aroma wafting through your kitchen as it cooks!
Ultimate Okonomiyaki: Fluffy Japanese Savory Pancakes at Home
Ingredients
Equipment
Method
- In a mixing bowl, combine flour with dashi and whisk until smooth. Add the egg and mix well.
- Fold in the shredded cabbage, chopped green onions, cooked seafood or meat, and pickled ginger.
- Heat oil in a skillet over medium heat and let it shimmer.
- Pour batter into the skillet, forming a pancake, and cook for 5-7 minutes until golden brown.
- Flip and cook the other side for another 5-7 minutes until golden brown.
- Transfer to a plate, drizzle with okonomiyaki sauce and mayonnaise, then sprinkle with aonori and bonito flakes.


Leave a Reply